Google AMP - historia
Amp-story to składnik wzmacniacza używany do wyświetlania treści, dzięki czemu użytkownik jest zaangażowany w historię. Na przykład za pomocą serii obrazów opowiadających o marce.
Aby rozpocząć pracę z amp-story, musimy dołączyć skrypt, jak pokazano poniżej -
<script async custom-element = "amp-story"
   src = "https://cdn.ampproject.org/v0/amp-story-1.0.js">
</script>
W tym rozdziale zrozumiemy, czym jest historia wzmacniacza i jak działa. Załóżmy, że mamy galerię obrazów i chcemy wyświetlać to samo na stronie. Na stronie wzmacniacza możemy sprawić, by wyglądał pięknie i interaktywnie dla użytkownika za pomocą komponentu amp-story.
Format tagu historii amp wygląda tak, jak pokazano poniżej -
<amp-story standalone> ---> Main story Tag
   <amp-story-page id = "page-1"> ---> Pages inside the story e.g page1
      <amp-story-grid-layer template = "fill"> -->
         Layers for the page1.You can have more than one layer.
         //Add html elements here or amp components
      </amp-story-grid-layer>
      <amp-story-grid-layer template = "fill"> -->
         Layers for the page1.You can have more than one layer.
         //Add html elements here or amp components
      </amp-story-grid-layer>
      ...
   </amp-story-page>

   <amp-story-page id = "page-2"> ---> Pages inside the story e.g page2
      <amp-story-grid-layer template = "fill"> -->
         Layers for the page2.You can have more than one layer.
         //Add html elements here or amp components
      </amp-story-grid-layer>
      ...
   </amp-story-page>
   ...
</amp-story>
Istnieją następujące dodatkowe atrybuty dla historii wzmacniacza:
<amp-story standalone title = "My Story"
   publisher = "The AMP Team"
   publisher-logo-src = "publisherlogo image here"
   poster-portrait-src = "poster portrait here"
   poster-square-src = "poster square image here"
   poster-landscape-src = "poster landscape image here">
Ta funkcja sprawia, że opowiadanie historii za pomocą wzmacniacza jest bardzo interaktywne.
Poniższy kod przedstawia działający przykład dla historii amp. Wynik dla tego samego jest wyświetlany zarówno w trybie stacjonarnym, jak i mobilnym.
Przykład
<!doctype html>
<html amp lang = "en">
   <head>
      <meta charset = "utf-8">
      <script async src = "https://cdn.ampproject.org/v0.js"></script>
      <script async custom-element = "amp-story" src = "https://cdn.ampproject.org/v0/amp-story-1.0.js"></script>
      <title>Google AMP - Story</title>
      <meta name = "viewport" content = "width = device-width,minimum-scale = 1,initial-scale=1">
      <link rel = "canonical" href = "/stories/introduction/amp_story_hello_world/">

      <style amp-boilerplate>
         body{
            -webkit-animation:
            -amp-start 8s steps(1,end) 0s 1 normal both;-moz-animation:
            -amp-start 8s steps(1,end) 0s 1 normal both;-ms-animation:
            -amp-start 8s steps(1,end) 0s 1 normal both;animation:
            -amp-start 8s steps(1,end) 0s 1 normal both
         }
         @-webkit-keyframes
         -amp-start{from{visibility:hidden}to{visibility:visible}}@-moz-keyframes
         -amp-start{from{visibility:hidden}to{visibility:visible}}@-ms-keyframes
         -amp-start{from{visibility:hidden}to{visibility:visible}}@-o-keyframes
         -amp-start{from{visibility:hidden}to{visibility:visible}}@keyframes
         -amp-start{from{visibility:hidden}to{visibility:visible}}
      </style>

      <noscript>
         <style amp-boilerplate>
            body{
               -webkit-animation:
               none;-moz-animation:none;
               -ms-animation:none;
               animation:none}
         </style>
      </noscript>

      <style amp-custom>
         amp-story {
            font-family: Roboto, Helvetica, Arial, sans-serif;
         }
         amp-story-page * {
            color: white;
            text-align: center;
         }
      </style>
   </head>
   <body>
      <amp-story standalone title = "Stories in AMP - Hello World" publisher = "AMP Project">
         <amp-story-page id = "page-1">
            <amp-story-grid-layer template = "fill">
               <amp-img src = "images/christmas1.jpg"
                  width = "300" height = "250"
                  layout = "responsive">
               </amp-img>
            </amp-story-grid-layer>
               <amp-story-grid-layer template = "vertical">
                  <h1>Hello World</h1>
                  <p>This is an AMP Story.</p>
               </amp-story-grid-layer>
            </amp-story-page>

            <amp-story-page id = "page-2">
               <amp-story-grid-layer template = "fill">
                  <amp-img src = "images/christmas5.jpg"
                     width = "300" height = "250"
                     layout = "responsive">
                  </amp-img>
               </amp-story-grid-layer>
               <amp-story-grid-layer template = "vertical">
                  <h1>Hello World</h1>
                  <p>This is an AMP Story.</p>
               </amp-story-grid-layer>
            </amp-story-page>

            <amp-story-page id = "page-3">
               <amp-story-grid-layer template = "fill">
                  <amp-img src = "images/christmas3.jpg"
                     width = "300" height = "250"
                     layout = "responsive">
                  </amp-img>
               </amp-story-grid-layer>
               <amp-story-grid-layer template = "vertical">
                  <h1>Hello World</h1>
                  <p>This is an AMP Story.</p>
               </amp-story-grid-layer>
            </amp-story-page>

            <amp-story-page id = "page-4">
               <amp-story-grid-layer template = "fill">
                  <amp-img src = "images/christmas4.jpg"
                     width = "300" height="250"
                     layout = "responsive">
                  </amp-img>
               </amp-story-grid-layer>
               <amp-story-grid-layer template = "vertical">
                  <h1>Hello World</h1>
                  <p>This is an AMP Story.</p>
              </amp-story-grid-layer>
            </amp-story-page>

            <amp-story-bookend src = "ampstory.json" layout = "nodisplay">
         </amp-story-bookend>
      </amp-story>
   <body>
</html>
ampstory.json
{
   "bookendVersion": "v1.0",
   "shareProviders": [
      "email",
      "twitter",
      "tumblr",
      {
         "provider": "facebook",
         "app_id": "254325784911610"
      }
   ],
      "components": [
      {
         "type": "heading",
         "text": "Introduction"
      },
      {
         "type": "small",
         "title": "Next Story is on Car Brands",
         "url": "ampcarbrand.html",
         "image": "images/audi.jpg"
      }
   ]
}
Wyjście na pulpit


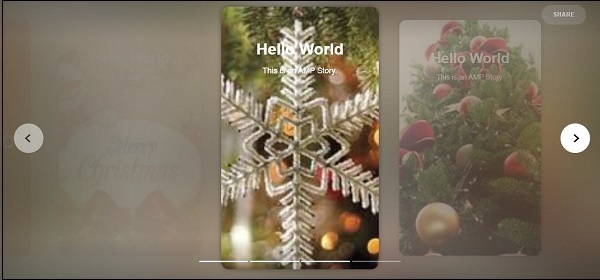
W ten sposób jest wyświetlana sekcja opowieści. Możesz także dodać filmy lub dowolny inny komponent wzmacniacza, aby uczynić historię bardziej interaktywną.
Gdy dotrze do końca historii, pokaże to, co jest podane w amp-bookend, jak pokazano poniżej -
<amp-story-bookend
   src = "ampstory.json" layout = "nodisplay">
</amp-story-bookend>
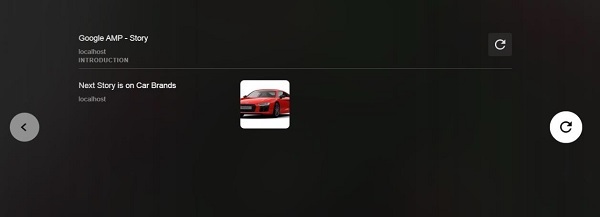
Udostępniliśmy plik ampstory.json do amp-bookend. Plik json zawiera szczegóły podglądu następnego wątku, jak pokazano poniżej. Gdy użytkownik kliknie trzy kropki pokazane po prawej stronie, zostanie wyświetlony następujący ekran -

Daje przycisk powtórki, który ponownie załaduje historię. Możesz kliknąć obraz samochodu, który wyświetli historię marek samochodów.
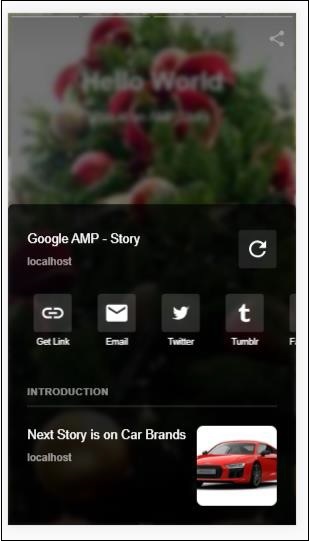
Dane wyjściowe w trybie mobilnym są następujące -


