Google AMP - Макет
AMP-Layout - одна из важных функций, доступных в Google-amp. Компоновка усилителя обеспечивает правильную визуализацию компонентов усилителя при загрузке страницы, не вызывая мерцания или проблем с прокруткой. Google AMP обеспечивает выполнение рендеринга макета на странице до выполнения любых других удаленных ресурсов, таких как HTTP-запрос изображений и вызовы данных.
Список атрибутов макета приведен ниже.
ширина и высота
layout
sizes
heights
media
placeholder
fallback
noloading
Мы рассмотрим layoutатрибут подробно в этой главе. Остальные атрибуты подробно обсуждаются в главе -Google AMP – Attributes этого учебника.
Атрибут макета
Мы можем использовать атрибут макета в amp-компоненте, который будет определять, как компонент будет отображаться на странице. Список макетов, поддерживаемых amp, приведен ниже -
Нет
Container
fill
fixed
fixed-height
flex-item
intrinsic
nodisplay
Responsive
Для каждого из этих макетов мы увидим рабочий пример, который покажет, как атрибут макета по-разному отображает amp-компонент. Мы будем использоватьamp-img компонент в наших примерах.
Отсутствует Пример
<!doctype html>
<html amp lang = "en">
<head>
<meta charset = "utf-8">
<script async src="https://cdn.ampproject.org/v0.js"></script>
<title>Google AMP - Image</title>
<link rel = "canonical" href =
"http://example.ampproject.org/article-metadata.html">
<meta name = "viewport" content = "width = device-width,
minimum-scale = 1,initial-scale = 1">
<style amp-boilerplate>
body{
-webkit-animation:
-amp-start 8s steps(1,end) 0s 1 normal both;-moz-animation:
-amp-start 8s steps(1,end) 0s 1 normal both;-ms-animation:
-amp-start 8s steps(1,end) 0s 1 normal both;animation:
-amp-start 8s steps(1,end) 0s 1 normal both
}
@-webkit-keyframes
-amp-start{from{visibility:hidden}to{visibility:visible}}@-moz-keyframes
-amp-start{from{visibility:hidden}to{visibility:visible}}@-ms-keyframes
-amp-start{from{visibility:hidden}to{visibility:visible}}@-o-keyframes
-amp-start{from{visibility:hidden}to{visibility:visible}}@keyframes
-amp-start{from{visibility:hidden}to{visibility:visible}}
</style>
<noscript>
<style amp-boilerplate>
body{
-webkit-animation:none;
-moz-animation:none;
-ms-animation:none;
animation:none
}
</style>
</noscript>
<style amp-custom>
amp-img {
border: 1px solid black;
border-radius: 4px;
padding: 5px;
}
</style>
</head>
<body>
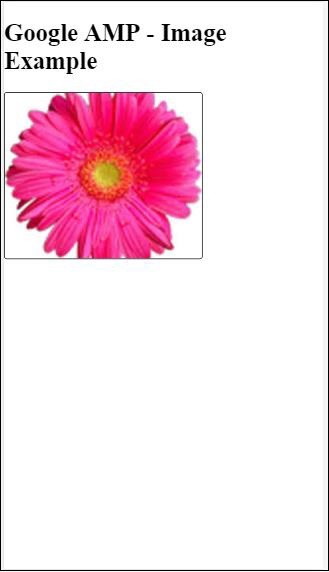
<h1>Google AMP - Image Example</h1>
<amp-img
alt = "Beautiful
Flower"src = "images/flower.jpg"
width = "246"
height = "205">
</amp-img>
</body>
</html>Вывод
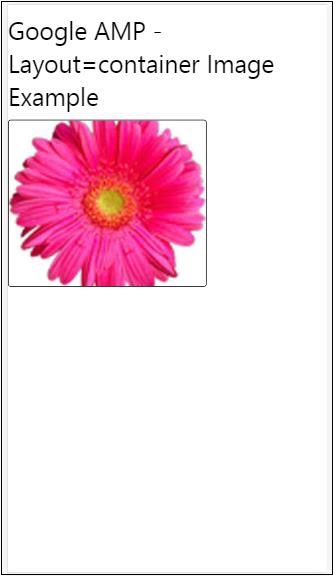
Пример контейнера
Layout = "container" в основном присваивается родительскому элементу, а дочерний элемент принимает определенные размеры.
<!doctype html>
<html amp lang = "en">
   <head>
      <meta charset = "utf-8">
      <script async src = "https://cdn.ampproject.org/v0.js"></script>
      <title>Google AMP - Image</title>
      <link rel = "canonical" href =
         "http://example.ampproject.org/article-metadata.html">
      <meta name = "viewport" content = "width = device-width,
         minimum-scale = 1,initial-scale = 1">
      <style amp-boilerplate>
         body{
            -webkit-animation:
            -amp-start 8s steps(1,end) 0s 1 normal both;-moz-animation:
            -amp-start 8s steps(1,end) 0s 1 normal both;-ms-animation:
            -amp-start 8s steps(1,end) 0s 1 normal both;animation:
            -amp-start 8s steps(1,end) 0s 1 normal both
         }@-webkit-keyframes
         -amp-start{from{visibility:hidden}to{visibility:visible}}@-moz-keyframes
         -amp-start{from{visibility:hidden}to{visibility:visible}}@-ms-keyframes
         -amp-start{from{visibility:hidden}to{visibility:visible}}@-o-keyframes
         -amp-start{from{visibility:hidden}to{visibility:visible}}@keyframes
         -amp-start{from{visibility:hidden}to{visibility:visible}}
      </style>
      <noscript>
         <style amp-boilerplate>
            body{
               -webkit-animation:none;
               -moz-animation:none;
               -ms-animation:none;
               animation:none
            }
         </style>
      </noscript>
      <style amp-custom>
         amp-img {
            border: 1px solid black;
            border-radius: 4px;
            padding: 5px;
         }
         h1{
            font-family: "Segoe UI",Arial,sans-serif;
            font-weight: 400;margin: 10px 0;
         }
      </style>
   </head>
   <body>
      <h1>Google AMP - Layout = container Image Example</h1>
      <amp-accordion layout = "container">
         <amp-img alt = "Beautiful Flower"
            src = "images/flower.jpg"
            width = "246"
            height = "205">
         </amp-img>
      </amp-accordion>
   </body>
</html>
Вывод
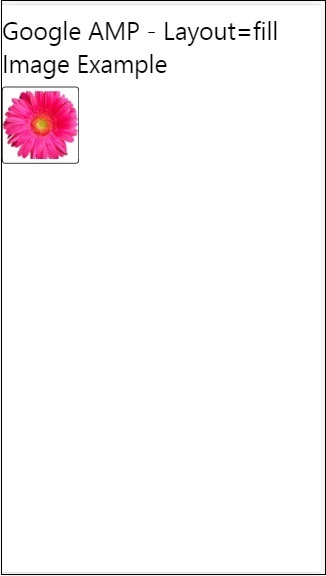
Пример заполнения
Layout = ”fill” принимает ширину и высоту родительского элемента.
<!doctype html>
<html amp lang = "en">
   <head>
      <meta charset = "utf-8">
      <script async src = "https://cdn.ampproject.org/v0.js"></script>
      <title>
      Google AMP - Image
      <title>
      <link rel = "canonical" href =
         "http://example.ampproject.org/article-metadata.html">
      <meta name = "viewport" content = "width = device-width,
         minimum-scale = 1,initial-scale = 1">
      <style amp-boilerplate>
         body{
            -webkit-animation:
            -amp-start 8s steps(1,end) 0s 1 normal both;-moz-animation:
            -amp-start 8s steps(1,end) 0s 1 normal both;-ms-animation:
            -amp-start 8s steps(1,end) 0s 1 normal both;animation:
            -amp-start 8s steps(1,end) 0s 1 normal both
         }
         @-webkit-keyframes
         -amp-start{from{visibility:hidden}to{visibility:visible}}@-moz-keyframes
         -amp-start{from{visibility:hidden}to{visibility:visible}}@-ms-keyframes
         -amp-start{from{visibility:hidden}to{visibility:visible}}@-o-keyframes
         -amp-start{from{visibility:hidden}to{visibility:visible}}@keyframes
         -amp-start{from{visibility:hidden}to{visibility:visible}}
      </style>
      <noscript>
         <style amp-boilerplate>
            body{
               -webkit-animation:none;
               -moz-animation:none;
               -ms-animation:none;
               animation:none
            }
         </style>
      </noscript>
      <style amp-custom>
         amp-img {
            border: 1px solid black;
            border-radius: 4px;
            padding: 5px;
         }
         h1{font-family: "Segoe UI",Arial,sans-serif;
         font-weight: 400;margin: 10px 0;}
      </style>
   </head>
   <body>
      <h1>Google AMP - Layout = fill Image Example</h1>
      <div style = "position:relative;width:100px;height:100px;">
         <amp-img alt = "Beautiful Flower"
            src = "images/flower.jpg"
            width = "246"
            height = "205"
            layout = "fill">
         </amp-img>
      </div>
   </body>
</html>
Вывод
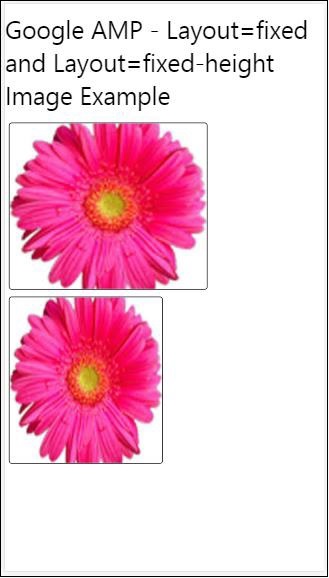
Пример фиксированной и фиксированной высоты
Прежде чем понимать использование фиксированной и фиксированной высоты, обратите внимание на следующие два момента:
layout=”fixed” должен иметь ширину и высоту, и в нем будет показан amp-компонент.
layout=”fixed-height” Для компонента должна быть указана высота. Это гарантирует, что высота не будет изменена. Ширину нельзя указывать при использовании фиксированной высоты, или она может быть автоматической.
<!doctype html>
<html amp lang = "en">
   <head>
      <meta charset = "utf-8">
      <script async src = "https://cdn.ampproject.org/v0.js"></script>
      <title>Google AMP - Image</title>
      <link rel = "canonical" href =
         "http://example.ampproject.org/article-metadata.html">
      <meta name = "viewport" content = "width = device-width,
         minimum-scale = 1,initial-scale = 1">
      <style amp-boilerplate>
         body{
            -webkit-animation:
            -amp-start 8s steps(1,end) 0s 1 normal both;-moz-animation:
            -amp-start 8s steps(1,end) 0s 1 normal both;-ms-animation:
            -amp-start 8s steps(1,end) 0s 1 normal both;animation:
            -amp-start 8s steps(1,end) 0s 1 normal both
         }
         @-webkit-keyframes
         -amp-start{from{visibility:hidden}to{visibility:visible}}@-moz-keyframes
         -amp-start{from{visibility:hidden}to{visibility:visible}}@-ms-keyframes
         -amp-start{from{visibility:hidden}to{visibility:visible}}@-o-keyframes
         -amp-start{from{visibility:hidden}to{visibility:visible}}@keyframes
         -amp-start{from{visibility:hidden}to{visibility:visible}}
      </style>
      <noscript>
         <style amp-boilerplate>
            body{
               -webkit-animation:none;
               -moz-animation:none;
               -ms-animation:none;
               animation:none
            }
         </style>
      </noscript>
      <style amp-custom>
         amp-img {
            border: 1px solid black;
            border-radius: 4px;
            padding: 5px;
         }
         div{
            display: inline-block;
            width: 200px;
            height:200px;
            margin: 5px;
         }
         h1{font-family: "Segoe UI",Arial,sans-serif;
         font-weight: 400;margin: 10px 0;}
      </style>
   </head>
   <body>
      <h1>Google AMP - Layout = fixed and
         Layout = fixed-height Image Example
      </h1>
      <div>
         <amp-img alt = "Beautiful Flower"
            src = "images/flower.jpg"
            width = "246"
            height = "205"
            layout = "fixed">
         </amp-img>
      </div>
      <div>
         <amp-img alt = "Beautiful Flower"
            src = "images/flower.jpg"
            height = "205"
            layout = "fixed-height">
         </amp-img>
      </div>
   </body>
</html>
Вывод
Flex-item и внутреннее
<!doctype html>
<html amp lang = "en">
<head>
<meta charset = "utf-8">
<script async src ="https://cdn.ampproject.org/v0.js"></script>
<title>Google AMP - Image</title>
<link rel = "canonical" href ="
http://example.ampproject.org/article-metadata.html">
<meta name = "viewport" content = "width = device-width,
minimum-scale = 1,initial-scale = 1">
<style amp-boilerplate>
body{
-webkit-animation:
-amp-start 8s steps(1,end) 0s 1 normal both;-moz-animation:
-amp-start 8s steps(1,end) 0s 1 normal both;-ms-animation:
-amp-start 8s steps(1,end) 0s 1 normal both;animation:
-amp-start 8s steps(1,end) 0s 1 normal both
}
@-webkit-keyframes
-amp-start{from{visibility:hidden}to{visibility:visible}}@-moz-keyframes
-amp-start{from{visibility:hidden}to{visibility:visible}}@-ms-keyframes
-amp-start{from{visibility:hidden}to{visibility:visible}}@-o-keyframes
-amp-start{from{visibility:hidden}to{visibility:visible}}@keyframes
-amp-start{from{visibility:hidden}to{visibility:visible
<style>
<noscript>
<style amp-boilerplate>
body{
-webkit-animation:none;
-moz-animation:none;
-ms-animation:none;
animation:none
}
</style>
</noscript>
<style amp-custom>
amp-img {
border: 1px solid black;
border-radius: 4px;
padding: 5px;
}
displayitem {
display: inline-block;
width: 200px;
height:200px;
margin: 5px;
}
h1{font-family: "Segoe UI",Arial,sans-serif;
font-weight: 400;margin: 10px 0;}
</style>
</head>
<body>
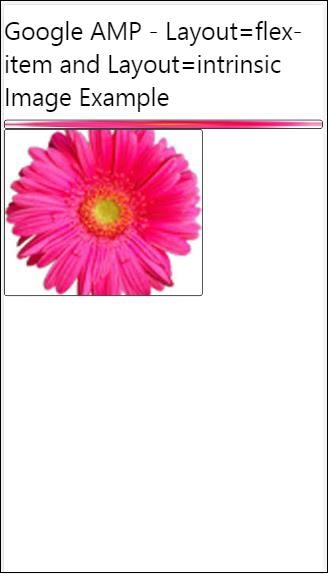
<h1>Google AMP - Layout = flex-item and
Layout = intrinsic Image Example
</h1>
<div class = "displayitem">
<amp-img alt = "Beautiful Flower"
src = "images/flower.jpg"
layout = "flex-item">
</amp-img>
</div>
<div class = "displayitem">
<amp-img alt = "Beautiful Flower"
src = "images/flower.jpg"
width = "246"
height = "205"
layout = "intrinsic">
</amp-img>
</div>
</body>
</html>Вывод
nodisplay и отзывчивый
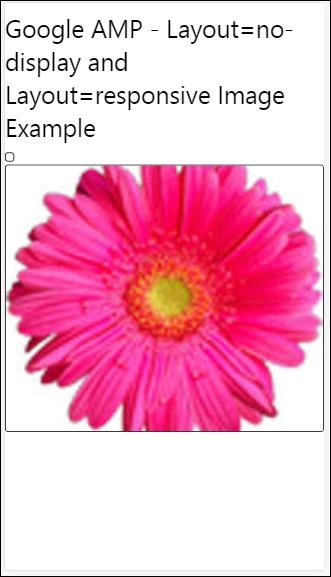
Компонент Amp с layout = nodisplay не будет занимать места на странице, как и display: none. Нет необходимости добавлять в такой макет какие-либо свойства ширины и высоты.
Компонент Amp с layout = responsive займет доступное пространство или ширину страницы, а высота будет изменена с сохранением соотношения сторон элемента.
<!doctype html>
<html amp lang = "en">
   <head>
      <meta charset = "utf-8">
      <script async src = "https://cdn.ampproject.org/v0.js">
      </script>
      <title>Google AMP - Image</title>
      <link rel = "canonical" href =
      "http://example.ampproject.org/article-metadata.html">
      <meta name = "viewport" content="width=device-width,
      minimum-scale = 1,initial-scale = 1">

      <style amp-boilerplate>
         body{
            -webkit-animation:
            -amp-start 8s steps(1,end) 0s 1 normal both;-moz-animation:
            -amp-start 8s steps(1,end) 0s 1 normal both;-ms-animation:
            -amp-start 8s steps(1,end) 0s 1 normal both;animation:
            -amp-start 8s steps(1,end) 0s 1 normal both}
         @-webkit-keyframes
         -amp-start{from{visibility:hidden}to{visibility:visible}}@-moz-keyframes
         -amp-start{from{visibility:hidden}to{visibility:visible}}@-ms-keyframes
         -amp-start{from{visibility:hidden}to{visibility:visible}}@-o-keyframes
         -amp-start{from{visibility:hidden}to{visibility:visible}}@keyframes
         -amp-start{from{visibility:hidden}to{visibility:visible}}
      </style>

      <noscript>
         <style amp-boilerplate>
            body{
               -webkit-animation:none;
               -moz-animation:none;
               -ms-animation:none;
               animation:none}
         </style>
      </noscript>
      <style amp-custom>
         amp-img {
            border: 1px solid black;
            border-radius: 4px;
            padding: 5px;
         }
         displayitem {
            display: inline-block;
            width: 200px;
            height:200px;
            margin: 5px;
         }
         h1{font-family: "Segoe UI",Arial,sans-serif;
         font-weight: 400;margin: 10px 0;}
      </style>
   </head>
   <body>
      <h1>Google AMP - Layout=no-display and
      Layout = responsive Image Example</h1>
      <div class = "displayitem">
         <amp-img alt = "Beautiful Flower"
            src = "images/flower.jpg"
            layout = "no-display">
         </amp-img>
      </div>
      <div class = "displayitem">
         <amp-img alt = "Beautiful Flower"
            src = "images/flower.jpg"
            width = "246"
            height = "205"
            layout = "responsive">
         </amp-img>
      </div>
   </body>
</html>
Вывод
Список макетов, поддерживаемых в Google AMP, выглядит следующим образом
Accordion
Carousel
Lightbox
Slider
Sidebar
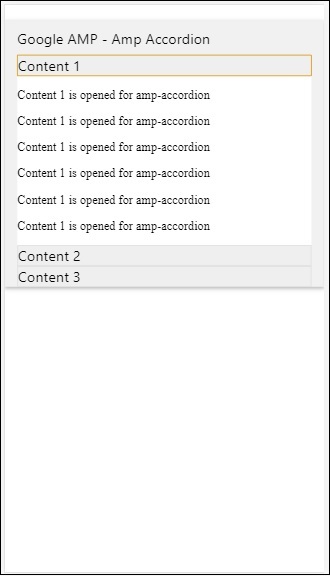
Усилитель-Аккордеон
Amp-accordion - это компонент amp, используемый для отображения содержимого в формате разворачивания-сворачивания. Пользователям становится легко просматривать его на мобильных устройствах, где они могут выбрать раздел по своему выбору с помощью аккордеона.
Для работы с amp-accordion вам необходимо добавить следующий скрипт -
<script async custom-element = "amp-accordion"
   src = "https://cdn.ampproject.org/v0/amp-accordion-0.1.js">
</script>
Ампер-аккордеонная бирка
<amp-accordion>
   <section class = "seca">
      <h3>Content 1</h3>
      <div>
         <p>Content 1 is opened for amp-accordion</p>
         <p>Content 1 is opened for amp-accordion</p>
         <p>Content 1 is opened for amp-accordion</p>
         <p>Content 1 is opened for amp-accordion</p>
         <p>Content 1 is opened for amp-accordion</p>
         <p>Content 1 is opened for amp-accordion</p>
      </div>
   </section>
   …
</amp-accordion>
Давайте посмотрим на рабочий пример усилителя-аккордеона.
<!doctype html>
<html amp lang = "en">
<head>
<meta charset = "utf-8">
<script async src = "https://cdn.ampproject.org/v0.js">
</script>
<title>Google AMP - Amp Accordion </title>
<link rel = "canonical" href=
"http://example.ampproject.org/article-metadata.html">
<meta name = "viewport" content = "width = device-width,
minimum-scale = 1,initial-scale = 1">
<style amp-boilerplate>
body{
-webkit-animation:
-amp-start 8s steps(1,end) 0s 1 normal both;-moz-animation:
-amp-start 8s steps(1,end) 0s 1 normal both;-ms-animation:
-amp-start 8s steps(1,end) 0s 1 normal both;animation:
-amp-start 8s steps(1,end) 0s 1 normal both
}
@-webkit-keyframes
-amp-start{from{visibility:hidden}to{visibility:visible}}@-moz-keyframes
-amp-start{from{visibility:hidden}to{visibility:visible}}@-ms-keyframes
-amp-start{from{visibility:hidden}to{visibility:visible}}@-o-keyframes
-amp-start{from{visibility:hidden}to{visibility:visible}}@keyframes
-amp-start{from{visibility:hidden}to{visibility:visible}}
</style>
<noscript>
<style amp-boilerplate>
body{
-webkit-animation:none;
-moz-animation:none;
-ms-animation:none;
animation:none}
</style>
</noscript>
<script async custom-element = "amp-accordion" src =
"https://cdn.ampproject.org/v0/amp-accordion-0.1.js">
</script>
<style>
input[type = text]{
width: 50%;
padding: 12px;
border: 1px solid #ccc;
border-radius: 4px;
resize: vertical;
}
label {
padding: 12px 12px 12px 0;
display: inline-block;
font-family: "Segoe UI",Arial,sans-serif;
font-weight: 400;
}
.col-label {
float: left;
width: 25%;
margin-top: 6px;
}
.col-content {
float: left;
width: 75%;
margin-top: 6px;
}
.row:after {
content: "";
display: table;
clear: both;
}
.amp_example {
background-color: #f1f1f1;
padding: 0.01em 16px;
margin: 20px 0;
box-shadow: 0 2px 4px 0
rgba(0,0,0,0.16),0 2px 10px 0
rgba(0,0,0,0.12)!important;
}
h3{
font-family: "Segoe UI",Arial,sans-serif;
font-weight: 400;margin: 10px 0;
}
input[type=submit] {
background-color: #ACAD5C;
color: white;
padding: 12px 20px;
border: none;
border-radius: 4px;
cursor: pointer;
float: right;
}
.lightbox {background-color: rgba(100, 100, 100, 0.5);}
.seca {background-color:#fff;}
</style>
</head>
<body>
<div class = "amp_example">
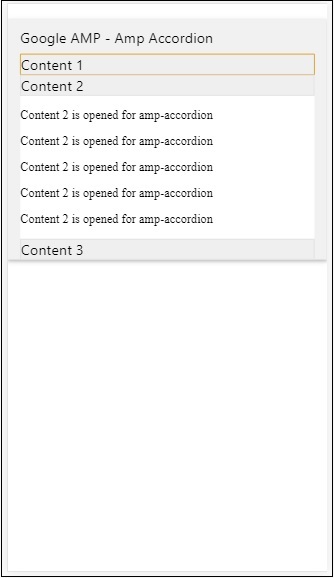
<h3>Google AMP - Amp Accordion</h3>
<amp-accordion>
<section class = "seca">
<h3>Content 1</h3>
<div>
<p>Content 1 is opened for amp-accordion</p>
<p>Content 1 is opened for amp-accordion</p>
<p>Content 1 is opened for amp-accordion</p>
<p>Content 1 is opened for amp-accordion</p>
<p>Content 1 is opened for amp-accordion</p>
<p>Content 1 is opened for amp-accordion</p>
</div>
</section>
<section expanded class = "seca">
<h3>Content 2</h3>
<div>
<p>Content 2 is opened for amp-accordion</p>
<p>Content 2 is opened for amp-accordion</p>
<p>Content 2 is opened for amp-accordion</p>
<p>Content 2 is opened for amp-accordion</p>
<p>Content 2 is opened for amp-accordion</p>
</div>
</section>
<section class="seca">
<h3>Content 3</h3>
<div>
<p>Content 3 is opened for amp-accordion</p>
<p>Content 3 is opened for amp-accordion</p>
<p>Content 3 is opened for amp-accordion</p>
<p>Content 3 is opened for amp-accordion</p>
<p>Content 3 is opened for amp-accordion</p>
</div>
</section>
</amp-accordion>
</div>
</body>
</html>Вывод
Внутри усилителя-аккордеона есть секции. У каждого раздела может быть 2 дочерних элемента, и более двух будут отображать ошибку в консоли браузера. Вы можете добавить контейнер в раздел и иметь в нем несколько элементов.
По умолчанию мы оставили один раздел в расширенном режиме с помощью атрибута, развернутого до раздела.
Авто-сворачивающиеся аккордеоны
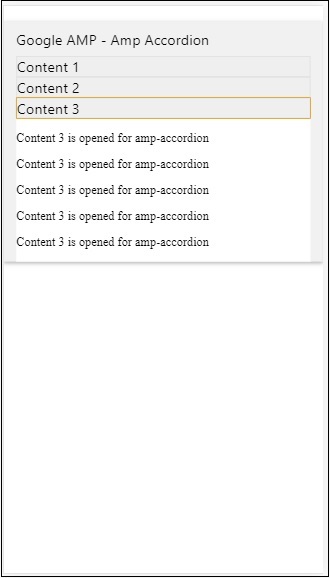
Для автоматического сворачивания мы используем атрибут expand-single-section на amp-accordion, как показано в примере. Раздел, который открывает пользователь, останется только в развернутом состоянии, остальные закроют, используя expand-single-section атрибут.
<!doctype html>
<html amp lang = "en">
   <head>
      <meta charset = "utf-8">
      <script async src = "https://cdn.ampproject.org/v0.js">
      </script>
      <title>Google AMP - Amp Accordion </title>
      <link rel = "canonical" href=
      "http://example.ampproject.org/article-metadata.html">
      <meta name = "viewport" content = "width = device-width,
      minimum-scale = 1,initial-scale = 1">

      <style amp-boilerplate>
         body{
            -webkit-animation:
            -amp-start 8s steps(1,end) 0s 1 normal both;-moz-animation:
            -amp-start 8s steps(1,end) 0s 1 normal both;-ms-animation:
            -amp-start 8s steps(1,end) 0s 1 normal both;animation:
            -amp-start 8s steps(1,end) 0s 1 normal both
         }
         @-webkit-keyframes
         -amp-start{from{visibility:hidden}to{visibility:visible}}@-moz-keyframes
         -amp-start{from{visibility:hidden}to{visibility:visible}}@-ms-keyframes
         -amp-start{from{visibility:hidden}to{visibility:visible}}@-o-keyframes
         -amp-start{from{visibility:hidden}to{visibility:visible}}@keyframes
         -amp-start{from{visibility:hidden}to{visibility:visible}}
      </style>

      <noscript>

         <style amp-boilerplate>
            body{
               -webkit-animation:none;
               -moz-animation:none;
               -ms-animation:none;
               animation:none}
         </style>
      </noscript>
      <script async custom-element = "amp-accordion" src =
         "https://cdn.ampproject.org/v0/amp-accordion-0.1.js">
      </script>
      <style>
         input[type = text]{
            width: 50%;
            padding: 12px;
            border: 1px solid #ccc;
            border-radius: 4px;
            resize: vertical;
         }
         label {
            padding: 12px 12px 12px 0;
            display: inline-block;
            font-family: "Segoe UI",Arial,sans-serif;
            font-weight: 400;
         }
         .col-label {
            float: left;
            width: 25%;
            margin-top: 6px;
         }
         .col-content {
            float: left;
            width: 75%;
            margin-top: 6px;
         }
         .row:after {
            content: "";
            display: table;
            clear: both;
         }
         .amp_example {
            background-color: #f1f1f1;
            padding: 0.01em 16px;
            margin: 20px 0;
            box-shadow: 0 2px 4px 0
            rgba(0,0,0,0.16),0 2px 10px 0
            rgba(0,0,0,0.12)!important;
         }
         h3{
            font-family: "Segoe UI",Arial,sans-serif;
            font-weight: 400;
            margin: 10px 0;
         }
         input[type=submit] {
            background-color: #ACAD5C;
            color: white;
            padding: 12px 20px;
            border: none;
            border-radius: 4px;
            cursor: pointer;
            float: right;}
         .lightbox {background-color: rgba(100, 100, 100, 0.5);}
         .seca {background-color:#fff;}
      </style>
   <head>
   <body>
      <div class = "amp_example">
         <h3>Google AMP - Amp Accordion</h3>
         <amp-accordion expand-single-section>
            <section class = "seca">
               <h3>Content 1</h3>
               <div>
                  <p>Content 1 is opened for amp-accordion</p>
                  <p>Content 1 is opened for amp-accordion</p>
                  <p>Content 1 is opened for amp-accordion</p>
                  <p>Content 1 is opened for amp-accordion</p>
                  <p>Content 1 is opened for amp-accordion</p>
                  <p>Content 1 is opened for amp-accordion</p>
               </div>
            </section>
            <section class = "seca">
               <h3>Content 2</h3>
               <div>
                  <p>Content 2 is opened for amp-accordion</p>
                  <p>Content 2 is opened for amp-accordion</p>
                  <p>Content 2 is opened for amp-accordion</p>
                  <p>Content 2 is opened for amp-accordion</p>
                  <;p>Content 2 is opened for amp-accordion</p>
               </div>
            </section>
            <section class = "seca">
               <h3>Content 3</h3>
               <div>
                  <p>Content 3 is opened for amp-accordion</p>
                  <p>Content 3 is opened for amp-accordion</p>
                  <p>Content 3 is opened for amp-accordion</p>
                  <p>Content 3 is opened for amp-accordion</p>
                  <p>Content 3 is opened for amp-accordion</p>
               </div>
            </section>
         </amp-accordion>
      </div>
   </body>
</html>
Вывод
Анимация на аккордеонах
Используя animateатрибут, мы можем добавить анимацию для разворачивания-сворачивания аккордеона. Взгляните на пример ниже -
<!doctype html>
<html amp lang = "en">
   <head>
      <meta charset = "utf-8">
      <script async src = "https://cdn.ampproject.org/v0.js">
      </script>
      <title>Google AMP - Amp Accordion </title>
      <link rel = "canonical" href = "http://example.ampproject.org/article-metadata.html>
      <meta name = "viewport" content = "width = device-width,minimum-scale = 1,initial-scale = 1">

      <style amp-boilerplate>
         body{
            -webkit-animation:
            -amp-start 8s steps(1,end) 0s 1 normal both;-moz-animation:
            -amp-start 8s steps(1,end) 0s 1 normal both;-ms-animation:
            -amp-start 8s steps(1,end) 0s 1 normal both;animation:
            -amp-start 8s steps(1,end) 0s 1 normal both
         }
         @-webkit-keyframes
         -amp-start{from{visibility:hidden}to{visibility:visible}}@-moz-keyframes
         -amp-start{from{visibility:hidden}to{visibility:visible}}@-ms-keyframes
         -amp-start{from{visibility:hidden}to{visibility:visible}}@-o-keyframes
         -amp-start{from{visibility:hidden}to{visibility:visible}}@keyframes
         -amp-start{from{visibility:hidden}to{visibility:visible}}
      </style>

      <noscript>
         <style amp-boilerplate>
            body{
               -webkit-animation:none;
               -moz-animation:none;
               -ms-animation:none;animation:none
            }
         </style>
      </noscript>
      <script async custom-element = "amp-accordion" src =
         "https://cdn.ampproject.org/v0/amp-accordion-0.1.js">
      </script>
      <style>
         input[type = text]{
            width: 50%;
            padding: 12px;
            border: 1px solid #ccc;
            border-radius: 4px;
            resize: vertical;
         }
         label {
            padding: 12px 12px 12px 0;
            display: inline-block;
            font-family: "Segoe UI",Arial,sans-serif;
            font-weight: 400;
         }
         .col-label {
            float: left;
            width: 25%;
            margin-top: 6px;
         }
         .col-content {
            float: left;
            width: 75%;
            margin-top: 6px;
         }
         .row:after {
            content: "";
            display: table;
            clear: both;
         }
         .amp_example {
            background-color: #f1f1f1;
            padding: 0.01em 16px;
            margin: 20px 0;
            box-shadow: 0 2px 4px 0 rgba(0,0,0,0.16),
            0 2px 10px 0 rgba(0,0,0,0.12)!important;
         }
         h3{
            font-family: "Segoe UI",Arial,sans-serif;
            font-weight: 400;margin: 10px 0;
         }
         input[type=submit] {
            background-color: #ACAD5C;
            color: white;
            padding: 12px 20px;
            border: none;
            border-radius: 4px;
            cursor: pointer;
            float: right;
         }
         .lightbox {background-color: rgba(100, 100, 100, 0.5);}
         .seca {background-color:#fff;}
      </style>
   </head>
   <body>
      <div class = "amp_example">
         <h3>Google AMP - Amp Accordion</h3>
         <amp-accordion animate expand-single-section>
            <section class = "seca">
               <h3>Content 1</h3>
               <div>
                  <p>Content 1 is opened for amp-accordion</p>
                  <p>Content 1 is opened for amp-accordion</p>
                  <p>Content 1 is opened for amp-accordion</p>
                  <p>Content 1 is opened for amp-accordion</p>
                  <p>Content 1 is opened for amp-accordion</p>
                  <p>Content 1 is opened for amp-accordion</p>
               </div>
            </section>
            <section class = "seca">
               <h3>Content 2</h3>
               <div>
                  <p>Content 2 is opened for amp-accordion</p>
                  <p>Content 2 is opened for amp-accordion</p>
                  <p>Content 2 is opened for amp-accordion</p>
                  <p>Content 2 is opened for amp-accordion</p>
                  <p>Content 2 is opened for amp-accordion</p>
               </div>
            </section>
            <section class="seca">
               <h3>Content 3</h3>
               <div>
                  <p>Content 3 is opened for amp-accordion</p>
                  <p>Content 3 is opened for amp-accordion</p>
                  <p>Content 3 is opened for amp-accordion</p>
                  <p>Content 3 is opened for amp-accordion</p>
                  <p>Content 3 is opened for amp-accordion</p>
               </div>
            </section>
         </amp-accordion>
      </div>
   </body>
</html>
Вывод
AMP-карусель
Amp-carousel - это компонент amp-компонент для отображения набора аналогичного содержимого на экране и использования стрелок для переключения между содержимым.
Для работы с amp-carousel нам нужно добавить следующий скрипт -
<script async custom-element = "amp-carousel" src = "https://cdn.ampproject.org/v0/amp-carousel-0.1.js"></script>Тег усилителя-карусели
Тег amp-carousel показан ниже:
<amp-carousel height="300" layout="fixed-height" type="carousel">
      <amp-img src="images/christmas1.jpg" width="400" height="300" alt="a sample image"></amp-img>
   ….
</amp-carousel>
Атрибуты, доступные для amp-carousel
Атрибуты, доступные для amp-carousel, перечислены в таблице ниже -
| Старший Нет | Атрибут и описание |
|---|---|
| 1 | type Мы можем отображать элементы карусели в виде карусели и слайдов |
| 2 | height Высота карусели в пикселях |
| 3 | controls (optional) На экране отображается стрелка влево / вправо. На устройствах она исчезает через несколько секунд. С помощью CSS можно сделать стрелки видимыми все время. |
| 4 | data-next-button-aria-label (optional) Используйте, чтобы установить метку для следующей карусели. |
| 5 | data-prev-button-aria-label (optional) Используется для установки метки предыдущей карусели. |
| 6 | autoplay (optional) Используется для отображения следующего слайда через 5000 мсек. IT может быть перезаписан с использованием атрибута задержки без милисекунд на amp-carousel. Он добавит атрибут цикла к карусели, и слайды будут воспроизводиться снова, как только он достигнет конца. Используется только для type = slides. и требуется как минимум 2 слайда для работы автовоспроизведения. |
Теперь давайте поработаем над примерами, позволяющими отображать карусели по-разному.
Тип карусели усилителя как карусель
При использовании карусельного типа элементы можно прокручивать по горизонтали.
Example
<!doctype html>
<html amp lang = "en">
   <head>
      <meta charset = "utf-8">
      <title>amp-carousel</title>
      <script async src = "https://cdn.ampproject.org/v0.js">
      </script>
      <!-- ## Setup -->
      <!-- Import the carousel component in the header. -->
      <script async custom-element = "amp-carousel" src =
         "https://cdn.ampproject.org/v0/amp-carousel-0.1.js">
      </script>
      <link rel = "canonical" href="
      https://ampbyexample.com/components/amp-carousel/">
      <meta name = "viewport" content = "width = device-width,
      minimum-scale = 1,initial-scale = 1">

      <style amp-boilerplate>
         body{
            -webkit-animation:
            -amp-start 8s steps(1,end) 0s 1 normal both;-moz-animation:
            -amp-start 8s steps(1,end) 0s 1 normal both;-ms-animation:
            -amp-start 8s steps(1,end) 0s 1 normal both;animation:
            -amp-start 8s steps(1,end) 0s 1 normal both
         }
         @-webkit-keyframes
         -amp-start{from{visibility:hidden}to{visibility:visible}}@-moz-keyframes
         -amp-start{from{visibility:hidden}to{visibility:visible}}@-ms-keyframes
         -amp-start{from{visibility:hidden}to{visibility:visible}}@-o-keyframes
         -amp-start{from{visibility:hidden}to{visibility:visible}}@keyframes
         -amp-start{from{visibility:hidden}to{visibility:visible}}
      </style>

      <noscript>
         <style amp-boilerplate>
            body{
               -webkit-animation:none;
               -moz-animation:none;
               -ms-animation:none;
               animation:none
            }
         </style>
      </noscript>
      <style amp-custom>
         h3{
            font-family: "Segoe UI",Arial,sans-serif;
            font-weight: 400;
            margin: 10px 0;
         }
      </style>
   </head>
   <body>
      <h3>Google Amp-Carousel</h3>
      <amp-carousel height = "300" layout = "fixed-height" type = "carousel">
         <amp-img
            src = "images/christmas1.jpg"
            width = "400"
            height = "300"
            alt = "a sample image">
         </amp-img>
         <amp-img src = "images/christmas2.jpg"
            width = "400"
            height = "300"
            alt = "another sample image">
         </amp-img>
         <amp-img
            src = "images/christmas3.jpg"
            width = "400"
            height = "300"
            alt = "and another sample image">
         </amp-img>
      </amp-carousel>
   </body>
</html>
Вывод
Усилитель карусельного типа в виде слайдов
Карусель усилителя type = ”slides” показывает по одному элементу за раз. Вы можете использовать макет как заливку, фиксированную, фиксированную высоту, гибкий элемент, нодисплей и адаптивный.
Example
<!doctype html>
<html amp lang = "en">
   <head>
      <meta charset = "utf-8">
      <title>amp-carousel</title>
      <script async src = "https://cdn.ampproject.org/v0.js">
      </script>
      <!-- ## Setup -->
      <!-- Import the carousel component in the header. -->
      <script async custom-element = "amp-carousel" src =
         "https://cdn.ampproject.org/v0/amp-carousel-0.1.js">
      </script>
      <link rel = "canonical" href=
      "https://ampbyexample.com/components/amp-carousel/">
      <meta name = "viewport" content = "width = device-width,
      minimum-scale = 1,initial-scale = 1">

      <style amp-boilerplate>
         body{
            -webkit-animation:
            -amp-start 8s steps(1,end) 0s 1 normal both;-moz-animation:
            -amp-start 8s steps(1,end) 0s 1 normal both;-ms-animation:
            -amp-start 8s steps(1,end) 0s 1 normal both;animation:
            -amp-start 8s steps(1,end) 0s 1 normal both
         }
         @-webkit-keyframes
         -amp-start{from{visibility:hidden}to{visibility:visible}}@-moz-keyframes
         -amp-start{from{visibility:hidden}to{visibility:visible}}@-ms-keyframes
         -amp-start{from{visibility:hidden}to{visibility:visible}}@-o-keyframes
         -amp-start{from{visibility:hidden}to{visibility:visible}}@keyframes
         -amp-start{from{visibility:hidden}to{visibility:visible}}
      </style>

      <noscript>
         <style amp-boilerplate>
            body{
               -webkit-animation:none;
               -moz-animation:none;
               -ms-animation:none;
               animation:none}
         </style>
      </noscript>
      <style amp-custom>
         h3{
            font-family: "Segoe UI",Arial,sans-serif;
            font-weight: 400;margin: 10px 0;}
      </style>
   </head>
   <body>
      <h3>Google Amp-Carousel</h3>
         <amp-carousel
            width = "400"
            height = "300"
            layout = "responsive"
            type = "slides">
               <amp-img
                  src = "images/christmas1.jpg"
                  width = "400"
                  height = "300"
                  layout = "responsive"
                  alt = "a sample image">
               </amp-img>
               <amp-img
                  src = "images/christmas2.jpg"
                  width = "400"
                  height = "300"
                  layout = "responsive"
                  alt="another sample image">
               </amp-img>
               <amp-img
                  src = "images/christmas3.jpg"
                  width = "400"
                  height = "300"
                  layout = "responsive"
                  alt = "and another sample image">
               </amp-img>
      </amp-carousel>
   </body>
</html>
Вывод
Карусель усилителей с использованием автовоспроизведения
В приведенном ниже примере мы добавили атрибут autoplay с задержкой в 2000 миллисекунд (2 секунды). Это изменит слайды после задержки в 2 секунды. По умолчанию задержка составляет 5000 миллисекунд (5 секунд).
Example
<!doctype html>
<html amp lang = "en">
   <head>
      <meta charset = "utf-8">
      <title>amp-carousel</title>
      <script async src = "https://cdn.ampproject.org/v0.js">
      </script>
      <!-- ## Setup -->
      <!-- Import the carousel component in the header. -->
      <script async custom-element = "amp-carousel" src =
         "https://cdn.ampproject.org/v0/amp-carousel-0.1.js">
      </script>
      <link rel = "canonical" href =
      "https://ampbyexample.com/components/amp-carousel/">
      <meta name = "viewport" content = "width = device-width,
      minimum-scale = 1,initial-scale = 1">

      <style amp-boilerplate>
         body{
            -webkit-animation:
            -amp-start 8s steps(1,end) 0s 1 normal both;-moz-animation:
            -amp-start 8s steps(1,end) 0s 1 normal both;-ms-animation:
            -amp-start 8s steps(1,end) 0s 1 normal both;animation:
            -amp-start 8s steps(1,end) 0s 1 normal both
         }
         @-webkit-keyframes
         -amp-start{from{visibility:hidden}to{visibility:visible}}@-moz-keyframes
         -amp-start{from{visibility:hidden}to{visibility:visible}}@-ms-keyframes
         -amp-start{from{visibility:hidden}to{visibility:visible}}@-o-keyframes
         -amp-start{from{visibility:hidden}to{visibility:visible}}@keyframes
         -amp-start{from{visibility:hidden}to{visibility:visible}}
      </style>

      <noscript>
         <style amp-boilerplate>
            body{
               -webkit-animation:none;
               -moz-animation:none;
               -ms-animation:none;
               animation:none}
         </style>
      </noscript>
      <style amp-custom>
         h3{
            font-family: "Segoe UI",Arial,sans-serif;
            font-weight: 400;
            margin: 10px 0;
         }
      </style>
   </head>
   <body>
      <h3>Google Amp-Carousel</h3>
      <amp-carousel
         width = "400"
         height = "300"
         layout = "responsive"
         type = "slides"
         autoplay delay = "2000">
            <amp-img
               src = "images/christmas1.jpg"
               width = "400"
               height = "300"
               layout = "responsive"
               alt = "a sample image">
            </amp-img>
            <amp-img
               src = "images/christmas2.jpg"
               width = "400"
               height = "300"
               layout = "responsive"
               alt = "another sample image">
            </amp-img>
            <amp-img
               src = "images/christmas3.jpg"
               width = "400"
               height = "300"
               layout = "responsive"
               alt = "and another sample image">
            </amp-img>
      </amp-carousel>
   </body>
</html>
Вывод
AMP Lightbox
Amp-lightbox - это компонент усилителя, который займет всю область просмотра и будет отображаться как наложение.
Для работы с amp-lightbox добавьте следующий скрипт -
<script async custom-element = "amp-lightbox" src = "https://cdn.ampproject.org/v0/amp-lightbox-0.1.js">
</script>
Атрибуты, доступные для amp-lightbox
Список атрибутов для amp-lightbox приведен ниже -
| Старший нет | Атрибуты и описание |
|---|---|
| 1 | animate-in (optional) Здесь вы можете указать стиль анимации для открытия лайтбокса. По умолчанию это постепенное появление . Значения, поддерживаемые для stying: постепенное проявление, переход в нижнюю и верхнюю границы |
| 2 | close-button (required on AMPHTML ads) При использовании для amphtmlads мы можем указать кнопку закрытия для лайтбокса. |
| 3 | id (required) Уникальный идентификатор лайтбокса |
| 4 | layout (required) Значение макета будет без отображения. |
| 5 | Scrollable (optional) С помощью этого атрибута в amp-lightbox содержимое лайтбокса можно прокручивать, превышая высоту лайтбокса. |
Пример лайтбокса
<!doctype html>
<html amp lang = "en">
   <head>
      <meta charset = "utf-8">
      <script async src = "https://cdn.ampproject.org/v0.js">
      </script>
      <title>Google AMP - Amp Lightbox</title>
      <link rel = "canonical" href =
      "http://example.ampproject.org/article-metadata.html">
      <meta name = "viewport" content = "width = device-width,
      minimum-scale = 1,initial-scale = 1">
      <style amp-boilerplate>
         body{
            -webkit-animation:
            -amp-start 8s steps(1,end) 0s 1 normal both;-moz-animation:
            -amp-start 8s steps(1,end) 0s 1 normal both;-ms-animation:
            -amp-start 8s steps(1,end) 0s 1 normal both;animation:
            -amp-start 8s steps(1,end) 0s 1 normal both
         }
         @-webkit-keyframes
         -amp-start{from{visibility:hidden}to{visibility:visible}}@-moz-keyframes
         -amp-start{from{visibility:hidden}to{visibility:visible}}@-ms-keyframes
         -amp-start{from{visibility:hidden}to{visibility:visible}}@-o-keyframes
         -amp-start{from{visibility:hidden}to{visibility:visible}}@keyframes
         -amp-start{from{visibility:hidden}to{visibility:visible}}
      </style>
      <noscript>
         <style amp-boilerplate>
            body{
               -webkit-animation:none;
               -moz-animation:none;
               -ms-animation:none;
               animation:none}
         </style>
      </noscript>
      <script async custom-element = "amp-lightbox" src =
         "https://cdn.ampproject.org/v0/amp-lightbox-0.1.js">
      </script>
      <style amp-custom>
         amp-img {
            border: 1px solid #ddd;
            border-radius: 4px;
            padding: 5px;
         }
         button{
            background-color: #ACAD5C;
            color: white;
            padding: 12px 20px;
            border: none;
            border-radius: 4px;
            cursor: pointer;
            float: left;
         }
         .lightbox {
            background: rgba(211,211,211,0.8);
            width: 100%;
            height: 100%;
            position: absolute;
            display: flex;
            align-items: center;
            justify-content: center;
         }
      </style>
   </head>
   <body>
      <h3>Google AMP - Amp Lightbox</h3>
      <button on = "tap:my-lightbox">
         Show LightBox
      </button>
      <amp-lightbox id = "my-lightbox" layout = "nodisplay">
         <div class = "lightbox" on="tap:my-lightbox.close" tabindex = "0">
            <amp-img
               alt = "Beautiful Flower"
               src = "images/flower.jpg"
               width = "246"
               height = "205">
            </amp-img>
         </div>
      </amp-lightbox>
   </body>
</html>
Вывод
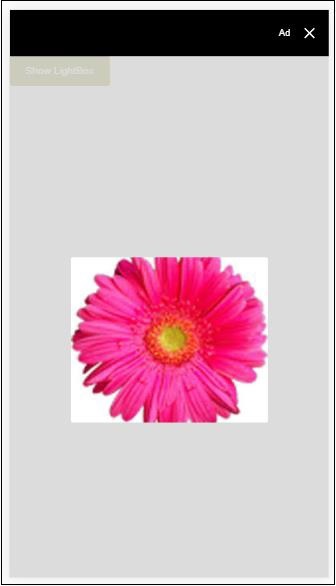
Щелкните в любом месте экрана, чтобы закрыть лайтбокс.
Вы можете добавить кнопку закрытия в лайтбокс, которая в основном используется при показе рекламы оверлейного типа. Обратите внимание на следующий пример -
пример
<!doctype html>
<html amp lang = "en">
   <head>
      <meta charset = "utf-8">
      <script async src = "https://cdn.ampproject.org/v0.js">
      </script>
      <title>Google AMP - Amp Lightbox</title>
      <link rel = "canonical" href =
      "http://example.ampproject.org/article-metadata.html">
      <meta name = "viewport" content = "width = device-width,
      minimum-scale = 1,initial-scale = 1">

      <style amp-boilerplate>
         body{
            -webkit-animation:
               -amp-start 8s steps(1,end) 0s 1 normal both;-moz-animation:
               -amp-start 8s steps(1,end) 0s 1 normal both;-ms-animation:
               -amp-start 8s steps(1,end) 0s 1 normal both;animation:
            -amp-start 8s steps(1,end) 0s 1 normal both
         }
         @-webkit-keyframes
         -amp-start{from{visibility:hidden}to{visibility:visible}}@-moz-keyframes
         -amp-start{from{visibility:hidden}to{visibility:visible}}@-ms-keyframes
         -amp-start{from{visibility:hidden}to{visibility:visible}}@-o-keyframes
         -amp-start{from{visibility:hidden}to{visibility:visible}}@keyframes
         -amp-start{from{visibility:hidden}to{visibility:visible}}
      </style>
      <noscript>
         <style amp-boilerplate>
            body{
               -webkit-animation:none;
               -moz-animation:none;
               -ms-animation:none;
               animation:none}
         </style>
      </noscript>
      <script async custom-element = "amp-lightbox" src =
         "https://cdn.ampproject.org/v0/amp-lightbox-0.1.js">
      </script>
      <style amp-custom>
         amp-img {
            border: 1px solid #ddd;
            border-radius: 4px;
            padding: 5px;
         }
         button{
            background-color: #ACAD5C;
            color: white;
            padding: 12px 20px;
            border: none;
            border-radius: 4px;
            cursor: pointer;
            float: left;
         }
         .lightbox {
            background: rgba(211,211,211,0.8);
            width: 100%;
            height: 100%;
            position: absolute;
            display: flex;
            align-items: center;
            justify-content: center;
         }
      </style>
   </head>
   <body>
      <h3>Google AMP - Amp Lightbox</h3>
      <button on = "tap:my-lightbox">
         Show LightBox
      </button>
      <amp-lightbox id = "my-lightbox" layout = "nodisplay" close-button>
         <div class = "lightbox" on = "tap:my-lightbox.close">
            <amp-img
               alt = "Beautiful Flower"
               src = "images/flower.jpg"
               width = "246"
               height = "205">
            </amp-img>
         </div>
      </amp-lightbox>
   </body>
</html>
Вывод
Боковая панель усилителя
Боковая панель Amp - это компонент amp, используемый для отображения контента, который скользит по краям окна при нажатии кнопки.
Для работы с amp-sidebar нам нужно добавить следующий скрипт -
<script async custom-element = "amp-sidebar" src = "
   https://cdn.ampproject.org/v0/amp-sidebar-0.1.js">
</script>
Тег боковой панели усилителя
<amp-sidebar id = "sidebar" layout = "nodisplay" side = "right">
   <span on = "tap:sidebar.close">X</span>
   Html content here..
</amp-sidebar>
Список атрибутов, доступных на боковой панели amp, приведен ниже -
| Старший нет | Атрибуты и описание |
|---|---|
| 1 | side Этот атрибут откроет боковую панель в указанном направлении. Пример слева / справа |
| 2 | layout Nodisplay будет использоваться для макета боковой панели |
| 3 | open Этот атрибут добавляется, когда открыта боковая панель. |
| 4 | data-close-button-aria-label Используется для установки метки для кнопки закрытия. |
Мы будем работать с боковой панелью, используя указанные выше атрибуты. Обратите внимание на пример, показанный ниже -
пример
<!doctype html>
<html amp lang = "en">
   <head>
      <meta charset = "utf-8">
      <script async src = "https://cdn.ampproject.org/v0.js">
      </script>
      <title>Google AMP - Amp Sidebar</title>
      <link rel = "canonical" href="
      http://example.ampproject.org/article-metadata.html">
      <meta name = "viewport" content = "width = device-width,
      minimum-scale = 1,initial-scale = 1">

      <style amp-boilerplate>
         body{
            -webkit-animation:
            -amp-start 8s steps(1,end) 0s 1 normal both;-moz-animation:
            -amp-start 8s steps(1,end) 0s 1 normal both;-ms-animation:
            -amp-start 8s steps(1,end) 0s 1 normal both;animation:
            -amp-start 8s steps(1,end) 0s 1 normal both
         }
         @-webkit-keyframes
         -amp-start{from{visibility:hidden}to{visibility:visible}}@-moz-keyframes
         -amp-start{from{visibility:hidden}to{visibility:visible}}@-ms-keyframes
         -amp-start{from{visibility:hidden}to{visibility:visible}}@-o-keyframes
         -amp-start{from{visibility:hidden}to{visibility:visible}}@keyframes
         -amp-start{from{visibility:hidden}to{visibility:visible}}
      </style>
      <noscript>
         <style amp-boilerplate>
            body{
               -webkit-animation:none;
               -moz-animation:none;
               -ms-animation:none;
               animation:none}
         </style>
      </noscript>
      <script async custom-element = "amp-sidebar" src =
         "https://cdn.ampproject.org/v0/amp-sidebar-0.1.js">
      </script>
      <style amp-custom>
         amp-img {
            border: 1px solid #ddd;
            border-radius: 4px;
            padding: 5px;
         }
         button{
            background-color: #ACAD5C;
            color: white;
            padding: 12px 20px;
            border: none;
            border-radius: 4px;
            cursor: pointer;
            float: left;
         }
      </style>
   </head>
   <body>
      <h3>Google AMP - Amp Sidebar</h3>
      <button on = "tap:sidebar">
         Show Sidebar
      </button>
      <amp-sidebar id = "sidebar" layout = "nodisplay" side = "right">
         <span on = "tap:sidebar.close">X</span>
         <ul>
            <li><a href = "/">About</a></li>
            <li><a href = "/">Services</a></li>
            <li><a href = "/">Contact US</a></li>
         </ul>
      </amp-sidebar>
   </body>
</html>
Вывод
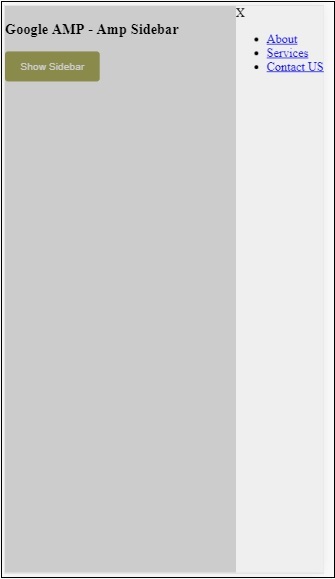
Мы использовали sideатрибут, чтобы открыть боковую панель справа. Вы можете использовать левое значение дляsideатрибут, чтобы открыть его с левой стороны. Вlayout атрибут должен nodisplay.Open Атрибут присутствует при открытии боковой панели.
данные-закрыть-кнопка-ария-метка
Слайдер изображения усилителя
Amp-image-slider - это компонент amp, используемый для сравнения двух изображений путем добавления ползунка при его вертикальном перемещении по изображению.
Для работы с amp-img-slider добавьте следующий скрипт -
<script async custom-element = "amp-image-slider" src = "
   https://cdn.ampproject.org/v0/amp-image-slider-0.1.js">
</script>
Тег amp-img-slider
<amp-image-slider width = "300" height = "200" layout = "responsive">
   <amp-img src = "images/christmas1.jpg" layout = "fill">
   </amp-img>
   <amp-img src = "images/christmas2.jpg" layout = "fill">
   </amp-img>
</amp-image-slider>
Здесь показан пример amp-img-slider. Здесь мы добавили 2 изображения внутри amp-img-slider, где первое изображение действует как слайдер, а вы можете скользить вверху на втором изображении.
пример
<!doctype html>
<html amp lang = "en">
   <head>
      <meta charset = "utf-8">
      <script async src = "https://cdn.ampproject.org/v0.js">
      </script>
      <title>Google AMP - Amp Image Slider</title>
      <link rel = "canonical" href =
      "http://example.ampproject.org/article-metadata.html">
      <meta name = "viewport" content = "width = device-width,
      minimum-scale = 1,initial-scale = 1">

      <style amp-boilerplate>
         body{
            -webkit-animation:
            -amp-start 8s steps(1,end) 0s 1 normal both;-moz-animation:
            -amp-start 8s steps(1,end) 0s 1 normal both;-ms-animation:
            -amp-start 8s steps(1,end) 0s 1 normal both;animation:
            -amp-start 8s steps(1,end) 0s 1 normal both
         }
         @-webkit-keyframes
         -amp-start{from{visibility:hidden}to{visibility:visible}}@-moz-keyframes
         -amp-start{from{visibility:hidden}to{visibility:visible}}@-ms-keyframes
         -amp-start{from{visibility:hidden}to{visibility:visible}}@-o-keyframes
         -amp-start{from{visibility:hidden}to{visibility:visible}}@keyframes
         -amp-start{from{visibility:hidden}to{visibility:visible}}
      </style>
      <noscript>
         <style amp-boilerplate>
            body{
               -webkit-animation:none;
               -moz-animation:none;
               -ms-animation:none;
               animation:none}
         </style>
      </noscript>
      <script async custom-element = "amp-image-slider" src =
         "https://cdn.ampproject.org/v0/amp-image-slider-0.1.js">
      </script>
      <style amp-custom>
         amp-img {
            border: 1px solid #ddd;
            border-radius: 4px;
            padding: 5px;
         }
      </style>
   </head>
   <body>
      <h3>Google AMP - Amp Image Slider</h3>
      <amp-image-slider
         width = "300"
         height = "200"
         layout = "responsive">
            <amp-img
               src = "images/christmas1.jpg"
               layout = "fill">
            </amp-img>
            <amp-img
               src = "images/christmas2.jpg"
               layout = "fill">
            </amp-img>
      </amp-image-slider>
   </body>
</html>
Вывод

У Amp-image-slider есть действие seekTo, с помощью которого вы можете изменить изображение, как показано в примере ниже -
пример
<!doctype html>
<html amp lang = "en">
   <head>
      <meta charset = "utf-8">
      <script async src = "https://cdn.ampproject.org/v0.js">
      </script>
      <title>Google AMP - Amp Image Slider</title>
      <link rel = "canonical" href ="
      http://example.ampproject.org/article-metadata.html">
      <meta name = "viewport" content = "width = device-width,
      minimum-scale = 1,initial-scale = 1">

      <style amp-boilerplate>
         body{
            -webkit-animation:
            -amp-start 8s steps(1,end) 0s 1 normal both;-moz-animation:
            -amp-start 8s steps(1,end) 0s 1 normal both;-ms-animation:
            -amp-start 8s steps(1,end) 0s 1 normal both;animation:
            -amp-start 8s steps(1,end) 0s 1 normal both
         }
         @-webkit-keyframes
         -amp-start{from{visibility:hidden}to{visibility:visible}}@-moz-keyframes
         -amp-start{from{visibility:hidden}to{visibility:visible}}@-ms-keyframes
         -amp-start{from{visibility:hidden}to{visibility:visible}}@-o-keyframes
         -amp-start{from{visibility:hidden}to{visibility:visible}}@keyframes
         -amp-start{from{visibility:hidden}to{visibility:visible}}
      </style>
      <noscript>
         <style amp-boilerplate>
            body{
               -webkit-animation:none;
               -moz-animation:none;
               -ms-animation:none;
               animation:none}
         </style>
      </noscript>
      <script async custom-element = "amp-image-slider" src =
         "https://cdn.ampproject.org/v0/amp-image-slider-0.1.js">
      </script>
      <style amp-custom>
         amp-img {
            border: 1px solid #ddd;
            border-radius: 4px;
            padding: 5px;
         }
         button{
            background-color: #ACAD5C;
            color: white;
            padding: 12px 20px;
            border: none;
            border-radius: 4px;
            cursor: pointer;
            float: left;
         }
         .amp-sidebar-toolbar-target-shown {
            display: none;
         }
      </style>
   </head>
   <body>
      <h3>Google AMP - Amp Image Slider</h3>
      <amp-image-slider
         width = "300"
         id="slider1"
         height = "200"
         layout = "responsive">
         <amp-img src = "images/christmas1.jpg" layout = "fill">
         </amp-img>
         <amp-img src = "images/christmas2.jpg" layout = "fill">
         </amp-img>
      </amp-image-slider>
      <button on = "tap:slider1.seekTo(percent = 1)">
         Image 1
      </button>
      <button on = "tap:slider1.seekTo(percent = 0)">
         Image 2
      </button>
   </body>
</html>
Вывод

Вы можете изменить изображения, нажав на кнопку.

<button on = "tap:slider1.seekTo(percent = 1)">Image 1</button>
<button on = "tap:slider1.seekTo(percent = 0)">Image 2</button>
</div>