Google AMP - Краткое руководство
Google Accelerated Mobile Pages(Google-AMP) - новый проект Google с открытым исходным кодом, специально разработанный для создания легких веб-страниц с использованием amp html. Основная цель этого проекта - убедиться, что код усилителя работает нормально и быстро загружается на всех возможных устройствах, таких как смартфоны, планшеты и т. Д.
Что такое AMP?
Accerated Mobile Pages (AMP) - это проект Google с открытым исходным кодом, специально разработанный для того, чтобы сделать веб-страницы удобными для мобильных устройств, делая их более быстрыми, плавными и отзывчивыми в любом браузере.
Официальный сайт Google amp - это - https://www.ampproject.org/
ПОЧЕМУ AMP?
Любой пользователь ожидает, что веб-сайты будут загружать контент очень быстро. Однако это может быть не так, когда страницы почти заполнены изображениями, видео, анимацией, социальными виджетами, что делает страницу очень тяжелой и, следовательно, увеличивает время ее загрузки. Такой сценарий может привести к потере пользователей сайта в долгосрочной перспективе.
Google AMP предназначен для решения этой проблемы. AMP имеет особый способ заботиться об изображениях, iframe, javascripts, рекламе, видео, анимации, CSS, загруженных шрифтах и т. Д. Содержимое AMP-страниц кэшируется на стороне Google, поэтому каждый раз, когда пользователь нажимает на результаты поиска, контент обслуживается из кеша. Версия кеша также обновляется своевременно, поэтому пользователь всегда получает свежую обновленную страницу.
Почему выбрать AMP?
В этом разделе рассказывается, почему вы должны выбрать AMP для своего сайта -
Приоритет в поиске Google
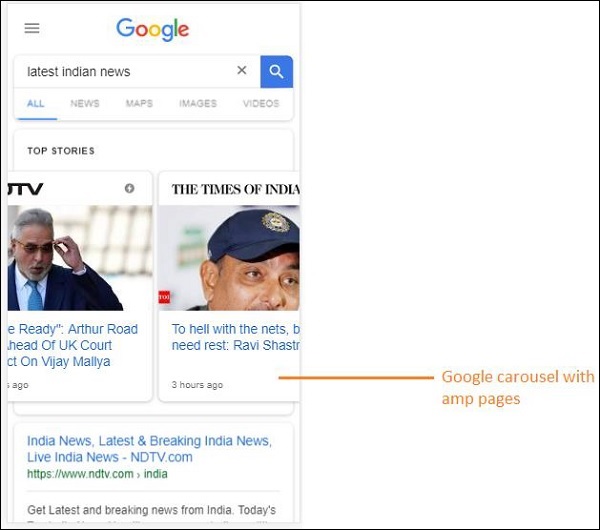
Сегодня, когда вы ищете что-то в Google, вы обнаружите, что вверху отображается карусель Google со страницами, за которой следует список страниц в ответ на ваш поиск. В карусели новостей отображаются все действующие сайты AMP. Это означает, что Google отдает приоритет страницам amp и отображает их в соответствии с рейтингом в новостной карусели.
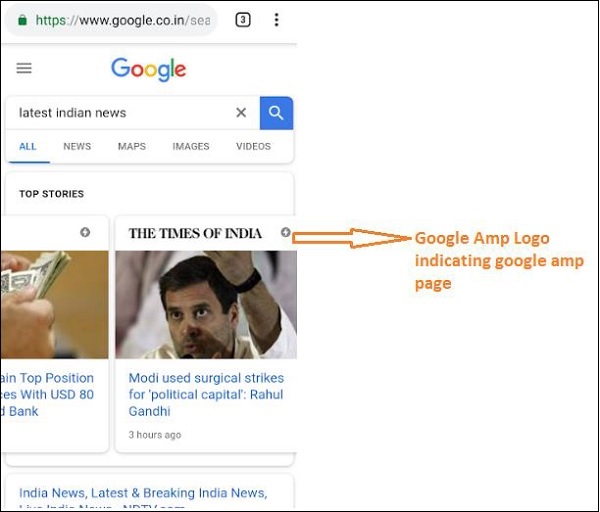
Пример поиска в Google по ключевому слову «latest indian news»Здесь -

Все страницы с высоким рейтингом, которые являются страницами AMP, отображаются в начале карусели Google, как показано на изображении выше.
Страница Google AMP выглядит так, как показано ниже, когда пользователь что-то ищет в поиске Google. Обратите внимание, что на страницах AMP есть логотип Google AMP.
Более быстрое время загрузки
Когда ваша страница преобразована в AMP, время загрузки будет намного лучше по сравнению со страницей без AMP. Более быстрое время загрузки также является важным фактором ранжирования страницы в поиске Google.
Без всплывающих окон
Использование Google AMP обеспечивает приятный просмотр веб-страниц, поскольку пользователь не увидит нежелательных всплывающих окон для страниц, созданных с помощью Google AMP.
Генерирует трафик
Когда скорость загрузки страниц высока, это автоматически увеличивает количество зрителей, и, следовательно, трафик на страницу увеличивается.
Как работает AMP?
Наиболее важными компонентами, которые используются для создания веб-сайта, являются javascript, изображения, видео, шрифты, CSS и т. Д. Дизайн AMP-страницы выполняется с учетом всех этих факторов уникальным образом. В этом разделе давайте вкратце обсудим, что именно делает AMP для ускорения страниц.
Асинхронный JavaScript
Javascript играет важную роль на странице, поскольку он помогает добавить интерактивности на страницу в виде анимации, изменений DOM и т. Д. Он также увеличивает медленность страницы и может блокировать отображение другого содержимого на странице.
Как AMP справляется с JavaScript?
AMP загружает JavaScript асинхронно. Пользовательский JavaScript строго запрещен на AMP-странице. Обратите внимание, что в AMP добавлено много компонентов, некоторые из них являются заменой существующих тегов html; например amp-img, amp-iframe, amp-video, amp-lightbox, amp-animations и т. д.
Для каждого из этих компонентов есть файл JavaScript, который должен быть загружен, с атрибутом async, добавленным к тегу сценария. На странице разрешены только файлы JavaScript, связанные с amp-components, а любой другой JavaScript внутри AMP-страницы или стороннего файла javascript запрещен. Поскольку AMP использует кеш Google AMP, файлы предварительно загружаются из кеша, что ускоряет их загрузку.
Размеры для HTML-тегов
Обязательно указать размер тегов image, iframe, video, чтобы amp page могла найти место на странице без необходимости загружать ресурс. Загружаемые ресурсы имеют приоритет на странице amp. Контенту отдается больший приоритет по сравнению с загружаемыми ресурсами.
Социальные виджеты / объявления
Amp предоставляет специальные компоненты, а именно amp-facebook, amp-twitter, amp-ad, amp-sticky, чтобы заботиться о том, чтобы социальные виджеты отображались на странице. Компонент AMP-рекламы используется для показа рекламы на странице. AMP уделяет особое внимание работе с компонентами и загружает содержимое в соответствии с приоритетом в зависимости от требований.
CSS
Внешний CSS не разрешен на страницах AMP. Пользовательский CSS, если он есть, можно добавить в тег стиля с помощью атрибута amp-custom. Встроенный CSS также разрешен. AMP сокращает http-запросы всеми возможными способами.
Шрифты
Шрифты разрешены на страницах amp, и приоритет загрузки шрифтов определяется AMP.
Анимация
AMP поддерживает компоненты amp-animation и позволяет переходить, как это поддерживается современными браузерами.
Принимая во внимание все перечисленные выше моменты, AMP особенно внимательно относится к HTTP-запросам, сделанным для шрифтов, изображений, окон iframe, рекламы и т. Д. Сначала отображаются ресурсы, доступные в верхней части страницы, а затем предпочтение отдается ресурсам, доступным в нижней части страницы. .
Прочие пункты
Google AMP Cache - еще один важный фактор, который помогает быстрее отрисовывать содержимое, поскольку содержимое извлекается из кеша.
Издатель должен поддерживать два сайта с усилением и без страницы. Например, предположим, что у сайта есть адрес -https://www.mypage.com. Тогда внутренние страницы для обычных компьютеров, которые будут отображаться на компьютере, будутhttps://www.mypage/com/news/amp/
Как Google определяет страницы AMP и не-AMP?
Теперь давайте разберемся, как Google идентифицирует страницы AMP и не-AMP.
Когда поиск Google сканирует страницу, если он получает amp в html, <html amp> или <html ⚡>, он знает, что это страница AMP.
Также, если Google обнаруживает страницу без усилителя, сначала, чтобы узнать о странице amp, необходимо обязательно добавить следующие теги ссылок в раздел заголовка страницы html как для страниц с усилителем, так и без него.
URL страницы для не amp-page
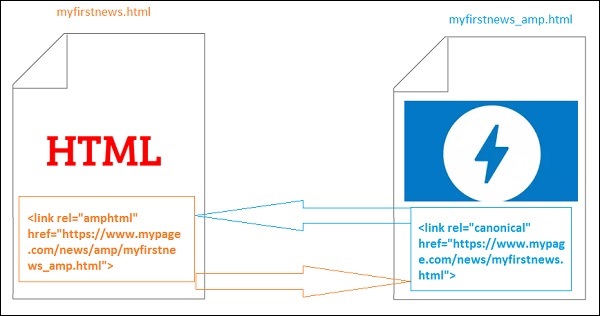
<link rel = "amphtml" href = "https://www.mypage.com/news/amp/myfirstnews_amp.html">Здесь rel = ”amphtml” указывается для страницы без поддержки amp, чтобы она указывала на версию amp, чтобы Google показывал правильную версию на основе платформы.
URL страницы для amp-page
<link rel = "canonical" href = "https://www.mypage.com/news/myfirstnews.html">Здесь rel = ”canonical” указывается на странице amp, чтобы указать на стандартную версию html, чтобы Google показывал правильную версию, основанную на платформе.
Если на вашем сайте только одна страница с усилителем, все же не забудьте добавить атрибут rel = ”canonical”, который будет указывать на себя -
<link rel = "canonical" href = "https://www.mypage.com/news/amp/myfirstnews_amp.html">На следующей диаграмме показана ссылка на rel = "amphtml", указывающая на страницу amp, и на rel = "canonical", указывающую на стандартную страницу html.
Особенности Google AMP
В этом разделе давайте обсудим важные функции, доступные с Google AMP -
Кэширование усилителя
Кэширование Google Amp - одна из основных функций, добавленных в amp. Он обеспечивает сеть доставки контента на основе прокси-сервера для обслуживания чистых страниц amp. Кеш-память AMP доступна по умолчанию для всех допустимых страниц AMP. Это помогает ускорить рендеринг страниц по сравнению со страницами без AMP. В настоящее время существует 2 поставщика кеш-памяти AMP, Google AMP Cache и Cloudflare AMP Cache. Когда пользователь щелкает и перенаправляется на страницу amp, контент обслуживается из кеша Google.
Компоненты усилителя
Amp имеет большой список компонентов, предназначенных для различных целей. Некоторые из них перечислены ниже -
amp-img - Используется для показа изображений на страницах amp.
amp-iframe- Используется для отображения iframe с внешним контентом, который будет отображаться на страницах. Обратите внимание, что используемые iframe изолированы, что означает, что ему требуется разрешение для отображения данных на странице amp. Поэтому для атрибута песочницы необходимо указать данные о перекрестном происхождении.
amp-video - Показать видео на странице.
amp-audio - Чтобы показать аудио на странице.
amp-datepicker- Используется для отображения виджетов даты на странице. Вам не нужно использовать сторонние датпикеры, так как они доступны напрямую в amp.
amp-story - Средство для отображения ваших историй на странице.
amp-selector- Это компонент усилителя, который отображает меню параметров, и пользователь может выбирать между ними. Отображаемые параметры могут быть текстом, изображениями или любым другим компонентом amp.
amp-list - Компонент amp, который вызывает конечную точку CORS json, и данные из файла json отображаются внутри шаблона.
Реклама
Реклама очень важна для издателей, поскольку их доход полностью зависит от рекламы, показываемой на странице. Amp не позволяет добавлять какой-либо внешний javascript на страницу, но имеет специальный компонент amp, называемый amp-ad, который заботится о показе рекламы на странице.
Рекламная сеть, которую издатель хочет показывать на своей странице, должна поддерживать amp-ad. Например, чтобы показывать объявления с двойным щелчком на странице, двойной щелчок должен поддерживать показ объявлений с использованием компонента amp-ad. В следующем коде показан тег amp-ad для doubleclick.
<amp-ad width = "300"
   height = "200"
   type = "doubleclick"
   data-slot = "/4119129/ad-layout">
   <div placeholder>
      <b>Placeholder here!!!</b>
   </div>
</amp-ad>
Amp также поддерживает amphtmlads, которые представляют собой чистые ampads, разработанные из компонентов AMP и html. Amp также поддерживает amp-sticky-ads, нижний колонтитул, отображаемый внизу страницы. Подробная информация о рекламе в amp обсуждается в главе о рекламе amp.
Социальные виджеты
Социальные виджеты, такие как Facebook, Twitter, Instagram, стали очень важными для отображения на странице издателя, чтобы страницы были доступны в социальных сетях. AMP расширил поддержку всех важных виджетов социальных сетей, которые будут использоваться на странице, разработав такие компоненты AMP, как amp-facebook, amp-twitter, amp-instagram, amp-pinterest и т. Д.
Amp Media
Другой важный компонент на страницах - это средства массовой информации для показа видео, а также показ рекламы между видео в качестве рекламы в середине ролика. AMP предоставляет среду для этого, используя amp-jwplayer, amp-youtube и т. Д. Вам не нужно загружать какие-либо дополнительные сторонние файлы, чтобы jwplayer, youtube отображались на вашей странице.
Amp Analytics
Аналитика Amp - это компонент AMP, используемый для отслеживания данных на данной странице. Все действия пользователя на странице могут быть записаны и сохранены для анализа данных для дальнейших улучшений или бизнес-целей.
Усилитель Анимации
Amp-animation - это компонент усилителя, который определяет анимацию, которая будет использоваться на других компонентах усилителя. IT поддерживает анимацию, переход которой хорошо работает в современном браузере. Вам не нужно использовать какую-либо внешнюю библиотеку CSS для выполнения анимации, и вы можете использовать компонент amp-animation.
Раскладки усилителей
AMP-Layout - одна из важных функций, доступных в google-amp. Компоновка усилителя обеспечивает правильную визуализацию компонентов усилителя при загрузке страницы, не вызывая мерцания или проблем с прокруткой.
Google AMP гарантирует, что рендеринг макета выполняется на странице до того, как будут выполнены любые другие удаленные ресурсы, такие как HTTP-запрос изображений и вызовы данных. Атрибуты, доступные для макета: ширина / высота для всех компонентов amp, атрибут макета со значениями, такими как отзывчивый, заполнение, фиксированный и т. Д., Атрибут заполнителя, который будет отображаться, когда ресурсу требуется время для загрузки или есть какая-либо ошибка, атрибут резервного копирования, который должен отображаться, на ресурсе есть ошибка.
Макеты дисплея усилителя
Amp поддерживает множество компонентов, используемых для отображения контента на странице, без необходимости использования какой-либо сторонней библиотеки или без необходимости создавать тяжелый CSS на странице. В список вошли
Accordion- Amp-accordion - это компонент усилителя, используемый для отображения содержимого в формате «развернуть-свернуть». Пользователям становится легко просматривать его на мобильных устройствах, где они могут выбрать раздел по своему выбору с помощью аккордеона.
Carousel - Amp-carousel - это amp-компонент для отображения набора аналогичного содержимого на экране и использования стрелок для переключения между содержимым.
Lightbox - Amp-lightbox - это компонент усилителя, который займет все окно просмотра и будет отображаться как наложение.
Slider - Amp-image-slider - это компонент amp, используемый для сравнения 2 изображений путем добавления ползунка при его перемещении по вертикали над изображением.
Sidebar - Боковая панель усилителя - это компонент усилителя, используемый для отображения содержимого, которое скользит по краям окна при нажатии кнопки.
Преимущества AMP
Страницы AMP легкие и загружаются быстрее
Google отдает приоритет страницам AMP в поиске Google. AMP-страницы перечислены в формате карусели вверху страницы. Чтобы получить более высокий рейтинг, рекомендуется иметь свои страницы в AMP.
AMP-страницы удобны для мобильных устройств, так как контент адаптируется и хорошо адаптируется во всех браузерах без необходимости какого-либо дополнительного стиля.
Удовлетворенность пользователей повышается для страниц AMP, поскольку скорость загрузки страницы выше по сравнению со страницами без усилителя, что позволяет сэкономить их пропускную способность и батарею мобильного телефона.
Недостатки AMP
Усилитель обладает следующими недостатками -
Издатель должен поддерживать две версии для своих страниц: amp и non-amp.
Пользователь должен приложить дополнительные усилия для преобразования страниц без усилителя в amp. Поскольку amp не поддерживает пользовательский javascript или загрузку внешнего javascript, то же самое должно быть достигнуто с тем, что доступно с amp.
Google Accelerated Mobile Pages(Google-AMP) - новый проект Google с открытым исходным кодом, специально разработанный для создания легких веб-страниц с использованием amp html. Основная цель этого проекта - убедиться, что код AMP работает нормально и быстро загружается на всех возможных устройствах, таких как смартфоны и планшеты.
AMP - это просто расширение стандартного HTML. Изменилось несколько тегов HTML, и AMP добавила ограничения на их использование. В этой главе мы перечислим HTML-теги, которые были изменены, и добавленные к ним ограничения. Изменены теги, отвечающие за загрузку внешних ресурсов, например изображений, css, js, отправки форм, видео, аудио и т. Д.
Также в amp добавлено множество новых функций, например amp-date-picker, amp-facebook, amp-ad, amp-analytics, amp-ad, amp-lightbox и многие другие, которые можно использовать непосредственно на html-страницах. Остальные, остальные, предназначенные для демонстрации, используются как есть.
Со всеми этими изменениями и новыми функциями AMP обещает обеспечить более быструю загрузку и лучшую производительность для страниц при использовании в реальной среде.
Когда вы ищете что-либо в поиске Google на своем мобильном телефоне, в верхней части карусели Google отображаются в основном страницы amp, как показано ниже -
Когда вы щелкаете страницу AMP, URL-адрес, который вы получаете в адресной строке, выглядит следующим образом:
https://www.google.co.in/amp/s/m.timesofindia.com/sports/cricket/india-in-australia/to-hell-with-the-nets-boys-need-rest-ravi-shastri/amp_articleshow/67022458.cms
URL-адрес не поступает напрямую от издателя, но Google указывает его на свою собственную копию на сервере Google, которая является кэшированной версией и помогает быстрее отображать контент по сравнению со страницей без AMP. Это произойдет только на устройствах или в режиме эмулятора Google.
Пример страницы усилителя
Пример для страницы amp показан ниже -
<!doctype html>
<html amp>
   <head>
      <meta charset = "utf-8">
      <title>Amp Sample Page</title>
      <link rel = "canonical" href = "./regular-html-version.html">
      <meta name = "viewport" content = "width = device-width,
         minimum-scale = 1,initial-scale = 1">
      <style amp-custom>
         h1 {color: red}
      </style>
      <script type = application/json>{
         "vars": {
            "uid": "23870",
            "domain": "dummyurl.com",
            "sections": "us",
            "authors": "Hello World"
         }
      }
      </script>
      <style amp-boilerplate>
         body{
            -webkit-animation:
            -amp-start 8s steps(1,end) 0s 1 normal both;-moz-animation:
            -amp-start 8s steps(1,end) 0s 1 normal both;-ms-animation:
            -amp-start 8s steps(1,end) 0s 1 normal both;animation:
            -amp-start 8s steps(1,end) 0s 1 normal both
         }
         @-webkit-keyframes
         -amp-start{from{visibility:hidden}to{visibility:visible}}@-moz-keyframes
         -amp-start{from{visibility:hidden}to{visibility:visible}}@-ms-keyframes
         -amp-start{from{visibility:hidden}to{visibility:visible}}@-o-keyframes
         -amp-start{from{visibility:hidden}to{visibility:visible}}@keyframes
         -amp-start{from{visibility:hidden}to{visibility:visible}}
      </style>
      <noscript>
         <style amp-boilerplate>
            body{
               -webkit-animation:none;
               -moz-animation:none;
               -ms-animation:none;
               animation:none}
         </style>
      </noscript>

      <script async src = "https://cdn.ampproject.org/v0.js"></script>
   </head>
   <body>
      <h1>Amp Sample Page</h1>
      <p>
         <amp-img src = "imgurl.jpg" width = "300" height = "300"
            layout = "responsive"></amp-img>
      </p>
      <amp-ad width = "300" height = "250" type = "doubleclick"
         data-slot = "/4119129/no-ad">
         <div fallback>
            <p style = "color:green;font-size:25px;">No ads to Serve!</p>
         </div>
      </amp-ad>
   </body>
</html>
Что можно и чего нельзя делать на странице AMP
Давайте разберемся, что нужно и чего нельзя делать программисту на странице AMP.
Обязательные теги
Есть несколько обязательных тегов, которые нужно включить на страницу amp, как указано ниже -
Мы должны убедиться, что к тегу html добавлен amp или ⚡, как показано ниже -
<html amp>
   OR
<html ⚡>
Теги <head> и <body> должны быть добавлены на html-страницу.
Следующие обязательные метатеги должны быть добавлены в заголовок страницы; в противном случае он не пройдет проверку amp
<meta charset = "utf-8">
<meta name = "viewport" content = "width=device-width, minimum-scale = 1, initial-scale = 1">
Ссылка rel = "canonical" будет добавлена внутри тега заголовка
<link rel = "canonical" href = "./regular-html-version.html">Тег стиля с amp-котелком -
<style amp-boilerplate>
   body{
      -webkit-animation:
      -amp-start 8s steps(1,end) 0s 1 normal both;-moz-animation:
      -amp-start 8s steps(1,end) 0s 1 normal both;-ms-animation:
      -amp-start 8s steps(1,end) 0s 1 normal both;animation:
      -amp-start 8s steps(1,end) 0s 1 normal both
   }
   @-webkit-keyframes
   -amp-start{from{visibility:hidden}to{visibility:visible}}@-moz-keyframes
   -amp-start{from{visibility:hidden}to{visibility:visible}}@-ms-keyframes
   -amp-start{from{visibility:hidden}to{visibility:visible}}@-o-keyframes
   -amp-start{from{visibility:hidden}to{visibility:visible}}@keyframes
   -amp-start{from{visibility:hidden}to{visibility:visible}}
</style>
Тег Noscript с amp-шаблона -
<noscript>
   <style amp-boilerplate>
      body{
         -webkit-animation:none;
         -moz-animation:none;
         -ms-animation:none;
         animation:none
      }
   </style>
</noscript>
Очень важен тег сценария amp с добавленным асинхронным кодом, как показано ниже -
<script async src = "https://cdn.ampproject.org/v0.js"> </script>Если вы хотите добавить на страницу собственный CSS, обратите внимание, что мы не можем вызывать внешнюю таблицу стилей на страницах amp. Чтобы добавить собственный CSS, весь ваш CSS должен быть здесь, как показано -
<style amp-custom>
   //all your styles here
</style>
К тегу стиля должен быть добавлен атрибут amp-custom.
Скрипты для компонентов AMP
Обратите внимание, что скрипты с src и type = ”text / javascript” строго запрещены на странице amp. В раздел заголовка можно добавлять только теги скрипта, которые асинхронны и относятся к amp-компонентам.
В этом разделе перечислены несколько скриптов, используемых для компонентов усилителя, как указано ниже -
amp-ad
<script async custom-element = "amp-ad"
   src = "https://cdn.ampproject.org/v0/amp-ad-0.1.js">
</script>
amp-iframe
<script async custom-element = "amp-iframe"
   src = "https://cdn.ampproject.org/v0/amp-iframe-0.1.js">
</script>
Обратите внимание, что в сценарии есть атрибут async и custom-element с именем загружаемого компонента amp. Amp проверяет теги сценария на основе асинхронности и свойства настраиваемого элемента и не позволяет загружать другие сценарии. Это требуетtype=application/json который мы добавили в образец файла, как показано ниже
<type = application/json>
{
   "vars": {
      "uid": "23870",
      "domain": "dummyurl.com",
      "sections": "us",
      "authors": "Hello World"
   }
}
</script>
Приведенный выше скрипт при необходимости можно использовать с другими amp-компонентами, например для amp-analytics.
HTML-теги
До сих пор мы видели обязательные теги, необходимые на странице amp. Теперь мы обсудим разрешенные / запрещенные элементы HTML и наложенные на них ограничения.
Вот список разрешенных / запрещенных HTML-тегов -
| Старший Нет | HTML-тег и описание |
|---|---|
| 1 | img Этот тег заменяется на amp-img. Использование прямого тега img на AMP-странице запрещено. |
| 2 | video Заменено на amp-video |
| 3 | audio Заменен на amp-audio |
| 4 | iframe Заменено на amp-iframe |
| 5 | object Не допускается |
| 6 | embed Не допускается |
| 7 | form Может использоваться как <form>. Нам нужно добавить скрипт для работы с формой на AMP-странице. Example − |
| 8 | Input elements |
| 9 | <fieldset> Разрешается |
| 10 | <label> Разрешается |
| 11 | P, div, header,footer,section Разрешается |
| 12 | button Разрешается |
| 13 | a Тег <a> разрешен при следующем условии, href не должен начинаться с javascript. Если присутствует, значение целевого атрибута должно быть _blank. |
| 14 | svg Не допускается |
| 15 | meta Разрешается |
| 16 | Link Разрешается. Но не позволяет загружать внешнюю таблицу стилей. |
| 17 | style Разрешается. У него должен быть атрибут amp-markerplate или amp-custom. |
| 18 | base Не допускается |
| 19 | noscript Разрешено |
Комментарии
Условные комментарии html не допускаются. Например -
<!--[if Chrome]>
This browser is chrome (any version)
<![endif]-->HTML-события
События, которые мы используем на html-страницах, такие как onclick, onmouseover, не разрешены на AMP-странице.
Мы можем использовать события следующим образом -
on = "eventName:elementId[.methodName[(arg1 = value, arg2 = value)]]"Вот пример события, используемого для элемента ввода -
<input id = "txtname" placeholder = "Type here"
on = "inputthrottled:
AMP.setState({name: event.value})">Используемое событие управляется вводом.
Классы
У вас не может быть классов на ваших страницах с префиксом вроде -amp- or i-amp-. Кроме того, вы можете использовать имя класса в соответствии с вашими требованиями.
Идентификаторы
У вас не может быть идентификаторов ваших html-элементов с префиксом -amp или i-amp-. Кроме того, вы можете использовать идентификаторы для своего элемента html в соответствии с вашими требованиями.
Ссылки
Использование JavaScript для href запрещено на страницах amp.
Example
<a href = "javascript:callfunc();">click me</a>Таблицы стилей
На странице AMP нельзя использовать внешние таблицы стилей. Можно добавить стили, необходимые для страницы внутри -
<style amp-custom>
//all your styles here
</style>Тег стиля должен иметь amp-custom к нему добавлен атрибут.
@ -правила
В таблицах стилей разрешены следующие @ -правила:
@ font-face, @keyframes, @media, @page, @ supports. @ import не будет разрешен. Поддержка того же будет добавлена в будущем.
@keyframes разрешено использовать внутри <styleamp-custom> . Если @keyframes слишком много, будет хорошо создать <styleamp-keyframes> тег и вызовите этот тег в конце документа amp.
Имена классов, идентификаторы, имена тегов и атрибуты не должны начинаться с префикса -amp- и i-amp- поскольку они внутренне используются в коде amp, который может вызвать конфликты, если он определен на странице во время выполнения.
!important свойство не допускается внутри стиля, поскольку amp хочет контролировать размер элемента, когда это необходимо.
Пользовательские шрифты
Таблицы стилей для пользовательских шрифтов разрешены на страницах AMP.
Example
<link rel = "stylesheet"
href = "https://fonts.googleapis.com/css?family=Tangerine">Шрифты занесены в белый список из следующих источников, которые можно использовать на страницах AMP.
Fonts.com - https://fast.fonts.net
Google Fonts - https://fonts.googleapis.com
Font Awesome - https://maxcdn.bootstrapcdn.com
Typekit - https://use.typekit.net/kitId.css (замените kitId соответственно)
Note - Пользовательские шрифты @ font-face разрешены на страницах amp.
Example
@font-face {
font-family: myFirstFont;
src: url(dummyfont.woff);
}AMP Runtime
Среда выполнения Amp определяется после загрузки файла ядра amp -
<script async src = "https://cdn.ampproject.org/v0.js"></script>Основной файл заботится о загрузке внешних ресурсов, определяет приоритетность их загрузки, а также помогает в проверке документа amp, когда # development = 1 добавляется к URL-адресу amp.
Example
http://localhost:8080/googleamp/amppage.html#development=1Приведенный выше URL-адрес при выполнении в браузере будет содержать список ошибок, если проверка amp не удалась, или сообщение об успешной проверке amp, если ошибок нет.
Компоненты AMP
В Amp добавлено много amp-компонентов. В основном они используются для эффективной обработки загрузки ресурса. Он также содержит компоненты для обработки анимации, отображения данных, отображения рекламы, социальных виджетов и т. Д.
В AMP есть 2 типа компонентов.
- Built-in
- External
Note- <amp-img> - это встроенный компонент, доступный, если добавлен файл core amp js. Внешние компоненты, такие как <amp-ad>, <amp-facebook>, <amp-video> и многие другие, нуждаются в добавлении соответствующего js-файла, связанного с компонентом.
Общие атрибуты
Такие атрибуты, как ширина, высота, макет, заполнитель и резерв, будут доступны почти для всех доступных компонентов AMP. Эти атрибуты очень важны для любого компонента AMP, поскольку они определяют отображение компонента на странице AMP.
Все перечисленные выше функции AMP подробно обсуждаются в следующих главах этого руководства.
Обратите внимание, что все примеры в этом руководстве протестированы для устройств и используют режим Google Mobile Emulator. Давайте узнаем об этом подробнее сейчас.
Эмулятор Google Mobile
Чтобы использовать мобильный эмулятор Google, откройте браузер Chrome, щелкните правой кнопкой мыши и откройте консоль разработчика, как показано ниже -

Мы видим инструмент разработчика для Chrome, как показано выше. Нажмите в браузере ссылку, которую вы хотите протестировать. Обратите внимание, что страница отображается в режиме рабочего стола.
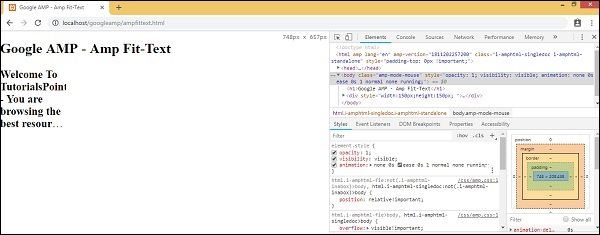
Чтобы получить указанную выше страницу для проверки устройств, нажмите на панели инструментов Toggle device, как показано ниже -

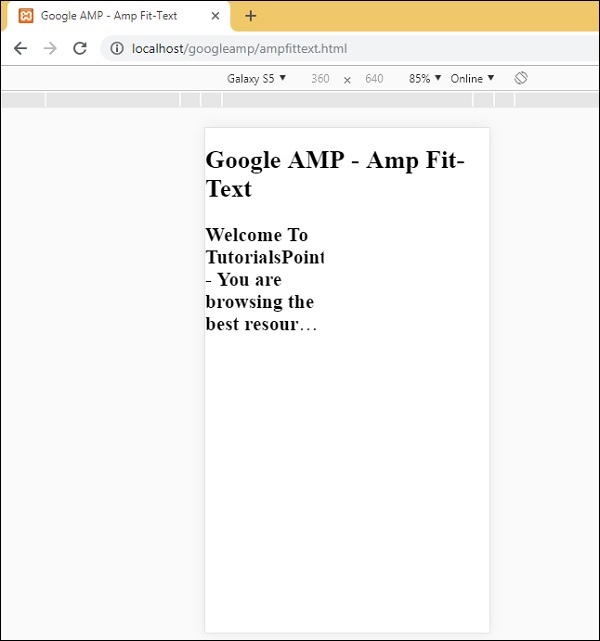
Вы также можете использовать сочетание клавиш Ctrl + Shift + M. Это изменит режим рабочего стола на режим устройства, как показано ниже -
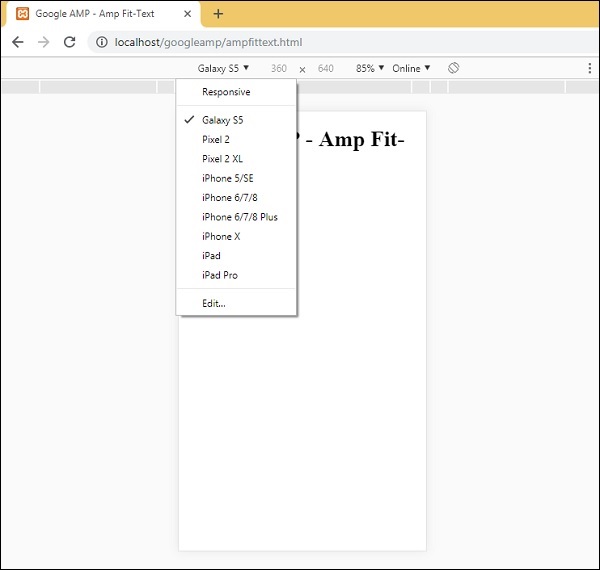
Список устройств можно увидеть, как показано ниже -
Вы можете выбрать устройство, на котором хотите протестировать страницу. Обратите внимание, что все страницы в этих руководствах протестированы на эмуляторе Google Mobile Emulator, как показано выше. Та же функция доступна для Firefox и недавних браузеров Internet Explorer.
Изображения, используемые на странице Google AMP, похожи на то, как они используются на стандартной html-странице, но разница только в том, как имя тега используется с некоторыми дополнительными свойствами. В этой главе они рассматриваются подробно.
Обратите внимание на синтаксис, показанный ниже -
Стандартный HTML
<img src = ”example.jpg” width = ”300” height = ”250” alt = ”Example” ></img>На странице AMP
<amp-img src = "example.jpg" alt = "Example" height = "300" width = "250" ><//amp-img>Обратите внимание, что тег из img изменен на amp-img.
Зачем использовать amp-img вместо img?
Причина изменения img на amp-img заключается в том, чтобы иметь больший контроль над макетом страницы и сетевым запросом для загрузки изображения. Amp добавляет ленивую загрузку к ресурсу изображения и устанавливает приоритет загрузки в соответствии с другими ресурсами, доступными на странице.
пример
Обратите внимание на следующий код для лучшего понимания -
<!doctype html>
<html amp lang = "en">
<head>
<meta charset = "utf-8">
<script async src = "https://cdn.ampproject.org/v0.js"></script>
<title>Google AMP - Image</title>
<link rel = "canonical" href = "http://example.ampproject.org/articlemetadata.html">
<meta name = "viewport" content = "width = device-width,
minimum-scale = 1,initialscale = 1">
<style amp-boilerplate>
body{
-webkit-animation:
-amp-start 8s steps(1,end) 0s1 normal both;-moz-animation:
-amp-start 8s steps(1,end) 0s 1 normal both;-msanimation:
- amp-start 8s steps(1,end) 0s 1 normal both;animation:
-amp-start 8s steps(1,end) 0s 1 normal both
}
@-webkit-keyframes
-ampstart{from{visibility:hidden}to{visibility:visible}}@-moz-keyframes
-ampstart{from{visibility:hidden}to{visibility:visible}}@-ms-keyframes
-ampstart{from{visibility:hidden}to{visibility:visible}}@-o-keyframes
-ampstart{from{visibility:hidden}to{visibility:visible}}@keyframes
amp-start{from{visibility:hidden}to{visibility:visible}}
</style>
<noscript>
<style amp-boilerplate>
body{
-webkit-animation:none;
-moz-animation:none;
-msanimation:none;
animation:none
}
</style>
</noscript>
</head>
<body>
<h1>Google AMP - Image Example</h1>
<amp-img alt = "Beautiful Flower" src = "images/flower.jpg"
width = "246"
height = "205">
</amp-img>
</body>
</html>Вывод
Когда вы выполните код, показанный выше, вы увидите результат, как показано ниже -

Вы также можете сделать изображение адаптивным, добавив свойство layout = "responsive" в тег amp-img, как показано ниже.
пример
Обратите внимание на следующий код для лучшего понимания -
<amp-img alt = "Beautiful Flower" src = "images/flower.jpg"
width = "246"
height = "205"
layout = "responsive">
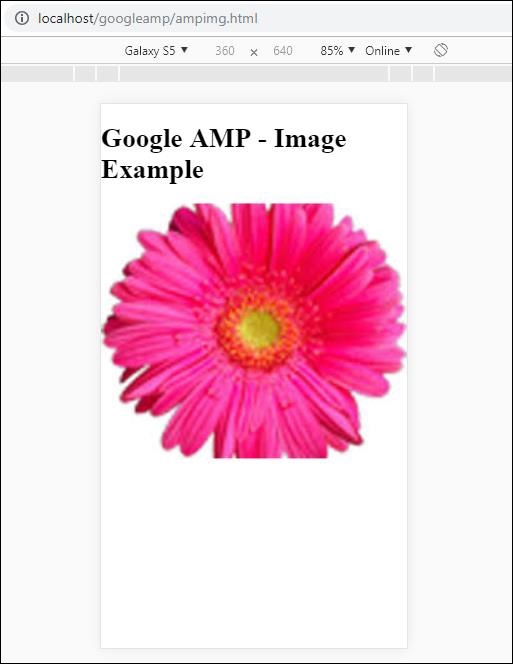
</amp-img>Вывод
Когда вы выполните код, показанный выше, вы увидите результат, как показано ниже -
В этой главе объясняется, как работать с формой в Google AMP.
Обратите внимание, что тег form остается таким же, как в стандартном HTML. AMP добавил специальное ограничение на использование форм, из-за которого нам нужно добавить файл JavaScript amp-form для работы с формами.
Скрипт для amp-form
<script async custom-element = "amp-form"
src = "https://cdn.ampproject.org/v0/ampform-0.1.js"></script>Чтобы использовать формы на странице AMP, нам нужно включить приведенный выше скрипт в файл .html. Файл JavaScript amp-form поддерживаетhttp и xmlhttprequestдля отправки формы. С помощью HTTP-запроса страница перезагружается и сxmlhttprequest он не перезагружает страницу, действует как запрос ajax.
Тег формы в AMP
For xmlhttprequest :
<form method = "post" class = "p2" action-xhr = "submitform.php" target = "_top">
//Input fields here
</form>
For http :
<form method = "post" class = "p2" action = "submitform.php" target = "_top">
//Input fields here
</form>Amp-form предоставляет специальные атрибуты, т. Е. submit-error и submit-success для обработки ошибки и успеха при отправке формы.
Example
Пример для amp-form показан ниже -
<!doctype html>
<html amp lang = "en">
<head>
<meta charset = "utf-8">
<script async src = "https://cdn.ampproject.org/v0.js"></script>
<title>Google AMP - Form</title>
<link rel = "canonical" href = "ampform.html">
<meta name = "viewport" conten t = "width = device-width,
minimum-scale = 1,initialscale = 1">
<style amp-boilerplate>
body{
-webkit-animation:
-amp-start 8s steps(1,end) 0s1 normal both;-moz-animation:
-amp-start 8s steps(1,end) 0s 1 normal both;-msanimation:
-amp-start 8s steps(1,end) 0s 1 normal both;animation:
-amp-start 8s steps(1,end) 0s 1 normal both
}
@-webkit-keyframes
-ampstart{from{visibility:hidden}to{visibility:visible}}@-moz-keyframes
-ampstart{from{visibility:hidden}to{visibility:visible}}@-ms-keyframes
-ampstart{from{visibility:hidden}to{visibility:visible}}@-o-keyframes
-ampstart{from{visibility:hidden}to{visibility:visible}}@keyframes
-ampstart{from{visibility:hidden}to{visibility:visible}}
</style>
<noscript>
<style amp-boilerplate>
body{
-webkit-animation:none;
-moz-animation:none;
-msanimation:none;
animation:none
}
</style>
</noscript>
<script async custom-element = "amp-form"
   src = "https://cdn.ampproject.org/v0/amp-form-0.1.js">
</script>
<script async custom-template = "amp-mustache"
src = "https://cdn.ampproject.org/v0/amp-mustache-0.2.js">
</script>
<style amp-custom>
form.amp-form-submit-success [submit-success],
form.amp-form-submit-error [submit-error]{
margin-top: 16px;
}
form.amp-form-submit-success [submit-success] {
color: white;
background-color:gray;
}
form.amp-form-submit-error [submit-error] {
color: red;
}
form.amp-form-submit-success.hide-inputs > input {
display: none;
}
</style>
</head>
<body>
<h3>Google AMP - Form</h3>
<form method = "post"
class = "p2"
action-xhr = "submitform.php"
target = "_top">
<p>AMP - Form Example</p>
<div>
<input type = "text" name = "name" placeholder = "Enter
Name" required><br/><br/>
<input type = "email" name = "email"
placeholder = "Enter Email" required>
<br/>
<br/>
</div>
<input type = "submit" value = "Submit">
<div submit-success>
<template type = "amp-mustache">
Form Submitted! Thanks {{name}}.
</template>
</div>
<div submit-error>
<template type = "amp-mustache">
Error! {{name}}, please try again.
</template>
</div>
</form>
</body>
</html>Output
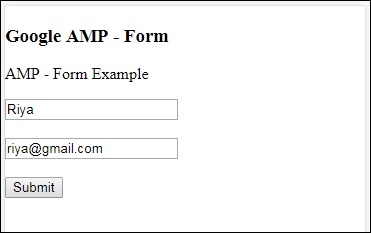
Когда вы выполните код, показанный выше, вы увидите результат, как показано ниже -
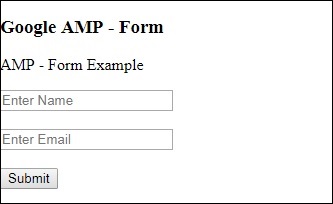
Теперь введите данные и нажмите кнопку «Отправить». Отображаемый экран вывода выглядит следующим образом -
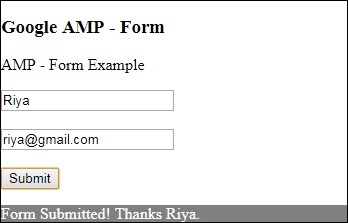
Обратите внимание, что мы использовали amp-mustache для привязки данных. Форма использует action-xhr, т.е. xmlhttprequest для отправки формы. Мы использовалиsubmitform.php файл, который возвращает данные в формате json.
<form method = "post" class = "p2" action-xhr = "submitform.php"
target = "_top">
</form>submitform.php
<?php
if(!empty($_POST)){ $domain_url = (isset($_SERVER['HTTPS']) ? "https" : "http") . "://$_SERVER[HTTP_HOST]";
header("Content-type: application/json");
header("AMP-Access-Control-Allow-Source-Origin: " . $domain_url); header("Access-Control-Expose-Headers: AMP-Access-Control-Allow-Source-Origin"); $myJSON = json_encode($_POST); echo $myJSON;
}
?>Чтобы форма работала с использованием xmlhttprequest, нам нужно добавить заголовки в соответствии со спецификацией CORS. Подробности заголовков ответов, добавленных в submitform.php, показаны ниже -
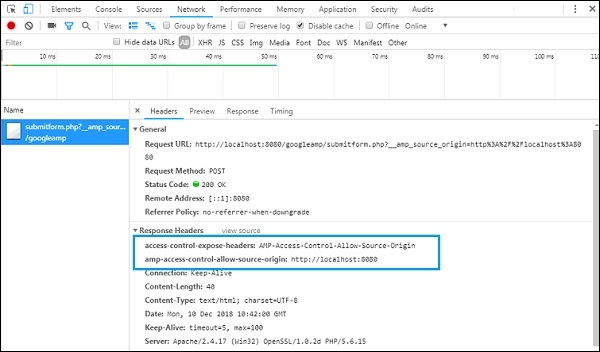
Чтобы форма работала, нам нужно добавить заголовки, такие как access-control-expose-headers со значением AMP-Access-Control-Allow-Source-Origin и amp-access-controlallow- source-origin -http://localhost:8080.
Обратите внимание, что мы используем файл php и сервер apache. В файл php мы добавили необходимые заголовки, как показано ниже -
<?php
if(!empty($_POST)){ $domain_url = (isset($_SERVER['HTTPS']) ? "https" : "http") . "://$_SERVER[HTTP_HOST]";
header("Content-type: application/json");
header("AMP-Access-Control-Allow-Source-Origin: " . $domain_url); header("Access-Control-Expose-Headers: AMP-Access-Control-Allow-Source-Origin"); $myJSON = json_encode($_POST); echo $myJSON;
}
?
?>Если мы используем обычный HTTP-запрос, страница будет перезагружена, как показано ниже -
Для HTTP-запроса мы использовали следующую форму -
<form method = "GET" class = "p2" action = "submitform.php"
target = "_top">
</form>Example
Обратите внимание на следующий код для лучшего понимания -
<!doctype html>
<html amp lang = "en">
<head>
<meta charset = "utf-8">
<script async src = "https://cdn.ampproject.org/v0.js"></script>
<title>Google AMP - Form</title>
<link rel = "canonical" href = "ampform.html">
<meta name = "viewport" content = "width = device-width,minimum-scale = 1,initialscale = 1">
<style amp-boilerplate>
body{
-webkit-animation:
-amp-start 8s steps(1,end) 0s1 normal both;-moz-animation:
-amp-start 8s steps(1,end) 0s 1 normal both;-msanimation:
-amp-start 8s steps(1,end) 0s 1 normal both;animation:
-amp-start 8s steps(1,end) 0s 1 normal both
}
@-webkit-keyframes
-ampstart{from{visibility:hidden}to{visibility:visible}}@-moz-keyframes
-ampstart{from{visibility:hidden}to{visibility:visible}}@-ms-keyframes
-ampstart{from{visibility:hidden}to{visibility:visible}}@-o-keyframes
-ampstart{from{visibility:hidden}to{visibility:visible}}@keyframes
-ampstart{from{visibility:hidden}to{visibility:visible}}
</style>
<noscript>
<style amp-boilerplate>
body {
-webkit-animation:none;
-moz-animation:none;
-msanimation:none;
animation:none}
>/style>
</noscript>
<script async custom-element = "amp-form"
src = "https://cdn.ampproject.org/v0/amp-form-0.1.js">
</script>
<script async custom-template = "amp-mustache"
src = "https://cdn.ampproject.org/v0/amp-mustache-0.2.js">
</script>
<style amp-custom>
form.amp-form-submit-success [submit-success],
form.amp-form-submit-error [submit-error]{
margin-top: 16px;
}
form.amp-form-submit-success [submit-success] {
color: white;
background-color:gray;
}
form.amp-form-submit-error [submit-error] {
color: red;
}
form.amp-form-submit-success.hide-inputs >
input {
display: none;
}
</style>
</head>
<body>
<h3>Google AMP - Form</h3>
<form method = "GET" class = "p2" action = "submitform.php" target = "_top">
<p>AMP - Form Example</p>
<div>
<input type = "text" name = "name" placeholder = "Enter Name" required>
<br/>
<br/>
<input type = "email" name = "email" placeholder = "Enter Email" required>
<br/>
<br/>
<div>
<input type = "submit" value = "Submit">
<div submit-success>
<template type = "amp-mustache">
Form Submitted! Thanks {{name}}.
</template>
</div>
<div submit-error>
<template type = "amp-mustache">
Error! {{name}}, please try again.
</template>
</div>
</form>
</body>
</html>Output
Когда вы выполните код, показанный выше, вы увидите результат, как показано ниже -
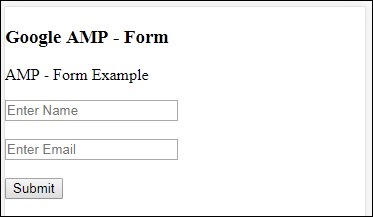

Google amp-iframeиспользуется для отображения окон iframe на странице. В amp-iframe необходимо добавить некоторые условия, поэтому мы не можем использовать обычные окна iframe на странице. В этой главе это обсуждается подробнее.
Условия, которые необходимо соблюдать для iFrames
При использовании iframe на страницах AMP необходимо соблюдать следующие условия:
URL-адрес, используемый в iframe, должен быть запросом https, URI данных или атрибутом srcdoc .
В amp-iframe по умолчанию будет добавлен атрибут песочницы. Атрибут песочницы будет пуст. Пустое значение в песочнице означает, что iframemaximum sandboxed(дополнительное ограничение на iframe). Мы можем добавить значения в песочницу, что обсудим с помощью примера ниже.
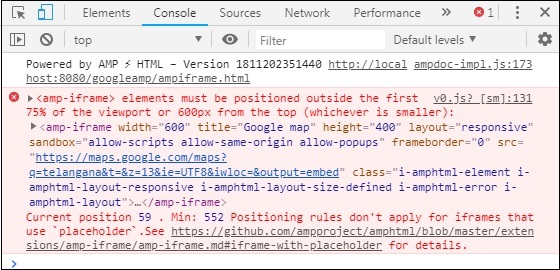
Amp-iframe не может отображаться вверху страницы, он должен находиться на расстоянии почти 600 пикселей от верха или в пределах первых 75% области просмотра при прокрутке вверху. Если вам нужно отобразить iframe в начале, вам нужно добавить заполнитель в iframe, который мы обсудим с помощью примеров позже в руководстве.
amp-iframe не должен иметь то же происхождение, что и контейнер. Например, если ваш основной сайт находится на www.xyz.com, вы не можете использовать iframe src в качествеwww.xyz.com/urlname. Это могут быть другие, например.xyz.com, example.xyz.com и т. Д.
Для работы с iframe нам нужно добавить следующий скрипт -
<script async custom-element = "amp-iframe"
src = "https://cdn.ampproject.org/v0/amp-iframe-0.1.js"></script>Формат Amp-iframe выглядит следующим образом -
<amp-iframe width = "600" title = "Google map"
height = "400" layout = "responsive"
sandbox = "allow-scripts allow-same-origin allow-popups"
frameborder = "0"
src = "https://maps.google.com/maps?q=telangana&t=&z=13&ie=UTF8&iwloc=&output=embed">
</amp-iframe>Давайте разберемся в этом с помощью рабочего примера, в котором мы будем использовать iframe для отображения карт Google, как показано ниже.
пример
<!doctype html>
<html amp lang = "en">
<head>
<meta charset = "utf-8">
<script async src = "https://cdn.ampproject.org/v0.js"></script>
<title>Google AMP - Amp Iframe</title>
<link rel = "canonical" href = "http://example.ampproject.org/article-metadata.html">
<meta name = "viewport" content = "width = device-width,minimum-scale = 1,initial-scale = 1">
<style amp-boilerplate>
body{
-webkit-animation:-amp-start 8s steps(1,end) 0s
1 normal both;-moz-animation:
-amp-start 8s steps(1,end) 0s 1 normal both;-ms-animation:
-amp-start 8s steps(1,end) 0s 1 normal both;animation:
-amp-start 8s steps(1,end) 0s 1 normal both}
@-webkit-keyframes
-amp-start{from{visibility:hidden}to{visibility:visible}}@-moz-keyframes
-amp-start{from{visibility:hidden}to{visibility:visible}}@-ms-keyframes
-amp-start{from{visibility:hidden}to{visibility:visible}}@-o-keyframes
-amp-start{from{visibility:hidden}to{visibility:visible}}@keyframes
-amp-start{from{visibility:hidden}to{visibility:visible}}
</style><noscript>
<style amp-boilerplate>
body{-webkit-animation:none;-moz-animation:
none;-ms-animation:none;animation:none}
</style></noscript>
<script async custom-element = "amp-iframe"
src = "https://cdn.ampproject.org/v0/amp-iframe-0.1.js"
></script>
<style>
div {
height:850px;
text-align:center;
}
</style>
</head>
<body>
<h3>Google AMP - Amp Iframe</h3>
<div>
Google Maps in Iframe
</div>
<h3>Google AMP - Amp Iframe</h3>
<amp-iframe width = "600"
title = "Google map"
height = "400"
layout = "responsive"
sandbox = "allow-scripts allow-same-origin allow-popups"
frameborder = "0" src = "https://maps.google.com/maps?q=telangana&t=&z=13&ie=UTF8&iwloc=&output=embed">
</amp-iframe>
</body>
</html>Вывод
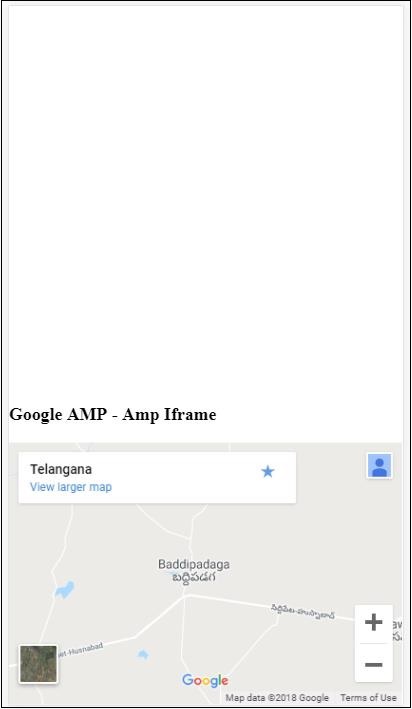
Обратите внимание, что мы разместили iframe на расстоянии более 600 пикселей от верха. Это дает ошибку, как показано ниже -
В приведенном выше примере мы использовали песочницу со значениями, указанными ниже -
sandbox = "allow-scripts allow-same-origin allow-popups"Атрибут Sandbox действует как разрешение на загрузку содержимого внутри iframe. Здесь мы разрешаем загрузку всех скриптов, которые поступают из ссылок на карты Google. Если мы не указываем атрибут песочницы, это отображаемая ошибка, которая блокирует загружаемый контент в iframe -

Обратите внимание, что мы должны предоставить песочнице правильное разрешение. Вы можете найти подробную информацию обо всех разрешениях, которые должны быть предоставлены песочнице здесь -https://developer.mozilla.org/en-US/docs/Web/HTML/Element/iframe#attr-sandbox.
Мы можем использовать атрибут placeholder внутри amp-iframe, чтобы избавиться от условия более 600 пикселей.
Рабочий пример того же приведен ниже -
<!doctype html>
<html amp lang = "en">
<head>
<meta charset = "utf-8">
<script async src = "https://cdn.ampproject.org/v0.js"></script>
<title>Google AMP - Amp Iframe</title>
<link rel = "canonical" href = "http://example.ampproject.org/article-metadata.html">
<meta name = "viewport" content = "width = device-width, minimum-scale=1,initial-scale=1">
<style amp-boilerplate>
body{
-webkit-animation:-amp-start 8s steps(1,end) 0s
1 normal both;-moz-animation:
-amp-start 8s steps(1,end) 0s 1 normal both;-ms-animation:
-amp-start 8s steps(1,end) 0s 1 normal both;animation:
-amp-start 8s steps(1,end) 0s 1 normal both
}
@-webkit-keyframes
-amp-start{from{visibility:hidden}to{visibility:visible}}@-moz-keyframes
-amp-start{from{visibility:hidden}to{visibility:visible}}@-ms-keyframes
-amp-start{from{visibility:hidden}to{visibility:visible}}@-o-keyframes
-amp-start{from{visibility:hidden}to{visibility:visible}}@keyframes
-amp-start{from{visibility:hidden}to{visibility:visible}}
</style>
<noscript>
<style amp-boilerplate>
body{
-webkit-animation:none;
-moz-animation:none;
-ms-animation:none;
animation:none
}
</style>
</noscript>
<script async custom-element = "amp-iframe"
src = "https://cdn.ampproject.org/v0/amp-iframe-0.1.js">
</script>
<style>
div {
height:850px;
text-align:center;
}
</style>
</head>
<body>
<h3>Google AMP - Amp Iframe</h3>
<amp-iframe width = "600"
title = "Google map"
height = "400"
layout = "responsive"
sandbox = "allow-scripts allow-same-origin allow-popups"
frameborder = "0"
src = "https://maps.google.com/maps?q=telangana&t=&z=13&ie=UTF8&iwloc=&output=embed">
<amp-img layout = "fill" src = "images/loading.jpg" placeholder></amp-img>
</amp-iframe>
</body>
</html>Мы использовали amp-img в качестве заполнителя следующим образом:
<amp-iframe width = "600"
title = "Google map"
height = "400"
layout = "responsive"
sandbox = "allow-scripts allow-same-origin allow-popups"
frameborder = "0"
src = "https://maps.google.com/maps?q=telangana&t=&z=13&ie = UTF8&iwloc = &output = embed">
<amp-img layout = "fill" src = "images/loading.jpg" placeholder></amp-img>
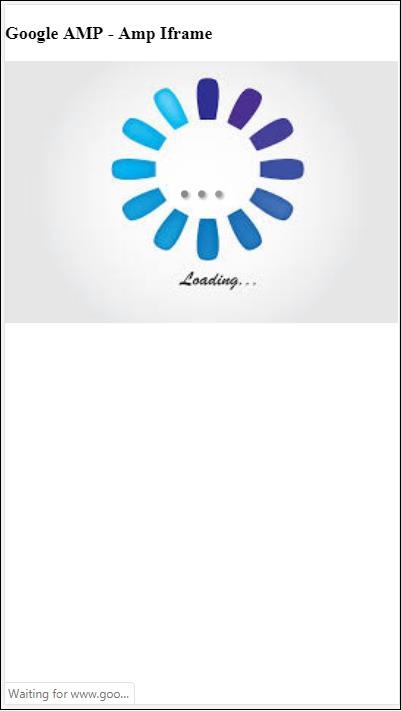
</amp-iframe>В этом случае ограничение в 600 пикселей и amp-iframe в области просмотра 75% не рассматривается. Индикатор загрузки (три точки), показанный на изображении, используется в качестве заполнителя, который в основном предназначен для amp-iframe src. После загрузки содержимого iframe изображение удаляется, и содержимое iframe отображается так, как показано в выводе, показанном ниже -
Вывод
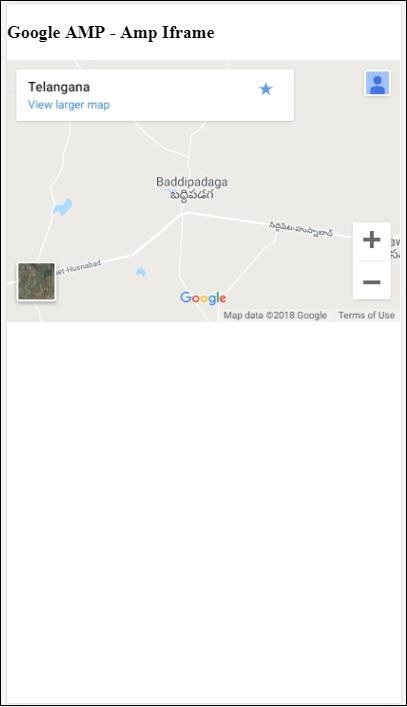
Amp-video в amp - это стандартное видео в формате html5, используемое для воспроизведения прямых вставок видео. В этой главе давайте поймем, как работать и использовать amp-video.
Для работы с amp-video нам нужно добавить следующий скрипт -
<script async custom-element = "amp-video"
src = "https://cdn.ampproject.org/v0/amp-video-0.1.js">
</script>Amp-video имеет атрибут src, который содержит загружаемый видеоресурс, который лениво загружается amp во время выполнения. Кроме того, все функции почти такие же, как и в теге html5 video.
Ниже приведены узлы, которые нужно добавить в amp видео:
Source - Вы можете добавлять различные медиа-файлы для воспроизведения с помощью этого тега.
Track - Этот тег позволяет включить субтитры для видео.
Placeholder - Этот тег-заполнитель будет показывать контент до начала видео.
Fallback - Этот тег будет вызываться, если браузер не поддерживает видео HTML5.
Формат тега amp-video
Формат тега amp-video показан здесь -
<amp-video controls width = "640" height = "360"
layout = "responsive" poster = "images/videoposter.png">
<source src = "video/bunny.webm" type = "video/webm" />
<source src = "video/samplevideo.mp4" type = "video/mp4" />
<div fallback>
<p>This browser does not support the video element.</p>
</div>
</amp-video>Давайте разберемся с amp-video на рабочем примере, как показано ниже -
пример
<!doctype html>
<html amp lang = "en">
<head>
<meta charset = "utf-8">
<script async src = "https://cdn.ampproject.org/v0.js"></script>
<title>Google AMP - Amp Video</title>
<link rel = "canonical" href = "http://example.ampproject.org/article-metadata.html">
<meta name = "viewport" content = "width = device-width, minimum-scale = 1,initial-scale=1">
<style amp-boilerplate>
body {
-webkit-animation:
-amp-start 8s steps(1,end) 0s 1 normal both;-moz-animation:
-amp-start 8s steps(1,end) 0s 1 normal both;-ms-animation:
-amp-start 8s steps(1,end) 0s 1 normal both;animation:
-amp-start 8s steps(1,end) 0s 1 normal both}
@-webkit-keyframes
-amp-start{from{visibility:hidden}to{visibility:visible}}@-moz-keyframes
-amp-start{from{visibility:hidden}to{visibility:visible}}@-ms-keyframes
-amp-start{from{visibility:hidden}to{visibility:visible}}@-o-keyframes
-amp-start{from{visibility:hidden}to{visibility:visible}}@keyframes
-amp-start{from{visibility:hidden}to{visibility:visible}}
</style>
<noscript>
<style amp-boilerplate>
body {
-webkit-animation:none;
-moz-animation:none;
-ms-animation:none;
animation:none
}
</style>
</noscript>
<script async custom-element = "amp-video"
src = "https://cdn.ampproject.org/v0/amp-video-0.1.js">
</script>
</head>
<body>
<h3>Google AMP - Amp Video</h3>
<amp-video controls
width = "640"
height = "360"
layout = "responsive"
poster = "images/videoposter.png">
<source src = "video/bunny.webm" type = "video/webm" />
<source src = "video/samplevideo.mp4" type = "video/mp4" />
<div fallback>
<p>This browser does not support the video element.</p>
</div>
</amp-video>
</body>
</html>Вывод
Вывод кода, приведенного выше, показан ниже -
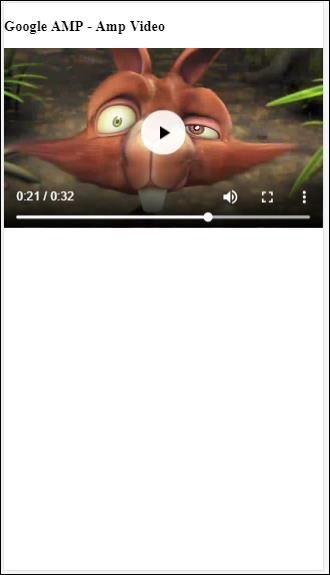
Атрибуты, доступные для amp-video
Атрибуты, доступные для amp-video, перечислены в таблице здесь -
| Старший Нет | Атрибуты и описание |
|---|---|
| 1 | src Если узел <source> отсутствует, необходимо указать src, и это должен быть https: // url. |
| 2 | poster Плакат принимает URL-адрес img, который отображается перед запуском видео. |
| 3 | autoplay Наличие этого атрибута в amp-video будет автоматически воспроизводить видео, если браузер поддерживает. Видео будет воспроизводиться в отключенном режиме, и пользователю нужно будет нажать на видео, чтобы включить его. |
| 4 | controls Наличие этого атрибута в amp-video приведет к отображению элементов управления на видео, аналогичных html5-видео. |
| 5 | loop Если этот атрибут присутствует в amp-video, видео будет воспроизводиться снова после завершения. |
| 6 | crossorigin Этот атрибут появляется, если ресурс для воспроизведения видео находится в другом источнике. |
| 7 | rotate-to-fullscreen Если видео видно, оно отображается в полноэкранном режиме после того, как пользователь поворачивает свое устройство в альбомный режим. |
Автовоспроизведение видео AMP
Мы можем использовать атрибут автовоспроизведения, если нам нужно автовоспроизвести видео. Эта функция будет работать в соответствии с поддержкой браузера. Обратите внимание, что при автовоспроизведении видео будет отключено. Когда пользователь нажимает на видео, звук включается.
Позвольте нам использовать функцию автовоспроизведения с помощью рабочего примера, как показано ниже -
пример
<!doctype html>
<html amp lang = "en">
<head>
<meta charset = "utf-8">
<script async src = "https://cdn.ampproject.org/v0.js"></script>
<title>Google AMP - Amp Video</title>
<link rel = "canonical" href = "http://example.ampproject.org/article-metadata.html">
<meta name = "viewport" content = "width=device-width,minimum-scale = 1, initial-scale = 1">
<style amp-boilerplate>
body {
-webkit-animation:
-amp-start 8s steps(1,end) 0s 1 normal both;
-moz-animation:-amp-start 8s steps(1,end) 0s 1 normal both;-ms-animation:
-amp-start 8s steps(1,end) 0s 1 normal both;animation:
-amp-start 8s steps(1,end) 0s 1 normal both
}
@-webkit-keyframes
-amp-start{from{visibility:hidden}to{visibility:visible}}@-moz-keyframes
-amp-start{from{visibility:hidden}to{visibility:visible}}@-ms-keyframes
-amp-start{from{visibility:hidden}to{visibility:visible}}@-o-keyframes
-amp-start{from{visibility:hidden}to{visibility:visible}}@keyframes
-amp-start{from{visibility:hidden}to{visibility:visible}}
</style>
<noscript>
<style amp-boilerplate>
body{
-webkit-animation:none;
-moz-animation:none;
-ms-animation:none;
animation:none
}
</style>
</noscript>
<script async custom-element = "amp-video" src = "
https://cdn.ampproject.org/v0/amp-video-0.1.js">
</script>
</head>
<body>
<h3>Google AMP - Amp Video Autoplay</h3>
<amp-video controls
width = "640"
height = "360"
layout = "responsive"
poster = "images/videoposter.png" autoplay>
<source src = "video/bunny.webm" type = "video/webm" />
<source src = "video/samplevideo.mp4" type = "video/mp4" />
<div fallback>
<p>This browser does not support the video element.</p>
</div>
</amp-video>
</body>
</html>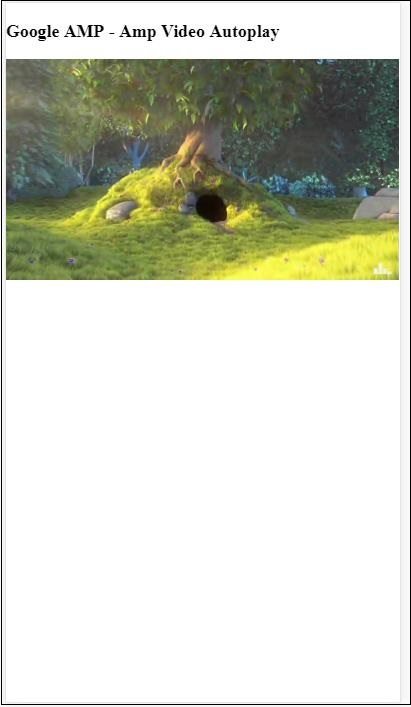
Вы можете активировать элементы управления для видео, добавив атрибут управления, как показано в следующем коде -
<amp-video controls
width = "640"
height = "360"
layout = "responsive"
poster = "images/videoposter.png" autoplay>
<source src = "video/bunny.webm" type = "video/webm" />
<source src = "video/samplevideo.mp4" type = "video/mp4" />
<div fallback>
<p>This browser does not support the video element.</p>
</div>
</amp-video>Кнопки - еще одна особенность AMP. Обратите внимание, что в AMP нет изменений для кнопок, и они используются как стандартный тег кнопки HTML. Единственное отличие кнопок на AMP-странице - это работа на ней событий.
В этой главе мы увидим несколько примеров, показывающих работу кнопки и ее использование с компонентами AMP.
Пример кода для лайтбокса
В следующем примере показано, как использовать кнопку для отображения / скрытия amp-lightbox, как показано ниже.
<!doctype html>
<html amp lang = "en">
<head>
<meta charset = "utf-8">
<script async src = "https://cdn.ampproject.org/v0.js"></script>
<title>Google AMP - Amp Lightbox</title>
<link rel = "canonical" href = "http://example.ampproject.org/article-metadata.html">
<meta name = "viewport" content ="width = device-width,minimum-scale = 1,initial-scale = 1">
<style amp-boilerplate>
body{
-webkit-animation:-amp-start 8s steps(1,end) 0s 1 normal both;-moz-animation:
-amp-start 8s steps(1,end) 0s 1 normal both;-ms-animation:
-amp-start 8s steps(1,end) 0s 1 normal both;animation:
-amp-start 8s steps(1,end) 0s 1 normal both
}
@-webkit-keyframes
-amp-start{from{visibility:hidden}to{visibility:visible}}@-moz-keyframes
-amp-start{from{visibility:hidden}to{visibility:visible}}@-ms-keyframes
-amp-start{from{visibility:hidden}to{visibility:visible}}@-o-keyframes
-amp-start{from{visibility:hidden}to{visibility:visible}}@keyframes
-amp-start{from{visibility:hidden}to{visibility:visible}}
</style>
<noscript>
<style amp-boilerplate>
body{
-webkit-animation:none;-moz-animation:none;-ms-an
imation:none;animation:none
}
</style>
</noscript>
<script async custom-element = "amp-lightbox"
src = "https://cdn.ampproject.org/v0/amp-lightbox-0.1.js">
</script>
<style amp-custom>
amp-img {
border: 1px solid #ddd;
border-radius: 4px;
padding: 5px;
}
button{
background-color:
#ACAD5C; color: white;
padding: 12px 20px;
border: none;
border-radius: 4px;
cursor: pointer;
float: left;
}
.lightbox {
background: rgba(211,211,211,0.8);
width: 100%;
height: 100%;
position: absolute;
display: flex;
align-items: center;
justify-content: center;
}
</style>
</head>
<body>
<h3>Google AMP - Amp Lightbox</h3>
<button on = "tap:my-lightbox">
Show LightBox
</button>
<amp-lightbox id = "my-lightbox" layout = "nodisplay">
<div class = "lightbox" on = "tap:my-lightbox.close" tabindex = "0">
<amp-img alt = "Beautiful Flower"
src = "images/flower.jpg"
width = "246"
height = "205">
</amp-img>
</div>
</amp-lightbox>
</body>
</html>Вывод
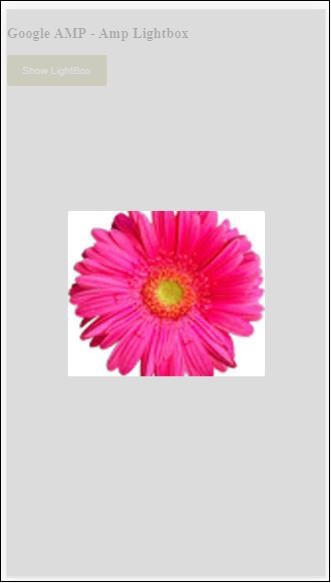
Теперь вы можете щелкнуть в любом месте экрана, чтобы закрыть лайтбокс.
В приведенном выше примере мы использовали кнопку, используя код, как показано ниже -
<button on = "tap:my-lightbox">
Show LightBox
</button>
Next, we have added action on the button using on attribute as shown:
on = "tap:my-lightbox"Действие произойдет при нажатии на кнопку. Обратите внимание, что ему присваивается идентификатор лайтбокса. Когда пользователь нажимает на кнопку, открывается лайтбокс. Точно так же вы можете использовать кнопку с действием с любым компонентом для взаимодействия с ним.
Timeago предоставит подробную информацию о временной метке, сравнив ее с прошлым, например, «x» часов назад. В этой главе давайте подробно обсудим эту функцию.
Чтобы вставить эту функцию в нашу работу, нам нужно добавить приведенный ниже скрипт на страницу .html -
<script async custom-element = "amp-timeago"
src = "https://cdn.ampproject.org/v0/amp-timeago-0.1.js">
</script>Тег amp-timeago выглядит, как показано ниже -
<amp-timeago layout = "fixed" width = "160" height = "20"
datetime = "2018-10-01T00:37:33.809Z"
locale = "en">Monday 01 October 2018 00.37
</amp-timeago>Давайте разберемся в этом с помощью рабочего примера, как показано ниже -
пример
<!doctype html>
<html amp lang = "en">
<head>
<meta charset = "utf-8">
<script async src = "https://cdn.ampproject.org/v0.js"></script>
<title>Google AMP - TimeAgo</title>
<link rel = "canonical" href = " http://example.ampproject.org/article-metadata.html">
<meta name = "viewport" content = "width = device-width,minimum-scale = 1,initial- scale = 1">
<style amp-boilerplate>
body{
-webkit-animation:-amp-start 8s steps(1,end)
0s 1 normal both;-moz-animation:
-amp-start 8s steps(1,end) 0s 1 normal both;-ms-animation:
-amp-start 8s steps(1,end) 0s 1 normal both;animation:
-amp-start 8s steps(1,end) 0s 1 normal both
}
@-webkit-keyframes
-amp-start{from{visibility:hidden}to{visibility:visible}}@-moz-keyframes
-amp-start{from{visibility:hidden}to{visibility:visible}}@-ms-keyframes
-amp-start{from{visibility:hidden}to{visibility:visible}}@-o-keyframes
-amp-start{from{visibility:hidden}to{visibility:visible}}@keyframes
-amp-start{from{visibility:hidden}to{visibility:visible}}
</style>
<noscript>
<style amp-boilerplate>
body{
-webkit-animation:none;-moz-animation:none;-ms
-animation:none;animation:none
}
</style>
</noscript>
<script async custom-element="amp-timeago"
src = "https://cdn.ampproject.org/v0/amp-timeago-0.1.js">
</script>
</head>
<body>
<h1>Google AMP - TimeAgo Example</h1>
<amp-timeago
layout = "fixed"
width = "160"
height = "20"
datetime = "2018-10-01T00:37:33.809Z"
locale = "en">Monday 01 October 2018 00.37
</amp-timeago>
</body>
</html>Вывод

По умолчанию установлен языковой стандарт en. Мы можем изменить то же самое и отображать timeago в локали по мере необходимости. Локали, которые можно использовать с тегом timeago, приведены в таблице ниже.
| Старший Нет | Язык и описание |
|---|---|
| 1 | ar арабский |
| 2 | be Белорусский |
| 3 | be Белорусский |
| 4 | bg болгарский |
| 5 | ca Каталонский |
| 6 | da Датский |
| 7 | de Немецкий |
| 8 | el Греческий |
| 9 | en английский |
| 10 | enShort Английский - короткий |
| 11 | es испанский язык |
| 12 | eu Баскский |
| 13 | fi Финский |
| 14 | fr французский язык |
| 15 | he иврит |
| 16 | hu венгерский язык |
| 17 | inBG Bangla |
| 18 | inHI хинди |
| 19 | inID малайский |
| 20 | it Итальянский |
| 21 год | ja Японский |
| 22 | ko корейский язык |
| 23 | ml Малаялам |
| 24 | nbNO Норвежский букмол |
| 25 | nl Голландский |
| 26 | nnNO Норвежский нюнорск |
| 27 | pl Польский |
| 28 | ptBR португальский |
| 29 | ro румынский |
| 30 | ru русский |
| 31 год | sv Шведский |
| 32 | ta Тамильский |
| 33 | th Тайский |
| 34 | tr турецкий |
| 35 год | uk украинец |
| 36 | vi вьетнамский |
| 37 | zhCN китайский язык |
| 38 | zhTW Тайваньский |
Давайте обсудим несколько локалей, используя рабочие примеры, как показано ниже -
пример
<!doctype html>
<html amp lang = "en">
<head>
<meta charset = "utf-8">
<script async src = "https://cdn.ampproject.org/v0.js"></script>
<title>Google AMP - TimeAgo Using Locale</title>
<link rel = "canonical" href = "http://example.ampproject.org/article-metadata.html">
<meta name = "viewport" content = "width = device-width,minimum-scale = 1, initial-scale = 1">
<style amp-boilerplate>
body{
-webkit-animation:
-amp-start 8s steps(1,end) 0s 1 normal both;-moz-animation:
-amp-start 8s steps(1,end) 0s 1 normal both;-ms-animation:
-amp-start 8s steps(1,end) 0s 1 normal both;animation:
-amp-start 8s steps(1,end) 0s 1 normal both
}
@-webkit-keyframes
-amp-start{from{visibility:hidden}to{visibility:visible}}@-moz-keyframes
-amp-start{from{visibility:hidden}to{visibility:visible}}@-ms-keyframes
-amp-start{from{visibility:hidden}to{visibility:visible}}@-o-keyframes
-amp-start{from{visibility:hidden}to{visibility:visible}}@keyframes
-amp-start{from{visibility:hidden}to{visibility:visible}}
</style>
<noscript>
<style amp-boilerplate>
body{
-webkit-animation:none;
-moz-animation:none;-ms
-animation:none;
animation:none
}
</style>
</noscript>
<script async custom-element = "amp-timeago"
src = "https://cdn.ampproject.org/v0/amp-timeago-0.1.js">
</script>
</head>
<body>
<h1>Google AMP - TimeAgo Example Using Locale</h1>
<h3>Locale : Russian</h3>
<amp-timeago layout = "fixed"
width = "160" height = "20"
datetime = "2018-10-01T00:37:33.809Z"
locale = "ru">
Monday 01 October 2018 00.37
</amp-timeago>
<h3>Locale : Korean</h3>
<amp-timeago
layout = "fixed"
width = "160"
height = "20"
datetime = "2018-10-01T00:37:33.809Z"
locale = "ko">
Monday 01 October 2018 00.37
</amp-timeago>
<h3>Locale : Hindi</h3>
<amp-timeago
layout = "fixed"
width = "160"
height = "20"
datetime = "2018-10-01T00:37:33.809Z"
locale = "inHI">
Monday 01 October 2018 00.37
</amp-timeago>
<h3>Locale : Spanish</h3>
<amp-timeago
layout = "fixed"
width = "160"
height = "20"
datetime = "2018-10-01T00:37:33.809Z"
locale = "es">
Monday 01 October 2018 00.37
</amp-timeago>
<h3>Locale : French</h3>
<amp-timeago
layout = "fixed"
width = "160"
height = "20"
datetime = "2018-10-01T00:37:33.809Z"
locale = "fr">
Monday 01 October 2018 00.3
</amp-timeago>
</body>
</html>Вывод
Вывод приведенного выше кода показан ниже -
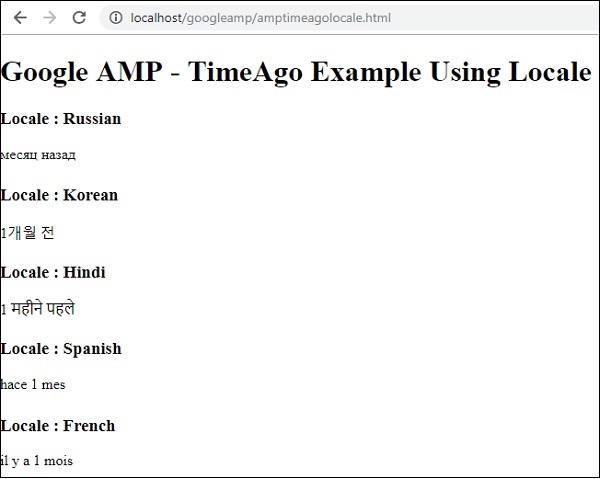
Если необходимо изменить отображение «X time ago», мы можем использовать атрибут «cutoff» с timeago. Cutoff принимает значения в секундах, чтобы избавиться от отображения назад.
Давайте разберемся в этом с помощью рабочего примера, приведенного ниже -
пример
<!doctype html>
<html amp lang = "en">
<head>
<meta charset = "utf-8">
<script async src = "https://cdn.ampproject.org/v0.js"></script>
<title>Google AMP - TimeAgo</title>
<link rel = "canonical" href = "http://example.ampproject.org/article-metadata.html">
<meta name = "viewport" content = "width = device-width,minimum-scale=1, initial-scale=1">
<style amp-boilerplate>
body{
-webkit-animation:
-amp-start 8s steps(1,end) 0s 1 normal both;-moz-animation:
-amp-start 8s steps(1,end) 0s 1 normal both;-ms-animation:
-amp-start 8s steps(1,end) 0s 1 normal both;animation:
-amp-start 8s steps(1,end) 0s 1 normal both
}
@-webkit-keyframes
-amp-start{from{visibility:hidden}to{visibility:visible}}@-moz-keyframes
-amp-start{from{visibility:hidden}to{visibility:visible}}@-ms-keyframes
-amp-start{from{visibility:hidden}to{visibility:visible}}@-o-keyframes
-amp-start{from{visibility:hidden}to{visibility:visible}}@keyframes
-amp-start{from{visibility:hidden}to{visibility:visible}}
</style>
<noscript>
<style amp-boilerplate>
body{
-webkit-animation:none;
-moz-animation:none;
-ms-animation:none;
animation:none
}
</style>
</noscript>
<script async custom-element = "amp-timeago"
src = "https://cdn.ampproject.org/v0/amp-timeago-0.1.js">
</script>
</head>
<body>
<h1>Google AMP - TimeAgo Example</h1>
<amp-timeago
layout = "fixed"
width = "160"
height = "20"
datetime = "2018-10-01T00:37:33.809Z"
locale = "en"
cutoff = "300">
Monday 01 October 2018 00.37
</amp-timeago>
</body>
</html>Вывод

Используя MathML, мы можем отображать математические формулы. В этой главе мы рассмотрим рабочий пример того, как использовать MathML и работать с несколькими математическими формулами, чтобы отобразить то же самое.
Для работы с MathML нам нужно включить следующий файл javascript -
<script async custom-element = "amp-mathml"
src = "https://cdn.ampproject.org/v0/amp-mathml-0.1.js">
</script>Тег MathML AMP
Тег mathML amp имеет формат, показанный здесь -
<amp-mathml layout = "container"
data-formula = "\[x = {-b \pm \sqrt{b^2-4ac} \over 2a}.\]">
</amp-mathml>Обратите внимание, что data-formula - обязательный атрибут, которому дается формула.
пример
Давайте лучше разберемся с этим тегом на примере.
<!doctype html>
<html amp lang = "en">
<head>
<meta charset = "utf-8">
<script async src = "https://cdn.ampproject.org/v0.js"></script>
<title>Google AMP - MathML</title>
<link rel = "canonical" href = " http://example.ampproject.org/article-metadata.html">
<meta name = "viewport" content = "width = device-width,minimum-scale = 1,initial-scale = 1">
<style amp-boilerplate>
body{
-webkit-animation:
-amp-start 8s steps(1,end) 0s 1 normal both;-moz-animation:
-amp-start 8s steps(1,end) 0s 1 normal both;-ms-animation:
-amp-start 8s steps(1,end) 0s 1 normal both;animation:
-amp-start 8s steps(1,end) 0s 1 normal both
}
@-webkit-keyframes
-amp-start{from{visibility:hidden}to{visibility:visible}}@-moz-keyframes
-amp-start{from{visibility:hidden}to{visibility:visible}}@-ms-keyframes
-amp-start{from{visibility:hidden}to{visibility:visible}}@-o-keyframes
-amp-start{from{visibility:hidden}to{visibility:visible}}@keyframes
-amp-start{from{visibility:hidden}to{visibility:visible}}
</style>
<noscript>
<style amp-boilerplate>
body{
-webkit-animation:none;
-moz-animation:none;
-ms-animation:none;
animation:none
}
</style>
</noscript>
<script async custom-element = "amp-mathml"
src = "https://cdn.ampproject.org/v0/amp-mathml-0.1.js">
</script>
</head>
<body>
<h1>Google AMP - MathML Example</h1>
<amp-mathml layout = "container"
data-formula = "\[x = {-b \pm \sqrt{b^2-4ac} \over 2a}.\]">
</amp-mathml>
</body>
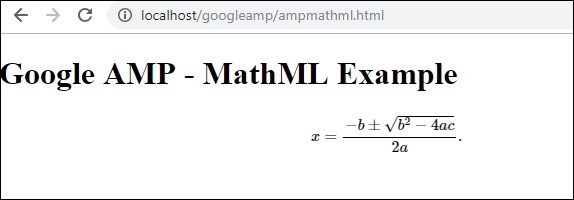
</html>Вывод
Теги Amp-mathml, когда они выполняются, отображают отображение в iframe, как показано ниже -
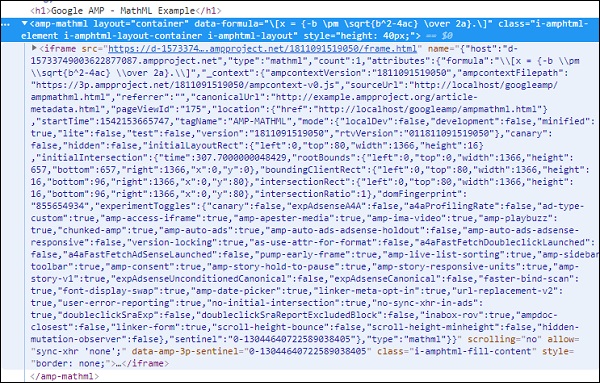
Тег усилителя amp-fit-textуменьшит размер шрифта, если места недостаточно для рендеринга дисплея. В этой главе подробно обсуждается этот тег.
Чтобы заставить amp-fit-text работать, нам нужно добавить следующий скрипт -
<script async custom-element = "amp-fit-text"
src = "https://cdn.ampproject.org/v0/amp-fit-text-0.1.js">
</script>Текстовый тег усилителя
Формат текстового тега amp-fit показан ниже -
<amp-fit-text width = "200" height = "200" layout = "responsive">
Text here
</amp-fit-text>пример
Давайте лучше разберемся с этим тегом на примере.
<!doctype html>
<html amp lang = "en">
<head>
<meta charset = "utf-8">
<script async src = "https://cdn.ampproject.org/v0.js"></script>
<title>Google AMP - Amp Fit-Text</title>
<link rel = "canonical" href = "http://example.ampproject.org/article-metadata.html">
<meta name = "viewport" content = "width = device-width,minimum-scale = 1, initial-scale = 1">
<style amp-boilerplate>
body{
-webkit-animation:-amp-start 8s steps(1,end)
0s 1 normal both;-moz-animation:
-amp-start 8s steps(1,end) 0s 1 normal both;-ms-animation:
-amp-start 8s steps(1,end) 0s 1 normal both;animation:
-amp-start 8s steps(1,end) 0s 1 normal both
}
@-webkit-keyframes
-amp-start{from{visibility:hidden}to{visibility:visible}}@-moz-keyframes
-amp-start{from{visibility:hidden}to{visibility:visible}}@-ms-keyframes
-amp-start{from{visibility:hidden}to{visibility:visible}}@-o-keyframes
-amp-start{from{visibility:hidden}to{visibility:visible}}@keyframes
-amp-start{from{visibility:hidden}to{visibility:visible}}
</style>
<noscript>
<style amp-boilerplate>
body{
-webkit-animation:none;-moz-animation:none;-ms
-animation:none;animation:none}
</style>
</noscript>
<script async custom-element = "amp-fit-text"
src = "https://cdn.ampproject.org/v0/amp-fit-text-0.1.js">
</script>
</head>
<body>
<h1>Google AMP - Amp Fit-Text</h1>
<div style = "width:150px;height:150px; ">
<amp-fit-text
width = "150"
height = "150"
layout = "responsive">
<b>Welcome To TutorialsPoint - You are browsing the best resource
for Online Education</b>
</amp-fit-text>
</div>
</body>
</html>Вывод
Вывод кода, приведенного выше, показан ниже -
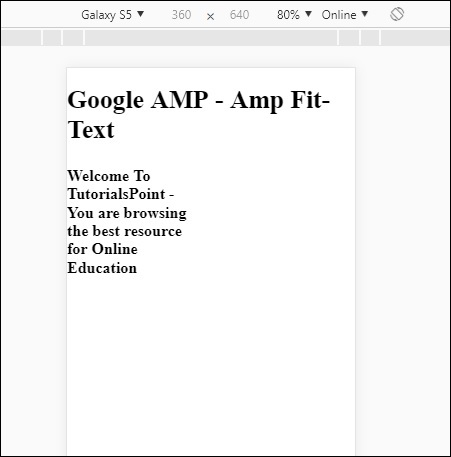
Если вы видите, что на дисплее используется amp-fit-text, содержимое пытается отрегулировать в соответствии с доступным пространством.
Amp-fit-text имеет 2 атрибута max-font-size и min-font-size.
Когда мы используем max-font-size, и если пространство недоступно для визуализации текста, он будет пытаться уменьшить размер и отрегулировать внутри доступного пространства.
Если мы укажем min-font-size, и если пространство недоступно, он обрежет текст и покажет точки, где текст скрыт.
пример
Давайте посмотрим на рабочий пример, в котором мы укажем max-font-size и min-font-size для amp-fit-text.
<!doctype html>
<html amp lang = "en">
<head>
<meta charset = "utf-8">
<script async src = "https://cdn.ampproject.org/v0.js"></script>
<title>Google AMP - Amp Fit-Text</title>
<link rel = "canonical" href = " http://example.ampproject.org/article-metadata.html">
<meta name = "viewport" content = "width = device-width,minimum-scale = 1,initial-scale = 1">
<style amp-boilerplate>
body{
-webkit-animation:
-amp-start 8s steps(1,end) 0s 1 normal both;-moz-animation:
-amp-start 8s steps(1,end) 0s 1 normal both;-ms-animation:
-amp-start 8s steps(1,end) 0s 1 normal both;animation:
-amp-start 8s steps(1,end) 0s 1 normal both
}
@-webkit-keyframes
-amp-start{from{visibility:hidden}to{visibility:visible}}@-moz-keyframes
-amp-start{from{visibility:hidden}to{visibility:visible}}@-ms-keyframes
-amp-start{from{visibility:hidden}to{visibility:visible}}@-o-keyframes
-amp-start{from{visibility:hidden}to{visibility:visible}}@keyframes
-amp-start{from{visibility:hidden}to{visibility:visible}}
</style>
<noscript>
<style amp-boilerplate>
body{
-webkit-animation:none;
-moz-animation:none;
-ms-animation:none;
animation:none}
</style>
</noscript>
<script async custom-element = "amp-fit-text" src =
"https://cdn.ampproject.org/v0/amp-fit-text-0.1.js">
</script>
</head>
<body>
<h1>Google AMP - Amp Fit-Text</h1>
<div style = "width:150px;height:150px; ">
<amp-fit-text
width = "150"
height = "150"
layout = "responsive"
max-font-size = "30"
min-font-size = "25">
<b>Welcome To TutorialsPoint - You are
browsing the best resource for Online Education</b>
</amp-fit-text>
</div>
</body>
</html>Вывод

Еще один компонент усилителя под названием Amp Date countdown, который используется для отображения дней, часов, минут, секунд до заданной даты, т.е. Y2K38 ( 2038)по умолчанию. Отображение может быть выполнено в соответствии с вашим выбором; по умолчанию это en (английский). amp-date-countdown использует шаблон amp-mustache для рендеринга данных.
В этой главе мы рассмотрим несколько рабочих примеров, чтобы более подробно разобраться в amp-date-countdown.
Для работы с amp-date-countdown нам нужно добавить следующий скрипт
Для amp-date-countdown
<script async custom-element = "amp-date-countdown"
src = "https://cdn.ampproject.org/v0/amp-date-countdown-0.1.js">
</script>Для amp-усов
<script async custom-template = "amp-mustache"
src = "https://cdn.ampproject.org/v0/amp-mustache-0.1.js">
</script>Тег Amp-date-countdown
Тег amp-date-countdown выглядит следующим образом:
<amp-date-countdown timestamp-seconds = "2100466648"
layout = "fixed-height"
height = "50">
<template type = "amp-mustache">
<p class = "p1">
{{d}} days, {{h}} hours, {{m}} minutes and {{s}} seconds until
<a href = "https://en.wikipedia.org/wiki/Year_2038_problem">
Y2K38
</a>.
</p>
</template>
</amp-date-countdown>Атрибуты для amp-date-countdown
Атрибуты для amp-date-countdown перечислены в таблице здесь -
| Старший Нет | Атрибут и описание |
|---|---|
| 1 | end-date Дата в формате ISO для обратного отсчета. Например, 2025-08-01T00: 00: 00 + 08: 00. |
| 2 | timestamp-ms Значение эпохи POSIX в миллисекундах; Предполагается, что это часовой пояс UTC. Например, timestamp-ms = "1521880470000". |
| 3 | timestamp-seconds Значение эпохи POSIX в секундах; Предполагается, что это часовой пояс UTC. Например, timestamp-seconds = "1521880470". |
| 4 | timeleft-ms Значение в миллисекундах, до которого нужно вести обратный отсчет. Например, осталось 50 часов timeleft-ms = "180 000 000". |
| 5 | offset-seconds (optional) Положительное или отрицательное число, указывающее количество секунд, которое нужно добавить или вычесть из заданной конечной даты. Например, offset-seconds = "60" добавляет 60 секунд к дате окончания. |
| 6 | when-ended (optional) Указывает, останавливать ли таймер, когда он достигает 0 секунд. Можно установить значение «Стоп» (по умолчанию), чтобы указать, что таймер остановится на 0 секунд и не пройдет окончательную дату, или продолжит, чтобы указать, что таймер должен продолжить работу после достижения 0 секунд. |
| 7 | locale (optional) Строка языка интернационализации для каждого таймера. Значение по умолчанию - en (для английского языка). Поддерживаемые значения перечислены ниже. |
Формат
Форматы, которые amp-date-countdown использует для отображения обратного отсчета, приведены в следующей таблице:
| Старший Нет | Формат и описание |
|---|---|
| 1 | d Отображать день как 0,1,2,3 ... бесконечность |
| 2 | dd Отображать день как 00,01,02,03 ... бесконечность |
| 3 | h Отображать час как 0,1,2,3 ... бесконечность |
| 4 | hh Отображение часа как 00,01,02,03 ... бесконечность |
| 5 | m Отображать минуты как 0,1,2,3,4… бесконечность |
| 6 | mm Отображать минуты как 00,01,02,03… .infinity |
| 7 | s Отображать секунду как 0,1,2,3 ... бесконечность |
| 8 | ss Отображать секунды как 00,01,02,03… .infinity |
| 9 | days Отображение строки дня или дней в соответствии с локалью |
| 10 | hours Отображение часа или строки часов в соответствии с локалью |
| 11 | minutes Отображение минут или минут в соответствии с локалью |
| 12 | seconds Отображение второй или секундной строки в соответствии с локалью |
пример
<!doctype html>
<html amp lang = "en">
<head>
<meta charset = "utf-8">
<script async src = "https://cdn.ampproject.org/v0.js"></script>
<title>Google AMP - Amp Date-Countdown</title>
<link rel = "canonical" href = " http://example.ampproject.org/article-metadata.html">
<meta name = "viewport" content = "width = device-width,minimum-scale = 1,initial-scale = 1">
<style amp-boilerplate>
body{-webkit-animation:-amp-start 8s steps(1,end)
0s 1 normal both;-moz-animation:
-amp-start 8s steps(1,end) 0s 1 normal both;-ms-animation:
-amp-start 8s steps(1,end) 0s 1 normal both;animation:
-amp-start 8s steps(1,end) 0s 1 normal both
}
@-webkit-keyframes
-amp-start{from{visibility:hidden}to{visibility:visible}}@-moz-keyframes
-amp-start{from{visibility:hidden}to{visibility:visible}}@-ms-keyframes
-amp-start{from{visibility:hidden}to{visibility:visible}}@-o-keyframes
-amp-start{from{visibility:hidden}to{visibility:visible}}@keyframes
-amp-start{from{visibility:hidden}to{visibility:visible}}
</style>
<noscript>
<style amp-boilerplate>
body{-webkit-animation:none;-moz-animation:none;-ms
-animation:none;animation:none}
</style>
</noscript>
<script async custom-element = "amp-date-countdown"
src = "https://cdn.ampproject.org/v0/amp-date-countdown-0.1.js">
</script>
<script async custom-template="amp-mustache" src=
"https://cdn.ampproject.org/v0/amp-mustache-0.1.js">
</script>
</head>
<body>
<h1>Google AMP - Amp Date-Countdown</h1>
<amp-date-countdown
timestamp-seconds = "2145683234"
layout = "fixed-height"
height = "50">
<template type = "amp-mustache">
<p class = "p1">
{{d}} days, {{h}} hours, {{m}} minutes and
{{s}} seconds until
<a href = "https://en.wikipedia.org/wiki/Year_2038_problem">
Y2K38
</a>.
</p>
</template>
</amp-date-countdown>
</body>
</html>Вывод
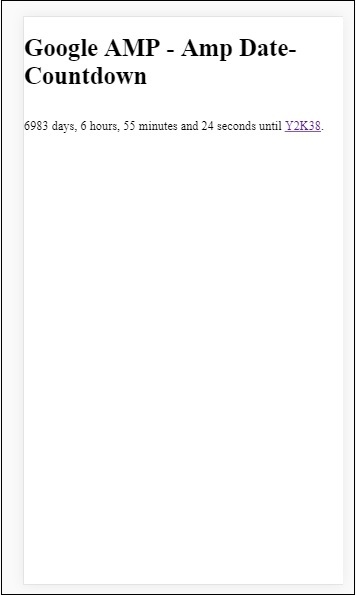
пример
Давайте разберемся с атрибутами смещения-секундного отсчета amp-countdown на рабочем примере -
<!doctype html>
<html amp lang = "en">
<head>
<meta charset = "utf-8">
<script async src = "https://cdn.ampproject.org/v0.js"></script>
<title>Google AMP - Amp Date-Countdown</title>
<link rel = "canonical" href = " http://example.ampproject.org/article-metadata.html">
<meta name = "viewport" content = "width = device-width,minimum-scale = 1,initial-scale = 1">
<style amp-boilerplate>
body{
-webkit-animation:-amp-start 8s steps(1,end)
0s 1 normal both;-moz-animation:
-amp-start 8s steps(1,end) 0s 1 normal both;-ms-animation:
-amp-start 8s steps(1,end) 0s 1 normal both;animation:
-amp-start 8s steps(1,end) 0s 1 normal both
}
@-webkit-keyframes
-amp-start{from{visibility:hidden}to{visibility:visible}}@-moz-keyframes
-amp-start{from{visibility:hidden}to{visibility:visible}}@-ms-keyframes
-amp-start{from{visibility:hidden}to{visibility:visible}}@-o-keyframes
-amp-start{from{visibility:hidden}to{visibility:visible}}@keyframes
-amp-start{from{visibility:hidden}to{visibility:visible}}
</style>
<noscript>
<style amp-boilerplate>
body{
-webkit-animation:none;-moz-animation:none;-ms
-animation:none;animation:none}
</style>
</noscript>
<script async custom-element = "amp-date-countdown"
src = "https://cdn.ampproject.org/v0/amp-date-countdown-0.1.js">
</script>
<script async custom-template = "amp-mustache"
src = "https://cdn.ampproject.org/v0/amp-mustache-0.1.js">
</script>
</head>
<body>
<h1>Google AMP - Amp Date-Countdown</h1>
<amp-date-countdown
end-date = "2020-01-19T08:14:08.000Z"
offset-seconds = "-50"
layout = "fixed-height"
height = "100">
<template type = "amp-mustache">
<p class = "p1">
{{d}} days, {{h}} hours, {{m}}
minutes and {{s}} seconds until 50
seconds before 2020.
</p>
</template>
</amp-date-countdown>
</body>
</html>Вывод
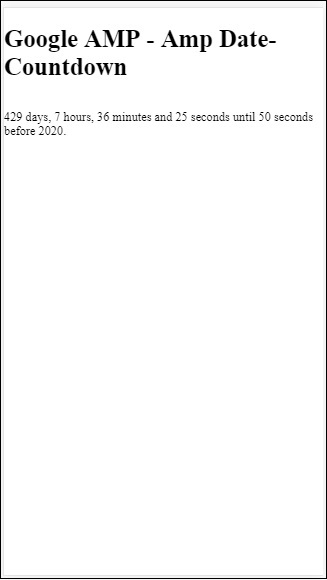
Список поддерживаемых локалей
Ниже приведен список языков, поддерживаемых amp-date-countdown:
| Старший Нет | Имя и язык |
|---|---|
| 1 | en английский |
| 2 | es испанский язык |
| 3 | fr французский язык |
| 4 | de Немецкий |
| 5 | id индонезийский |
| 6 | it Итальянский |
| 7 | ja Японский |
| 8 | ko корейский язык |
| 9 | nl Голландский |
| 10 | pt португальский |
| 11 | ru русский |
| 12 | th Тайский |
| 13 | tr турецкий |
| 14 | vi вьетнамский |
| 15 | zh-cn Китайский упрощенный |
| 16 | zh-tw Китайский традиционный |
Теперь мы попробуем один пример отображения обратного отсчета с использованием одного из указанных выше языковых стандартов.
пример
<!doctype html>
<html amp lang = "en">
<head>
<meta charset = "utf-8">
<script async src = "https://cdn.ampproject.org/v0.js"></script>
<title>Google AMP - Amp Date-Countdown</title>
<link rel = "canonical" href = "http://example.ampproject.org/article-metadata.html">
<meta name="viewport" content="width = device-width, minimum-scale = 1,initial-scale = 1">
<style amp-boilerplate>
body{
-webkit-animation:
-amp-start 8s steps(1,end)0s 1 normal both;-moz-animation:
-amp-start 8s steps(1,end) 0s 1 normal both;-ms-animation:
-amp-start 8s steps(1,end) 0s 1 normal both;animation:
-amp-start 8s steps(1,end) 0s 1 normal both
}
@-webkit-keyframes
-amp-start{from{visibility:hidden}to{visibility:visible}}@-moz-keyframes
-amp-start{from{visibility:hidden}to{visibility:visible}}@-ms-keyframes
-amp-start{from{visibility:hidden}to{visibility:visible}}@-o-keyframes
-amp-start{from{visibility:hidden}to{visibility:visible}}@keyframes
-amp-start{from{visibility:hidden}to{visibility:visible}}
</style>
<noscript>
<style amp-boilerplate>
body{
-webkit-animation:none;
-moz-animation:none;
-ms-animation:none;
animation:none}
</style>
</noscript>
<script async custom-element = "amp-date-countdown"
src = "https://cdn.ampproject.org/v0/amp-date-countdown-0.1.js">
</script>
<script async custom-template = "amp-mustache"
src = "https://cdn.ampproject.org/v0/amp-mustache-0.1.js">
</script>
</head>
<body>
<h1>Google AMP - Amp Date-Countdown</h1>
<amp-date-countdown
locale = "ja"
end-date = "2020-01-19T08:14:08.000Z"
offset-seconds = "-50"
layout = "fixed-height"
height = "100">
<template type = "amp-mustache">
<p class = "p1">
{{d}} {{days}}, {{h}} {{hours}}, {{m}}
{{minutes}} and {{s}} {{seconds}} until
50 seconds before 2020.
</p>
</template>
</amp-date-countdown>
</body>
</html>Вывод

AMP Datepicker - это компонент amp, который отображает календарь на странице, где пользователь может выбирать даты. Средство выбора даты AMP может отображаться как статический календарь или на основе выбора ввода, то есть одним нажатием кнопки.
Чтобы amp-date-picker заработал, нам нужно добавить на страницу следующий скрипт:
<script async custom-element = "amp-date-picker"
src = "https://cdn.ampproject.org/v0/amp-date-picker-0.1.js">
</script>Тег AMP-Date-Picker
Тег amp-date-picker выглядит следующим образом -
<amp-date-picker layout = "fixed-height" height = "360"></amp-date-picker>Поддерживаемые атрибуты
Для amp-date-picker поддерживаются следующие атрибуты:
| Старший Нет | Атрибут и описание |
|---|---|
| 1 | mode Доступны варианты статического и наложения. Для статического календаря по умолчанию открывается на странице. Для Overlay календарь откроется после взаимодействия. |
| 2 | mode Доступны варианты: одиночный и диапазонный. В режиме single вы можете выбрать только одну дату в календаре. С диапазоном вы можете выбрать более одной даты, но в непрерывном диапазоне. |
| 3 | input-selector Это может быть селектор запросов для ввода даты. Например, для id - #nameoftheid, для класса -. название класса. Дата будет обновлена для тега, которому присвоен идентификатор. |
| 4 | start-input-selector Это может быть селектор запросов для ввода даты. Например, для id - #nameoftheid, для класса - .nameoftheclass. Дата будет обновлена для тега, которому присвоен идентификатор. |
| 5 | end-input-selector Это может быть селектор запросов для ввода даты. Например, для id - #nameoftheid, для класса - .nameoftheclass. Дата будет обновлена для тега, которому присвоен идентификатор. |
| 6 | min Самая ранняя дата, которую может выбрать пользователь. Он должен быть отформатирован как дата ISO 8601. Если атрибут min отсутствует, текущая дата будет минимальной датой. |
| 7 | max Самая последняя дата, которую может выбрать пользователь. Он должен быть отформатирован как дата ISO 8601. Если атрибут max отсутствует, в средстве выбора даты не будет максимальной даты. |
| 8 | month-format Формат месяца, необходимый для отображения выбранной даты. По умолчанию используются значения «ММММ ГГГГ». |
| 9 | format Формат, в котором вы хотите, чтобы дата отображалась в поле ввода или любом элементе htmlement, чей селектор используется. По умолчанию это «ГГГГ-ММ-ДД». |
| 10 | week-day-format Формат отображения дня недели. |
| 11 | locale Локаль для отображения календаря. По умолчанию это en. |
| 12 | minimum-nights Количество ночей, которое пользователь должен выбрать в диапазоне дат. По умолчанию - «1». Значение «0» позволяет пользователям выбирать одну и ту же дату для дат начала и окончания. |
| 13 | number-of-months Количество месяцев для одновременного отображения в представлении календаря. По умолчанию - «1». |
| 14 | first-day-of-week День, который нужно указать как первый день недели (0–6). Значение по умолчанию - «0» (воскресенье). |
| 15 | day-size Размер в пикселях ячеек даты в таблице календарного представления. По умолчанию - 39. |
Основные атрибуты: type и mode. Заmode, у нас есть static и overlayнабрать календари. Заtype мы можем иметь single и rangeпараметры. С участиемtype = ”single” мы можем выбрать только одну дату из календаря и для type = ”range” мы можем выбрать несколько данных в диапазоне.
Теперь давайте разберемся с amp-date-picker для статических календарей и календарей с наложением на некоторых рабочих примерах.
Статический выбор даты AMP
Для выбора даты статического типа нам нужно указать mode = static, как показано в примере ниже.
пример
<!doctype html>
<html amp lang = "en">
<head>
<meta charset = "utf-8">
<script async src = "https://cdn.ampproject.org/v0.js"></script>
<title>Google AMP - Amp Date-Picker Static </title>
<link rel = "canonical" href = " http://example.ampproject.org/article-metadata.html">
<meta name = "viewport" content = "width = device-width, minimum-scale = 1,initial-scale = 1">
<style amp-boilerplate>
body{
-webkit-animation:
-amp-start 8s steps(1,end) 0s 1 normal both;-moz-animation:
-amp-start 8s steps(1,end) 0s 1 normal both;-ms-animation:
-amp-start 8s steps(1,end) 0s 1 normal both;animation:
-amp-start 8s steps(1,end) 0s 1 normal both
}
@-webkit-keyframes
-amp-start{from{visibility:hidden}to{visibility:visible}}@-moz-keyframes
-amp-start{from{visibility:hidden}to{visibility:visible}}@-ms-keyframes
-amp-start{from{visibility:hidden}to{visibility:visible}}@-o-keyframes
-amp-start{from{visibility:hidden}to{visibility:visible}}@keyframes
-amp-start{from{visibility:hidden}to{visibility:visible}}
</style>
<noscript>
<style amp-boilerplate>
body{-webkit-animation:
none;-moz-animation:none;-ms-animation:none;animation:none}
</style>
</noscript>
<script async custom-element = "amp-date-picker"
src = "https://cdn.ampproject.org/v0/amp-date-picker-0.1.js">
</script>
<script async custom-element = "amp-bind"
src = "https://cdn.ampproject.org/v0/amp-bind-0.1.js">
</script>
<script async custom-template = "amp-mustache"
src = "https://cdn.ampproject.org/v0/amp-mustache-0.1.js">
</script>
<style>
input[type = text]{
width: 50%;
padding: 12px;
border: 1px
solid #ccc;
border-radius: 4px;
resize: vertical;
}
label {
padding: 12px 12px 12px 0;display: inline-block;
}
.col-label {
float: left;width: 25%;margin-top: 6px;
}
.col-content {
float: left;width: 75%;margin-top: 6px;
}
.row:after {
content: "";display: table;clear: both;
}
.amp_example {
background-color: #f1f1f1;
padding: 0.01em 16px;
margin: 20px 0;
box-shadow: 0 2px 4px 0
rgba(0,0,0,0.16),0 2px 10px 0
rgba(0,0,0,0.12)!important;
}
h3{font-family: "Segoe UI",Arial,sans-serif;
font-weight: 400;margin: 10px 0;}
</style>
</head>
<body>
<div class = "amp_example">
<h3>Google AMP - Amp Date-Picker using type = single</h3>
<amp-date-picker
id = "static-date"
type = "single"
mode = "static"
layout = "fixed-height"
height = "600"
format = "YYYY-MM-DD"
input-selector = "#date">
<div class = "row">
<div class = "col-label">
<label for = "start">
Date is:
</label>
</div>
<div class = "col-content">
<input type = "text" id = "date" name = "date"
placeholder = "Date Selected Is...">
</div>
</div>
</amp-date-picker>
<div>
</body>
</html>Обратите внимание, что в этом примере мы отображаем календарь, то есть дату по умолчанию на экране.
Дата, выбранная пользователем, отображается в текстовом поле, как показано на демонстрационном экране, показанном ниже -
Вывод
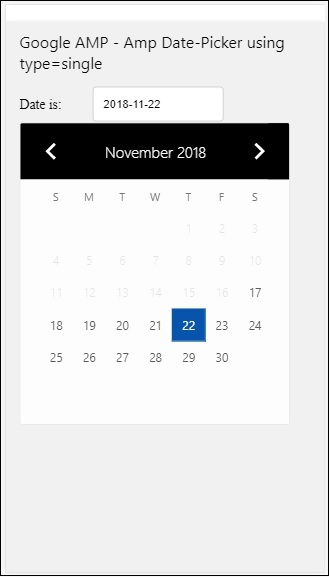
Как выбрать дату в amp-date-picker?
Если вы проверите приведенный выше пример, там есть атрибут с именем input-selectorкоторому задан идентификатор текстового поля. Когда пользователь выбирает дату, она отображается внутри поля ввода.
<amp-date-picker
id = "static-date"
type = "single"
mode = "static"
layout = "fixed-height"
height = "600"
format = "YYYY-MM-DD"
input-selector = "#date"
<div class = "row">
<div class = "col-label">
<label for = "start">Date is:</label>
</div>
<div class = "col-content">
<input type = "text" id = "date" name = "date"
placeholder = "Date Selected Is...">
</div>
</div>
</amp-date-picker>Вы также можете указать свойство name для атрибута input-selector следующим образом:
<amp-date-picker
type = "single"
mode = "static"
layout = "container"
input-selector = "[name = date]">
<input type = "text" id = "date" name = "date" placeholder = "Date Selected Is...">
</amp-date-picker>Если не задан селектор ввода, то amp-date-picker создает скрытое поле ввода и дает ему имя date or ${id}-date используя идентификатор средства выбора amp-date.
Мы обсудим еще несколько примеров с различными атрибутами, доступными с помощью средства выбора даты. Выше мы можем выбрать единственную дату, как мы упоминалиtype=”single”и режим как статический. Мы также можем выбрать диапазон дат, указав тип какtype=”range”.
пример
<!doctype html>
<html amp lang = "en">
<head>
<meta charset = "utf-8">
<script async src = "https://cdn.ampproject.org/v0.js"></script>
<title>Google AMP - Amp Date-Picker Static </title>
<link rel = "canonical" href = "http://example.ampproject.org/article-metadata.html">
<meta name = "viewport" content = "width = device-width, minimum-scale = 1,initial-scale = 1">
<style amp-boilerplate>
body{-webkit-animation:
-amp-start 8s steps(1,end) 0s 1 normal both;-moz-animation:
-amp-start 8s steps(1,end) 0s 1 normal both;-ms-animation:
-amp-start 8s steps(1,end) 0s 1 normal both;animation:
-amp-start 8s steps(1,end) 0s 1 normal both
}
@-webkit-keyframes
-amp-start{from{visibility:hidden}to{visibility:visible}}@-moz-keyframes
-amp-start{from{visibility:hidden}to{visibility:visible}}@-ms-keyframes
-amp-start{from{visibility:hidden}to{visibility:visible}}@-o-keyframes
-amp-start{from{visibility:hidden}to{visibility:visible}}@keyframes
-amp-start{from{visibility:hidden}to{visibility:visible}}
</style>
<noscript>
<style amp-boilerplate>
body{
-webkit-animation:
none;-moz-animation:none;-ms-animation:none;animation:none}
</style>
</noscript>
<script async custom-element = "amp-date-picker"
src = "https://cdn.ampproject.org/v0/amp-date-picker-0.1.js">
</script>
<script async custom-element = "amp-bind"
src = "https://cdn.ampproject.org/v0/amp-bind-0.1.js">
</script>
<script async custom-template = "amp-mustache"
src = "https://cdn.ampproject.org/v0/amp-mustache-0.1.js">
</script>
<style>
input[type = text]{
width: 50%;
padding: 12px;
border: 1px solid #ccc;
border-radius: 4px;
resize: vertical;
}
label {padding: 12px 12px 12px 0;display: inline-block;}
.col-label {float: left;width: 25%;margin-top: 6px;}
.col-content {float: left;width: 75%;margin-top: 6px;}
.row:after {content: "";display: table;clear: both;}
.amp_example {
background-color: #f1f1f1;
padding: 0.01em 16px;
margin: 20px 0;
box-shadow: 0 2px 4px 0
rgba(0,0,0,0.16),0 2px 10px 0
rgba(0,0,0,0.12)!important;
}
h3{
font-family: "Segoe UI",Arial,sans-serif;
font-weight: 400;margin: 10px 0;
}
</style>
</head>
<body>
<div class = "amp_example">
<h3>Google AMP - Amp Date-Picker Static Multi Select Dates using type = range</h3>
<amp-date-picker
id = "static-date"
type = "range"
mode = "static"
layout = "fixed-height"
height = "600"
start-input-selector = "#start"
end-input-selector = "#end"
format = "YYYY-MM-DD"
input-selector = "#static-date-input">
<div class = "row">
<div class = "col-label">
<label for = "start">Start Date:</label>
</div>
<div class = "col-content">
<input type = "text" id = "start"
name = "start" placeholder = "Start Date">
</div>
</div>
<div class = "row">
<div class = "col-label">
<label for = "end">End Date:</label>
</div>
<div class = "col-content">
<input type = "text" id = "end"
name = "end" placeholder = "End Date">
</div>
</div>
</amp-date-picker>
</div>
</body>
</html>Вывод
Вывод кода, показанного выше, приведен ниже -
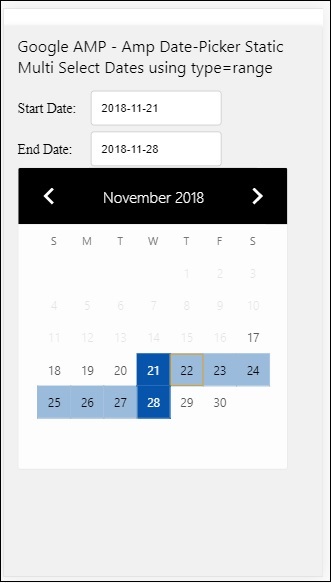
How to get the start and end date using type= ”range” selected from amp-date-picker?
Чтобы получить дату начала и окончания, мы использовали атрибут amp-date-picker start-input-selector и end-input-selector.
Подробности синтаксиса показаны здесь -
<amp-date-picker
id = "static-date"
type = "range"
mode = "static"
layout = "fixed-height"
height = "600"
start-input-selector = "#start"
end-input-selector="#end"
format = "YYYY-MM-DD"
input-selector = "#static-date-input">
<input type = "text" id = "start" name = "start" placeholder="Start Date">
<input type = "text" id = "end" name = "end" placeholder = "End Date">
</amp-date-picker>Оба селектора имеют идентификатор поля ввода, в котором мы хотим отображать дату начала и окончания. Вы также можете указать имя поля ввода, как описано здесь.
Выбор даты наложения AMP
Для выбора даты в режиме наложения календарь отображается в ответ на поле ввода. Мы можем иметь оверлей с type = ”single” и type = “range”, как мы видели для статического выбора даты.
Давайте теперь посмотрим на рабочий пример выбора диапазона дат для выбора даты типа оверлей.
пример
<!doctype html>
<html amp lang = "en">
<head>
<meta charset = "utf-8">
<script async src = "https://cdn.ampproject.org/v0.js"></script>
<itle>Google AMP - Amp Date-Picker Static</title>
<link rel = "canonical" href = "http://example.ampproject.org/article-metadata.html">
<meta name = "viewport" content = "width = device-width,minimum-scale = 1,initial-scale = 1">
<style amp-boilerplate>
body{
-webkit-animation:
-amp-start 8s steps(1,end) 0s 1 normal both;-moz-animation:
-amp-start 8s steps(1,end) 0s 1 normal both;-ms-animation:
-amp-start 8s steps(1,end) 0s 1 normal both;animation:
-amp-start 8s steps(1,end) 0s 1 normal both
}
@-webkit-keyframes
-amp-start{from{visibility:hidden}to{visibility:visible}}@-moz-keyframes
-amp-start{from{visibility:hidden}to{visibility:visible}}@-ms-keyframes
-amp-start{from{visibility:hidden}to{visibility:visible}}@-o-keyframes
-amp-start{from{visibility:hidden}to{visibility:visible}}@keyframes
-amp-start{from{visibility:hidden}to{visibility:visible}}
</style>
<noscript>
<style amp-boilerplate>
body{
-webkit-animation:
none;-moz-animation:none;-ms-animation:none;animation:none}
</style>
</noscript>
<script async custom-element = "amp-date-picker"
src = "https://cdn.ampproject.org/v0/amp-date-picker-0.1.js">
</script>
<script async custom-element = "amp-bind"
src = "https://cdn.ampproject.org/v0/amp-bind-0.1.js">
</script>
<script async custom-template = "amp-mustache"
src = "https://cdn.ampproject.org/v0/amp-mustache-0.1.js">
</script>
<style>
input[type=text]{
width: 50%;
padding: 12px;border:
1px solid #ccc;
border-radius: 4px;resize: vertical;
}
label {
padding: 12px 12px 12px 0;
display: inline-block;
font-family: "Segoe UI",Arial,sans-serif;
font-weight: 400;
}
.col-label {float: left;width: 25%;margin-top: 6px;}
.col-content {float: left;width: 75%;margin-top: 6px;}
.row:after {content: "";display: table;clear: both;}
.amp_example {
background-color: #f1f1f1;
padding: 0.01em 16px;
margin: 20px 0;
box-shadow: 0 2px 4px 0
rgba(0,0,0,0.16),0 2px 10px 0
rgba(0,0,0,0.12)!important;
}
h3{font-family: "Segoe UI",Arial,sans-serif;font-weight: 400;margin: 10px 0;}
button { background-color: #ACAD5C;
color: white;
padding: 12px 20px;
border: none;
border-radius: 4px;
cursor: pointer;
float: right;
}
</style>
</head>
<body>
<div class = "amp_example">
<h3>Google AMP - Amp Date-Picker Overlay Multi Select Dates using type = rangelt;/h3>
<amp-date-picker id = "overlay-date"
type = "range"
mode = "overlay"
start-input-selector = "#start"
end-input-selector = "#end"
format = "YYYY-MM-DD"
open-after-select
input-selector = "#start">
<div class = "row">
<div class = "col-label">
<label for = "start">Start Date:lt;/label>
</div>
<div class = "col-content">
<input type = "text" id = "start"
name = "start" placeholder = "Start Date">
</div>
</div>
<div class = "row">
<div class = "col-label">
<label for = "end">End Date:lt;/label>
</div>
<div class = "col-content">
<input type = "text" id="end" name = "end"
placeholder = "End Date">
</div>
</div>
<div class = "row">
<div class = "col-label">
</div>
<div class = "col-content">
<button class = "ampstart-btn caps" on = "tap:overlay-date.clear">
Clear
</button>
</div>
</div>
</amp-date-picker>
</div>
</body>
</html>Вывод
Вывод кода, показанного выше, приведен ниже -
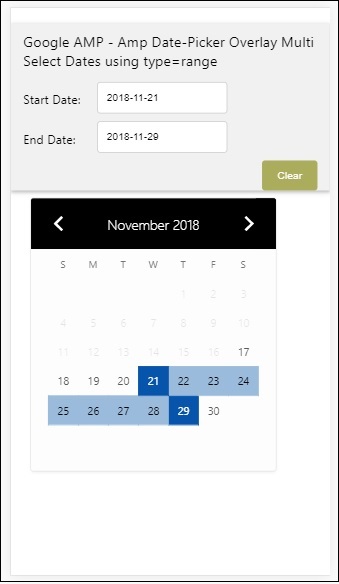
Мы уже видели, как получить дату начала и дату окончания. Обратите внимание, что мы использовали здесь еще один атрибутopen-after-select. Этот атрибут будет держать оверлей открытым после выбора. Если вы щелкнете за пределами поля выбора даты, оно будет закрыто. Также добавлена кнопка под названием очистить. При нажатии кнопки очистки даты, выбранные с помощью, будут очищены. Синтаксис для выполнения этого следующий:
<button class = "ampstart-btn caps" on = "tap:overlay-date.clear">
Clear
</button>Чтобы добавить событие, мы должны использовать onатрибут. Подробности о событиях будут обсуждаться вEventsГлава этого учебника. Мы использовали поведение тега, и для этого задается идентификатор datepicker и очищает событие, которое заботится об очистке выбранного диапазона дат.
Затем давайте посмотрим, как использовать amp-date-picker в качестве лайтбокса.
Средство выбора даты в лайтбоксе AMP
Средство выбора даты можно использовать внутри модального окна. Мы также можем использовать средство выбора даты в лайтбоксе. Разберемся в этом на рабочем примере.
Чтобы использовать выбор даты внутри лайтбокса, нам нужно добавить скрипт лайтбокса, как показано ниже -
<script async custom-element = "amp-lightbox"
src = "https://cdn.ampproject.org/v0/amp-lightbox-0.1.js">
</script>пример
<!doctype html>
<html amp lang = "en">
<head>
<meta charset = "utf-8">
<script async src = "https://cdn.ampproject.org/v0.js"></script>
<title>Google AMP - Amp Date-Picker Static </title>
<link rel = "canonical" href = "http://example.ampproject.org/article-metadata.html">
<meta name = "viewport" content = "width=device-width,minimum-scale = 1,initial-scale = 1">
<style amp-boilerplate>
body{
-webkit-animation:
-amp-start 8s steps(1,end) 0s 1 normal both;-moz-animation:
-amp-start 8s steps(1,end) 0s 1 normal both;-ms-animation:
-amp-start 8s steps(1,end) 0s 1 normal both;animation:
-amp-start 8s steps(1,end) 0s 1 normal both
}
@-webkit-keyframes
-amp-start{from{visibility:hidden}to{visibility:visible}}@-moz-keyframes
-amp-start{from{visibility:hidden}to{visibility:visible}}@-ms-keyframes
-amp-start{from{visibility:hidden}to{visibility:visible}}@-o-keyframes
-amp-start{from{visibility:hidden}to{visibility:visible}}@keyframes
-amp-start{from{visibility:hidden}to{visibility:visible}}
</style>
<noscript>
<style amp-boilerplate>
body{
-webkit-animation:none;
-moz-animation:none;
-ms-animation:none;
animation:none}
</style>
</noscript>
<script async custom-element = "amp-date-picker"
src = "https://cdn.ampproject.org/v0/amp-date-picker-0.1.js">
</script>
<script async custom-element = "amp-bind" src = "
https://cdn.ampproject.org/v0/amp-bind-0.1.js">
<script>
<script async custom-template = "amp-mustache"
src = "https://cdn.ampproject.org/v0/amp-mustache-0.1.js">
</script>
<script async custom-element = "amp-lightbox"
src = "https://cdn.ampproject.org/v0/amp-lightbox-0.1.js">
</script>
<style>
input[type=text]{
width: 50%;
padding: 12px;
border: 1px solid #ccc;
border-radius: 4px;
resize: vertical;
}
label {
padding: 12px 12px 12px 0;
display: inline-block;
font-family: "Segoe UI",Arial,sans-serif;
font-weight: 400;
}
.col-label {
float: left;width: 25%;
margin-top: 6px;
}
.col-content {
float: left;
width: 75%;
margin-top: 6px;
}
.row:after {
content: "";
display: table;clear: both;
}
.amp_example {
background-color: #f1f1f1;
padding: 0.01em 16px;
margin: 20px 0;
box-shadow: 0 2px 4px 0 rgba(0,0,0,0.16),0 2px 10px 0rgba(0,0,0,0.12)!important;
}
h3{font-family: "Segoe UI",Arial,sans-serif;
font-weight: 400;
margin: 10px 0;
}
button {
background-color: #ACAD5C;
color: white;
padding: 12px 20px;
border: none;
border-radius: 4px;
cursor: pointer;
float: right;
}
.lightbox {background-color: rgba(100, 100, 100, 0.5);}
</style>
</head>
<body>
<div class = "amp_example">
<h3>Google AMP - Amp Date-Picker Overlay Multi Select Dates using type = range</h3>
<div class = "row">
<div class = "col-label">
<label for = "start">Start Date:</label>
<div>
<div class = "col-content">
<input type = "text" id = "start" name =
"start" placeholder = "Start Date" on = "tap:lightbox.open">
</div>
</div>
<div class = "row">
<div class = "col-label">
<label for = "end">End Date:</label>
</div>
<div class = "col-content">
<input type = "text" id = "end" name =
"end" placeholder = "End Date" on = "tap:lightbox.open">
</div>
</div>
<div class = "row">
<div class = "col-label"></div>
<div class = "col-content">
<button class = "ampstart-btn caps" on =
"tap:overlay-date.clear">Clear</button>
</div>
</div>
<amp-lightbox id = "lightbox" layout = "nodisplay" class = "lightbox">
<amp-date-picker id = "overlay-date"
type = "range"
layout = "fill"
start-input-selector = "#start"
end-input-selector = "#end"
format = "YYYY-MM-DD"
on = "activate: lightbox.open;deactivate: lightbox.close">
</amp-date-picker>
</amp-lightbox>
</div>
</body>
</html>Вывод
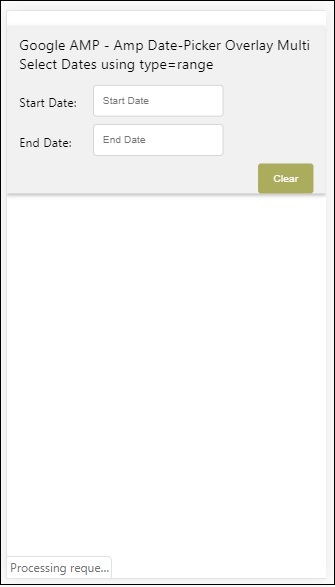
Когда пользователь нажимает на поле ввода, окно выбора даты открывается внутри лайтбокса, как показано ниже -
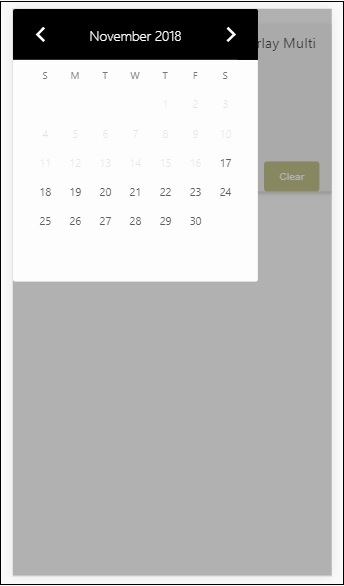
Для этого в поле ввода добавлено событие, как показано ниже -
<input type = "text" id = "start" name = "start"
placeholder = "Start Date" on = "tap:lightbox.open">
<input type = "text" id = "end" name = "end"
placeholder = "End Date" on = "tap:lightbox.open">Обратите внимание, что “on” событие, которое он вызывает, нажмите - lightbox.open, чтобы открыть лайтбокс.
Здесь лайтбокс - это идентификатор, присвоенный amp-lightbox, как показано ниже. Amp-date-picker вызывается внутри amp-lightbox и активируется при нажатии на поля ввода.
<amp-lightbox id = "lightbox" layout = "nodisplay" class = "lightbox">
<amp-date-picker id = "overlay-date"
type = "range"
layout = "fill"
start-input-selector = "#start"
end-input-selector = "#end"
format = "YYYY-MM-DD"
on = "activate: lightbox.open;deactivate: lightbox.close">
</amp-date-picker>
</amp-lightbox>Amp-story - это компонент-amp-компонент, используемый для отображения контента, позволяющего пользователю заинтересоваться историей. Например, используя серию изображений, рассказывающих о бренде.
Чтобы начать работу с amp-story, нам нужно включить скрипт, как показано ниже -
<script async custom-element = "amp-story"
src = "https://cdn.ampproject.org/v0/amp-story-1.0.js">
</script>В этой главе давайте разберемся, что такое amp-story и как это работает. Предположим, у нас есть галерея изображений, и мы хотим отобразить ее на странице. На странице amp мы можем сделать ее красивой и интерактивной для пользователя с помощью компонента amp-story.
Формат тега amp-story выглядит так, как показано ниже -
<amp-story standalone> ---> Main story Tag
<amp-story-page id = "page-1"> ---> Pages inside the story e.g page1
<amp-story-grid-layer template = "fill"> -->
Layers for the page1.You can have more than one layer.
//Add html elements here or amp components
</amp-story-grid-layer>
<amp-story-grid-layer template = "fill"> -->
Layers for the page1.You can have more than one layer.
//Add html elements here or amp components
</amp-story-grid-layer>
...
</amp-story-page>
<amp-story-page id = "page-2"> ---> Pages inside the story e.g page2
<amp-story-grid-layer template = "fill"> -->
Layers for the page2.You can have more than one layer.
//Add html elements here or amp components
</amp-story-grid-layer>
...
</amp-story-page>
...
</amp-story>Для amp-story добавлены следующие дополнительные атрибуты:
<amp-story standalone title = "My Story"
publisher = "The AMP Team"
publisher-logo-src = "publisherlogo image here"
poster-portrait-src = "poster portrait here"
poster-square-src = "poster square image here"
poster-landscape-src = "poster landscape image here">Эта функция делает рассказ с помощью amp очень интерактивным.
В следующем коде показан рабочий пример для amp-story. Вывод для них показан как для настольного, так и для мобильного режима.
пример
<!doctype html>
<html amp lang = "en">
<head>
<meta charset = "utf-8">
<script async src = "https://cdn.ampproject.org/v0.js"></script>
<script async custom-element = "amp-story" src = "https://cdn.ampproject.org/v0/amp-story-1.0.js"></script>
<title>Google AMP - Story</title>
<meta name = "viewport" content = "width = device-width,minimum-scale = 1,initial-scale=1">
<link rel = "canonical" href = "/stories/introduction/amp_story_hello_world/">
<style amp-boilerplate>
body{
-webkit-animation:
-amp-start 8s steps(1,end) 0s 1 normal both;-moz-animation:
-amp-start 8s steps(1,end) 0s 1 normal both;-ms-animation:
-amp-start 8s steps(1,end) 0s 1 normal both;animation:
-amp-start 8s steps(1,end) 0s 1 normal both
}
@-webkit-keyframes
-amp-start{from{visibility:hidden}to{visibility:visible}}@-moz-keyframes
-amp-start{from{visibility:hidden}to{visibility:visible}}@-ms-keyframes
-amp-start{from{visibility:hidden}to{visibility:visible}}@-o-keyframes
-amp-start{from{visibility:hidden}to{visibility:visible}}@keyframes
-amp-start{from{visibility:hidden}to{visibility:visible}}
</style>
<noscript>
<style amp-boilerplate>
body{
-webkit-animation:
none;-moz-animation:none;
-ms-animation:none;
animation:none}
</style>
</noscript>
<style amp-custom>
amp-story {
font-family: Roboto, Helvetica, Arial, sans-serif;
}
amp-story-page * {
color: white;
text-align: center;
}
</style>
</head>
<body>
<amp-story standalone title = "Stories in AMP - Hello World" publisher = "AMP Project">
<amp-story-page id = "page-1">
<amp-story-grid-layer template = "fill">
<amp-img src = "images/christmas1.jpg"
width = "300" height = "250"
layout = "responsive">
</amp-img>
</amp-story-grid-layer>
<amp-story-grid-layer template = "vertical">
<h1>Hello World</h1>
<p>This is an AMP Story.</p>
</amp-story-grid-layer>
</amp-story-page>
<amp-story-page id = "page-2">
<amp-story-grid-layer template = "fill">
<amp-img src = "images/christmas5.jpg"
width = "300" height = "250"
layout = "responsive">
</amp-img>
</amp-story-grid-layer>
<amp-story-grid-layer template = "vertical">
<h1>Hello World</h1>
<p>This is an AMP Story.</p>
</amp-story-grid-layer>
</amp-story-page>
<amp-story-page id = "page-3">
<amp-story-grid-layer template = "fill">
<amp-img src = "images/christmas3.jpg"
width = "300" height = "250"
layout = "responsive">
</amp-img>
</amp-story-grid-layer>
<amp-story-grid-layer template = "vertical">
<h1>Hello World</h1>
<p>This is an AMP Story.</p>
</amp-story-grid-layer>
</amp-story-page>
<amp-story-page id = "page-4">
<amp-story-grid-layer template = "fill">
<amp-img src = "images/christmas4.jpg"
width = "300" height="250"
layout = "responsive">
</amp-img>
</amp-story-grid-layer>
<amp-story-grid-layer template = "vertical">
<h1>Hello World</h1>
<p>This is an AMP Story.</p>
</amp-story-grid-layer>
</amp-story-page>
<amp-story-bookend src = "ampstory.json" layout = "nodisplay">
</amp-story-bookend>
</amp-story>
<body>
</html>ampstory.json
{
"bookendVersion": "v1.0",
"shareProviders": [
"email",
"twitter",
"tumblr",
{
"provider": "facebook",
"app_id": "254325784911610"
}
],
"components": [
{
"type": "heading",
"text": "Introduction"
},
{
"type": "small",
"title": "Next Story is on Car Brands",
"url": "ampcarbrand.html",
"image": "images/audi.jpg"
}
]
}Вывод на рабочий стол


Так отображается раздел истории. Вы также можете добавить видео или любой другой компонент amp, чтобы сделать историю более интерактивной.
Как только он достигнет конца истории, он покажет, что указано в amp-bookend, как показано ниже -
<amp-story-bookend
src = "ampstory.json" layout = "nodisplay">
</amp-story-bookend>Мы передали amp-bookend файл ampstory.json. В json-файле содержится подробная информация о предварительном просмотре следующей истории, как показано ниже. Когда пользователь нажимает на три точки, показанные справа, отображается следующий экран -
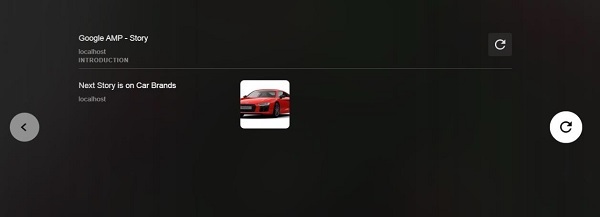
Это дает кнопку воспроизведения, которая снова загрузит историю. Вы можете щелкнуть изображение автомобиля, которое отобразит историю марок автомобилей.
Выход в мобильном режиме выглядит следующим образом -


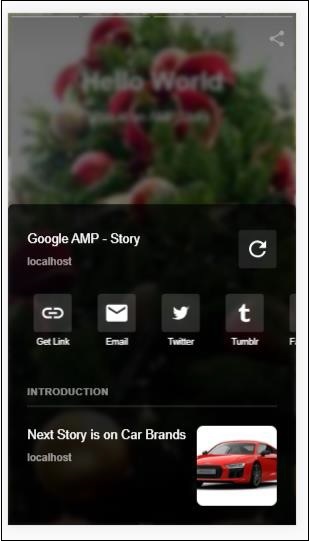
Селектор усилителя - это компонент усилителя, который отображает меню параметров, и пользователь может выбирать между ними. Отображаемые параметры могут быть текстом, изображениями или любым другим компонентом amp. В этой главе давайте обсудим это подробно.
Для работы с amp-selector нам нужно включить следующие файлы javascript:
<script async custom-element = "amp-selector"
src = "https://cdn.ampproject.org/v0/amp-selector-0.1.js">
</script>Формат amp-selector
В следующем коде показан пример формата amp-selector -
<amp-selector layout = "container">
<amp-img src = "images/christmas1.jpg"
width = "60"
height = "40"
option = "1">
<amp-img src = "images/christmas2.jpg"
width = "60"
height = "40"
option = "2">
</amp-img>
<amp-img src = "images/christmas3.jpg"
width = "60"
height = "40"
option = "3">
</amp-img>
<amp-img src = "images/christmas4.jpg"
width = "60"
height = "40"
option = "4">
</amp-img>
</amp-selector>Вы можете использовать стандартные html-теги или компоненты amp внутри amp-selector. Содержимое отображается как меню на экране, и пользователь может выбирать между ними. Отображаемые меню могут быть одиночным или множественным выбором.
Давайте разберемся в этом с помощью примера одиночного и множественного выбора, как показано ниже.
Одиночный выбор селектора усилителя
Следующий код представляет собой образец для одиночного выбора amp-selector -
<!doctype html>
<html amp lang = "en">
<head>
<meta charset = "utf-8">
<script async src = "https://cdn.ampproject.org/v0.js"></script>
<title>Google AMP - Amp Selector</title>
<link rel = "canonical" href = "http://example.ampproject.org/article-metadata.html">
<meta name="viewport" content="width=device-width,minimum-scale = 1,initial-scale = 1">
<style amp-boilerplate>
body{-
webkit-animation:-amp-start 8s steps(1,end) 0s 1 normal both;-moz-animation:
-amp-start 8s steps(1,end) 0s 1 normal both;-ms-animation:
-amp-start 8s steps(1,end) 0s 1 normal both;animation:
-amp-start 8s steps(1,end) 0s 1 normal both
}
@-webkit-keyframes
-amp-start{from{visibility:hidden}to{visibility:visible}}@-moz-keyframes
-amp-start{from{visibility:hidden}to{visibility:visible}}@-ms-keyframes
-amp-start{from{visibility:hidden}to{visibility:visible}}@-o-keyframes
-amp-start{from{visibility:hidden}to{visibility:visible}}@keyframes
-amp-start{from{visibility:hidden}to{visibility:visible}}
</style>
<noscript>
<style amp-boilerplate>
body{
-webkit-animation:none;-moz-animation:none;
-ms-animation:none;animation:none}
</style>
</noscript>
<script async custom-element="amp-selector"
src = "https://cdn.ampproject.org/v0/amp-selector-0.1.js">
</script>
<style amp-custom>
amp-selector:not([disabled])
amp-img[option][selected]:not([disabled]) {
outline-color: #b6A848;
outline-width: 2px;
}
</style>
</head>
<body>
<h3>Google AMP - Amp Selector</h3>
<amp-selector layout = "container">
<amp-img src = "images/christmas1.jpg"
width = "60"
height = "40"
option="1">
</amp-img>
<amp-img src="images/christmas2.jpg"
widt h = 60"
height = "40"
option = "2">
</amp-img>
<amp-img src = "images/christmas3.jpg"
width = "60"
height = "40"
option = "3">
</amp-img>
<amp-img src = "images/christmas4.jpg"
width = "60"
height = "40"
option = "4">
</amp-img>
</amp-selector>
</body>
</html>Вывод
Вывод приведенного выше кода показан ниже -
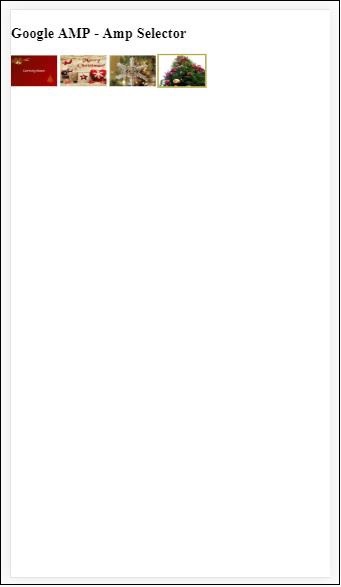
Обратите внимание, что в приведенном выше примере мы использовали amp-selector и использовали изображения внутри, чтобы показать параметры. Это селектор с одним выбором, поэтому вы можете выбрать любое изображение, как показано на выходе.
Множественный выбор селектора усилителя
В этом примере давайте отобразим amp-selector с изображениями с использованием нескольких атрибутов, мы можем выбрать несколько вариантов из селектора.
пример
<!doctype html>
<html amp lang = "en">
<head>
<meta charset = "utf-8 ">
<script async src = "https://cdn.ampproject.org/v0.js"></script>
<title>Google AMP - Amp Selector</title>
<link rel = "canonical" href = "http://example.ampproject.org/article-metadata.html">
<meta name = "viewport" content = "width = device-width,minimum-scale = 1,initial-scale =1">
<style amp-boilerplate>
body{-webkit-animation:
-amp-start 8s steps(1,end) 0s 1 normal both;-moz-animation:
-amp-start 8s steps(1,end) 0s 1 normal both;-ms-animation:
-amp-start 8s steps(1,end) 0s 1 normal both;animation:
-amp-start 8s steps(1,end) 0s 1 normal both}
@-webkit-keyframes
-amp-start{from{visibility:hidden}to{visibility:visible}}@-moz-keyframes
-amp-start{from{visibility:hidden}to{visibility:visible}}@-ms-keyframes
-amp-start{from{visibility:hidden}to{visibility:visible}}@-o-keyframes
-amp-start{from{visibility:hidden}to{visibility:visible}}@keyframes
-amp-start{from{visibility:hidden}to{visibility:visible}}
</style>
<noscript>
<style amp-boilerplate>
body{
-webkit-animation:none;-moz-animation:none;
-ms-animation:none;animation:none
}
</style>
</noscript>
<script async custom-element = "amp-selector"
src = "https://cdn.ampproject.org/v0/amp-selector-0.1.js">
</script>
<style amp-custom>
amp-selector:not([disabled])
amp-img[option][selected]:not([disabled]) {
outline-color: blue;
outline-width: 2px;
}
</style>
</head>
<body>
<h3>Google AMP - Amp Selector</h3>
<amp-selector layout = "container" multiple>
<amp-img src = "images/christmas1.jpg"
width = "60"
height ="40"
option = "1">
</amp-img>
<amp-img src="images/christmas2.jpg"
width = "60"
height = "40"
option = "2">
</amp-img>
<amp-img src ="images/christmas3.jpg"
width = "60"
height = "40"
option = "3">
</amp-img>
<amp-img src = "images/christmas4.jpg"
width = "60"
height = "40"
option = "4">
</amp-img>
</amp-selector>
</body>
</html>Вывод
Вывод кода, показанного выше, приведен ниже -
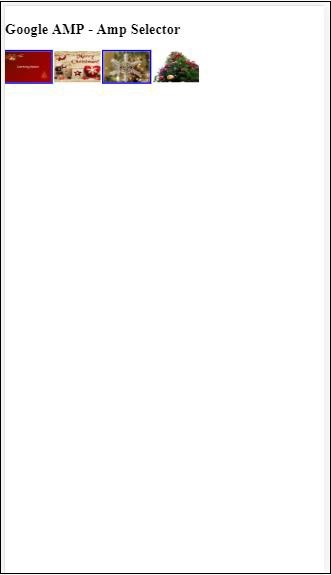
Мы также можем использовать amp-selector для отображения переключателей, как показано в приведенном ниже коде -
пример
<!doctype html>
<html amp lang = "en">
<head>
<meta charset = "utf-8">
<script async src = "https://cdn.ampproject.org/v0.js"></script>
<title>Google AMP - Amp Selector</title>
<link rel = "canonical" href = "http://example.ampproject.org/article-metadata.html">
<meta name = "viewport" content ="width = device-width,minimum-scale = 1,initial-scale = 1">
<style amp-boilerplate>
body{
-webkit-animation:
-amp-start 8s steps(1,end) 0s 1 normal both;-moz-animation:
-amp-start 8s steps(1,end) 0s 1 normal both;-ms-animation:
-amp-start 8s steps(1,end) 0s 1 normal both;animation:
-amp-start 8s steps(1,end) 0s 1 normal both
}
@-webkit-keyframes
-amp-start{from{visibility:hidden}to{visibility:visible}}@-moz-keyframes
-amp-start{from{visibility:hidden}to{visibility:visible}}@-ms-keyframes
-amp-start{from{visibility:hidden}to{visibility:visible}}@-o-keyframes
-amp-start{from{visibility:hidden}to{visibility:visible}}@keyframes
-amp-start{from{visibility:hidden}to{visibility:visible}}
</style>
<noscript>
<style amp-boilerplate>
body{
-webkit-animation:none;
-moz-animation:none;
-ms-animation:none;
animation:none}
</style>
</noscript>
<script async custom-element = "amp-selector"
src = "https://cdn.ampproject.org/v0/amp-selector-0.1.js">
</script>
<style amp-custom>
.radio-menu {
list-style: none;
}
.radio-menu [option][selected] {
outline: none;
}
.radio-menu [option] {
display: flex;
align-items: center;
}
.radio-menu [option]:before {
transition: background 0.25s ease-in-out;
content: "";
display: inline-block;
width: 24px;
height: 24px;
margin: 8px;
border-radius: 100%;
border: solid 1px black;
}
.radio-menu [option = red][selected]:before {
text-align: center;
content: "✓";
color: white;
background: red;
}
.radio-menu [option = green][selected]:before {
text-align: center;
content: "✓";
color: white;
background: green;
}
.radio-menu [option = blue][selected]:before {
text-align: center;
content: "✓";
color: white;
background: blue;
}
</style>
</head>
<body>
<h3>Google AMP - Amp Selector</h3>
<amp-selector class = "radio-menu" layout = "container" name = "my-selector">
<div option = "red">Red</div>
<div option = "green">Green</div>
<div option = "blue">Blue</div>
</amp-selector>
</body>
</html>Вывод
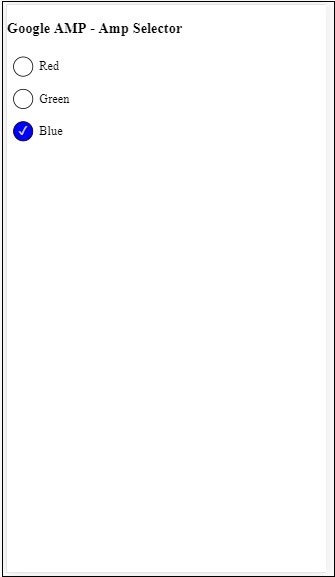
Тег Link в amp используется, чтобы сообщить поисковой системе Google о доступных страницах amp и non-amp. В этой главе давайте подробно обсудим аспекты, связанные с тегом Link, и то, как Google принимает решение об использовании amp-page и non-amp-page.
Обнаружение страницы AMP
Допустим, у вас есть сайт www.mypage.com. Новостная статья ссылается на страницу - www.mypage.com/news/myfirstnews.html.
Когда пользователь выполняет поиск в поисковой системе Google и получает не-amp-страницу, чтобы также получить ссылку на страницу amp, нам нужно указать URL-адрес amp, используя тег ссылки, как показано ниже -
пример
Page-url for Non amp-page
<link rel = "amphtml" href = "https://www.mypage.com/news/amp/myfirstnews_amp.html">Здесь rel = ”amphtml” указывает, что страница без AMP указывает на версию AMP, чтобы Google показывал правильную версию в зависимости от платформы.
Page-url for amp-page
<link rel = "canonical" href = "https://www.mypage.com/news/myfirstnews.html">Здесь rel = "canonical" указывается на странице amp, чтобы указать на стандартную версию html, чтобы Google показывал правильную версию в зависимости от платформы.
Если на вашем сайте только одна страница, которая является страницей amp, вы все равно не должны забывать добавить rel = ”canonical”, который будет указывать на себя -
<link rel = "canonical" href = "https://www.mypage.com/news/amp/myfirstnews_amp.html">На следующей диаграмме показана ссылка на rel = "amphtml", указывающая на страницу amp, и на rel = "canonical", указывающую на стандартную страницу html.
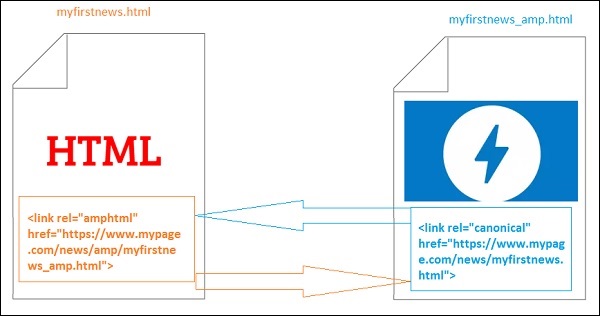
Шрифты с использованием ссылки
Шрифты можно загружать извне, используя ссылку, как показано ниже -
<link rel = "stylesheet" href = "https://fonts.googleapis.com/css?family=Roboto">Обратите внимание, что разрешены только источники из белого списка. Список источников из белого списка, из которых мы можем получить шрифты, показан здесь -
Fonts.com - https://fast.fonts.net
Google Fonts - https://fonts.googleapis.com
Font Awesome - https://maxcdn.bootstrapcdn.com
Typekit - https://use.typekit.net/kitId.css (замените kitId соответственно)
Рабочий пример с использованием rel = "canonical" и rel = "stylesheet" показан ниже.
пример
<!doctype html>
<html amp>
<head>
<meta charset ="utf-8">
<title>Amp Sample Page</title>
<link rel = "canonical" href = "amppage.html">
<meta name = "viewport" content = "width = device-width,minimum-scale=1,initial-scale = 1">
<style amp-custom>
h1 {color: red}
</style>
<style amp-boilerplate>
body{
-webkit-animation:
-amp-start 8s steps(1,end) 0s 1 normal both;-moz-animation:
-amp-start 8s steps(1,end) 0s 1 normal both;-ms-animation:
-amp-start 8s steps(1,end) 0s 1 normal both;animation:
-amp-start 8s steps(1,end) 0s 1 normal both
}
@-webkit-keyframes
-amp-start{from{visibility:hidden}to{visibility:visible}}@-moz-keyframes
-amp-start{from{visibility:hidden}to{visibility:visible}}@-ms-keyframes
-amp-start{from{visibility:hidden}to{visibility:visible}}@-o-keyframes
-amp-start{from{visibility:hidden}to{visibility:visible}}@keyframes
-amp-start{from{visibility:hidden}to{visibility:visible}}
</style>
<noscript>
<style amp-boilerplate>
body{
-webkit-animation:none;
-moz-animation:none;
-ms-animation:none;
animation:none
}
</style>
</noscript>
<script async src = "https://cdn.ampproject.org/v0.js"></script>
<link rel = "stylesheet" href = "https://fonts.googleapis.com/css?family=Roboto">
</head>
<body>
<h1>Amp Sample Page</h1>
<p>
<amp-img src = "images/christmas1.jpg"
width = "300" height = "250"
layout = "responsive">
</amp-img>
</p>
<p style = "font-family: 'Roboto'; font-size:25px;">
Welcome to Amp Page
</p>
</body>
</html>Вывод
Результат кода, показанного выше, показан ниже -
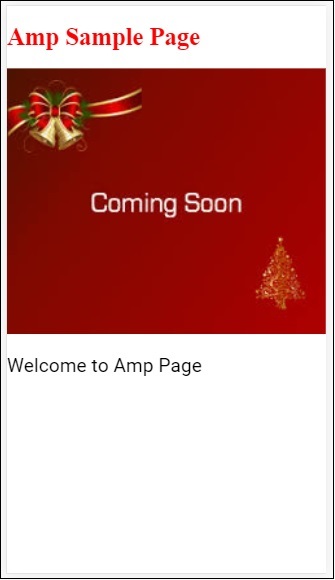
Шрифт Amp - это компонент amp в amp, который в основном помогает запускать и отслеживать пользовательские шрифты на странице amp. В этой главе подробно рассматривается amp-font.
Для работы с amp-font нам нужно добавить следующий файл javascript -
<script async custom-element = "amp-font"
src = "https://cdn.ampproject.org/v0/amp-font-0.1.js">
</script>Компонент amp-font используется для управления временем, затрачиваемым на загрузку шрифта. У него есть атрибут тайм-аута, который занимает время в миллисекундах, по умолчанию это 3000 мс. Компонент позволяет добавлять / удалять классы из document.documentElement или document.body в зависимости от того, загружен ли требуемый шрифт или находится в состоянии ошибки.
Формат тега amp-font показан ниже -
<amp-font
layout = "nodisplay"
font-family = "Roboto Italic"
timeout = "2000"
on-error-remove-class = "robotoitalic-loading"
on-error-add-class = "robotoitalic-missing"
on-load-remove-class = "robotoitalic-loading"
on-load-add-class = "robotoitalic-loaded">
</amp-font>Рабочий пример того, как использовать amp-font на страницах amp, показан здесь:
пример
<!doctype html>
<html amp lang = "en">
<head>
<meta charset = "utf-8">
<script async src = "https://cdn.ampproject.org/v0.js"></script>
<title>Google AMP - Amp Font</title>
<link rel = "canonical" href = "http://example.ampproject.org/article-metadata.html">
<meta name = "viewport" content = "width = device-width,minimum-scale = 1,initial-scale = 1">
<style amp-boilerplate>
body{
-webkit-animation:
-amp-start 8s steps(1,end) 0s 1 normal both;-moz-animation:
-amp-start 8s steps(1,end) 0s 1 normal both;-ms-animation:
-amp-start 8s steps(1,end) 0s 1 normal both;animation:
-amp-start 8s steps(1,end) 0s 1 normal both
}
@-webkit-keyframes
-amp-start{from{visibility:hidden}to{visibility:visible}}@-moz-keyframes
-amp-start{from{visibility:hidden}to{visibility:visible}}@-ms-keyframes
-amp-start{from{visibility:hidden}to{visibility:visible}}@-o-keyframes
-amp-start{from{visibility:hidden}to{visibility:visible}}@keyframes
-amp-start{from{visibility:hidden}to{visibility:visible}}
</style>
<noscript>
<style amp-boilerplate>
body{
-webkit-animation:none;
-moz-animation:none;
-ms-animation:none;
animation:none}
</style>
</noscript>
<cript async custom-element = "amp-font"
src = "https://cdn.ampproject.org/v0/amp-font-0.1.js"
></script>
<style amp-custom>
@font-face {
font-family: 'This font is not available';
font-style: normal;
font-weight: 300;
src: url(fonts/MissingFont.ttf) format('truetype');
}
.font-missing {
color:red;
font-size:25px;
}
</style>
</head>
<body>
<h1>Google AMP - Amp Font</h1>
<amp-font
layout = "nodisplay"
font-family = "Font Does Not exist"
timeout = "2000"
on-error-remove-class = "font-missing"
on-error-add-class = "font-error"
on-load-remove-class = "font-missing"
on-load-add-class = "font-loaded">
</amp-font>
<p class = "font-missing">
Example of amp-font component to show how
attributes on-error-remove-class,
on-error-add-class, on-load-remove-class
and on-load-add-class works when the font
file to be loaded does not exist.
</p>
</body>
</html>Вывод
Результат примера кода, приведенного выше, показан ниже -
Пример amp-font при успешной загрузке файла шрифта показан здесь -
пример
<!doctype html>
<html amp lang = "en">
<head>
<meta charset = "utf-8">
<script async src = "https://cdn.ampproject.org/v0.js"></script>
<title>Google AMP - Amp Font</title>
<link rel = "canonical" href = "http://example.ampproject.org/article-metadata.html">
<meta name = "viewport" content = "width = device-width,minimum-scale = 1,initial-scale = 1">
<style amp-boilerplate>
body{
-webkit-animation:
-amp-start 8s steps(1,end) 0s 1 normal both;-moz-animation:
-amp-start 8s steps(1,end) 0s 1 normal both;-ms-animation:
-amp-start 8s steps(1,end) 0s 1 normal both;animation:
-amp-start 8s steps(1,end) 0s 1 normal both
}
@-webkit-keyframes
-amp-start{from{visibility:hidden}to{visibility:visible}}@-moz-keyframes
-amp-start{from{visibility:hidden}to{visibility:visible}}@-ms-keyframes
-amp-start{from{visibility:hidden}to{visibility:visible}}@-o-keyframes
-amp-start{from{visibility:hidden}to{visibility:visible}}@keyframes
-amp-start{from{visibility:hidden}to{visibility:visible}}
</style>
<noscript>
<style amp-boilerplate>
body{
-webkit-animation:none;
-moz-animation:none;
-ms-animation:none;
animation:none}
</style>
</noscript>
<script async custom-element = "amp-font"
src = "https://cdn.ampproject.org/v0/amp-font-0.1.js">
</script>
<style amp-custom>
@font-face {
font-family: 'This font is not available';
font-style: normal;
font-weight: 300;
src: url(fonts/MissingFont.ttf)
format('truetype');
}
@font-face {
font-family: 'Roboto Italic';
font-style: normal;
font-weight: 300;
src:url(fonts/Roboto-Italic.ttf) format('truetype');
}
.font-missing {
color:red;
font-size:25px;
}
.robotoitalic-loading {
color: green;
}
.robotoitalic-loaded {
font-size:25px;
color: blue;
}
.robotoitalic-missing {
color: red;
}
.robotoitalic {
font-family: 'Roboto Italic';
}
</style>
</head>
<body>
<h1>Google AMP - Amp Font</h1>
<amp-font
layout = "nodisplay"
font-family = "Font Does Not exist"
timeout = "2000"
on-error-remove-class = "font-missing"
on-error-add-class = "font-error"
on-load-remove-class = "font-missing"
on-load-add-class = "font-loaded">
</amp-font>
<p class="font-missing">
Example of amp-font component to show
how attributes on-error-remove-class,
on-error-add-class, on-load-remove-class
and on-load-add-class works when the
font file to be loaded does not exist.
</p>
<amp-font
layout = "nodisplay"
font-family = "Roboto Italic"
timeout = "2000"
on-error-remove-class = "robotoitalic-
loading"
on-error-add-class = "robotoitalic-missing"
on-load-remove-class = "robotoitalic-loading"
on-load-add-class = "robotoitalic-loaded">
</amp-font>
<p class = "robotoitalic">
Example of amp-font component to show how
attributes on-error-remove-class,
on-error-add-class, on-load-remove-class
and on-load-add-class works when the font
file exists and loads fine.
</p>
</body>
</html>Вывод
Результат примера кода, приведенного выше, показан ниже -
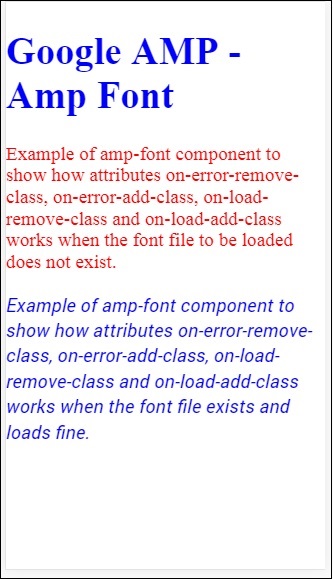
В приведенном выше примере показано, как работать с такими атрибутами шрифта, как font-family,timeout,on-error-remove-class,on-error-add-class,on-load-remove-class,on-load-add-class.Классы решают, есть ли ошибка или успешная загрузка шрифта.
Amp-list - это компонент amp, который вызывает конечную точку CORS json и отображает данные в форме файла json внутри шаблона. Разберемся в этом на рабочих примерах.
Для работы с amp-list нам нужно включить следующий скрипт -
<script async custom-element = "amp-list"
src = "https://cdn.ampproject.org/v0/amp-list-0.1.js">
</script>Это формат тега amp-list -
<amp-list width = "auto" height = "100"
layout = "fixed-height" src = "amplist.json" class = "m1">
<template type = "amp-mustache">
<div class = "images_for_display">
<amp-img width = "150"
height = "100"
alt = "{{title}}"
src = "{{url}}">
</amp-img>
</div>
</template>
</amp-list>Src, используемый для amp-list, представляет собой файл json, в котором есть сведения, которые должны быть перечислены. Мы можем использовать обычные html-теги или amp-компоненты внутри amp-list для отображения данных из json-файла. Тип шаблона amp-mustache используется для привязки отображаемых данных.
Давайте разберемся в этом с помощью рабочего примера, как показано ниже -
пример
<!doctype html>
<html amp lang = "en">
<head>
<meta charset = "utf-8">
<script async src = "https://cdn.ampproject.org/v0.js"></script>
<title>Google AMP - Amp List</title>
<link rel = "canonical" href = "http://example.ampproject.org/article-metadata.html">
<meta name = "viewport" content = "width = device-width,minimum-scale = 1,initial-scale = 1">
<style amp-boilerplate>
body{-webkit-animation:
-amp-start 8s steps(1,end) 0s 1 normal both;-moz-animation:
-amp-start 8s steps(1,end) 0s 1 normal both;-ms-animation:
-amp-start 8s steps(1,end) 0s 1 normal both;animation:
-amp-start 8s steps(1,end) 0s 1 normal both
}
@-webkit-keyframes
-amp-start{from{visibility:hidden}to{visibility:visible}}@-moz-keyframes
-amp-start{from{visibility:hidden}to{visibility:visible}}@-ms-keyframes
-amp-start{from{visibility:hidden}to{visibility:visible}}@-o-keyframes
-amp-start{from{visibility:hidden}to{visibility:visible}}@keyframes
-amp-start{from{visibility:hidden}to{visibility:visible}}
</style>
<noscript>
<style amp-boilerplate>
body{
-webkit-animation:none;-moz-animation:none;
-ms-animation:none;animation:none}
</style>
</noscript>
<script async custom-element = "amp-list"
src = "https://cdn.ampproject.org/v0/amp-list-0.1.js">
</script>
<script async custom-template = "amp-mustache"
src ="https://cdn.ampproject.org/v0/amp-mustache-0.2.js">
</script>
<style amp-custom>
amp-img {
border: 1px solid #ddd;
border-radius: 4px;
padding: 5px;
}
</style>
</head>
<body>
<h3>Google AMP - Amp List</h3>
<amp-list width = "auto" height = "100"
layout = "fixed-height" src = "amplist.json" class = "m1">
<template type = "amp-mustache">
<div class = "images_for_display">
<amp-img width = "150"
height = "100"
alt = "{{title}}"
src = "{{url}}">
</amp-img>
</div>
</template>
</amp-list>
</body>
</html>Вывод
Результат рабочего примера, показанного выше, показан ниже -
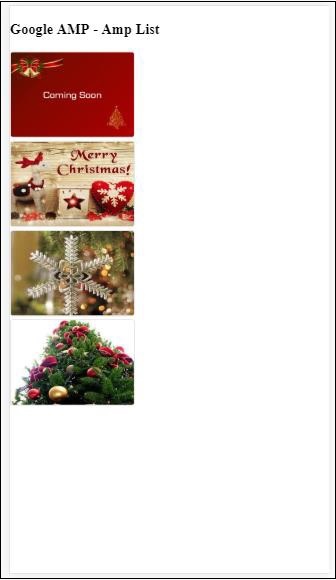
Файл json, используемый в приведенном выше рабочем примере, показан здесь -
{
"items": [
{
"title": "Christmas Image 1",
"url": "images/christmas1.jpg"
},
{
"title": "Christmas Image 2",
"url": "images/christmas2.jpg"
},
{
"title": "Christmas Image 3",
"url": "images/christmas3.jpg"
},
{
"title": "Christmas Image 4",
"url": "images/christmas4.jpg"
}
]
}Мы можем обновить список, используя событие в amp-list, как показано в приведенном ниже коде -
пример
<!doctype html>
<html amp lang = "en">
<head>
<meta charset = "utf-8">
<script async src = "https://cdn.ampproject.org/v0.js"></script>
<title>Google AMP - Amp List</title>
<link rel = "canonical" href = "http://example.ampproject.org/article-metadata.html">
<meta name = "viewport" content = "width = device-width,minimum-scale = 1,initial-scale = 1">
<style amp-boilerplate>
body{
-webkit-animation:
-amp-start 8s steps(1,end) 0s 1 normal both;-moz-animation:
-amp-start 8s steps(1,end) 0s 1 normal both;-ms-animation:
-amp-start 8s steps(1,end) 0s 1 normal both;animation:
-amp-start 8s steps(1,end) 0s 1 normal both
}
@-webkit-keyframes
-amp-start{from{visibility:hidden}to{visibility:visible}}@-moz-keyframes
-amp-start{from{visibility:hidden}to{visibility:visible}}@-ms-keyframes
-amp-start{from{visibility:hidden}to{visibility:visible}}@-o-keyframes
-amp-start{from{visibility:hidden}to{visibility:visible}}@keyframes
-amp-start{from{visibility:hidden}to{visibility:visible}}
</style>
<noscript>
<style amp-boilerplate>
body{
-webkit-animation:none;
-moz-animation:none;
-ms-animation:none;
animation:none}
</style>
</noscript>
<script async custom-element = "amp-list"
src = "https://cdn.ampproject.org/v0/amp-list-0.1.js">
</script>
<script async custom-template = "amp-mustache"
src = "https://cdn.ampproject.org/v0/amp-mustache-0.2.js">
</script>
<style amp-custom>
amp-img {
border: 1px solid #ddd;
border-radius: 4px;
padding: 5px;
}
button{
background-color: #ACAD5C;
color: white;
padding: 12px 20px;
border: none;
border-radius: 4px;
cursor: pointer;
float: right;
}
</style>
</head>
<body>
<h3>Google AMP - Amp List</h3>
<button on = "tap:amplist.refresh">Refresh Images</button>
<amp-list id = "amplist" width = "auto" height = "100"
layout = "fixed-height" src = "amplist.json" class = "m1">
<template type = "amp-mustache">
<div class = "images_for_display">
<amp-img width = "150"
height = "100"
alt = "{{title}}"
src = "{{url}}"></amp-img>
</div>
</template>
</amp-list>
</body>
</html>Вывод
Результат для рабочего примера, приведенного выше, показан здесь -
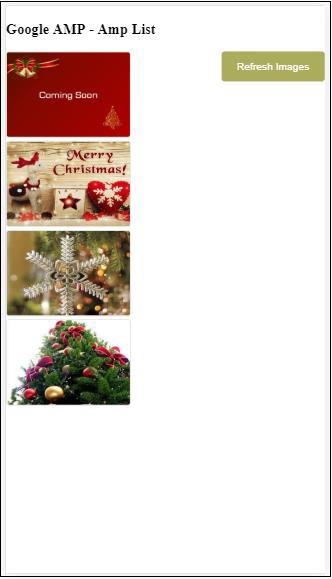
Добавлена кнопка, которая при нажатии вызывает действие обновления с использованием события включения, как показано ниже -
<button on = "tap:amplist.refresh">
Refresh Images
</button>
//amplist is the id used for amp-listПри нажатии кнопки снова вызывается файл json и загружается его содержимое. Если изображения уже загружены, они будут кэшированы.
Google amp-user-notification используется для показа пользователю запрещенных сообщений диалогового окна. Мы можем использовать его для уведомления пользователя о файлах cookie на странице.
Для работы с amp-user-notification нам нужно добавить на страницу следующий скрипт -
<script async custom-element = "amp-user-notification"
src = "https://cdn.ampproject.org/v0/amp-user-notification-0.1.js">
</script>Формат тега Amp-user-notification -
<amp-user-notification id = "my-notification" layout = "nodisplay">
<div>Example of amp-user-notification.
<button on = "tap:my-notification.dismiss">I accept
</button>
</div>
</amp-user-notification>Давайте разберемся с amp-user-notification на рабочем примере -
пример
<!doctype html>
<html amp lang = "en">
<head>
<meta charset = "utf-8">
<script async src = "https://cdn.ampproject.org/v0.js"></script>
<title>Google AMP - Amp Selector</title>
<link rel = "canonical" href = " http://example.ampproject.org/article-metadata.html">
<meta name = "viewport" content = "width = device-width,minimum-scale = 1,initial-scale = 1">
<style amp-boilerplate>
body{
-webkit-animation:
-amp-start 8s steps(1,end) 0s 1 normal both;-moz-animation:
-amp-start 8s steps(1,end) 0s 1 normal both;-ms-animation:
-amp-start 8s steps(1,end) 0s 1 normal both;animation:
-amp-start 8s steps(1,end) 0s 1 normal both
}
@-webkit-keyframes
-amp-start{from{visibility:hidden}to{visibility:visible}}@-moz-keyframes
-amp-start{from{visibility:hidden}to{visibility:visible}}@-ms-keyframes
-amp-start{from{visibility:hidden}to{visibility:visible}}@-o-keyframes
-amp-start{from{visibility:hidden}to{visibility:visible}}@keyframes
-amp-start{from{visibility:hidden}to{visibility:visible}}
</style>
<noscript>
<style amp-boilerplate>
body{
-webkit-animation:none;
-moz-animation:none;
-ms-animation:none
animation:none
}
</style>
</noscript>
<script async custom-element = "amp-user-notification"
src = "https://cdn.ampproject.org/v0/amp-user-notification-0.1.js">
</script>
<style amp-custom>
div {
font-size: 15px;
background-color : #ccc;
padding: 10px 10px;
border-radius: 2px;
}
button{
background-color: #ACAD5C;
color: white;
cursor: pointer;
float: right;
}
</style>
</head>
<body>
<h3>Google AMP - Amp User Notification</h3>
<amp-user-notification
id = "my-notification"
layout = "nodisplay">
<div>Example of amp-user-notification.
<button on = "tap:my-notification.dismiss">I accept
</button>
</div>
</amp-user-notification>
</body>
</html>Вывод
Результат рабочего примера кода, приведенного выше, показан ниже -
Как только пользователь нажимает кнопку, уведомление закрывается. После закрытия уведомление не будет отображаться, даже если вы перезагрузите страницу.
Данные уведомления пользователя хранятся в локальном хранилище браузера. Если локальное хранилище очищено и страница обновлена, вы снова сможете увидеть уведомление. Вы можете попробовать то же самое, используяlocalStorage.clear() в консоли браузера.
С помощью dismiss действие уведомление можно отклонить, используя действие на кнопке следующим образом
<button on = "tap:my-notification.dismiss">
I accept
</button>Когда пользователь нажимает на кнопку, уведомление будет закрыто.
Следующая страница Amp - это компонент amp, который может динамически загружать больше страниц, когда пользователь достигает конца документа. В этой главе подробно рассматривается эта концепция.
Для работы с компонентом amp-next-page нам нужно добавить следующий скрипт -
<script async custom-element = "amp-next-page"
src = "https://cdn.ampproject.org/v0/amp-next-page-0.1.js">
</script>Также amp-next-page не запускается полностью, поэтому, чтобы тестовая страница работала, добавьте следующий метатег -
<meta name = "amp-experiments-opt-in" content = "amp-next-page">Чтобы загружать страницы динамически, нам нужно передать URL-адреса страниц тегу скрипта type = ”application / json”, как показано ниже -
<amp-next-page>
<script type = "application/json">
{
"pages": [
{
"title": "Page 2",
"image": "images/christmas1.jpg",
"ampUrl": "ampnextpage1.html"
},
{
"title": "Page 3",
"image": "images/christmas1.jpg",
"ampUrl": "ampnextpage2.html"
}
]
}
</script>
</amp-next-page>В указанном выше теге мы пытаемся загрузить 2 страницы ampnextpage1.html и ampnextpage2.html.
Теперь давайте посмотрим на окончательный результат. Все страницы, которые необходимо загрузить, необходимо добавить в массив страниц с заголовком, изображением и ampUrl.
пример
<!doctype html>
<html amp>
<head>
<meta charset = "utf-8">
<title>Google Amp - Next Page</title>
<link rel = "canonical" href = "ampnextpage.html">
<meta name = "amp-experiments-opt-in" content = "amp-next-page">
<meta name = "viewport" content ="width = device-width,
minimum-scale = 1,initial-scale = 1">
<style amp-boilerplate>
body {
-webkit-animation:
-amp-start 8s steps(1,end) 0s 1 normal both;-moz-animation:
-amp-start 8s steps(1,end) 0s 1 normal both;-ms-animation:
-amp-start 8s steps(1,end) 0s 1 normal both;animation:
-amp-start 8s steps(1,end) 0s 1 normal both
}
@-webkit-keyframes
-amp-start{from{visibility:hidden}to{visibility:visible}}@-moz-keyframes
-amp-start{from{visibility:hidden}to{visibility:visible}}@-ms-keyframes
-amp-start{from{visibility:hidden}to{visibility:visible}}@-o-keyframes
-amp-start{from{visibility:hidden}to{visibility:visible}}@keyframes
-amp-start{from{visibility:hidden}to{visibility:visible}}
</style>
<noscript>
<style amp-boilerplate>
body{
-webkit-animation:none;
-moz-animation:none;
-ms-animation:none;
animation:none
}
</style>
</noscript>
<script async src="https://cdn.ampproject.org/v0.js">
</script>
<script async custom-element = "amp-next-page"
src = "https://cdn.ampproject.org/v0/amp-next-page-0.1.js">
</script>
</head>
<body>
<h1>Google Amp - Next Page</h1>
<h1>Page 1</h1>
<p>Start of page 1</p>
<p>This content is loaded from page 1</p>
<p>This content is loaded from page 1</p>
<p>This content is loaded from page 1</p>
<p>This content is loaded from page 1</p>
<p>This content is loaded from page 1</p>
<p>This content is loaded from page 1</p>
<p>This content is loaded from page 1</p>
<p>This content is loaded from page 1</p>
<p>This content is loaded from page 1</p>
<p>This content is loaded from page 1</p>
<p>This content is loaded from page 1</p>
<p>This content is loaded from page 1</p>
<p>This content is loaded from page 1</p>
<p>This content is loaded from page 1</p>
<p>This content is loaded from page 1</p>
<p>This content is loaded from page 1</p>
<p>This content is loaded from page 1</p>
<p>This content is loaded from page 1</p>
<p>This content is loaded from page 1</p>
<p>This content is loaded from page 1</p>
<p>This content is loaded from page 1</p>
<p>This content is loaded from page 1</p>
<p>End of page 1</p>
<amp-next-page>
<script type = "application/json">
{
"pages": [
{
"title": "Page 2",
"image": "images/christmas1.jpg",
"ampUrl": "ampnextpage1.html"
},
{
"title": "Page 3",
"image": "images/christmas1.jpg",
"ampUrl": "ampnextpage2.html"
}
]
}
</script>
</amp-next-page>
</body>
</html>Вывод


Вы можете заметить, что по мере прокрутки отображается страница, которая будет загружена следующей, а также изменяется URL-адрес страницы в адресной строке.
В этой главе будут обсуждаться все общие атрибуты, используемые amp-components.
Список общих атрибутов следующий -
- fallback
- heights
- layout
- media
- noloading
- on
- placeholder
- sizes
- ширина и высота
резервный атрибут
Атрибут резервного копирования в основном используется, когда браузер не поддерживает используемый элемент, имеет проблемы с загрузкой файла или ошибки с используемым файлом.
Например, вы используете amp-video, и с медиафайлом возникают проблемы в браузере, поэтому в таких случаях мы можем указать резервный атрибут и отобразить сообщение о том, что медиафайл не может быть воспроизведен или не поддерживается браузером, вместо отображения сообщение об ошибке на странице.
Резервный вариант, используемый в amp-video
<amp-video controls
width = "640"
height = "360"
layout = "responsive"
poster = "images/videoposter.png">
<source src = "video/bunny.webm" type = "video/webm" />
<source src = "video/samplevideo.mp4" type = "video/mp4" />
<div fallback>
<p>This browser does not support the video element.</p>
</div>
</amp-video>Давайте разберемся с резервным вариантом рабочей ОС на примере -
пример
<!doctype html>
<html amp lang = "en">
<head>
<meta charset = "utf-8">
<script async src = "https://cdn.ampproject.org/v0.js"></script>
<title>Google AMP - Amp Video</title>
<link rel = "canonical" href = " http://example.ampproject.org/article-metadata.html">
<meta name = "viewport" content = "width = device-width,minimum-scale = 1,initial-scale = 1">
<style amp-boilerplate>
body{
-webkit-animation:
-amp-start 8s steps(1,end) 0s 1 normal both;-moz-animation:
-amp-start 8s steps(1,end) 0s 1 normal both;-ms-animation:
-amp-start 8s steps(1,end) 0s 1 normal both;animation:
-amp-start 8s steps(1,end) 0s 1 normal both
}
@-webkit-keyframes
-amp-start{from{visibility:hidden}to{visibility:visible}}@-moz-keyframes
-amp-start{from{visibility:hidden}to{visibility:visible}}@-ms-keyframes
-amp-start{from{visibility:hidden}to{visibility:visible}}@-o-keyframes
-amp-start{from{visibility:hidden}to{visibility:visible}}@keyframes
-amp-start{from{visibility:hidden}to{visibility:visible}}
</style>
<noscript>
<style amp-boilerplate>
body{
-webkit-animation:none;-moz-animation:none;
-ms-animation:none;animation:none
}
</style>
</noscript>
<script async custom-element = "amp-video"
src = "https://cdn.ampproject.org/v0/amp-video-0.1.js">
</script>
</head>
<body>
<h3>Google AMP - Amp Video</h3>
<amp-video controls
width = "640"
height = "360"
layout = "responsive"
poster = "images/videoposter.png">
<source src = "video/bunny.webm"type="video/webm" />
<source src = "video/samplevideo.mp4"type = "video/mp4" />
<div fallback>
<p>This browser does not support the video element.</p>
</div>
</amp-video>
</body>
</html>Вывод

Атрибут высоты
Этот атрибут в основном поддерживается для адаптивного макета. Вы можете использовать мультимедийное выражение для атрибута высоты, и оно применяется к высоте элемента. Он также принимает процентные значения, поэтому высота рассчитывается на основе заданного процентного значения ширины.
пример
<!doctype html>
<html amp lang = "en">
<head>
<meta charset = "utf-8">
<script async src = "https://cdn.ampproject.org/v0.js"></script>
<title>Google AMP - heights attribute</title>
<link rel = "canonical" href = "http://example.ampproject.org/article-metadata.html">
<meta name = "viewport" content = "width=device-width,minimum-scale = 1,initial-scale = 1">
<style amp-boilerplate>
body{
-webkit-animation:
-amp-start 8s steps(1,end) 0s 1 normal both;-moz-animation:
-amp-start 8s steps(1,end) 0s 1 normal both;-ms-animation:
-amp-start 8s steps(1,end) 0s 1 normal both;animation:
-amp-start 8s steps(1,end) 0s 1 normal both
}
@-webkit-keyframes
-amp-start{from{visibility:hidden}to{visibility:visible}}@-moz-keyframes
-amp-start{from{visibility:hidden}to{visibility:visible}}@-ms-keyframes
-amp-start{from{visibility:hidden}to{visibility:visible}}@-o-keyframes
-amp-start{from{visibility:hidden}to{visibility:visible}}@keyframes
-amp-start{from{visibility:hidden}to{visibility:visible}}
</style>
<noscript>
<style amp-boilerplate>
body{
-webkit-animation:none;-moz-animation:none;
-ms-animation:none;animation:none
}
</style>
</noscript>
<style amp-custom>
amp-img {
border: 1px solid black;
border-radius: 4px;
padding: 5px;
}
h1{font-family: "Segoe UI",Arial,sans-serif;font-weight: 400;margin: 10px 0;}
</style>
</head>
<body>
<h1>Google AMP - heights attribute</h1>
<amp-img src = "images/christmas1.jpg"
width = "320" height = "256"
heights = "(min-width:500px) 200px, 80%">
</amp-img>
</body>
</html>Вывод

атрибут макета
AMP-Layout - одна из важных функций, доступных в google-amp. Компоновка усилителя обеспечивает правильную визуализацию компонентов усилителя при загрузке страницы, не вызывая мерцания или проблем с прокруткой. Он также проверяет рендеринг страницы перед выполнением любых других удаленных ресурсов, таких как http-запрос изображений, вызовы данных.
Список макетов, поддерживаемых усилителем, выглядит следующим образом:
- Нет
- Container
- fill
- fixed
- fixed-height
- flex-item
- intrinsic
- nodisplay
- Responsive
Подробнее об этом вы узнаете в главе Google AMP − Layout этого учебника.
Давайте разберемся в работе layout = "responsive" с помощью примера, как показано -
пример
<!doctype html>
<html amp lang = "en">
<head>
<meta charset = "utf-8">
<script async src = "https://cdn.ampproject.org/v0.js"></script>
<title>Google AMP - Image>/title>
<link rel = "canonical" href = " http://example.ampproject.org/article-metadata.html">
<meta name = "viewport" content = "width = device-width,minimum-scale = 1,initial-scale = 1">
<style amp-boilerplate>
body {
-webkit-animation:
-amp-start 8s steps(1,end) 0s 1 normal both;-moz-animation:
-amp-start 8s steps(1,end) 0s 1 normal both;-ms-animation:
-amp-start 8s steps(1,end) 0s 1 normal both;animation:
-amp-start 8s steps(1,end) 0s 1 normal both
}
@-webkit-keyframes
-amp-start{from{visibility:hidden}to{visibility:visible}}@-moz-keyframes
-amp-start{from{visibility:hidden}to{visibility:visible}}@-ms-keyframes
-amp-start{from{visibility:hidden}to{visibility:visible}}@-o-keyframes
-amp-start{from{visibility:hidden}to{visibility:visible}}@keyframes
-amp-start{from{visibility:hidden}to{visibility:visible}}
</style>
<noscript>
<style amp-boilerplate>
body {
-webkit-animation:none;-moz-animation:none;
-ms-animation:none;animation:none
}
</style>
</noscript>
<style amp-custom>
amp-img {
border: 1px solid black;
border-radius: 4px;
padding: 5px;
}
displayitem {
display: inline-block;
width: 200px;
height:200px;
margin: 5px;
}
h1{font-family: "Segoe
UI",Arial,sans-serif;font-weight: 400;margin: 10px 0;}
</style>
</head>
<body>
<h1>Google AMP - Layout = responsive Image Example>/h1>
<div class = "displayitem">
<amp-img alt = "Beautiful Flower"
src = "images/flower.jpg"
width = "246"
height = "205"
layout = "responsive">
</amp-img>
</div>
</body>
</html>Вывод
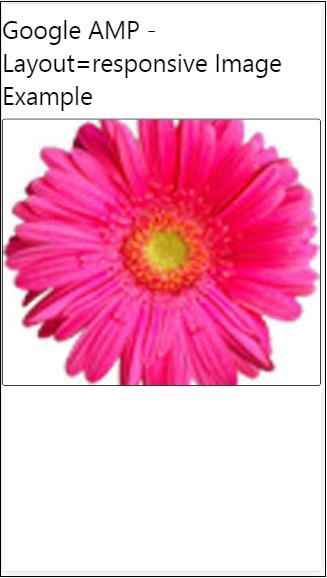
Атрибут СМИ
Этот атрибут можно использовать на большинстве компонентов усилителя. Требуется медиа-запрос, и если значение не соответствует, компонент не будет отображаться.
Давайте разберемся с работой атрибута media на примере -
пример
<!doctype html>
<html amp lang = "en">
<head>
<meta charset = "utf-8">
<script async src = "https://cdn.ampproject.org/v0.js"></script>
<title>Google AMP - Image</title>
<link rel = "canonical" href = " http://example.ampproject.org/article-metadata.html">
<meta name = "viewport" content = "width = device-width,minimum-scale = 1,initial-scale = 1">
<style amp-boilerplate>
body{
-webkit-animation:
-amp-start 8s steps(1,end) 0s 1 normal both;-moz-animation:
-amp-start 8s steps(1,end) 0s 1 normal both;-ms-animation:
-amp-start 8s steps(1,end) 0s 1 normal both;animation:
-amp-start 8s steps(1,end) 0s 1 normal both
}
@-webkit-keyframes
-amp-start{from{visibility:hidden}to{visibility:visible}}@-moz-keyframes
-amp-start{from{visibility:hidden}to{visibility:visible}}@-ms-keyframes
-amp-start{from{visibility:hidden}to{visibility:visible}}@-o-keyframes
-amp-start{from{visibility:hidden}to{visibility:visible}}@keyframes
-amp-start{from{visibility:hidden}to{visibility:visible}}
</style>
<noscript>
<style amp-boilerplate>
body {
-webkit-animation:none;-moz-animation:none;
-ms-animation:none;animation:none
}
</style>
</noscript>
<style amp-custom>
amp-img {
border: 1px solid black;
border-radius: 4px;
padding: 5px;
}
h1{font-family: "Segoe
UI",Arial,sans-serif;font-weight: 400;margin: 10px 0;}
</style>
</head>
<body>
<h1>Google AMP - Media Attribute</h1>
<div class = "displayitem">
<amp-img
media = "(min-width: 600px)"
src = "images/christmas1.jpg"
width = "466"
height = "355"
layout = "responsive">
</amp-img>
</div>
</body>
</html>Мы использовали атрибут media в теге <amp-img>, как показано ниже -
<amp-img
media = "(min-width: 600px)"
src = "images/christmas1.jpg"
width = "466"
height = "355"
layout = "responsive">
</amp-img>Обратите внимание, что изображение не будет отображаться, если ширина экрана меньше 600 пикселей. Мы будем использовать мобильный режим эмулятора Google для тестирования примера.
Выход на смартфон
Мы проверили на устройстве изображение не видно, так как ширина устройства меньше 600 пикселей. Если мы проверим на планшете, мы получим результат, как показано ниже -
Вывод на IPAD

Атрибут загрузки
Компоненты усилителя, такие как <amp-img>, <amp-video>, <amp-facebook>, показывают индикатор загрузки до того, как фактический контент будет загружен и показан пользователю.
Чтобы перестать показывать индикатор загрузки, мы можем использовать атрибут noloading следующим образом:
<amp-img src = "images/christmas1.jpg"
noloading
height = "300"
width = "250"
layout = "responsive">
</amp-img>По атрибуту
Атрибут on используется в элементах для обработки событий и действий в amp-components. Синтаксис для использования атрибута следующий:
Синтаксис -
on = "eventName:elementId[.methodName[(arg1 = value, arg2 = value)]]"Подробности переданы в on атрибут следующие -
eventName- принимает имя события, доступного для amp-component. Например, для форм мы можем использовать submit-success, submit-error eventNames.
elementId- Принимает идентификатор элемента, для которого необходимо вызвать событие. Это может быть идентификатор формы, для которой мы хотим знать об успехе или ошибке.
methodName - Принимает имя метода, который будет вызываться при возникновении события.
arg=value - Это принимает аргументы с формой ключ = значение, переданные методу.
Также можно передать несколько событий в атрибут On следующим образом:
on = "submit-success:lightbox;submit-error:lightbox1"Note - Если событий несколько, они передаются в атрибут on и разделяются точкой с запятой (;).
Атрибут Действия
Действия в основном используются с атрибутом on, а синтаксис следующий:
on = "tab:elementid.hide;"Мы можем передать несколько действий следующим образом -
on = "tab:elementid.open;tab:elementid.hide;”Elementid - это идентификатор элемента, над которым должно быть выполнено действие.
Amp имеет несколько глобально определенных событий и действий, которые можно использовать с любым компонентом amp, и они tap events и действия hide, show и togglevisibility.
Note - Если вы хотите скрыть / показать или использовать togglevisibility для любого компонента html или amp, вы можете использовать on=”tap:elementid.[hide/show/togglevisibility]”
Атрибут заполнителя
Атрибут заполнителя можно использовать в любом элементе html, таком как элемент ввода, а также в amp-компоненте. Заполнитель - это первое, что будет отображаться на странице, и после загрузки содержимого заполнитель удаляется и удаляется. сделал невидимым.
Заполнитель в элементе ввода
<input type = "text" id = "date" name = "date" placeholder = "Start Date">Заполнитель на amp-component
<amp-anim src = "images/loreal.gif" width = "300" height = "250" layout = "responsive">
<amp-img placeholder src = "images/flower.jpg"
layout = "fill">
</amp-img>
</amp-anim>Атрибут размеров
Используется так же, как атрибут высоты. Значение представляет собой выражение, как показано ниже -
<amp-img src = "amp.png"
width = "400" height = "300"
layout = "responsive"
sizes = "(min-width: 250px) 250px, 100vw">
</amp-img>Атрибуты ширины и высоты
Они используются почти во всех элементах html и компонентах amp. Ширина и высота используются для обозначения места, которое элемент amp-element занимает на странице.
пример
<amp-img src = "amp.png"
width = "400" height = "300"
layout = "responsive">
</amp-img>После тщательного рассмотрения Amp отображает страницы на экране. Загруженные страницы будут содержать изображения, видео, фреймы и т. Д., Что является большей частью HTTP-запросов. Таким образом, выполняемый HTTP-запрос откладывается, поэтому отображается контент на странице, а также создается необходимое пространство для загрузки изображений, видео и фреймов.
Amp имеет такие функции, как заполнители, резервные копии, атрибут srcset и layout, чтобы сделать страницы отзывчивыми, а также гарантирует, что содержимое на странице не нарушается. В этой главе давайте обсудим все это подробно.
Тег стиля усилителя
У усилителя есть тег стиля с amp-custom на нем, как показано ниже -
<style amp-custom>
button{
background-color: #ACAD5C;
color: white;
padding: 12px 20px;
border: none;
border-radius: 4px;
cursor: pointer;
float: left;
}
amp-img {
border: 1px solid black;
border-radius: 4px;
padding: 5px;
}
p {
padding: 1rem;
font-size:25px;
}
largeText {
font-size:30px;
background-color:red;
}
</style>Он в основном используется для написания пользовательского CSS, необходимого для страницы. Не забудьте добавитьamp-customатрибут; в противном случае проверка усилителя не удастся, как показано ниже -

Amp также поддерживает встроенный CSS для элементов html, как показано ниже -
<div style = "color:green;margin-left:30px;">
Welcome to TutorialsPoint</p>Тег внешней таблицы стилей
Amp не поддерживает внешнюю таблицу стилей и не сможет пройти проверку при проверке для amp.
пример
<!doctype html>
<html amp lang = "en">
<head>
<meta charset = "utf-8">
<script async src = "https://cdn.ampproject.org/v0.js"></script>
<title>Google AMP - Dynamic Css Classes</title>
<link rel = "canonical" href = "
http://example.ampproject.org/article-metadata.html">
<meta name = "viewport" content = "width = device-width,minimum-scale = 1,initial-scale = 1">
<style amp-boilerplate>
body {
-webkit-animation:
-amp-start 8s steps(1,end) 0s 1 normal both;-moz-animation:
-amp-start 8s steps(1,end) 0s 1 normal both;-ms-animation:
-amp-start 8s steps(1,end) 0s 1 normal both;animation:
-amp-start 8s steps(1,end) 0s 1 normal both
}
@-webkit-keyframes
-amp-start{from{visibility:hidden}to{visibility:visible}}@-moz-keyframes
-amp-start{from{visibility:hidden}to{visibility:visible}}@-ms-keyframes
-amp-start{from{visibility:hidden}to{visibility:visible}}@-o-keyframes
-amp-start{from{visibility:hidden}to{visibility:visible}}@keyframes
-amp-start{from{visibility:hidden}to{visibility:visible}}
</style>
<noscript>
<style amp-boilerplate>
body {
-webkit-animation:none;
-moz-animation:none;
-ms-animation:none;
animation:none
}
</style>
</noscript>
<script async custom-element = "amp-bind" src = "
https://cdn.ampproject.org/v0/amp-bind-0.1.js">
</script>
<script async custom-element = "amp-dynamic-css-classes"
src = "https://cdn.ampproject.org/v0/amp-dynamic-css-classes-0.1.js">
</script>
<link rel = "stylesheet"
href = "https://cdnjs.cloudflare.com/ajax/libs/materialize/0.9 8.0/css/materialize.min.css">
<style amp-custom>
p {
padding: 1rem;
font-size:25px;
}
</style>
</head>
<body>
<h3>Google AMP - Dynamic Css Classes</h3>
<div style = "color:green;margin-left:30px;">
Welcome to TutorialsPoint</p>
</body>
</html>При проверке с помощью валидатора AMP мы получаем следующую ошибку.

Чтобы элементы на странице отображались оперативно, в элементах amp необходимо указать ширину и высоту, которые элемент будет занимать на странице. Добавление layout = «responseive» сделает элемент отзывчивым на странице с сохранением соотношения сторон.
Детали атрибута макета подробно обсуждаются в главе Google AMP – Layout.
Amp-dynamic-css-classes добавляет динамические классы к тегу body. В этой главе давайте узнаем подробности этого тега.
Для работы с amp-dynamic-css-классами нам нужно добавить следующий скрипт -
<script asynccustom-element="amp-dynamic-css-classes"
src = "https://cdn.ampproject.org/v0/amp-dynamic-css-classes-0.1.js">
</script>Есть два важных класса, о которых заботятся amp-dynamic-css-classes:
- amp-referrer-*
- amp-viewer
Обсудим подробно каждый из них.
amp-referrer- *
Эти классы устанавливаются в зависимости от того, как приходят пользователи. Это означает, что если пользователь переходит из Google, будет установлен класс реферера, связанный с Google. То же самое верно и для Twitter и Pinterest.
Доступность классов зависит от типа реферера.
Например, для Google следующие классы будут добавлены, если пользователь щелкает страницы amp из поисковой системы Google.
- amp-referrer-www-google-com
- amp-referrer-google-com
- amp-referrer-com
Аналогичным образом есть классы для Twitter, Pinterest, Linkedin и т. Д.
amp-viewer
Средство просмотра Amp в основном изменит URL-адрес amp, чтобы получить информацию из кеша Google. Если вы ищете что-то в поиске Google, отображаемая карусель будет содержать все страницы amp.
Когда вы нажимаете на них, они перенаправляются на URL-адрес с URL-адресом Google в качестве префикса. Класс amp-viewer будет установлен, когда страница просматривается пользователем в amp-viewer и с использованием динамических классов.

Когда вы нажимаете страницу amp, URL-адрес, который вы получаете в адресной строке, выглядит следующим образом:
https://www.google.co.in/amp/s/m.timesofindia.com/sports/cricket/india-in-australia/to-hell-with-the-nets-boys-need-rest-ravi-shastri/amp_articleshow/67022458.cms
пример
<!doctype html>
<html amp lang = "en">
<head>
<meta charset = "utf-8">
<script async src = "https://cdn.ampproject.org/v0.js"></script>
<title>Google AMP - Dynamic Css Classes</title>
<link rel = "canonical" href = "http://example.ampproject.org/article-metadata.html">
<meta name = "viewport" content = "width = device-width,minimum-scale = 1,initial-scale = 1">
<style amp-boilerplate>
body{
-webkit-animation:
-amp-start 8s steps(1,end) 0s 1 normal both;-moz-animation:
-amp-start 8s steps(1,end) 0s 1 normal both;-ms-animation:
-amp-start 8s steps(1,end) 0s 1 normal both;animation:
-amp-start 8s steps(1,end) 0s 1 normal both
}
@-webkit-keyframes
-amp-start{from{visibility:hidden}to{visibility:visible}}@-moz-keyframes
-amp-start{from{visibility:hidden}to{visibility:visible}}@-ms-keyframes
-amp-start{from{visibility:hidden}to{visibility:visible}}@-o-keyframes
-amp-start{from{visibility:hidden}to{visibility:visible}}@keyframes
-amp-start{from{visibility:hidden}to{visibility:visible}}
</style>
<noscript>
<style amp-boilerplate>
body {
-webkit-animation:none;-moz-animation:none;
-ms-animation:none;animation:none
}
</style>
</noscript>
<script async custom-element = "amp-bind"
src = "https://cdn.ampproject.org/v0/amp-bind-0.1.js">
</script>
<script async custom-element = "amp-dynamic-css-classes"
src = "https://cdn.ampproject.org/v0/amp-dynamic-css-classes-0.1.js">
</script>
<link rel = "stylesheet" href = "https://cdnjs.cloudflare.com/ajax/libs/materialize/0.98.0/css/materialize.min.css">
<style amp-custom>
body:not(.amp-referrer-pinterest-com) .if-pinterest,
body:not(.amp-referrer-ampbyexample-com) .if-ampbyexample,
body:not(.amp-referrer-google-com) .if-google,
body:not(.amp-referrer-twitter-com) .if-twitter,
body:not(.amp-referrer-linkedin-com) .if-linkedin,
body:not(.amp-referrer-localhost) .if-localhost {
display: none;
}
body:not(.amp-viewer) .if-viewer,
body.amp-viewer .if-not-viewer {
display: none;
}
p {
padding: 1rem;
font-size:25px;
}
</style>
</head>
<body>
<h3>Google AMP - Dynamic Css Classes</h3>
<div>
<p class = "if-pinterest">You were referred here or embedded by Pinterest!</p>
<p class = "if-twitter">You were referred here or embedded by Twitter!</p>
<p class = "if-google">You were referred here or embedded by Google!</p>
<p class = "if-ampbyexample">You came here directly! Cool :)</p>
< class = "if-localhost">You came here directly! Cool :)</p>
</div>
<div>
<p class = "if-not-viewer">Hey! You are not coming from amp viewer</p>
<p class = "if-viewer">Hey! From amp viewer.</p>
<div>
</body>
</html>Вывод
Чтобы использовать действия или события в amp-компоненте, мы можем использовать атрибут on. В этой главе давайте обсудим их подробно.
События
Синтаксис для работы с событиями следующий:
on = "eventName:elementId[.methodName[(arg1 = value, arg2 = value)]]"Детали переданы on атрибут следующие -
eventName- принимает имя события, доступного для amp-component. Например, для форм мы можем использовать submit-success, submit-error eventNames.
elementId- Принимает идентификатор элемента, для которого необходимо вызвать событие. Это может быть идентификатор формы, для которой мы хотим знать об успехе или ошибке.
methodName - Принимает имя метода, который будет вызываться при возникновении события.
arg=value - Это принимает аргументы с формой ключ = значение, переданные методу.
Также можно передать несколько событий в атрибут on, и это делается следующим образом:
on = "submit-success:lightbox;submit-error:lightbox1"Если событий несколько, они передаются в атрибут on и разделяются точкой с запятой (;).
Действия
Действия в основном используются с атрибутом on, а синтаксис следующий:
on = "tab:elementid.hide;"Мы можем передать несколько действий следующим образом -
on = "tab:elementid.open;tab:elementid.hide;”Elementid - это идентификатор элемента, над которым должно быть выполнено действие.
У Amp есть несколько глобально определенных событий и действий, которые можно использовать с любым компонентом amp, и они tap event и действия hide, show и togglevisibility.
Если вы хотите скрыть / показать или использовать togglevisibility для любого компонента html или amp, вы можете использовать on=”tap:elementid.[hide/show/togglevisibility]”
Давайте посмотрим на несколько рабочих примеров для событий и действий.
На элементе ввода
Давайте разберемся с этим лучше на рабочем примере -
пример
<!doctype html>
<html amp lang = "en">
<head>
<meta charset = "utf-8">
<script async src = "https://cdn.ampproject.org/v0.js"></script>
<title>Google AMP - Amp Bind</title>
<link rel = "canonical" href = "http://example.ampproject.org/article-metadata.html">
<meta name = "viewport" content = "width = device-width,minimum-scale = 1,initial-scale = 1">
<style amp-boilerplate>
body{
-webkit-animation:
-amp-start 8s steps(1,end) 0s 1 normal both;-moz-animation:
-amp-start 8s steps(1,end) 0s 1 normal both;-ms-animation:
-amp-start 8s steps(1,end) 0s 1 normal both;animation:
-amp-start 8s steps(1,end) 0s 1 normal both
}
@-webkit-keyframes
-amp-start{from{visibility:hidden}to{visibility:visible}}@-moz-keyframes
-amp-start{from{visibility:hidden}to{visibility:visible}}@-ms-keyframes
-amp-start{from{visibility:hidden}to{visibility:visible}}@-o-keyframes
-amp-start{from{visibility:hidden}to{visibility:visible}}@keyframes
-amp-start{from{visibility:hidden}to{visibility:visible}}
</style>
<noscript>
<style amp-boilerplate>
body {
-webkit-animation:none;
-moz-animation:none;
-ms-animation:none;
animation:none
}
</style>
</noscript>
<script async custom-element = "amp-bind" src = "
https://cdn.ampproject.org/v0/amp-bind-0.1.js">
</script>
<script async custom-element = "amp-lightbox" src = "
https://cdn.ampproject.org/v0/amp-lightbox-0.1.js">
</script>
<style amp-custom>
button{
background-color: #ACAD5C;
color: white;
padding: 12px 20px;
border: none;
border-radius: 4px;
cursor: pointer;
float: left;}
.lightbox {
background: rgba(211,211,211,0.8);
width: 100%;
height: 100%;
position: absolute;
display: flex;
align-items: center;
justify-content: center;
}
#txtname{
width: 100%;
padding: 12px 20px;
margin: 8px 0;
display: inline-block;
border: 1px solid #ccc;
border-radius: 4px;
box-sizing: border-box;
}
div {
font-size:25px;
}
</style>
</head>
<body>
<h3>Google AMP - Amp Bind</h3>
<button on = "tap:AMP.setState({displaylightbox: true})">
Click Here
</button>
<br/>
<br/>
<h3>AMP - Input Element</h3>
<input id = "txtname" placeholder = "Type here" on =
"input-throttled:AMP.setState({name: event.value})">
<div [text] = "name"></div>
</body>
</html>Вывод
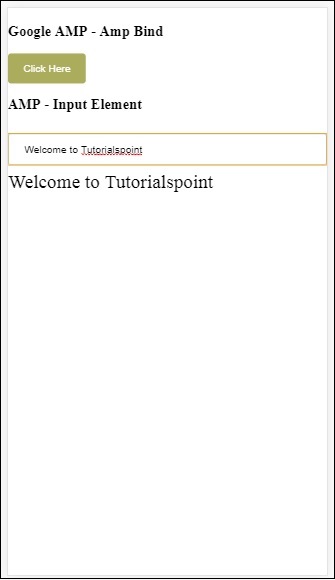
Обратите внимание, что в приведенном выше примере мы используем событие в поле ввода следующим образом:
<input id = "txtname" placeholder = "Type here"
on = "input-throttled:AMP.setState({name: event.value})">Используемое событие input-throlled.
Мы также можем использовать изменение следующим образом -
<input id = "txtname" placeholder = "Type here" on =
"change:AMP.setState({name: event.value})">Вывод будет отображаться, когда пользователь выйдет из поля ввода. Мы можем использовать событие изменения для типа ввода как радио, флажок и т.д., а также для элемента выбора.
<input id = "txtname" placeholder = "Type here" on =
"input-debounced:AMP.setState({name: event.value})">Событие input-debounced такой же как changeсобытие, но вывод будет виден через 300 мс после ввода пользователем.
пример
<!doctype html>
<html amp lang = "en">
<head>
<meta charset = "utf-8">
<script async src = "https://cdn.ampproject.org/v0.js"></script>
<title>Google AMP - Amp Bind</title>
<link rel = "canonical" href = " http://example.ampproject.org/article-metadata.html">
<meta name = "viewport" content = "width = device-width,minimum-scale = 1,initial-scale = 1">
<style amp-boilerplate>
body{
-webkit-animation:
-amp-start 8s steps(1,end) 0s 1 normal both;-moz-animation:
-amp-start 8s steps(1,end) 0s 1 normal both;-ms-animation:
-amp-start 8s steps(1,end) 0s 1 normal both;animation:
-amp-start 8s steps(1,end) 0s 1 normal both
}
@-webkit-keyframes
-amp-start{from{visibility:hidden}to{visibility:visible}}@-moz-keyframes
-amp-start{from{visibility:hidden}to{visibility:visible}}@-ms-keyframes
-amp-start{from{visibility:hidden}to{visibility:visible}}@-o-keyframes
-amp-start{from{visibility:hidden}to{visibility:visible}}@keyframes
-amp-start{from{visibility:hidden}to{visibility:visible}}
</style>
<noscript>
<style amp-boilerplate>
body{
-webkit-animation:none;
-moz-animation:none;
-ms-animation:none;
animation:none}
</style>
</noscript>
<script async custom-element = "amp-bind"
src = "https://cdn.ampproject.org/v0/amp-bind-0.1.js">
</script>
<script async custom-element = "amp-lightbox"
src = "https://cdn.ampproject.org/v0/amp-lightbox-0.1.js">
</script>
<style amp-custom>
button{
background-color: #ACAD5C;
color: white;
padding: 12px 20px;
border: none;
border-radius: 4px;
cursor: pointer;
float: left;
}
.lightbox {
background: rgba(211,211,211,0.8);
width: 100%;
height: 100%;
position: absolute;
display: flex;
align-items: center;
justify-content: center;
}
#txtname{
width: 100%;
padding: 12px 20px;
margin: 8px 0;
display: inline-block;
border: 1px solid #ccc;
border-radius: 4px;
box-sizing: border-box;
}
div {
font-size:25px;
}
</style>
</head>
<body>
<h3>Google AMP - Amp Bind</h3>
<button on = "tap:AMP.setState({displaylightbox: true})">
Click Here
</button>
<br/>
<br/>
<h3>AMP - Input Element</h3>
<input id = "txtname" placeholder = "Type here" on =
"input-debounced:AMP.setState({name: event.value})">
<div [text] = "name"></div>
</body>
</html>Вывод
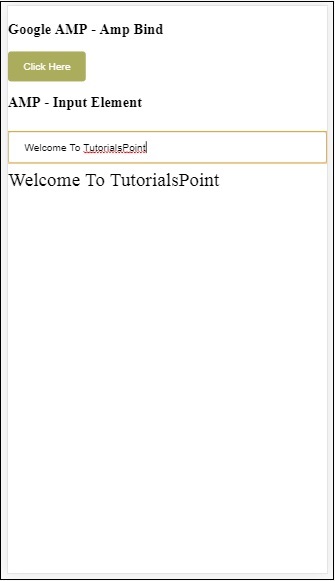
В лайтбоксе усилителя
В этом разделе мы собираемся протестировать следующие события на лайтбоксе:
- lightboxOpen
- lightboxClose
пример
<!doctype html>
<html amp lang = "en">
<head>
<meta charset = "utf-8">
<script async src = "https://cdn.ampproject.org/v0.js"></script>
<title>Google AMP - Amp Lightbox</title>
<link rel = "canonical" href = " http://example.ampproject.org/article-metadata.html">
<meta name = "viewport" content = "width = device-width,minimum-scale = 1,initial-scale = 1">
<style amp-boilerplate>
body{
-webkit-animation:
-amp-start 8s steps(1,end) 0s 1 normal both;-moz-animation:
-amp-start 8s steps(1,end) 0s 1 normal both;-ms-animation:
-amp-start 8s steps(1,end) 0s 1 normal both;animation:
-amp-start 8s steps(1,end) 0s 1 normal both
}
@-webkit-keyframes
-amp-start{from{visibility:hidden}to{visibility:visible}}@-moz-keyframes
-amp-start{from{visibility:hidden}to{visibility:visible}}@-ms-keyframes
-amp-start{from{visibility:hidden}to{visibility:visible}}@-o-keyframes
-amp-start{from{visibility:hidden}to{visibility:visible}}@keyframes
-amp-start{from{visibility:hidden}to{visibility:visible}}
</style>
<noscript>
<style amp-boilerplate>
body{
-webkit-animation:none;
-moz-animation:none;
-ms-animation:none;
animation:none}
</style>
</noscript>
<script async custom-element = "amp-bind"
src = "https://cdn.ampproject.org/v0/amp-bind-0.1.js">
</script>
<script async custom-element = "amp-lightbox"
src = "https://cdn.ampproject.org/v0/amp-lightbox-0.1.js">
</script>
<style amp-custom>
amp-img {
border: 1px solid #ddd;
border-radius: 4px;
padding: 5px;
}
button {
background-color: #ACAD5C;
color: white;
padding: 12px 20px;
border: none;
border-radius: 4px;
cursor: pointer;
float: left;
}
.lightbox {
background: rgba(211,211,211,0.8);
width: 100%;
height: 100%;
position: absolute;
display: flex;
align-items: center;
justify-content: center;
}
p{font-size:30px;}
</style>
</head>
<body>
<h3>Google AMP - Amp Lightbox</h3>
<p [text] = "'Lightbox is ' + lightboxstatus + '.'">
Lightbox Event Testing
</p>
<button on = "tap:my-lightbox.open">
Show LightBox
</button>
<amp-lightbox id = "my-lightbox" layout = "nodisplay"
close-button on = "lightboxOpen:AMP.setState({lightboxstatus:'opened'});
lightboxClose:AMP.setState({lightboxstatus:'closed'});">
<div class = "lightbox">
<amp-img alt = "Beautiful Flower" src = "images/loreal.gif"
width = "246"
height = "205">
</amp-img>
</div>
</amp-lightbox>
</body>
</html>Вывод
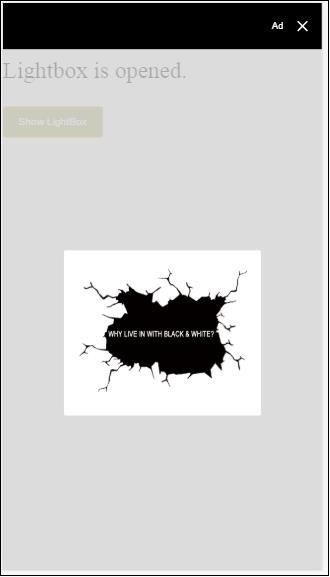
Следующий код показывает, как события открытия и закрытия реализованы в лайтбоксе:
<p [text]="'Lightbox is ' + lightboxstatus + '.'">Lightbox Event Testing</p>
<button on = "tap:my-lightbox.open">Show LightBox</button>
<amp-lightbox id = "my-lightbox" layout = "nodisplay"
close-button on = "lightboxOpen:AMP.setState({lightboxstatus:'opened'});
lightboxClose:AMP.setState({lightboxstatus:'closed'});">
<div class = "lightbox">
<amp-img alt = "Beautiful Flower" src = "images/loreal.gif"
width = "246"
height = "205">
</amp-img>
</div>
</amp-lightbox>Событие на Amp -Selector
Событие, доступное в amp-selector: select.
пример
<!doctype html>
<html amp lang = "en">
<head>
<meta charset = "utf-8">
<script async src = "https://cdn.ampproject.org/v0.js"></script>
<title>Google AMP - Amp Selector</title>
<link rel = "canonical" href = "http://example.ampproject.org/article-metadata.html">
<meta name = "viewport" content = "width = device-width,minimum-scale = 1,initial-scale = 1">
<style amp-boilerplate>
body{
-webkit-animation:
-amp-start 8s steps(1,end) 0s 1 normal both;-moz-animation:
-amp-start 8s steps(1,end) 0s 1 normal both;-ms-animation:
-amp-start 8s steps(1,end) 0s 1 normal both;animation:
-amp-start 8s steps(1,end) 0s 1 normal both
}
@-webkit-keyframes
-amp-start{from{visibility:hidden}to{visibility:visible}}@-moz-keyframes
-amp-start{from{visibility:hidden}to{visibility:visible}}@-ms-keyframes
-amp-start{from{visibility:hidden}to{visibility:visible}}@-o-keyframes
-amp-start{from{visibility:hidden}to{visibility:visible}}@keyframes
-amp-start{from{visibility:hidden}to{visibility:visible}}
</style>
<noscript>
<style amp-boilerplate>
body {
-webkit-animation:none;
-moz-animation:none;
-ms-animation:none;
animation:none
}
</style>
</noscript>
<script async custom-element = "amp-bind"
src = "https://cdn.ampproject.org/v0/amp-bind-0.1.js">
</script>
<script async custom-element = "amp-selector"
src = "https://cdn.ampproject.org/v0/amp-selector-0.1.js">
</script>
<style amp-custom>
.radio-menu {
list-style: none;
}
.radio-menu [option][selected] {
outline: none;
}
.radio-menu [option] {
display: flex;
align-items: center;
}
.radio-menu [option]:before {
transition: background 0.25s ease-in-out;
content: "";
display: inline-block;
width: 24px;
height: 24px;
margin: 8px;
border-radius: 100%;
border: solid 1px black;
}
.radio-menu [option = red][selected]:before {
text-align: center;
content: "✓";
color: white;
background: red;
}
.radio-menu [option = green][selected]:before {
text-align: center;
content: "✓";
color: white;
background: green;
}
.radio-menu [option = blue][selected]:before {
text-align: center;
content: "✓";
color: white;
background: blue;
}
p{font-size:30px;}
</style>
</head>
<body>
<h3>Google AMP - Amp Selector</h3>
<p [text] = "'Color selected is ' + ampselectorstatus + '.'">
Amp Selector Event Testing
<p>
<amp-selector
class = "radio-menu"
layout = "container"
name = "my-selector"
on = "select:AMP.setState({ampselectorstatus:event.selectedOptions})">
<div option = "red">
Red
</div>
<div option = "green">
Green
</div>
<div option = "blue">
Blue
</div>
</amp-selector>
</body>
</html>Вывод
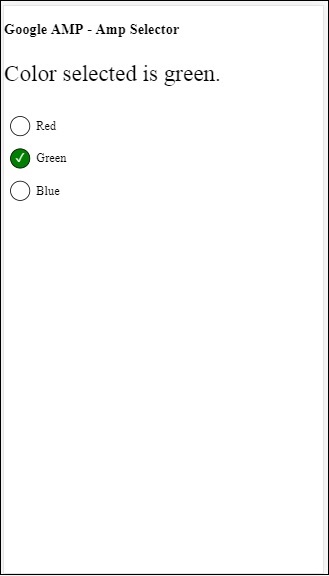
Выбор события используется следующим образом -
<p [text]="'Color selected is ' + ampselectorstatus + '.'">
Amp Selector Event Testing
</p>
<amp-selector
class = "radio-menu"
layout ="container"
name =" my-selector"
on = "select:AMP.setState({ampselectorstatus:event.selectedOptions})">
<div option = "red">
Red
</div>
<div option = "green">
Green
</div>
<div option = "blue">
Blue
</div>
</amp-selector>Событие на боковой панели усилителя
Доступные события: sidebarOpen и sidebarClose.
пример
<!doctype html>
<html amp lang = "en">
<head>
<meta charset = "utf-8">
<script async src = "https://cdn.ampproject.org/v0.js"></script>
<title>Google AMP - Amp Sidebar</title>
<link rel = "canonical" href = "http://example.ampproject.org/article-metadata.html">
<meta name = "viewport" content = "width = device-width,minimum-scale = 1,initial-scale = 1">
<style amp-boilerplate>
body{
-webkit-animation:
-amp-start 8s steps(1,end) 0s 1 normal both;-moz-animation:
-amp-start 8s steps(1,end) 0s 1 normal both;-ms-animation:
-amp-start 8s steps(1,end) 0s 1 normal both;animation:
-amp-start 8s steps(1,end) 0s 1 normal both
}
@-webkit-keyframes
-amp-start{from{visibility:hidden}to{visibility:visible}}@-moz-keyframes
-amp-start{from{visibility:hidden}to{visibility:visible}}@-ms-keyframes
-amp-start{from{visibility:hidden}to{visibility:visible}}@-o-keyframes
-amp-start{from{visibility:hidden}to{visibility:visible}}@keyframes
-amp-start{from{visibility:hidden}to{visibility:visible}}
</style>
<noscript>
<style amp-boilerplate>
body{
-webkit-animation:none;
-moz-animation:none;
-ms-animation:none;
animation:none
}
</style>
</noscript>
<script async custom-element = "amp-bind"
src = "https://cdn.ampproject.org/v0/amp-bind-0.1.js">
</script>
<script async custom-element = "amp-sidebar"
src = "https://cdn.ampproject.org/v0/amp-sidebar-0.1.js">
</script>
<style amp-custom>
amp-img {
border: 1px solid #ddd;
border-radius: 4px;
padding: 5px;
}
button{
background-color: #ACAD5C;
color: white;
padding: 12px 20px;
border: none;
border-radius: 4px;
cursor: pointer;
float: left;
}
.amp-sidebar-toolbar-target-shown {
display: none;
}
p{font-size:30px;}
</style>
</head>
<body>
<h3>Google AMP - Amp Sidebar</h3>
<p [text] = "'Sidebar is ' + ampsidebarstatus + '.'">
Amp Sidebar Event Testing
</p>
<button on = "tap:sidebar1">
Show Sidebar
</button>
<amp-sidebar
id = "sidebar1"
layout = "nodisplay"
side = "right"
on = "sidebarOpen:AMP.setState({ampsidebarstatus: 'Opened'});
sidebarClose:AMP.setState({ampsidebarstatus: 'Closed'})">
<ul>
<li>Nav item 1</li>
<li>
<a href = "#idTwo" on = "tap:idTwo.scrollTo">Nav item 2</a>
</li>
<li>Nav item 3</li>
<li>
<a href = "#idFour" on="tap:idFour.scrollTo">Nav item 4</a>
</li>
<li>Nav item 5</li>
<li>Nav item 6</li>
</ul>
</amp-sidebar>
<div id = "target-element">
</div>
</body>
</html>Вывод
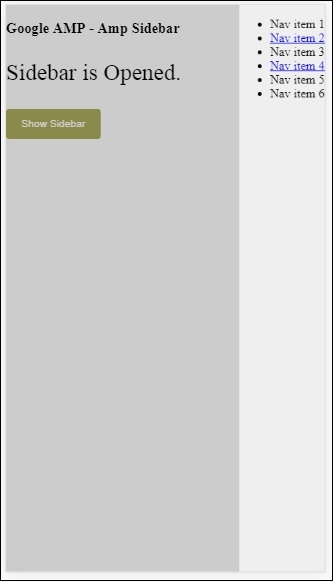
События используются следующим образом -
<p [text] = "'Sidebar is ' + ampsidebarstatus + '.'">
Amp Sidebar Event Testing
</p>
<button on = "tap:sidebar1">
Show Sidebar
</button>
<amp-sidebar
id = "sidebar1"
layout = "nodisplay"
side = "right"
on = "sidebarOpen:AMP.setState({ampsidebarstatus: 'Opened'});
sidebarClose:AMP.setState({ampsidebarstatus: 'Closed'})">
<ul>
<li>Nav item 1</li>
<li>
<a href = "#idTwo" on = "tap:idTwo.scrollTo">Nav item 2</a>
</li>
<li>Nav item 3</li>
<li>
<a href = "#idFour" on = "tap:idFour.scrollTo">Nav item 4</a>
</li>
<li>Nav item 5</li>
<li>Nav item 6</li>
</ul>
</amp-sidebar>Amp-animation - это компонент усилителя, который определяет анимацию, которая будет использоваться на других компонентах усилителя. В этой главе они рассматриваются подробно.
Для работы с amp-анимацией нам нужно добавить следующий скрипт -
<script async custom-element = "amp-animation"
src = "https://cdn.ampproject.org/v0/amp-animation-0.1.js">
</script>Детали анимации определены внутри структуры json.
Базовая структура amp-animation как показано здесь -
<amp-animation layout = "nodisplay">
<script type = "application/json">
{
// Timing properties
...
"animations": [
{
// animation 1
},
...
{
// animation n
}
]
}
</script>
</amp-animation>В animation Компонент состоит из следующего - Selectors, Variables, Timing Properties, Keyframes etc.
{
"selector": "#target-id",
// Variables
// Timing properties
// Subtargets
...
"keyframes": []
}Селектор
Здесь нам нужно указать класс или идентификатор элемента, для которого будет использоваться анимация.
Переменные
Это значения, которые определены для использования внутри ключевых кадров. Переменные определяются с использованиемvar().
пример
{
"--delay": "0.5s",
"animations": [
{
"selector": "#target1",
"delay": "var(--delay)",
"--x": "150px",
"--y" : "200px",
"keyframes": {
"transform": "translate(var(--x), var(--y, 0px)"
}
}
]
}Вот delay, x и y являются переменными, а значения переменных определены в показанном примере.
Свойства времени
Здесь вы можете определить продолжительность и задержку анимации. Следующие поддерживаемые свойства синхронизации -
| Свойство | Значение | Описание |
|---|---|---|
| продолжительность | Свойство времени. Значение должно быть в миллисекундах. | Продолжительность анимации. |
| задержка | Свойство времени. Значение должно быть в миллисекундах. | Задержка перед запуском анимации |
| endDelay | Свойство времени. Значение должно быть в миллисекундах или секундах. | Заданная задержка, которая применяется после завершения анимации. |
| итерации | Значение должно быть числом. | Количество повторов анимации. |
| iterationStart | Значение должно быть числом. | Смещение времени, с которого начинается анимация эффекта. |
| ослабление | Значение - это строка | Это используется для получения эффекта замедления в анимации. Некоторые примеры замедления: линейность, легкость, легкость входа, легкость выхода, легкость выхода и т. Д. |
| направление | Значение - это строка | Один из «нормального», «обратного», «альтернативного» или «альтернативно-обратного». |
| заполнить | Значение - это строка | Значения могут быть «нет», «вперед», «назад», «оба», «авто». |
Ключевые кадры
Ключевые кадры можно определять разными способами, например в форме объекта или массива. Рассмотрим следующие примеры.
пример
"keyframes": {"transform": "translate(100px,200px)"}пример
{
"keyframes": {
"opacity": [1, 0],
"transform": ["scale(1)", "scale(2)"]
}
}пример
{
"keyframes": [
{"opacity": 1, "transform": "scale(1)"},
{"opacity": 0, "transform": "scale(2)"}
]
}пример
{
"keyframes": [
{"easing": "ease-out", "opacity": 1, "transform": "scale(1)"},
{"opacity": 0, "transform": "scale(2)"}
]
}Ключевые кадры с использованием CSS
<style amp-custom>
div {
width: 100px;
height: 100px;
background-color: red;
position: relative;
margin: 0 auto;
transform:scale(3);
}
@keyframes example { 0% {transform:scale(3)}
75% {transform:scale(2)}
100% {transform:scale(1)}
}
</style>
<amp-animation layout = "nodisplay">
<script type = "application/json">
{
"duration": "4s",
"keyframes": "example"
}
</script>
</amp-animation>Внутри ключевых кадров можно использовать некоторые свойства CSS. Поддерживаемые свойства называются объектами из белого списка. Ниже приведены свойства из белого списка, которые можно использовать внутри ключевых кадров:
- opacity
- transform
- visibility
- 'offsetDistance'
Note - Использование любого другого свойства, кроме свойств из белого списка, вызовет ошибку в консоли.
Давайте теперь разберемся на простом примере, который будет вращать изображение при применении к нему анимации. В этом примере мы вращаем изображение с помощью amp-animation.
пример
<!doctype html>
<html amp lang = "en">
<head>
<meta charset = "utf-8">
<script async src = "https://cdn.ampproject.org/v0.js"></script>
<title>Google AMP - Amp Video</title>
<link rel = "canonical" href = "http://example.ampproject.org/article-metadata.html">
<meta name = "viewport" content = "width = device-width, minimum-scale = 1,initial-scale = 1">
<style amp-boilerplate>
body{
-webkit-animation:
-amp-start 8s steps(1,end) 0s 1 normal both;-moz-animation:
-amp-start 8s steps(1,end) 0s 1 normal both;-ms
-amp-start 8s steps(1,end) 0s 1 normal both;animation:
-amp-start 8s steps(1,end) 0s 1 normal both
}
@-webkit-keyframes
-amp-start{from{visibility:hidden}to{visibility:visible}}@-moz-keyframes
-amp-start{from{visibility:hidden}to{visibility:visible}}@-ms-keyframes
-amp-start{from{visibility:hidden}to{visibility:visible}}@-o-keyframes
-amp-start{from{visibility:hidden}to{visibility:visible}}@keyframes
-amp-start{from{visibility:hidden}to{visibility:visible}}
</style>
<noscript>
<style amp-boilerplate>
body{
-webkit-animation:none;
-moz-animation:none;
-ms-animation:none;
animation:none
}
</style>
</noscript>
<script async custom-element = "amp-animation"
src =" https://cdn.ampproject.org/v0/amp-animation-0.1.js">
</script>
<style amp-custom>
amp-img {
border: 1px solid black;
border-radius: 4px;
padding: 5px;
}
</style>
</head>
<body>
<h3>Google AMP - Amp Animation Example</h3>
<amp-animation id = "anim1" layout = "nodisplay" trigger = "visibility">
<script type = "application/json">
{
"duration": "1s",
"fill": "both",
"direction": "alternate",
"animations": [
{
"selector": "#image1",
"easing": "cubic-bezier(0,0,.21,1)",
"keyframes": {
"transform": "rotate(20deg)"
}
}
]
}
</script>
</amp-animation>
<br/>
<br/>
<amp-img
id = "image1"
src = "images/christmas1.jpg"
width = 300
height = 250
layout = "responsive">
</amp-img>
<br/>
</body>
</html>Вывод

Детали использованных выше деталей amp-анимации приведены в коде, показанном ниже -
<amp-animation id = "anim1" layout = "nodisplay" trigger = "visibility">
<script type = "application/json">
{
"duration": "1s",
"fill": "both",
"direction": "alternate",
"animations": [
{
"selector": "#image1",
"easing": "cubic-bezier(0,0,.21,1)",
"keyframes": {
"transform": "rotate(20deg)"
}
}
]
}
</script>
</amp-animation>Селектор здесь - это идентификатор изображения, к которому применяется анимация поворота -
<amp-img
id = "image1"
src = "images/christmas1.jpg"
width = 300
height = 250
layout = "responsive">
</amp-img>Пример использования ключевых кадров из CSS
пример
<!doctype html>
<html amp lang = "en">
<head>
<meta charset = "utf-8">
<script async src = "https://cdn.ampproject.org/v0.js"></script>
<title>Google AMP - Amp Video</title>
<link rel = "canonical" href = "http://example.ampproject.org/article-metadata.html">
<meta name = "viewport" content = "width = device-width,minimum-scale = 1,initial-scale = 1">
<style amp-boilerplate>
body{
-webkit-animation:
-amp-start 8s steps(1,end) 0s 1 normal both;-moz-animation:
-amp-start 8s steps(1,end) 0s 1 normal both;-ms-animation:
-amp-start 8s steps(1,end) 0s 1 normal both;animation:
-amp-start 8s steps(1,end) 0s 1 normal both
}
@-webkit-keyframes
-amp-start{from{visibility:hidden}to{visibility:visible}}@-moz-keyframes
-amp-start{from{visibility:hidden}to{visibility:visible}}@-ms-keyframes
-amp-start{from{visibility:hidden}to{visibility:visible}}@-o-keyframes
-amp-start{from{visibility:hidden}to{visibility:visible}}@keyframes
-amp-start{from{visibility:hidden}to{visibility:visible}}
</style>
<noscript>
<style amp-boilerplate>
body{
-webkit-animation:none;
-moz-animation:none;
-ms-animation:none;
animation:none
}
</style>
</noscript>
<script async custom-element = "amp-animation"
src = "https://cdn.ampproject.org/v0/amp-animation-0.1.js">
</script>
<style amp-custom>
div {
width: 100px;
height: 100px;
background-color: red;
position: relative;
margin: 0 auto;
transform:scale(3);
}
@keyframes example {
0% {transform:scale(3)}
75% {transform:scale(2)}
100% {transform:scale(1)}
}
</style>
</head>
<body>
<h3>Google AMP - Amp Animation Example</h3>
<amp-animation id = "anim1" layout = "nodisplay" trigger = "visibility">
<script type = "application/json">
{
"duration": "3s",
"fill": "both",
"direction": "alternate",
"animations": [{
"selector": "#image1",
"easing": "cubic-bezier(0,0,.21,1)",
"keyframes":"example"
}]
}
</script>
</amp-animation>
<br/>
<br/>
<div id = "image1"></div>
<br/>
</body>
</html>Вывод
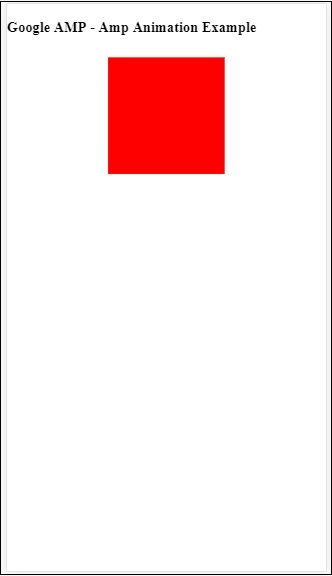
Запуск анимации
Если trigger = "visibility", анимация применяется по умолчанию. Чтобы запустить анимацию для события, мы должны удалить trigger = ”visibility” и добавить событие для запуска анимации, как показано в примере ниже -
пример
<!doctype html>
<html amp lang = "en">
<head>
<meta charset = "utf-8">
<script async src = "https://cdn.ampproject.org/v0.js"></script>
<title>Google AMP - Amp Video</title>
<link rel = "canonical" href = "http://example.ampproject.org/article-metadata.html">
<meta name = "viewport" content = "width = device-width,
minimum-scale = 1,initial-scale = 1">
<style amp-boilerplate>
body{
-webkit-animation:
-amp-start 8s steps(1,end) 0s 1 normal both;-moz-animation:
-amp-start 8s steps(1,end) 0s 1 normal both;-ms-animation:
-amp-start 8s steps(1,end) 0s 1 normal both;animation:
-amp-start 8s steps(1,end) 0s 1 normal both
}
@-webkit-keyframes
-amp-start{from{visibility:hidden}to{visibility:visible}}@-moz-keyframes
-amp-start{from{visibility:hidden}to{visibility:visible}}@-ms-keyframes
-amp-start{from{visibility:hidden}to{visibility:visible}}@-o-keyframes
-amp-start{from{visibility:hidden}to{visibility:visible}}@keyframes
-amp-start{from{visibility:hidden}to{visibility:visible}}
</style>
<noscript>
<style amp-boilerplate>
body{
-webkit-animation:none;
-moz-animation:none;
-ms-animation:none;
animation:none}
</style>
</noscript>
<script async custom-element = "amp-animation"
src = "https://cdn.ampproject.org/v0/amp-animation-0.1.js">
</script>
<style amp-custom>
div {
width: 100px;
height: 100px;
background-color: red;
position: relative;
margin: 0 auto;
transform:scale(2);
}
@keyframes example {
0% {transform:scale(2)}
75% {transform:scale(1)}
100% {transform:scale(0.5)}
}
button{
background-color: #ACAD5C;
color: white;
padding: 12px 20px;
border: none;
border-radius: 4px;
cursor: pointer;
float: left;
}
</style>
</head>
<body>
<h3>Google AMP - Amp Animation Example</h3>
<amp-animation id = "anim1" layout = "nodisplay">
<script type = "application/json">
{
"duration": "3s",
"fill": "both",
"direction": "alternate",
"animations": [{
"selector": "#image1",
"easing": "cubic-bezier(0,0,.21,1)",
"keyframes":"example"
}]
}
</script>
</amp-animation>
<button on = "tap:anim1.start">Start</button>
<br/>
<br/>
<div id = "image1"></div>
</body>
</html>Обратите внимание, что анимация начнется при нажатии кнопки запуска.
Вывод
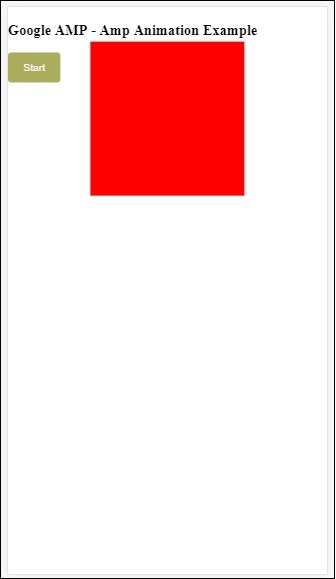
Мы использовали действие под названием starton On, чтобы начать анимацию. Точно так же поддерживаются и другие действия, а именно:
- start
- pause
- restart
- resume
- togglePause
- seekTo
- reverse
- finish
- cancel
Давайте посмотрим на рабочий пример, где мы можем использовать действие.
пример
<!doctype html>
<html amp lang = "en">
<head>
<meta charset = "utf-8">
<script async src = "https://cdn.ampproject.org/v0.js"></script>
<title>Google AMP - Amp Video</title>
<link rel = "canonical" href = "http://example.ampproject.org/article-metadata.html">
<meta name = "viewport" content = "width=device-width,minimum-scale = 1,initial-scale = 1">
<style amp-boilerplate>
body{
-webkit-animation:
-amp-start 8s steps(1,end) 0s 1 normal both;-moz-animation:
-amp-start 8s steps(1,end) 0s 1 normal both;-ms-animation:
-amp-start 8s steps(1,end) 0s 1 normal both;animation:
-amp-start 8s steps(1,end) 0s 1 normal both
}
@-webkit-keyframes
-amp-start{from{visibility:hidden}to{visibility:visible}}@-moz-keyframes
-amp-start{from{visibility:hidden}to{visibility:visible}}@-ms-keyframes
-amp-start{from{visibility:hidden}to{visibility:visible}}@-o-keyframes
-amp-start{from{visibility:hidden}to{visibility:visible}}@keyframes
-amp-start{from{visibility:hidden}to{visibility:visible}}
</style>
<noscript>
<style amp-boilerplate>
body{
-webkit-animation:none;
-moz-animation:none;
-ms-animation:none;
animation:none}
</style>
</noscript>
<script async custom-element = "amp-animation"
src = "https://cdn.ampproject.org/v0/amp-animation-0.1.js">
</script>
<style amp-custom>
#image1 {
width: 100px;
height: 100px;
background-color: red;
position: relative;
margin: 0 auto;
transform:scale(2);
}
@keyframes example {
0% {transform:scale(2)}
75% {transform:scale(1)}
100% {transform:scale(0.5)}
}
button1{
background-color: #ACAD5C;
color: white;
padding: 12px 20px;
border: none;
border-radius: 4px;
cursor: pointer;
float: left;
}
</style>
</head>
<body>
<h3>Google AMP - Amp Animation Example</h3>
<amp-animation id = "anim1" layout = "nodisplay">
<script type = "application/json">
{
"duration": "3s",
"fill": "both",
"direction": "alternate",
"animations": [{
"selector": "#image1",
"easing": "cubic-bezier(0,0,.21,1)",
"keyframes":"example"
}]
}
</script>
</amp-animation>
<button on = "tap:anim1.start">Start</button>
<button on = "tap:anim1.pause">Pause</button>
<button on = "tap:anim1.resume">Resume</button>
<button on = "tap:anim1.reverse">Reverse</button>
<button on = "tap:anim1.cancel">cancel</button>
<button on = "tap:anim1.finish">finish</button>
<button on = "tap:anim1.togglePause">togglePause</button>
<button on = "tap:anim1.seekTo(percent = 1.00)">seekTo(100%)</button>
<br/>
<br/>
<br/>
<br/>
<div id="image1"></div>
</body>
</html>Вывод
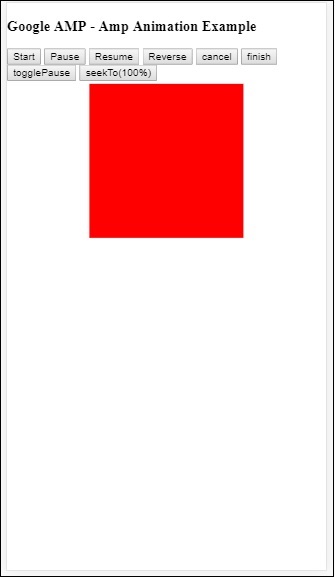
Amp-bind помогает добавить интерактивности к amp-components и html-тегам на основе действия с использованием привязки данных и выражений, подобных JS. В этой главе подробно обсуждается привязка данных.
Для работы с amp-bind нам нужно добавить на нашу страницу следующий скрипт -
<script async custom-element = "amp-bind"
src = "https://cdn.ampproject.org/v0/amp-bind-0.1.js">
</script>Давайте поймем это полностью с помощью рабочего примера, как показано -
пример
<!doctype html>
<html amp lang = "en">
<head>
<meta charset = "utf-8">
<script async src = "https://cdn.ampproject.org/v0.js"></script>
<title>Google AMP - Amp Bind</title>
<link rel = "canonical" href =
"http://example.ampproject.org/article-metadata.html">
<meta name = "viewport" content = "width = device-width,
minimum-scale = 1,initial-scale = 1">
<style amp-boilerplate>
body{
-webkit-animation:
-amp-start 8s steps(1,end) 0s 1 normal both;-moz-animation:
-amp-start 8s steps(1,end) 0s 1 normal both;-ms-animation:
-amp-start 8s steps(1,end) 0s 1 normal both;animation:
-amp-start 8s steps(1,end) 0s 1 normal both
}
@-webkit-keyframes
-amp-start{from{visibility:hidden}to{visibility:visible}}@-moz-keyframes
-amp-start{from{visibility:hidden}to{visibility:visible}}@-ms-keyframes
-amp-start{from{visibility:hidden}to{visibility:visible}}@-o-keyframes
-amp-start{from{visibility:hidden}to{visibility:visible}}@keyframes
-amp-start{from{visibility:hidden}to{visibility:visible}}
</style>
<noscript>
<style amp-boilerplate>
body{
-webkit-animation:none;
-moz-animation:none;
-ms-animation:none;
animation:none
}
</style>
</noscript>
<script async custom-element = "amp-bind"
src = "https://cdn.ampproject.org/v0/amp-bind-0.1.js"></script>
<style amp-custom>
button{
background-color: #ACAD5C;
color: white;
padding: 12px 20px;
border: none;
border-radius: 4px;
}
</style>
</head>
<body>
<h3>Google AMP - Amp Bind</h3>
<p [text] = "'Hello ' + world + '.'">
Click on the button to change the text
</p>
<button on = "tap:AMP.setState({world: 'This is amp-bind example'})">
Click Here
</button>
</body>
</html>Вывод
Нажмите кнопку, чтобы увидеть, как текст меняется, как показано ниже -
Таким образом, в показанном выше примере мы использовали amp-bind для изменения текста при нажатии кнопки.
Amp-bind состоит из трех компонентов:
State- Изначально состояние пустое. Как только вы нажмете кнопку, состояние изменится. Например,
<button on = "tap:AMP.setState({world: 'This is amp-bind example'})">
Click Here
</button>Для изменения состояния используется метод AMP.setState. Переменнаяworld присвоено значение This is amp-bind example. Переменнаяworld используется внутри тега html -
<p [text] = "'Hello ' + world + '.'">
Click on the button to change the text
</p>При нажатии кнопки миру присваивается новое значение: Это пример amp-bind.
Мы также можем использовать amp-state с привязкой, как показано ниже -
<amp-state id = "myState">
<script type = "application/json">
{
"foo": "bar"
}
</script>
</amp-state>Выражению будет присвоено bmyState.foo во время переплета.
Expressions - Выражения для amp-bind для работы приведены ниже:
'Hello ' + worldworld считается state variable.
Bindings- Привязки применяются к специальным атрибутам в форме [атрибуты]. Например -
<p [text] = "'Hello ' + world + '.'">
Click on the button to change the text
</p>В приведенном выше примере [text] имеет выражение, которое используется для привязки p тег.
Мы можем использовать следующий атрибут для привязок -
- [text]
- [class]
- [hidden]
- [width]
- [height]
Привязки также возможны для amp-компонентов, и разрешены только определенные атрибуты. В следующем списке показаны такие компоненты и атрибуты -
| Старший Нет | Компонент усилителя | Атрибуты и описание |
|---|---|---|
| 1 | <amp-carousel type = slides> | [slide]* Измените слайд, используя это поведение привязки |
| 2 | <amp-date-picker> | [min] min -> Устанавливает самую раннюю выбираемую дату [max]max -> Устанавливает последнюю выбираемую дату |
| 3 | <amp-iframe> | [src] Изменить src iframe |
| 4 | <amp-img> | [alt] [attribution] [src] [srcset] Мы можем изменить alt, attribution, src и srcset. Если src изменен, измените srcset, поскольку он используется для кеширования |
| 5 | <amp-lightbox> | [open]* Вы можете показать / скрыть лайтбокс, привязав его к открытию |
| 6 | <amp-list> | [src] Если выражение является строкой, извлекает и отображает JSON из строкового URL. Если выражение является объектом или массивом, отображает данные выражения. |
| 7 | <amp-selector> | [selected]* [disabled] Изменяет выбранные в данный момент дочерние элементы, идентифицируемые их значениями атрибутов option. Поддерживает список значений, разделенных запятыми, для множественного выбора |
Связывание с использованием Amp-State
Мы можем определить amp-state со всеми данными, которые мы хотели бы использовать в элементе html или amp-компоненте.
Данные, используемые внутри amp-state, должны быть в формате json, как показано ниже -
<amp-state id = "myCarsList">
<script type = "application/json">
{
"currentcar" : "bmw",
"audi": {
"imageUrl": "images/audi.jpg"
},
"bmw": {
"imageUrl": "images/bmw.jpg"
}
}
</script>
</amp-state>Таким образом, мы определили пары ключ-значение с названием автомобиля и изображением, используемым для автомобиля.
Amp-bind для текста и Amp-Image
Рабочий пример использования amp-state с amp-bind показан ниже -
<!doctype html>
<html amp lang = "en">
<head>
<meta charset = "utf-8">
<script async src = "https://cdn.ampproject.org/v0.js"></script>
<title>Google AMP - Amp Bind</title>
<link rel = "canonical" href =
"http://example.ampproject.org/article-metadata.html">
<meta name = "viewport" content = "width = device-width,
minimum-scale = 1,initial-scale = 1">
<style amp-boilerplate>
body{
-webkit-animation:
-amp-start 8s steps(1,end) 0s 1 normal both;-moz-animation:
-amp-start 8s steps(1,end) 0s 1 normal both;-ms-animation:
-amp-start 8s steps(1,end) 0s 1 normal both;animation:
-amp-start 8s steps(1,end) 0s 1 normal both
}
@-webkit-keyframes
-amp-start{from{visibility:hidden}to{visibility:visible}}@-moz-keyframes
-amp-start{from{visibility:hidden}to{visibility:visible}}@-ms-keyframes
-amp-start{from{visibility:hidden}to{visibility:visible}}@-o-keyframes
-amp-start{from{visibility:hidden}to{visibility:visible}}@keyframes
-amp-start{from{visibility:hidden}to{visibility:visible}
}
</style>
<noscript>
<style amp-boilerplate>
body{
-webkit-animation:none;
-moz-animation:none;
-ms-animation:none;
animation:none
}
</style>
</noscript>
<script async custom-element = "amp-bind" src =
"https://cdn.ampproject.org/v0/amp-bind-0.1.js"></script>
<style amp-custom>
button{
background-color: #ACAD5C;
color: white;
padding: 12px 20px;
border: none;
border-radius: 4px;
cursor: pointer;
float: left;
}
</style>
</head>
<body>
<h3>Google AMP - Amp Bind</h3>
<amp-state id = "myCarsList">
<script type = "application/json">
{
"currentcar" : "bmw",
"audi": {
"imageUrl": "images/audi.jpg",
"style": "greenBackground"
},
"bmw": {
"imageUrl": "images/bmw.jpg",
"style": "redBackground"
}
}
</script>
</amp-state>
<amp-img
width = "300"
height = "200"
src = "images/bmw.jpg"
[src] = "myCarsList[currentcar].imageUrl">
</amp-img>
<p [text] = "'This is a ' + currentcar + '.'">
This is a BMW.
</p>
<br/>
<button on = "tap:AMP.setState({currentcar: 'audi'})">
Change Car
</button>
</body>
</html>Вывод
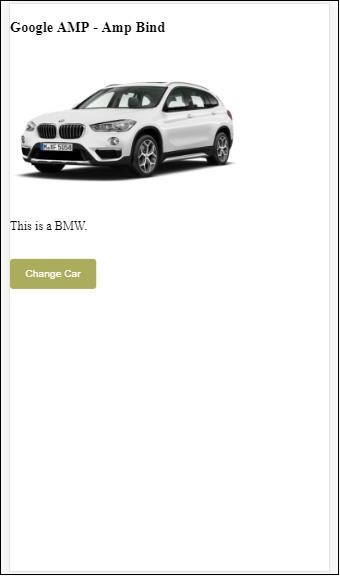
Нажмите кнопку, чтобы увидеть изображение автомобиля, а также текст ниже.
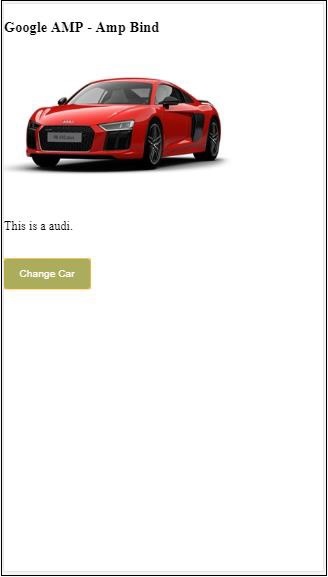
Amp-bind для видео и IFrame
Теперь мы увидим рабочий пример, который изменит amp-iframe и amp-video src.
<!doctype html>
<html amp lang = "en">
<head>
<meta charset = "utf-8">
<script async src = "https://cdn.ampproject.org/v0.js"></script>
<title>Google AMP - Amp Bind</title>
<link rel = "canonical" href =
"http://example.ampproject.org/article-metadata.html">
<meta name = "viewport" content = "width = device-width,
minimum-scale = 1,initial-scale = 1">
<style amp-boilerplate>
body{
-webkit-animation:
-amp-start 8s steps(1,end) 0s 1 normal both;-moz-animation:
-amp-start 8s steps(1,end) 0s 1 normal both;-ms-animation:
-amp-start 8s steps(1,end) 0s 1 normal both;animation:
-amp-start 8s steps(1,end) 0s 1 normal both
}
@-webkit-keyframes
-amp-start{from{visibility:hidden}to{visibility:visible}}@-moz-keyframes
-amp-start{from{visibility:hidden}to{visibility:visible}}@-ms-keyframes
-amp-start{from{visibility:hidden}to{visibility:visible}}@-o-keyframes
-amp-start{from{visibility:hidden}to{visibility:visible}}@keyframes
-amp-start{from{visibility:hidden}to{visibility:visible}}
</style>
<noscript>
<style amp-boilerplate>
body{
-webkit-animation:none;
-moz-animation:none;
-ms-animation:none;
animation:none
}
</style>
</noscript>
<script async custom-element = "amp-bind" src =
"https://cdn.ampproject.org/v0/amp-bind-0.1.js"></script>
<script async custom-element = "amp-video" src =
"https://cdn.ampproject.org/v0/amp-video-0.1.js"></script>
<script async custom-element = "amp-iframe" src =
"https://cdn.ampproject.org/v0/amp-iframe-0.1.js"></script>
<style amp-custom>
button{
background-color: #ACAD5C;
color: white;
padding: 12px 20px;
border: none;
border-radius: 4px;
cursor: pointer;
float: left;
}
</style>
</head>
<body>
<h3>Google AMP - Amp Bind</h3>
<button on = "tap:AMP.setState({currentlist: 'list1'})">
Click Here
</button>
<br/>
<br/>
<amp-state id = "myList">
<script type = "application/json">
{
"currentlist" : "",
"list1": {
"url": "video/m.mp4",
"style": "greenBackground",
"iframeurl":"https://maps.google.com/maps?q=hyderabad&t=&z=13&ie=UTF8&iwloc=&output=embed"
}
}
</script>
</amp-state>
<h3>AMP - IFRAME</h3>
<amp-iframe
width = "600"
title = "Google map"
height = "400"
layout = "responsive"
sandbox = "allow-scripts allow-same-origin allow-popups"
frameborder = "0"
src = "https://maps.google.com/maps?q=telangana&t=&z=13&ie=UTF8&iwloc=&output=embed"
[src] = "myList[currentlist].iframeurl">
<amp-img
layout = "fill"
src = "images/loading.jpg"
placeholder
>
/amp-img>
</amp-iframe>
<h3>AMP - VIDEO</h3>
<amp-video
id = "amp-video"
src = "video/samplevideo.mp4"
layout="responsive"
[src] = "myList[currentlist].url"
width = "300"
height = "170" autoplay controls>
</amp-video>
</body>
</html>Обратите внимание, что здесь мы использовали amp-state с iframesrc и video src.
<amp-state id = "myList">
<script type = "application/json">
{
"currentlist" : "",
"list1": {
"url": "video/m.mp4",
"style": "greenBackground",
"iframeurl":"
https://maps.google.com/maps?q=hyderabad&t=&z=13&ie=UTF8&iwloc=&output=embed"
}
}
</script>
</amp-state>Текущий список пуст, и при нажатии кнопки для него устанавливается значение list1. Переменная текущего списка используется для src iframe и видео, как показано ниже -
<amp-iframe width="600"
title = "Google map"
height = "400"
layout = "responsive"
sandbox = "allow-scripts allow-same-origin allow-popups"
frameborder = "0" src = "https://maps.google.com/maps?q=telangana&t=&z=13&ie=UTF8&iwloc=&output=embed"
[src] = "myList[currentlist].iframeurl">
<amp-img layout = "fill" src = "images/loading.jpg" placeholder>
</amp-img>
</amp-iframe>
<amp-video id = "amp-video" src = "video/samplevideo.mp4"
layout = "responsive" [src] = "myList[currentlist].url" width = "300"
height = "170" autoplay controls>
</amp-video>Вывод
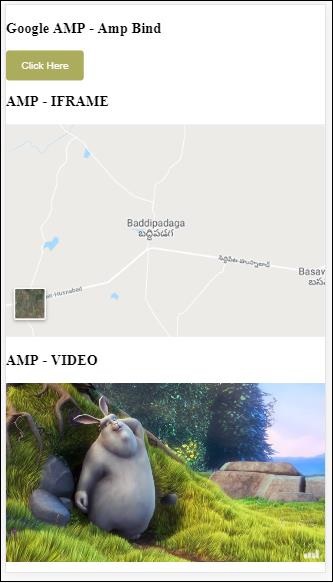
Нажмите кнопку, чтобы увидеть, как меняются параметры видео и iframe.
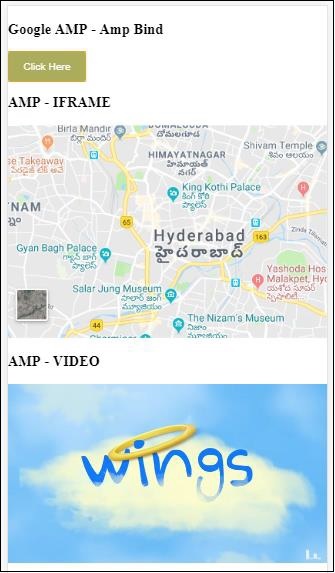
Amp-bind с amp-lightbox
Теперь давайте посмотрим, как работают привязка и amp-lightbox при совместном использовании.
пример
<!doctype html>
<html amp lang = "en">
<head>
<meta charset = "utf-8">
<script async src="https://cdn.ampproject.org/v0.js"></script>
<title>Google AMP - Amp Bind</title>
<link rel = "canonical" href =
"http://example.ampproject.org/article-metadata.html">
<meta name = "viewport" content = "width = device-width,
minimum-scale = 1,initial-scale = 1">
<style amp-boilerplate>
body{
-webkit-animation:
-amp-start 8s steps(1,end) 0s 1 normal both;-moz-animation:
-amp-start 8s steps(1,end) 0s 1 normal both;-ms-animation:
-amp-start 8s steps(1,end) 0s 1 normal both;animation:
-amp-start 8s steps(1,end) 0s 1 normal both
}
@-webkit-keyframes
-amp-start{from{visibility:hidden}to{visibility:visible}}@-moz-keyframes
-amp-start{from{visibility:hidden}to{visibility:visible}}@-ms-keyframes
-amp-start{from{visibility:hidden}to{visibility:visible}}@-o-keyframes
-amp-start{from{visibility:hidden}to{visibility:visible}}@keyframes
-amp-start{from{visibility:hidden}to{visibility:visible}}
</style>
<noscript>
<style amp-boilerplate>
body{
-webkit-animation:none;
-moz-animation:none;
-ms-animation:none;
animation:none
}
</style>
</noscript>
<script async custom-element = "amp-bind" src =
"https://cdn.ampproject.org/v0/amp-bind-0.1.js"></script>
<script async custom-element = "amp-lightbox" src =
"https://cdn.ampproject.org/v0/amp-lightbox-0.1.js"></script>
<style amp-custom>
button{
background-color: #ACAD5C;
color: white;
padding: 12px 20px;
border: none;
border-radius: 4px;
cursor: pointer;
float: left;
}
.lightbox {
background: rgba(211,211,211,0.8);
width: 100%;
height: 100%;
position: absolute;
display: flex;
align-items: center;
justify-content: center;
}
</style>
</head>
<body>
<h3>Google AMP - Amp Bind</h3>
<button on = "tap:AMP.setState({displaylightbox: true})">
Click Here
</button>
<br/>
<br/>
<h3>AMP - Lightbox</h3>
<amp-lightbox
id = "my-lightbox"
[open] = "displaylightbox"
layout = "nodisplay"
close-button>
<div class = "lightbox" on = "tap:AMP.setState({displaylightbox: false})">
<amp-img alt = "Beautiful Flower"
src = "images/loreal.gif"
width = "246"
height = "205">
</amp-img>
</div>
</amp-lightbox>
</body>
</html>Чтобы использовать привязку к amp-lightbox, мы использовали [open] для amp-lightbox, как показано ниже -
<amp-lightbox id = "my-lightbox" [open] = "displaylightbox"
layout = "nodisplay" close-button>
<div class = "lightbox" on="tap:AMP.setState({displaylightbox: false})">
<amp-img alt = "Beautiful Flower"
src = "images/loreal.gif"
width = "246"
height = "205">
</amp-img>
</div>
</amp-lightbox>[Open] = «displaylightbox» - это переменная, состояние которой изменяется при нажатии кнопки и при нажатии на div лайтбокса на true / false -
<button on = "tap:AMP.setState({displaylightbox: true})">
Click Here
</button>
<div class = "lightbox" on = "tap:AMP.setState({displaylightbox: false})">
<amp-img alt = "Beautiful Flower"
src = "images/loreal.gif"
width = "246"
height = "205">
</amp-img>
</div>Вывод
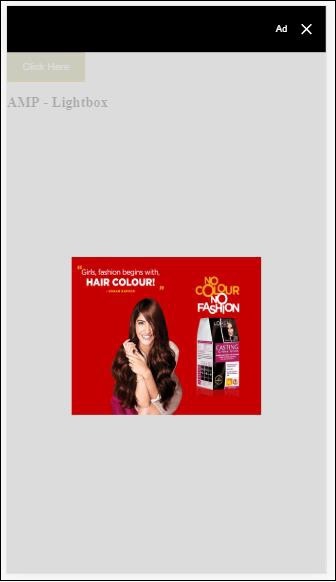
Привязка усилителя к элементу ввода
Давайте разберемся, как работает привязка amp к входному элементу с помощью рабочего примера, как показано -
<!doctype html>
<html amp lang = "en">
<head>
<meta charset = "utf-8">
<script async src = "https://cdn.ampproject.org/v0.js"></script>
<title>Google AMP - Amp Bind</title>
<link rel = "canonical" href=
"http://example.ampproject.org/article-metadata.html">
<meta name = "viewport" content = "width = device-width,
minimum-scale = 1,initial-scale = 1">
<style amp-boilerplate>
body{
-webkit-animation:
-amp-start 8s steps(1,end) 0s 1 normal both;-moz-animation:
-amp-start 8s steps(1,end) 0s 1 normal both;-ms-animation:
-amp-start 8s steps(1,end) 0s 1 normal both;animation:
-amp-start 8s steps(1,end) 0s 1 normal both
}
@-webkit-keyframes
-amp-start{from{visibility:hidden}to{visibility:visible}}@-moz-keyframes
-amp-start{from{visibility:hidden}to{visibility:visible}}@-ms-keyframes
-amp-start{from{visibility:hidden}to{visibility:visible}}@-o-keyframes
-amp-start{from{visibility:hidden}to{visibility:visible}}@keyframes
-amp-start{from{visibility:hidden}to{visibility:visible}}
</style>
<noscript>
<style amp-boilerplate>
body{
-webkit-animation:none;
-moz-animation:none;
-ms-animation:none;
animation:none
}
</style>
<noscript>
<script async custom-element = "amp-bind"
src = "https://cdn.ampproject.org/v0/amp-bind-0.1.js">
<script>
<script async custom-element = "amp-lightbox"
src = "https://cdn.ampproject.org/v0/amp-lightbox-0.1.js">
</script>
<style amp-custom>
button{
background-color: #ACAD5C;
color: white;
padding: 12px 20px;
border: none;
border-radius: 4px;
cursor: pointer;
float: left;
}
.lightbox {
background: rgba(211,211,211,0.8);
width: 100%;
height: 100%;
position: absolute;
display: flex;
align-items: center;
justify-content: center;
}
#txtname{
width: 100%;
padding: 12px 20px;
margin: 8px 0;
display: inline-block;
border: 1px solid #ccc;
border-radius: 4px;
box-sizing: border-box;
}
div {
font-size:25px;
}
</style>
</head>
<body>
<h3>Google AMP - Amp Bind</h3>
<button on = "tap:AMP.setState({displaylightbox: true})">
Click Here
</button>
<br/>
<br/>
<h3>
AMP - Input Element
<h3>
<input id = "txtname" placeholder = "Type here"
on = "input-throttled:AMP.setState({name: event.value})">
<div [text] = "name">
</div>
</body>
</html>Вывод
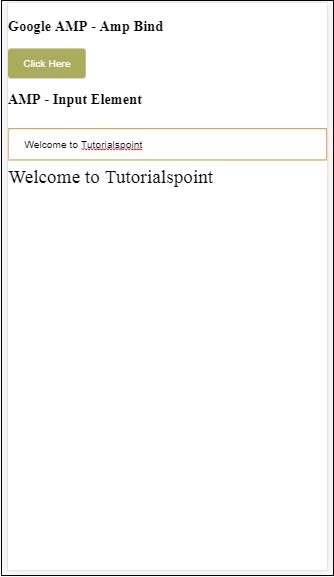
Данные, введенные в текстовое поле, отображаются внизу. Это можно сделать, изменив переменную состоянияname на событии ввода, как показано -
<input id = "txtname" placeholder = "Type here" on =
"input-throttled:AMP.setState({name: event.value})">
<div [text] = "name">
</div>AMP-Layout - одна из важных функций, доступных в Google-amp. Компоновка усилителя обеспечивает правильную визуализацию компонентов усилителя при загрузке страницы, не вызывая мерцания или проблем с прокруткой. Google AMP обеспечивает выполнение рендеринга макета на странице до выполнения любых других удаленных ресурсов, таких как HTTP-запрос изображений и вызовы данных.
Список атрибутов макета приведен ниже.
ширина и высота
layout
sizes
heights
media
placeholder
fallback
noloading
Мы рассмотрим layoutатрибут подробно в этой главе. Остальные атрибуты подробно обсуждаются в главе -Google AMP – Attributes этого учебника.
Атрибут макета
Мы можем использовать атрибут макета в amp-компоненте, который будет определять, как компонент будет отображаться на странице. Список макетов, поддерживаемых amp, приведен ниже -
Нет
Container
fill
fixed
fixed-height
flex-item
intrinsic
nodisplay
Responsive
Для каждого из этих макетов мы увидим рабочий пример, который покажет, как атрибут макета по-разному отображает amp-компонент. Мы будем использоватьamp-img компонент в наших примерах.
Отсутствует Пример
<!doctype html>
<html amp lang = "en">
<head>
<meta charset = "utf-8">
<script async src="https://cdn.ampproject.org/v0.js"></script>
<title>Google AMP - Image</title>
<link rel = "canonical" href =
"http://example.ampproject.org/article-metadata.html">
<meta name = "viewport" content = "width = device-width,
minimum-scale = 1,initial-scale = 1">
<style amp-boilerplate>
body{
-webkit-animation:
-amp-start 8s steps(1,end) 0s 1 normal both;-moz-animation:
-amp-start 8s steps(1,end) 0s 1 normal both;-ms-animation:
-amp-start 8s steps(1,end) 0s 1 normal both;animation:
-amp-start 8s steps(1,end) 0s 1 normal both
}
@-webkit-keyframes
-amp-start{from{visibility:hidden}to{visibility:visible}}@-moz-keyframes
-amp-start{from{visibility:hidden}to{visibility:visible}}@-ms-keyframes
-amp-start{from{visibility:hidden}to{visibility:visible}}@-o-keyframes
-amp-start{from{visibility:hidden}to{visibility:visible}}@keyframes
-amp-start{from{visibility:hidden}to{visibility:visible}}
</style>
<noscript>
<style amp-boilerplate>
body{
-webkit-animation:none;
-moz-animation:none;
-ms-animation:none;
animation:none
}
</style>
</noscript>
<style amp-custom>
amp-img {
border: 1px solid black;
border-radius: 4px;
padding: 5px;
}
</style>
</head>
<body>
<h1>Google AMP - Image Example</h1>
<amp-img
alt = "Beautiful
Flower"src = "images/flower.jpg"
width = "246"
height = "205">
</amp-img>
</body>
</html>Вывод
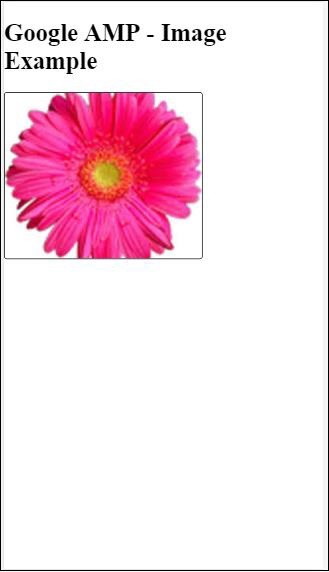
Пример контейнера
Layout = "container" в основном присваивается родительскому элементу, а дочерний элемент принимает определенные размеры.
<!doctype html>
<html amp lang = "en">
<head>
<meta charset = "utf-8">
<script async src = "https://cdn.ampproject.org/v0.js"></script>
<title>Google AMP - Image</title>
<link rel = "canonical" href =
"http://example.ampproject.org/article-metadata.html">
<meta name = "viewport" content = "width = device-width,
minimum-scale = 1,initial-scale = 1">
<style amp-boilerplate>
body{
-webkit-animation:
-amp-start 8s steps(1,end) 0s 1 normal both;-moz-animation:
-amp-start 8s steps(1,end) 0s 1 normal both;-ms-animation:
-amp-start 8s steps(1,end) 0s 1 normal both;animation:
-amp-start 8s steps(1,end) 0s 1 normal both
}@-webkit-keyframes
-amp-start{from{visibility:hidden}to{visibility:visible}}@-moz-keyframes
-amp-start{from{visibility:hidden}to{visibility:visible}}@-ms-keyframes
-amp-start{from{visibility:hidden}to{visibility:visible}}@-o-keyframes
-amp-start{from{visibility:hidden}to{visibility:visible}}@keyframes
-amp-start{from{visibility:hidden}to{visibility:visible}}
</style>
<noscript>
<style amp-boilerplate>
body{
-webkit-animation:none;
-moz-animation:none;
-ms-animation:none;
animation:none
}
</style>
</noscript>
<style amp-custom>
amp-img {
border: 1px solid black;
border-radius: 4px;
padding: 5px;
}
h1{
font-family: "Segoe UI",Arial,sans-serif;
font-weight: 400;margin: 10px 0;
}
</style>
</head>
<body>
<h1>Google AMP - Layout = container Image Example</h1>
<amp-accordion layout = "container">
<amp-img alt = "Beautiful Flower"
src = "images/flower.jpg"
width = "246"
height = "205">
</amp-img>
</amp-accordion>
</body>
</html>Вывод
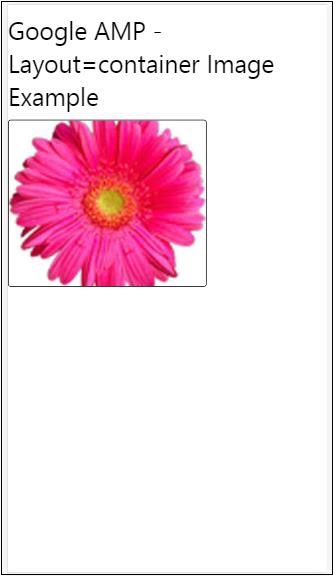
Пример заполнения
Layout = ”fill” принимает ширину и высоту родительского элемента.
<!doctype html>
<html amp lang = "en">
<head>
<meta charset = "utf-8">
<script async src = "https://cdn.ampproject.org/v0.js"></script>
<title>
Google AMP - Image
<title>
<link rel = "canonical" href =
"http://example.ampproject.org/article-metadata.html">
<meta name = "viewport" content = "width = device-width,
minimum-scale = 1,initial-scale = 1">
<style amp-boilerplate>
body{
-webkit-animation:
-amp-start 8s steps(1,end) 0s 1 normal both;-moz-animation:
-amp-start 8s steps(1,end) 0s 1 normal both;-ms-animation:
-amp-start 8s steps(1,end) 0s 1 normal both;animation:
-amp-start 8s steps(1,end) 0s 1 normal both
}
@-webkit-keyframes
-amp-start{from{visibility:hidden}to{visibility:visible}}@-moz-keyframes
-amp-start{from{visibility:hidden}to{visibility:visible}}@-ms-keyframes
-amp-start{from{visibility:hidden}to{visibility:visible}}@-o-keyframes
-amp-start{from{visibility:hidden}to{visibility:visible}}@keyframes
-amp-start{from{visibility:hidden}to{visibility:visible}}
</style>
<noscript>
<style amp-boilerplate>
body{
-webkit-animation:none;
-moz-animation:none;
-ms-animation:none;
animation:none
}
</style>
</noscript>
<style amp-custom>
amp-img {
border: 1px solid black;
border-radius: 4px;
padding: 5px;
}
h1{font-family: "Segoe UI",Arial,sans-serif;
font-weight: 400;margin: 10px 0;}
</style>
</head>
<body>
<h1>Google AMP - Layout = fill Image Example</h1>
<div style = "position:relative;width:100px;height:100px;">
<amp-img alt = "Beautiful Flower"
src = "images/flower.jpg"
width = "246"
height = "205"
layout = "fill">
</amp-img>
</div>
</body>
</html>Вывод
Пример фиксированной и фиксированной высоты
Прежде чем понимать использование фиксированной и фиксированной высоты, обратите внимание на следующие два момента:
layout=”fixed” должен иметь ширину и высоту, и в нем будет показан amp-компонент.
layout=”fixed-height” Для компонента должна быть указана высота. Это гарантирует, что высота не будет изменена. Ширину нельзя указывать при использовании фиксированной высоты, или она может быть автоматической.
<!doctype html>
<html amp lang = "en">
<head>
<meta charset = "utf-8">
<script async src = "https://cdn.ampproject.org/v0.js"></script>
<title>Google AMP - Image</title>
<link rel = "canonical" href =
"http://example.ampproject.org/article-metadata.html">
<meta name = "viewport" content = "width = device-width,
minimum-scale = 1,initial-scale = 1">
<style amp-boilerplate>
body{
-webkit-animation:
-amp-start 8s steps(1,end) 0s 1 normal both;-moz-animation:
-amp-start 8s steps(1,end) 0s 1 normal both;-ms-animation:
-amp-start 8s steps(1,end) 0s 1 normal both;animation:
-amp-start 8s steps(1,end) 0s 1 normal both
}
@-webkit-keyframes
-amp-start{from{visibility:hidden}to{visibility:visible}}@-moz-keyframes
-amp-start{from{visibility:hidden}to{visibility:visible}}@-ms-keyframes
-amp-start{from{visibility:hidden}to{visibility:visible}}@-o-keyframes
-amp-start{from{visibility:hidden}to{visibility:visible}}@keyframes
-amp-start{from{visibility:hidden}to{visibility:visible}}
</style>
<noscript>
<style amp-boilerplate>
body{
-webkit-animation:none;
-moz-animation:none;
-ms-animation:none;
animation:none
}
</style>
</noscript>
<style amp-custom>
amp-img {
border: 1px solid black;
border-radius: 4px;
padding: 5px;
}
div{
display: inline-block;
width: 200px;
height:200px;
margin: 5px;
}
h1{font-family: "Segoe UI",Arial,sans-serif;
font-weight: 400;margin: 10px 0;}
</style>
</head>
<body>
<h1>Google AMP - Layout = fixed and
Layout = fixed-height Image Example
</h1>
<div>
<amp-img alt = "Beautiful Flower"
src = "images/flower.jpg"
width = "246"
height = "205"
layout = "fixed">
</amp-img>
</div>
<div>
<amp-img alt = "Beautiful Flower"
src = "images/flower.jpg"
height = "205"
layout = "fixed-height">
</amp-img>
</div>
</body>
</html>Вывод
Flex-item и внутреннее
<!doctype html>
<html amp lang = "en">
<head>
<meta charset = "utf-8">
<script async src ="https://cdn.ampproject.org/v0.js"></script>
<title>Google AMP - Image</title>
<link rel = "canonical" href ="
http://example.ampproject.org/article-metadata.html">
<meta name = "viewport" content = "width = device-width,
minimum-scale = 1,initial-scale = 1">
<style amp-boilerplate>
body{
-webkit-animation:
-amp-start 8s steps(1,end) 0s 1 normal both;-moz-animation:
-amp-start 8s steps(1,end) 0s 1 normal both;-ms-animation:
-amp-start 8s steps(1,end) 0s 1 normal both;animation:
-amp-start 8s steps(1,end) 0s 1 normal both
}
@-webkit-keyframes
-amp-start{from{visibility:hidden}to{visibility:visible}}@-moz-keyframes
-amp-start{from{visibility:hidden}to{visibility:visible}}@-ms-keyframes
-amp-start{from{visibility:hidden}to{visibility:visible}}@-o-keyframes
-amp-start{from{visibility:hidden}to{visibility:visible}}@keyframes
-amp-start{from{visibility:hidden}to{visibility:visible
<style>
<noscript>
<style amp-boilerplate>
body{
-webkit-animation:none;
-moz-animation:none;
-ms-animation:none;
animation:none
}
</style>
</noscript>
<style amp-custom>
amp-img {
border: 1px solid black;
border-radius: 4px;
padding: 5px;
}
displayitem {
display: inline-block;
width: 200px;
height:200px;
margin: 5px;
}
h1{font-family: "Segoe UI",Arial,sans-serif;
font-weight: 400;margin: 10px 0;}
</style>
</head>
<body>
<h1>Google AMP - Layout = flex-item and
Layout = intrinsic Image Example
</h1>
<div class = "displayitem">
<amp-img alt = "Beautiful Flower"
src = "images/flower.jpg"
layout = "flex-item">
</amp-img>
</div>
<div class = "displayitem">
<amp-img alt = "Beautiful Flower"
src = "images/flower.jpg"
width = "246"
height = "205"
layout = "intrinsic">
</amp-img>
</div>
</body>
</html>Вывод
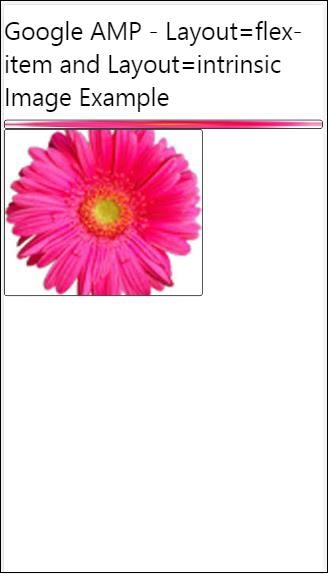
nodisplay и отзывчивый
Компонент Amp с layout = nodisplay не будет занимать места на странице, как и display: none. Нет необходимости добавлять в такой макет какие-либо свойства ширины и высоты.
Компонент Amp с layout = responsive займет доступное пространство или ширину страницы, а высота будет изменена с сохранением соотношения сторон элемента.
<!doctype html>
<html amp lang = "en">
<head>
<meta charset = "utf-8">
<script async src = "https://cdn.ampproject.org/v0.js">
</script>
<title>Google AMP - Image</title>
<link rel = "canonical" href =
"http://example.ampproject.org/article-metadata.html">
<meta name = "viewport" content="width=device-width,
minimum-scale = 1,initial-scale = 1">
<style amp-boilerplate>
body{
-webkit-animation:
-amp-start 8s steps(1,end) 0s 1 normal both;-moz-animation:
-amp-start 8s steps(1,end) 0s 1 normal both;-ms-animation:
-amp-start 8s steps(1,end) 0s 1 normal both;animation:
-amp-start 8s steps(1,end) 0s 1 normal both}
@-webkit-keyframes
-amp-start{from{visibility:hidden}to{visibility:visible}}@-moz-keyframes
-amp-start{from{visibility:hidden}to{visibility:visible}}@-ms-keyframes
-amp-start{from{visibility:hidden}to{visibility:visible}}@-o-keyframes
-amp-start{from{visibility:hidden}to{visibility:visible}}@keyframes
-amp-start{from{visibility:hidden}to{visibility:visible}}
</style>
<noscript>
<style amp-boilerplate>
body{
-webkit-animation:none;
-moz-animation:none;
-ms-animation:none;
animation:none}
</style>
</noscript>
<style amp-custom>
amp-img {
border: 1px solid black;
border-radius: 4px;
padding: 5px;
}
displayitem {
display: inline-block;
width: 200px;
height:200px;
margin: 5px;
}
h1{font-family: "Segoe UI",Arial,sans-serif;
font-weight: 400;margin: 10px 0;}
</style>
</head>
<body>
<h1>Google AMP - Layout=no-display and
Layout = responsive Image Example</h1>
<div class = "displayitem">
<amp-img alt = "Beautiful Flower"
src = "images/flower.jpg"
layout = "no-display">
</amp-img>
</div>
<div class = "displayitem">
<amp-img alt = "Beautiful Flower"
src = "images/flower.jpg"
width = "246"
height = "205"
layout = "responsive">
</amp-img>
</div>
</body>
</html>Вывод
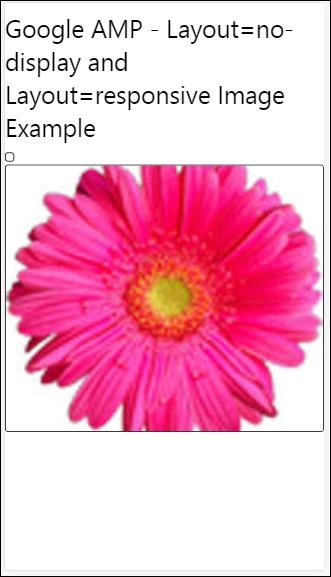
Список макетов, поддерживаемых в Google AMP, выглядит следующим образом
Accordion
Carousel
Lightbox
Slider
Sidebar
Усилитель-Аккордеон
Amp-accordion - это компонент amp, используемый для отображения содержимого в формате разворачивания-сворачивания. Пользователям становится легко просматривать его на мобильных устройствах, где они могут выбрать раздел по своему выбору с помощью аккордеона.
Для работы с amp-accordion вам необходимо добавить следующий скрипт -
<script async custom-element = "amp-accordion"
src = "https://cdn.ampproject.org/v0/amp-accordion-0.1.js">
</script>Ампер-аккордеонная бирка
<amp-accordion>
<section class = "seca">
<h3>Content 1</h3>
<div>
<p>Content 1 is opened for amp-accordion</p>
<p>Content 1 is opened for amp-accordion</p>
<p>Content 1 is opened for amp-accordion</p>
<p>Content 1 is opened for amp-accordion</p>
<p>Content 1 is opened for amp-accordion</p>
<p>Content 1 is opened for amp-accordion</p>
</div>
</section>
…
</amp-accordion>Давайте посмотрим на рабочий пример усилителя-аккордеона.
<!doctype html>
<html amp lang = "en">
<head>
<meta charset = "utf-8">
<script async src = "https://cdn.ampproject.org/v0.js">
</script>
<title>Google AMP - Amp Accordion </title>
<link rel = "canonical" href=
"http://example.ampproject.org/article-metadata.html">
<meta name = "viewport" content = "width = device-width,
minimum-scale = 1,initial-scale = 1">
<style amp-boilerplate>
body{
-webkit-animation:
-amp-start 8s steps(1,end) 0s 1 normal both;-moz-animation:
-amp-start 8s steps(1,end) 0s 1 normal both;-ms-animation:
-amp-start 8s steps(1,end) 0s 1 normal both;animation:
-amp-start 8s steps(1,end) 0s 1 normal both
}
@-webkit-keyframes
-amp-start{from{visibility:hidden}to{visibility:visible}}@-moz-keyframes
-amp-start{from{visibility:hidden}to{visibility:visible}}@-ms-keyframes
-amp-start{from{visibility:hidden}to{visibility:visible}}@-o-keyframes
-amp-start{from{visibility:hidden}to{visibility:visible}}@keyframes
-amp-start{from{visibility:hidden}to{visibility:visible}}
</style>
<noscript>
<style amp-boilerplate>
body{
-webkit-animation:none;
-moz-animation:none;
-ms-animation:none;
animation:none}
</style>
</noscript>
<script async custom-element = "amp-accordion" src =
"https://cdn.ampproject.org/v0/amp-accordion-0.1.js">
</script>
<style>
input[type = text]{
width: 50%;
padding: 12px;
border: 1px solid #ccc;
border-radius: 4px;
resize: vertical;
}
label {
padding: 12px 12px 12px 0;
display: inline-block;
font-family: "Segoe UI",Arial,sans-serif;
font-weight: 400;
}
.col-label {
float: left;
width: 25%;
margin-top: 6px;
}
.col-content {
float: left;
width: 75%;
margin-top: 6px;
}
.row:after {
content: "";
display: table;
clear: both;
}
.amp_example {
background-color: #f1f1f1;
padding: 0.01em 16px;
margin: 20px 0;
box-shadow: 0 2px 4px 0
rgba(0,0,0,0.16),0 2px 10px 0
rgba(0,0,0,0.12)!important;
}
h3{
font-family: "Segoe UI",Arial,sans-serif;
font-weight: 400;margin: 10px 0;
}
input[type=submit] {
background-color: #ACAD5C;
color: white;
padding: 12px 20px;
border: none;
border-radius: 4px;
cursor: pointer;
float: right;
}
.lightbox {background-color: rgba(100, 100, 100, 0.5);}
.seca {background-color:#fff;}
</style>
</head>
<body>
<div class = "amp_example">
<h3>Google AMP - Amp Accordion</h3>
<amp-accordion>
<section class = "seca">
<h3>Content 1</h3>
<div>
<p>Content 1 is opened for amp-accordion</p>
<p>Content 1 is opened for amp-accordion</p>
<p>Content 1 is opened for amp-accordion</p>
<p>Content 1 is opened for amp-accordion</p>
<p>Content 1 is opened for amp-accordion</p>
<p>Content 1 is opened for amp-accordion</p>
</div>
</section>
<section expanded class = "seca">
<h3>Content 2</h3>
<div>
<p>Content 2 is opened for amp-accordion</p>
<p>Content 2 is opened for amp-accordion</p>
<p>Content 2 is opened for amp-accordion</p>
<p>Content 2 is opened for amp-accordion</p>
<p>Content 2 is opened for amp-accordion</p>
</div>
</section>
<section class="seca">
<h3>Content 3</h3>
<div>
<p>Content 3 is opened for amp-accordion</p>
<p>Content 3 is opened for amp-accordion</p>
<p>Content 3 is opened for amp-accordion</p>
<p>Content 3 is opened for amp-accordion</p>
<p>Content 3 is opened for amp-accordion</p>
</div>
</section>
</amp-accordion>
</div>
</body>
</html>Вывод
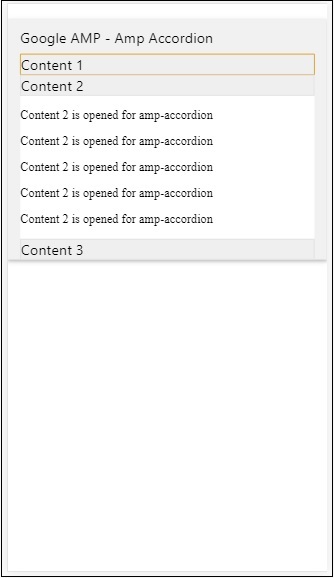
Внутри усилителя-аккордеона есть секции. У каждого раздела может быть 2 дочерних элемента, и более двух будут отображать ошибку в консоли браузера. Вы можете добавить контейнер в раздел и иметь в нем несколько элементов.
По умолчанию мы оставили один раздел в расширенном режиме с помощью атрибута, развернутого до раздела.
Авто-сворачивающиеся аккордеоны
Для автоматического сворачивания мы используем атрибут expand-single-section на amp-accordion, как показано в примере. Раздел, который открывает пользователь, останется только в развернутом состоянии, остальные закроют, используя expand-single-section атрибут.
<!doctype html>
<html amp lang = "en">
<head>
<meta charset = "utf-8">
<script async src = "https://cdn.ampproject.org/v0.js">
</script>
<title>Google AMP - Amp Accordion </title>
<link rel = "canonical" href=
"http://example.ampproject.org/article-metadata.html">
<meta name = "viewport" content = "width = device-width,
minimum-scale = 1,initial-scale = 1">
<style amp-boilerplate>
body{
-webkit-animation:
-amp-start 8s steps(1,end) 0s 1 normal both;-moz-animation:
-amp-start 8s steps(1,end) 0s 1 normal both;-ms-animation:
-amp-start 8s steps(1,end) 0s 1 normal both;animation:
-amp-start 8s steps(1,end) 0s 1 normal both
}
@-webkit-keyframes
-amp-start{from{visibility:hidden}to{visibility:visible}}@-moz-keyframes
-amp-start{from{visibility:hidden}to{visibility:visible}}@-ms-keyframes
-amp-start{from{visibility:hidden}to{visibility:visible}}@-o-keyframes
-amp-start{from{visibility:hidden}to{visibility:visible}}@keyframes
-amp-start{from{visibility:hidden}to{visibility:visible}}
</style>
<noscript>
<style amp-boilerplate>
body{
-webkit-animation:none;
-moz-animation:none;
-ms-animation:none;
animation:none}
</style>
</noscript>
<script async custom-element = "amp-accordion" src =
"https://cdn.ampproject.org/v0/amp-accordion-0.1.js">
</script>
<style>
input[type = text]{
width: 50%;
padding: 12px;
border: 1px solid #ccc;
border-radius: 4px;
resize: vertical;
}
label {
padding: 12px 12px 12px 0;
display: inline-block;
font-family: "Segoe UI",Arial,sans-serif;
font-weight: 400;
}
.col-label {
float: left;
width: 25%;
margin-top: 6px;
}
.col-content {
float: left;
width: 75%;
margin-top: 6px;
}
.row:after {
content: "";
display: table;
clear: both;
}
.amp_example {
background-color: #f1f1f1;
padding: 0.01em 16px;
margin: 20px 0;
box-shadow: 0 2px 4px 0
rgba(0,0,0,0.16),0 2px 10px 0
rgba(0,0,0,0.12)!important;
}
h3{
font-family: "Segoe UI",Arial,sans-serif;
font-weight: 400;
margin: 10px 0;
}
input[type=submit] {
background-color: #ACAD5C;
color: white;
padding: 12px 20px;
border: none;
border-radius: 4px;
cursor: pointer;
float: right;}
.lightbox {background-color: rgba(100, 100, 100, 0.5);}
.seca {background-color:#fff;}
</style>
<head>
<body>
<div class = "amp_example">
<h3>Google AMP - Amp Accordion</h3>
<amp-accordion expand-single-section>
<section class = "seca">
<h3>Content 1</h3>
<div>
<p>Content 1 is opened for amp-accordion</p>
<p>Content 1 is opened for amp-accordion</p>
<p>Content 1 is opened for amp-accordion</p>
<p>Content 1 is opened for amp-accordion</p>
<p>Content 1 is opened for amp-accordion</p>
<p>Content 1 is opened for amp-accordion</p>
</div>
</section>
<section class = "seca">
<h3>Content 2</h3>
<div>
<p>Content 2 is opened for amp-accordion</p>
<p>Content 2 is opened for amp-accordion</p>
<p>Content 2 is opened for amp-accordion</p>
<p>Content 2 is opened for amp-accordion</p>
<;p>Content 2 is opened for amp-accordion</p>
</div>
</section>
<section class = "seca">
<h3>Content 3</h3>
<div>
<p>Content 3 is opened for amp-accordion</p>
<p>Content 3 is opened for amp-accordion</p>
<p>Content 3 is opened for amp-accordion</p>
<p>Content 3 is opened for amp-accordion</p>
<p>Content 3 is opened for amp-accordion</p>
</div>
</section>
</amp-accordion>
</div>
</body>
</html>Вывод
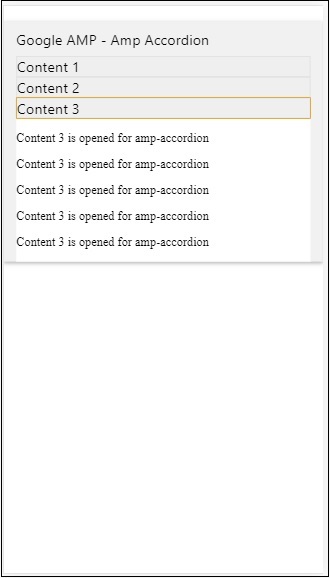
Анимация на аккордеонах
Используя animateатрибут, мы можем добавить анимацию для разворачивания-сворачивания аккордеона. Взгляните на пример ниже -
<!doctype html>
<html amp lang = "en">
<head>
<meta charset = "utf-8">
<script async src = "https://cdn.ampproject.org/v0.js">
</script>
<title>Google AMP - Amp Accordion </title>
<link rel = "canonical" href = "http://example.ampproject.org/article-metadata.html>
<meta name = "viewport" content = "width = device-width,minimum-scale = 1,initial-scale = 1">
<style amp-boilerplate>
body{
-webkit-animation:
-amp-start 8s steps(1,end) 0s 1 normal both;-moz-animation:
-amp-start 8s steps(1,end) 0s 1 normal both;-ms-animation:
-amp-start 8s steps(1,end) 0s 1 normal both;animation:
-amp-start 8s steps(1,end) 0s 1 normal both
}
@-webkit-keyframes
-amp-start{from{visibility:hidden}to{visibility:visible}}@-moz-keyframes
-amp-start{from{visibility:hidden}to{visibility:visible}}@-ms-keyframes
-amp-start{from{visibility:hidden}to{visibility:visible}}@-o-keyframes
-amp-start{from{visibility:hidden}to{visibility:visible}}@keyframes
-amp-start{from{visibility:hidden}to{visibility:visible}}
</style>
<noscript>
<style amp-boilerplate>
body{
-webkit-animation:none;
-moz-animation:none;
-ms-animation:none;animation:none
}
</style>
</noscript>
<script async custom-element = "amp-accordion" src =
"https://cdn.ampproject.org/v0/amp-accordion-0.1.js">
</script>
<style>
input[type = text]{
width: 50%;
padding: 12px;
border: 1px solid #ccc;
border-radius: 4px;
resize: vertical;
}
label {
padding: 12px 12px 12px 0;
display: inline-block;
font-family: "Segoe UI",Arial,sans-serif;
font-weight: 400;
}
.col-label {
float: left;
width: 25%;
margin-top: 6px;
}
.col-content {
float: left;
width: 75%;
margin-top: 6px;
}
.row:after {
content: "";
display: table;
clear: both;
}
.amp_example {
background-color: #f1f1f1;
padding: 0.01em 16px;
margin: 20px 0;
box-shadow: 0 2px 4px 0 rgba(0,0,0,0.16),
0 2px 10px 0 rgba(0,0,0,0.12)!important;
}
h3{
font-family: "Segoe UI",Arial,sans-serif;
font-weight: 400;margin: 10px 0;
}
input[type=submit] {
background-color: #ACAD5C;
color: white;
padding: 12px 20px;
border: none;
border-radius: 4px;
cursor: pointer;
float: right;
}
.lightbox {background-color: rgba(100, 100, 100, 0.5);}
.seca {background-color:#fff;}
</style>
</head>
<body>
<div class = "amp_example">
<h3>Google AMP - Amp Accordion</h3>
<amp-accordion animate expand-single-section>
<section class = "seca">
<h3>Content 1</h3>
<div>
<p>Content 1 is opened for amp-accordion</p>
<p>Content 1 is opened for amp-accordion</p>
<p>Content 1 is opened for amp-accordion</p>
<p>Content 1 is opened for amp-accordion</p>
<p>Content 1 is opened for amp-accordion</p>
<p>Content 1 is opened for amp-accordion</p>
</div>
</section>
<section class = "seca">
<h3>Content 2</h3>
<div>
<p>Content 2 is opened for amp-accordion</p>
<p>Content 2 is opened for amp-accordion</p>
<p>Content 2 is opened for amp-accordion</p>
<p>Content 2 is opened for amp-accordion</p>
<p>Content 2 is opened for amp-accordion</p>
</div>
</section>
<section class="seca">
<h3>Content 3</h3>
<div>
<p>Content 3 is opened for amp-accordion</p>
<p>Content 3 is opened for amp-accordion</p>
<p>Content 3 is opened for amp-accordion</p>
<p>Content 3 is opened for amp-accordion</p>
<p>Content 3 is opened for amp-accordion</p>
</div>
</section>
</amp-accordion>
</div>
</body>
</html>Вывод
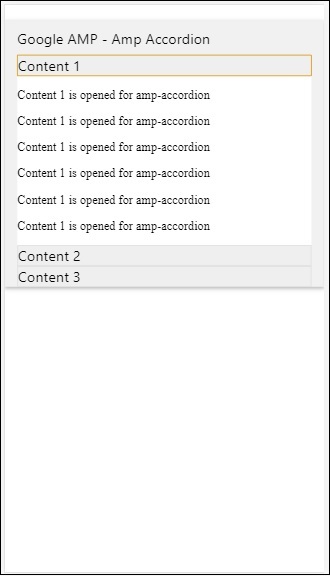
AMP-карусель
Amp-carousel - это компонент amp-компонент для отображения набора аналогичного содержимого на экране и использования стрелок для переключения между содержимым.
Для работы с amp-carousel нам нужно добавить следующий скрипт -
<script async custom-element = "amp-carousel" src = "https://cdn.ampproject.org/v0/amp-carousel-0.1.js"></script>Тег усилителя-карусели
Тег amp-carousel показан ниже:
<amp-carousel height="300" layout="fixed-height" type="carousel">
<amp-img src="images/christmas1.jpg" width="400" height="300" alt="a sample image"></amp-img>
….
</amp-carousel>Атрибуты, доступные для amp-carousel
Атрибуты, доступные для amp-carousel, перечислены в таблице ниже -
| Старший Нет | Атрибут и описание |
|---|---|
| 1 | type Мы можем отображать элементы карусели в виде карусели и слайдов |
| 2 | height Высота карусели в пикселях |
| 3 | controls (optional) На экране отображается стрелка влево / вправо. На устройствах она исчезает через несколько секунд. С помощью CSS можно сделать стрелки видимыми все время. |
| 4 | data-next-button-aria-label (optional) Используйте, чтобы установить метку для следующей карусели. |
| 5 | data-prev-button-aria-label (optional) Используется для установки метки предыдущей карусели. |
| 6 | autoplay (optional) Используется для отображения следующего слайда через 5000 мсек. IT может быть перезаписан с использованием атрибута задержки без милисекунд на amp-carousel. Он добавит атрибут цикла к карусели, и слайды будут воспроизводиться снова, как только он достигнет конца. Используется только для type = slides. и требуется как минимум 2 слайда для работы автовоспроизведения. |
Теперь давайте поработаем над примерами, позволяющими отображать карусели по-разному.
Тип карусели усилителя как карусель
При использовании карусельного типа элементы можно прокручивать по горизонтали.
Example
<!doctype html>
<html amp lang = "en">
<head>
<meta charset = "utf-8">
<title>amp-carousel</title>
<script async src = "https://cdn.ampproject.org/v0.js">
</script>
<!-- ## Setup -->
<!-- Import the carousel component in the header. -->
<script async custom-element = "amp-carousel" src =
"https://cdn.ampproject.org/v0/amp-carousel-0.1.js">
</script>
<link rel = "canonical" href="
https://ampbyexample.com/components/amp-carousel/">
<meta name = "viewport" content = "width = device-width,
minimum-scale = 1,initial-scale = 1">
<style amp-boilerplate>
body{
-webkit-animation:
-amp-start 8s steps(1,end) 0s 1 normal both;-moz-animation:
-amp-start 8s steps(1,end) 0s 1 normal both;-ms-animation:
-amp-start 8s steps(1,end) 0s 1 normal both;animation:
-amp-start 8s steps(1,end) 0s 1 normal both
}
@-webkit-keyframes
-amp-start{from{visibility:hidden}to{visibility:visible}}@-moz-keyframes
-amp-start{from{visibility:hidden}to{visibility:visible}}@-ms-keyframes
-amp-start{from{visibility:hidden}to{visibility:visible}}@-o-keyframes
-amp-start{from{visibility:hidden}to{visibility:visible}}@keyframes
-amp-start{from{visibility:hidden}to{visibility:visible}}
</style>
<noscript>
<style amp-boilerplate>
body{
-webkit-animation:none;
-moz-animation:none;
-ms-animation:none;
animation:none
}
</style>
</noscript>
<style amp-custom>
h3{
font-family: "Segoe UI",Arial,sans-serif;
font-weight: 400;
margin: 10px 0;
}
</style>
</head>
<body>
<h3>Google Amp-Carousel</h3>
<amp-carousel height = "300" layout = "fixed-height" type = "carousel">
<amp-img
src = "images/christmas1.jpg"
width = "400"
height = "300"
alt = "a sample image">
</amp-img>
<amp-img src = "images/christmas2.jpg"
width = "400"
height = "300"
alt = "another sample image">
</amp-img>
<amp-img
src = "images/christmas3.jpg"
width = "400"
height = "300"
alt = "and another sample image">
</amp-img>
</amp-carousel>
</body>
</html>Вывод

Усилитель карусельного типа в виде слайдов
Карусель усилителя type = ”slides” показывает по одному элементу за раз. Вы можете использовать макет как заливку, фиксированную, фиксированную высоту, гибкий элемент, нодисплей и адаптивный.
Example
<!doctype html>
<html amp lang = "en">
<head>
<meta charset = "utf-8">
<title>amp-carousel</title>
<script async src = "https://cdn.ampproject.org/v0.js">
</script>
<!-- ## Setup -->
<!-- Import the carousel component in the header. -->
<script async custom-element = "amp-carousel" src =
"https://cdn.ampproject.org/v0/amp-carousel-0.1.js">
</script>
<link rel = "canonical" href=
"https://ampbyexample.com/components/amp-carousel/">
<meta name = "viewport" content = "width = device-width,
minimum-scale = 1,initial-scale = 1">
<style amp-boilerplate>
body{
-webkit-animation:
-amp-start 8s steps(1,end) 0s 1 normal both;-moz-animation:
-amp-start 8s steps(1,end) 0s 1 normal both;-ms-animation:
-amp-start 8s steps(1,end) 0s 1 normal both;animation:
-amp-start 8s steps(1,end) 0s 1 normal both
}
@-webkit-keyframes
-amp-start{from{visibility:hidden}to{visibility:visible}}@-moz-keyframes
-amp-start{from{visibility:hidden}to{visibility:visible}}@-ms-keyframes
-amp-start{from{visibility:hidden}to{visibility:visible}}@-o-keyframes
-amp-start{from{visibility:hidden}to{visibility:visible}}@keyframes
-amp-start{from{visibility:hidden}to{visibility:visible}}
</style>
<noscript>
<style amp-boilerplate>
body{
-webkit-animation:none;
-moz-animation:none;
-ms-animation:none;
animation:none}
</style>
</noscript>
<style amp-custom>
h3{
font-family: "Segoe UI",Arial,sans-serif;
font-weight: 400;margin: 10px 0;}
</style>
</head>
<body>
<h3>Google Amp-Carousel</h3>
<amp-carousel
width = "400"
height = "300"
layout = "responsive"
type = "slides">
<amp-img
src = "images/christmas1.jpg"
width = "400"
height = "300"
layout = "responsive"
alt = "a sample image">
</amp-img>
<amp-img
src = "images/christmas2.jpg"
width = "400"
height = "300"
layout = "responsive"
alt="another sample image">
</amp-img>
<amp-img
src = "images/christmas3.jpg"
width = "400"
height = "300"
layout = "responsive"
alt = "and another sample image">
</amp-img>
</amp-carousel>
</body>
</html>Вывод
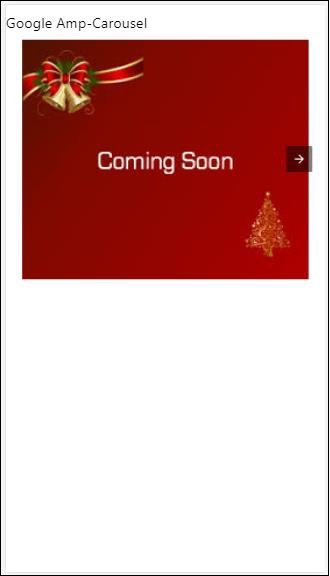
Карусель усилителей с использованием автовоспроизведения
В приведенном ниже примере мы добавили атрибут autoplay с задержкой в 2000 миллисекунд (2 секунды). Это изменит слайды после задержки в 2 секунды. По умолчанию задержка составляет 5000 миллисекунд (5 секунд).
Example
<!doctype html>
<html amp lang = "en">
<head>
<meta charset = "utf-8">
<title>amp-carousel</title>
<script async src = "https://cdn.ampproject.org/v0.js">
</script>
<!-- ## Setup -->
<!-- Import the carousel component in the header. -->
<script async custom-element = "amp-carousel" src =
"https://cdn.ampproject.org/v0/amp-carousel-0.1.js">
</script>
<link rel = "canonical" href =
"https://ampbyexample.com/components/amp-carousel/">
<meta name = "viewport" content = "width = device-width,
minimum-scale = 1,initial-scale = 1">
<style amp-boilerplate>
body{
-webkit-animation:
-amp-start 8s steps(1,end) 0s 1 normal both;-moz-animation:
-amp-start 8s steps(1,end) 0s 1 normal both;-ms-animation:
-amp-start 8s steps(1,end) 0s 1 normal both;animation:
-amp-start 8s steps(1,end) 0s 1 normal both
}
@-webkit-keyframes
-amp-start{from{visibility:hidden}to{visibility:visible}}@-moz-keyframes
-amp-start{from{visibility:hidden}to{visibility:visible}}@-ms-keyframes
-amp-start{from{visibility:hidden}to{visibility:visible}}@-o-keyframes
-amp-start{from{visibility:hidden}to{visibility:visible}}@keyframes
-amp-start{from{visibility:hidden}to{visibility:visible}}
</style>
<noscript>
<style amp-boilerplate>
body{
-webkit-animation:none;
-moz-animation:none;
-ms-animation:none;
animation:none}
</style>
</noscript>
<style amp-custom>
h3{
font-family: "Segoe UI",Arial,sans-serif;
font-weight: 400;
margin: 10px 0;
}
</style>
</head>
<body>
<h3>Google Amp-Carousel</h3>
<amp-carousel
width = "400"
height = "300"
layout = "responsive"
type = "slides"
autoplay delay = "2000">
<amp-img
src = "images/christmas1.jpg"
width = "400"
height = "300"
layout = "responsive"
alt = "a sample image">
</amp-img>
<amp-img
src = "images/christmas2.jpg"
width = "400"
height = "300"
layout = "responsive"
alt = "another sample image">
</amp-img>
<amp-img
src = "images/christmas3.jpg"
width = "400"
height = "300"
layout = "responsive"
alt = "and another sample image">
</amp-img>
</amp-carousel>
</body>
</html>Вывод
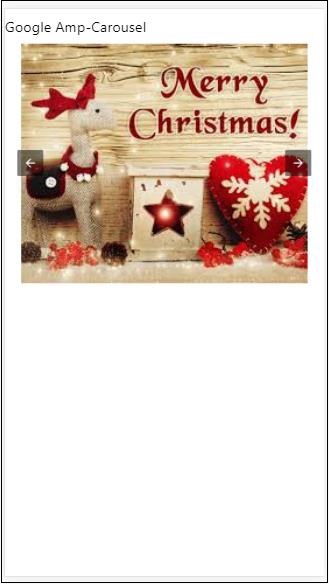
AMP Lightbox
Amp-lightbox - это компонент усилителя, который займет всю область просмотра и будет отображаться как наложение.
Для работы с amp-lightbox добавьте следующий скрипт -
<script async custom-element = "amp-lightbox" src = "https://cdn.ampproject.org/v0/amp-lightbox-0.1.js">
</script>Атрибуты, доступные для amp-lightbox
Список атрибутов для amp-lightbox приведен ниже -
| Старший нет | Атрибуты и описание |
|---|---|
| 1 | animate-in (optional) Здесь вы можете указать стиль анимации для открытия лайтбокса. По умолчанию это постепенное появление . Значения, поддерживаемые для stying: постепенное проявление, переход в нижнюю и верхнюю границы |
| 2 | close-button (required on AMPHTML ads) При использовании для amphtmlads мы можем указать кнопку закрытия для лайтбокса. |
| 3 | id (required) Уникальный идентификатор лайтбокса |
| 4 | layout (required) Значение макета будет без отображения. |
| 5 | Scrollable (optional) С помощью этого атрибута в amp-lightbox содержимое лайтбокса можно прокручивать, превышая высоту лайтбокса. |
Пример лайтбокса
<!doctype html>
<html amp lang = "en">
<head>
<meta charset = "utf-8">
<script async src = "https://cdn.ampproject.org/v0.js">
</script>
<title>Google AMP - Amp Lightbox</title>
<link rel = "canonical" href =
"http://example.ampproject.org/article-metadata.html">
<meta name = "viewport" content = "width = device-width,
minimum-scale = 1,initial-scale = 1">
<style amp-boilerplate>
body{
-webkit-animation:
-amp-start 8s steps(1,end) 0s 1 normal both;-moz-animation:
-amp-start 8s steps(1,end) 0s 1 normal both;-ms-animation:
-amp-start 8s steps(1,end) 0s 1 normal both;animation:
-amp-start 8s steps(1,end) 0s 1 normal both
}
@-webkit-keyframes
-amp-start{from{visibility:hidden}to{visibility:visible}}@-moz-keyframes
-amp-start{from{visibility:hidden}to{visibility:visible}}@-ms-keyframes
-amp-start{from{visibility:hidden}to{visibility:visible}}@-o-keyframes
-amp-start{from{visibility:hidden}to{visibility:visible}}@keyframes
-amp-start{from{visibility:hidden}to{visibility:visible}}
</style>
<noscript>
<style amp-boilerplate>
body{
-webkit-animation:none;
-moz-animation:none;
-ms-animation:none;
animation:none}
</style>
</noscript>
<script async custom-element = "amp-lightbox" src =
"https://cdn.ampproject.org/v0/amp-lightbox-0.1.js">
</script>
<style amp-custom>
amp-img {
border: 1px solid #ddd;
border-radius: 4px;
padding: 5px;
}
button{
background-color: #ACAD5C;
color: white;
padding: 12px 20px;
border: none;
border-radius: 4px;
cursor: pointer;
float: left;
}
.lightbox {
background: rgba(211,211,211,0.8);
width: 100%;
height: 100%;
position: absolute;
display: flex;
align-items: center;
justify-content: center;
}
</style>
</head>
<body>
<h3>Google AMP - Amp Lightbox</h3>
<button on = "tap:my-lightbox">
Show LightBox
</button>
<amp-lightbox id = "my-lightbox" layout = "nodisplay">
<div class = "lightbox" on="tap:my-lightbox.close" tabindex = "0">
<amp-img
alt = "Beautiful Flower"
src = "images/flower.jpg"
width = "246"
height = "205">
</amp-img>
</div>
</amp-lightbox>
</body>
</html>Вывод
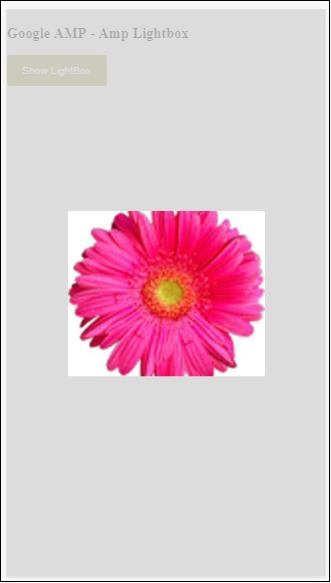
Щелкните в любом месте экрана, чтобы закрыть лайтбокс.
Вы можете добавить кнопку закрытия в лайтбокс, которая в основном используется при показе рекламы оверлейного типа. Обратите внимание на следующий пример -
пример
<!doctype html>
<html amp lang = "en">
<head>
<meta charset = "utf-8">
<script async src = "https://cdn.ampproject.org/v0.js">
</script>
<title>Google AMP - Amp Lightbox</title>
<link rel = "canonical" href =
"http://example.ampproject.org/article-metadata.html">
<meta name = "viewport" content = "width = device-width,
minimum-scale = 1,initial-scale = 1">
<style amp-boilerplate>
body{
-webkit-animation:
-amp-start 8s steps(1,end) 0s 1 normal both;-moz-animation:
-amp-start 8s steps(1,end) 0s 1 normal both;-ms-animation:
-amp-start 8s steps(1,end) 0s 1 normal both;animation:
-amp-start 8s steps(1,end) 0s 1 normal both
}
@-webkit-keyframes
-amp-start{from{visibility:hidden}to{visibility:visible}}@-moz-keyframes
-amp-start{from{visibility:hidden}to{visibility:visible}}@-ms-keyframes
-amp-start{from{visibility:hidden}to{visibility:visible}}@-o-keyframes
-amp-start{from{visibility:hidden}to{visibility:visible}}@keyframes
-amp-start{from{visibility:hidden}to{visibility:visible}}
</style>
<noscript>
<style amp-boilerplate>
body{
-webkit-animation:none;
-moz-animation:none;
-ms-animation:none;
animation:none}
</style>
</noscript>
<script async custom-element = "amp-lightbox" src =
"https://cdn.ampproject.org/v0/amp-lightbox-0.1.js">
</script>
<style amp-custom>
amp-img {
border: 1px solid #ddd;
border-radius: 4px;
padding: 5px;
}
button{
background-color: #ACAD5C;
color: white;
padding: 12px 20px;
border: none;
border-radius: 4px;
cursor: pointer;
float: left;
}
.lightbox {
background: rgba(211,211,211,0.8);
width: 100%;
height: 100%;
position: absolute;
display: flex;
align-items: center;
justify-content: center;
}
</style>
</head>
<body>
<h3>Google AMP - Amp Lightbox</h3>
<button on = "tap:my-lightbox">
Show LightBox
</button>
<amp-lightbox id = "my-lightbox" layout = "nodisplay" close-button>
<div class = "lightbox" on = "tap:my-lightbox.close">
<amp-img
alt = "Beautiful Flower"
src = "images/flower.jpg"
width = "246"
height = "205">
</amp-img>
</div>
</amp-lightbox>
</body>
</html>Вывод
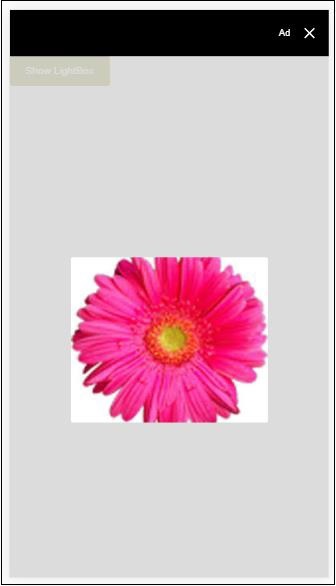
Боковая панель усилителя
Боковая панель Amp - это компонент amp, используемый для отображения контента, который скользит по краям окна при нажатии кнопки.
Для работы с amp-sidebar нам нужно добавить следующий скрипт -
<script async custom-element = "amp-sidebar" src = "
https://cdn.ampproject.org/v0/amp-sidebar-0.1.js">
</script>Тег боковой панели усилителя
<amp-sidebar id = "sidebar" layout = "nodisplay" side = "right">
<span on = "tap:sidebar.close">X</span>
Html content here..
</amp-sidebar>Список атрибутов, доступных на боковой панели amp, приведен ниже -
| Старший нет | Атрибуты и описание |
|---|---|
| 1 | side Этот атрибут откроет боковую панель в указанном направлении. Пример слева / справа |
| 2 | layout Nodisplay будет использоваться для макета боковой панели |
| 3 | open Этот атрибут добавляется, когда открыта боковая панель. |
| 4 | data-close-button-aria-label Используется для установки метки для кнопки закрытия. |
Мы будем работать с боковой панелью, используя указанные выше атрибуты. Обратите внимание на пример, показанный ниже -
пример
<!doctype html>
<html amp lang = "en">
<head>
<meta charset = "utf-8">
<script async src = "https://cdn.ampproject.org/v0.js">
</script>
<title>Google AMP - Amp Sidebar</title>
<link rel = "canonical" href="
http://example.ampproject.org/article-metadata.html">
<meta name = "viewport" content = "width = device-width,
minimum-scale = 1,initial-scale = 1">
<style amp-boilerplate>
body{
-webkit-animation:
-amp-start 8s steps(1,end) 0s 1 normal both;-moz-animation:
-amp-start 8s steps(1,end) 0s 1 normal both;-ms-animation:
-amp-start 8s steps(1,end) 0s 1 normal both;animation:
-amp-start 8s steps(1,end) 0s 1 normal both
}
@-webkit-keyframes
-amp-start{from{visibility:hidden}to{visibility:visible}}@-moz-keyframes
-amp-start{from{visibility:hidden}to{visibility:visible}}@-ms-keyframes
-amp-start{from{visibility:hidden}to{visibility:visible}}@-o-keyframes
-amp-start{from{visibility:hidden}to{visibility:visible}}@keyframes
-amp-start{from{visibility:hidden}to{visibility:visible}}
</style>
<noscript>
<style amp-boilerplate>
body{
-webkit-animation:none;
-moz-animation:none;
-ms-animation:none;
animation:none}
</style>
</noscript>
<script async custom-element = "amp-sidebar" src =
"https://cdn.ampproject.org/v0/amp-sidebar-0.1.js">
</script>
<style amp-custom>
amp-img {
border: 1px solid #ddd;
border-radius: 4px;
padding: 5px;
}
button{
background-color: #ACAD5C;
color: white;
padding: 12px 20px;
border: none;
border-radius: 4px;
cursor: pointer;
float: left;
}
</style>
</head>
<body>
<h3>Google AMP - Amp Sidebar</h3>
<button on = "tap:sidebar">
Show Sidebar
</button>
<amp-sidebar id = "sidebar" layout = "nodisplay" side = "right">
<span on = "tap:sidebar.close">X</span>
<ul>
<li><a href = "/">About</a></li>
<li><a href = "/">Services</a></li>
<li><a href = "/">Contact US</a></li>
</ul>
</amp-sidebar>
</body>
</html>Вывод
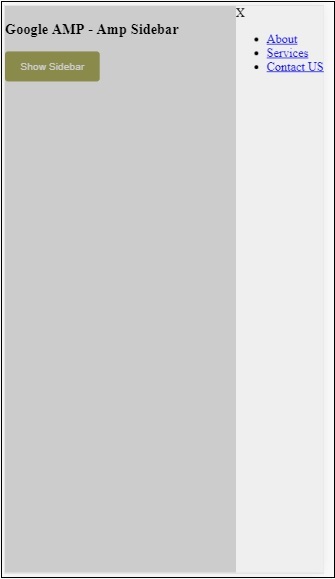
Мы использовали sideатрибут, чтобы открыть боковую панель справа. Вы можете использовать левое значение дляsideатрибут, чтобы открыть его с левой стороны. Вlayout атрибут должен nodisplay.Open Атрибут присутствует при открытии боковой панели.
данные-закрыть-кнопка-ария-метка
Слайдер изображения усилителя
Amp-image-slider - это компонент amp, используемый для сравнения двух изображений путем добавления ползунка при его вертикальном перемещении по изображению.
Для работы с amp-img-slider добавьте следующий скрипт -
<script async custom-element = "amp-image-slider" src = "
https://cdn.ampproject.org/v0/amp-image-slider-0.1.js">
</script>Тег amp-img-slider
<amp-image-slider width = "300" height = "200" layout = "responsive">
<amp-img src = "images/christmas1.jpg" layout = "fill">
</amp-img>
<amp-img src = "images/christmas2.jpg" layout = "fill">
</amp-img>
</amp-image-slider>Здесь показан пример amp-img-slider. Здесь мы добавили 2 изображения внутри amp-img-slider, где первое изображение действует как слайдер, а вы можете скользить вверху на втором изображении.
пример
<!doctype html>
<html amp lang = "en">
<head>
<meta charset = "utf-8">
<script async src = "https://cdn.ampproject.org/v0.js">
</script>
<title>Google AMP - Amp Image Slider</title>
<link rel = "canonical" href =
"http://example.ampproject.org/article-metadata.html">
<meta name = "viewport" content = "width = device-width,
minimum-scale = 1,initial-scale = 1">
<style amp-boilerplate>
body{
-webkit-animation:
-amp-start 8s steps(1,end) 0s 1 normal both;-moz-animation:
-amp-start 8s steps(1,end) 0s 1 normal both;-ms-animation:
-amp-start 8s steps(1,end) 0s 1 normal both;animation:
-amp-start 8s steps(1,end) 0s 1 normal both
}
@-webkit-keyframes
-amp-start{from{visibility:hidden}to{visibility:visible}}@-moz-keyframes
-amp-start{from{visibility:hidden}to{visibility:visible}}@-ms-keyframes
-amp-start{from{visibility:hidden}to{visibility:visible}}@-o-keyframes
-amp-start{from{visibility:hidden}to{visibility:visible}}@keyframes
-amp-start{from{visibility:hidden}to{visibility:visible}}
</style>
<noscript>
<style amp-boilerplate>
body{
-webkit-animation:none;
-moz-animation:none;
-ms-animation:none;
animation:none}
</style>
</noscript>
<script async custom-element = "amp-image-slider" src =
"https://cdn.ampproject.org/v0/amp-image-slider-0.1.js">
</script>
<style amp-custom>
amp-img {
border: 1px solid #ddd;
border-radius: 4px;
padding: 5px;
}
</style>
</head>
<body>
<h3>Google AMP - Amp Image Slider</h3>
<amp-image-slider
width = "300"
height = "200"
layout = "responsive">
<amp-img
src = "images/christmas1.jpg"
layout = "fill">
</amp-img>
<amp-img
src = "images/christmas2.jpg"
layout = "fill">
</amp-img>
</amp-image-slider>
</body>
</html>Вывод

У Amp-image-slider есть действие seekTo, с помощью которого вы можете изменить изображение, как показано в примере ниже -
пример
<!doctype html>
<html amp lang = "en">
<head>
<meta charset = "utf-8">
<script async src = "https://cdn.ampproject.org/v0.js">
</script>
<title>Google AMP - Amp Image Slider</title>
<link rel = "canonical" href ="
http://example.ampproject.org/article-metadata.html">
<meta name = "viewport" content = "width = device-width,
minimum-scale = 1,initial-scale = 1">
<style amp-boilerplate>
body{
-webkit-animation:
-amp-start 8s steps(1,end) 0s 1 normal both;-moz-animation:
-amp-start 8s steps(1,end) 0s 1 normal both;-ms-animation:
-amp-start 8s steps(1,end) 0s 1 normal both;animation:
-amp-start 8s steps(1,end) 0s 1 normal both
}
@-webkit-keyframes
-amp-start{from{visibility:hidden}to{visibility:visible}}@-moz-keyframes
-amp-start{from{visibility:hidden}to{visibility:visible}}@-ms-keyframes
-amp-start{from{visibility:hidden}to{visibility:visible}}@-o-keyframes
-amp-start{from{visibility:hidden}to{visibility:visible}}@keyframes
-amp-start{from{visibility:hidden}to{visibility:visible}}
</style>
<noscript>
<style amp-boilerplate>
body{
-webkit-animation:none;
-moz-animation:none;
-ms-animation:none;
animation:none}
</style>
</noscript>
<script async custom-element = "amp-image-slider" src =
"https://cdn.ampproject.org/v0/amp-image-slider-0.1.js">
</script>
<style amp-custom>
amp-img {
border: 1px solid #ddd;
border-radius: 4px;
padding: 5px;
}
button{
background-color: #ACAD5C;
color: white;
padding: 12px 20px;
border: none;
border-radius: 4px;
cursor: pointer;
float: left;
}
.amp-sidebar-toolbar-target-shown {
display: none;
}
</style>
</head>
<body>
<h3>Google AMP - Amp Image Slider</h3>
<amp-image-slider
width = "300"
id="slider1"
height = "200"
layout = "responsive">
<amp-img src = "images/christmas1.jpg" layout = "fill">
</amp-img>
<amp-img src = "images/christmas2.jpg" layout = "fill">
</amp-img>
</amp-image-slider>
<button on = "tap:slider1.seekTo(percent = 1)">
Image 1
</button>
<button on = "tap:slider1.seekTo(percent = 0)">
Image 2
</button>
</body>
</html>Вывод
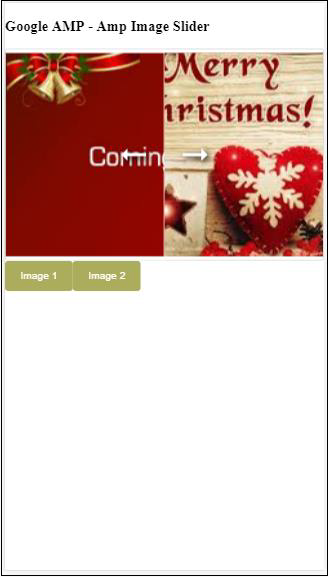
Вы можете изменить изображения, нажав на кнопку.

<button on = "tap:slider1.seekTo(percent = 1)">Image 1</button>
<button on = "tap:slider1.seekTo(percent = 0)">Image 2</button>
</div>Объявления играют важную роль для страниц издателя, поскольку они являются источником дохода для издателя. В случае с amp Pages есть небольшая вариация. Они не позволяют добавлять сторонние файлы javascript. Для показа рекламы на странице есть компонент amp-ad, который помогает показывать рекламу на странице. Большинство рекламных сетей, в которых показывается реклама, совместимы с тегом amp-ad.
Подробности о том, как работают объявления, показаны на следующем изображении -
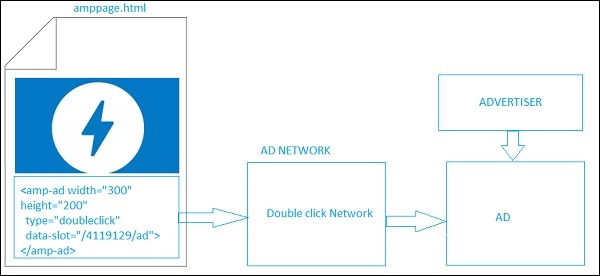
Чтобы показывать рекламу на странице издателя, нам нужно добавить <amp-ad>, который будет действовать как заполнитель для показа рекламы на странице. <amp-ad> вызовет рекламную сеть, указанную для типа.
AD-сеть изнутри вызывает объявление для показа на странице, предоставленной рекламодателем, которая в основном представляет собой html- или amphtml-рекламу.
Чтобы он заработал, нам нужно сначала добавить скрипт на страницу.
<script async custom-element = "amp-ad" src = "
https://cdn.ampproject.org/v0/amp-ad-0.1.js">
</script>Тег amp-ad для doubleclick выглядит следующим образом:
<amp-ad width = "300"
height = "200"
type = "doubleclick"
data-slot = "/4119129/ad">
<div placeholder>
<b>Placeholder here!!!</b>
</div>
</amp-ad>Существует множество рекламных сетей, поддерживающих amp-ad. Обратите внимание, что мы рассмотримdoubleclick amp-ad tag в наших примерах. Имя рекламной сети должно быть указано в полеtype атрибут.
пример
<!doctype html>
<html amp lang = "en">
<head>
<meta charset = "utf-8">
<script async src = "https://cdn.ampproject.org/v0.js">
</script>
<title>Google AMP - AD</title>
<link rel = "canonical" href=
"http://example.ampproject.org/article-metadata.html">
<meta name = "viewport" content = "width = device-width,
minimum-scale = 1,initial-scale = 1">
<style amp-boilerplate>
body{
-webkit-animation:
-amp-start 8s steps(1,end) 0s 1 normal both;-moz-animation:
-amp-start 8s steps(1,end) 0s 1 normal both;-ms-animation:
-amp-start 8s steps(1,end) 0s 1 normal both;animation:
-amp-start 8s steps(1,end) 0s 1 normal both
}
@-webkit-keyframes
-amp-start{from{visibility:hidden}to{visibility:visible}}@-moz-keyframes
-amp-start{from{visibility:hidden}to{visibility:visible}}@-ms-keyframes
-amp-start{from{visibility:hidden}to{visibility:visible}}@-o-keyframes
-amp-start{from{visibility:hidden}to{visibility:visible}}@keyframes
-amp-start{from{visibility:hidden}to{visibility:visible}}
</style>
<noscript>
<style amp-boilerplate>
body{
-webkit-animation:none;
-moz-animation:none;
-ms-animation:none;
animation:none}
</style>
</noscript>
<script async custom-element = "amp-ad" src =
"https://cdn.ampproject.org/v0/amp-ad-0.1.js">
</script>
<style amp-custom>
div {
text-align:center;
}
</style>
</head>
<body>
<h3>Google AMP - AD</h3>
<h3>300x250 - Banner AD</h3>
<p>This is a example of adnetwork doubleclick banner ad</p>
<p>This is a example of adnetwork doubleclick banner ad</p>
<p>This is a example of adnetwork doubleclick banner ad</p>
<p>This is a example of adnetwork doubleclick banner ad</p>
<p>This is a example of adnetwork doubleclick banner ad</p>
<p>This is a example of adnetwork doubleclick banner ad</p>
<div>
<amp-ad
data-slot = /30497360/amp_by_example/AMP_Banner_300x250
height = 250
layout = fixed
style = width:300px;height:250px;
type = doubleclick
width = 300>
</amp-ad>
</div>
<p>This is a example of adnetwork doubleclick banner ad</p>
<p>This is a example of adnetwork doubleclick banner ad</p>
<p>This is a example of adnetwork doubleclick banner ad</p>
<p>This is a example of adnetwork doubleclick banner ad</p>
<p>This is a example of adnetwork doubleclick banner ad</p>
<p>This is a example of adnetwork doubleclick banner ad</p>
<p>This is a example of adnetwork doubleclick banner ad</p>
<p>This is a example of adnetwork doubleclick banner ad</p>
<p>This is a example of adnetwork doubleclick banner ad</p>
</body>
</html>Вывод
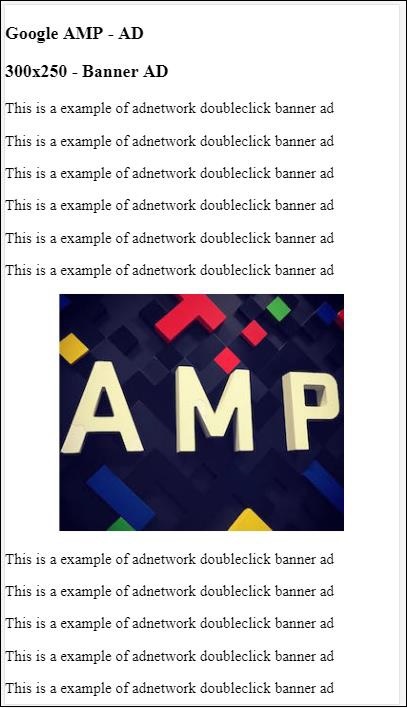
Давайте взглянем на некоторые важные атрибуты, доступные в amp-ad, которые перечислены в таблице ниже.
| Старший Нет | Атрибуты и описание |
|---|---|
| 1 | type Название рекламной сети |
| 2 | width Ширина объявления |
| 3 | height Высота объявления |
| 4 | placeholder Заполнитель используется в качестве дочернего элемента и отображается пользователю, когда объявление все еще загружается. Обратите внимание, что этот атрибут должен поддерживаться концом рекламной сети. |
| 5 | data-* Атрибуты данных для передачи в рекламную сеть. Например, рекламная сеть doubleclick нуждается в data-slot= / 30497360 / amp_by_example / AMP_Banner_300x250, чтобы отобразить объявление на странице. Для каждой рекламной сети будут указаны параметры данных. Мы также можем переопределить используемую ширину и высоту, используя data-override-width и data-override-height. |
| 6 | fallback Резервный вариант используется как дочерний элемент для amp-ad и отображается, когда нет рекламы для показа. |
Давайте разберемся в этом с помощью рабочего примера, который использует placeholder который выполняется, когда нет рекламы для показа.
пример
<!doctype html>
<html amp lang = "en">
<head>
<meta charset = "utf-8">
<script async src = "https://cdn.ampproject.org/v0.js">
</script>
<title>Google AMP - AD</title>
<link rel = "canonical" href =
"http://example.ampproject.org/article-metadata.html">
<meta name = "viewport" content="width = device-width,
minimum-scale = 1,initial-scale = 1">
<style amp-boilerplate>
body{
-webkit-animation:
-amp-start 8s steps(1,end) 0s 1 normal both;-moz-animation:
-amp-start 8s steps(1,end) 0s 1 normal both;-ms-animation:
-amp-start 8s steps(1,end) 0s 1 normal both;animation:
-amp-start 8s steps(1,end) 0s 1 normal both
}
@-webkit-keyframes
-amp-start{from{visibility:hidden}to{visibility:visible}}@-moz-keyframes
-amp-start{from{visibility:hidden}to{visibility:visible}}@-ms-keyframes
-amp-start{from{visibility:hidden}to{visibility:visible}}@-o-keyframes
-amp-start{from{visibility:hidden}to{visibility:visible}}@keyframes
-amp-start{from{visibility:hidden}to{visibility:visible}}
</style>
<noscript>
<style amp-boilerplate>
body{
-webkit-animation:none;
-moz-animation:none;
-ms-animation:none;
animation:none}
</style>
</noscript>
<script async custom-element = "amp-ad" src =
"https://cdn.ampproject.org/v0/amp-ad-0.1.js">
</script>
<style amp-custom>
div {
text-align:center;
}
</style>
</head>
<body>
<h3>Google AMP - AD</h3>
<h3>300x250 - Banner AD</h3>
<p>This is a example of adnetwork doubleclick banner ad</p>
<p>This is a example of adnetwork doubleclick banner ad</p>
<p>This is a example of adnetwork doubleclick banner ad</p>
<p>This is a example of adnetwork doubleclick banner ad</p>
<p>This is a example of adnetwork doubleclick banner ad</p>
<p>This is a example of adnetwork doubleclick banner ad</p>
<div>
<amp-ad
data-slot = /30497360/amp_by_example/AMP_Banner_300x250
height = 250
layout = fixed
style = width:300px;height:250px;
type = doubleclick
width = 300>
<div placeholder>
<b>Placeholder Example : Ad is loading!!!</b>
</div>
</amp-ad>
</div>
<p>This is a example of adnetwork doubleclick banner ad</p>
<p>This is a example of adnetwork doubleclick banner ad</p>
<p>This is a example of adnetwork doubleclick banner ad</p>
<p>This is a example of adnetwork doubleclick banner ad<p>
<p>This is a example of adnetwork doubleclick banner ad</p>
<p>This is a example of adnetwork doubleclick banner ad</p>
</body>
</html>Вывод
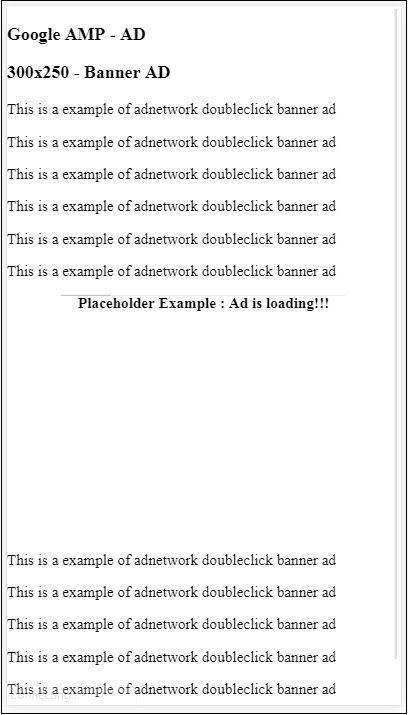
Мы можем использовать резервный атрибут, который является дочерним элементом для amp-ad и отображается, когда нет рекламы для показа.
пример
<!doctype html>
<html amp lang = "en">
<head>
<meta charset = "utf-8">
<script async src = "https://cdn.ampproject.org/v0.js">
</script>
<title>Google AMP - AD</title>
<link rel = "canonical" href =
"http://example.ampproject.org/article-metadata.html">
<meta name = "viewport" content = "width = device-width,
minimum-scale = 1,initial-scale = 1">
<style amp-boilerplate>
body{
-webkit-animation:
-amp-start 8s steps(1,end) 0s 1 normal both;-moz-animation:
-amp-start 8s steps(1,end) 0s 1 normal both;-ms-animation:
-amp-start 8s steps(1,end) 0s 1 normal both;animation:
-amp-start 8s steps(1,end) 0s 1 normal both
}
@-webkit-keyframes
-amp-start{from{visibility:hidden}to{visibility:visible}}@-moz-keyframes
-amp-start{from{visibility:hidden}to{visibility:visible}}@-ms-keyframes
-amp-start{from{visibility:hidden}to{visibility:visible}}@-o-keyframes
-amp-start{from{visibility:hidden}to{visibility:visible}}@keyframes
-amp-start{from{visibility:hidden}to{visibility:visible}}
</style>
<noscript>
<style amp-boilerplate>
body{
-webkit-animation:none;
-moz-animation:none;
-ms-animation:none;
animation:none}
</style>
</noscript>
<script async custom-element = "amp-ad" src =
"https://cdn.ampproject.org/v0/amp-ad-0.1.js">
</script>
<style amp-custom>
div, p{
text-align:center;
}
amp-ad {
border : solid 1px black;
}
</style>
</head>
<body>
<h3>Google AMP - AD</h3>
<h3>300x250 - Banner AD</h3>
<p>This is a example of adnetwork doubleclick banner ad</p>
<p>This is a example of adnetwork doubleclick banner ad</p>
<p>This is a example of adnetwork doubleclick banner ad</p>
<p>This is a example of adnetwork doubleclick banner ad</p>
<p>This is a example of adnetwork doubleclick banner ad</p>
<p>This is a example of adnetwork doubleclick banner ad</p>
<div>
<amp-ad
width = "300"
height = "250"
type = "doubleclick"
data-slot = "/4119129/no-ad">
<div fallback>
<p style = "color:green;font-size:25px;">No ads to Serve!</p>
</div>
</amp-ad>
</div>
<p>This is a example of adnetwork doubleclick banner ad</p>
<p>This is a example of adnetwork doubleclick banner ad</p>
<p>This is a example of adnetwork doubleclick banner ad</p>
<p>This is a example of adnetwork doubleclick banner ad</p>
<p>This is a example of adnetwork doubleclick banner ad</p>
<p>This is a example of adnetwork doubleclick banner ad</p>
</body>
</html>Вывод
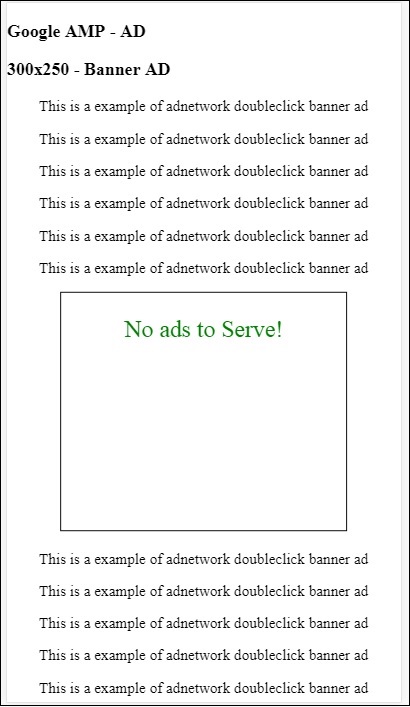
В случае резервного атрибута, если объявление находится в области просмотра, оно отобразит сообщение внутри резервного элемента.
Если рекламный компонент находится ниже области просмотра и нет рекламы, amp-ad свернет пространство и не будет отображать резервное сообщение.
Рекламный блок сворачивается только в том случае, если нет никакой рекламы и если он находится ниже области просмотра, чтобы пользователю не мешали читать контент, поскольку сворачивание может вызвать смещение контента.
Список поддерживаемых рекламных сетей приведен здесь: https://www.ampproject.org/docs/ads/ads_vendors
В этой главе мы собираемся обсудить следующие теги, связанные с рекламой в amp -
Google AMP - пиксель отслеживания событий
Google AMP - липкое объявление
Google AMP - AMPHTML Ads
Пиксель отслеживания событий
Amp предлагает amp-pixel, который в основном используется для запуска пикселя для подсчета просмотров страниц. Amp-pixel похож на тег img, в котором нам нужно указать URL-адрес пикселя, который будет запущен, и пользователь может видеть URL-адрес, запущенный на вкладке сети браузера во время отладки. Пиксель не будет отображаться на странице.
Для работы с amp-pixel нам не нужно добавлять какой-либо дополнительный скрипт, поскольку его функциональность доступна в основном скрипте amp.
Тег amp-pixel выглядит так, как показано здесь -
<amp-pixel src = "https://urlhere" layout = "nodisplay">
</amp-pixel>Давайте разберемся с работой amp-pixel на рабочем примере -
пример
<!doctype html>
<html amp lang = "en">
<head>
<meta charset = "utf-8">
<script async src = "https://cdn.ampproject.org/v0.js">
</script>
<title>Google AMP - Tracking Pixel</title>
<link rel = "canonical" href =
"http://example.ampproject.org/article-metadata.html">
<meta name = "viewport" content = "width = device-width,
minimum-scale = 1,initial-scale = 1">
<style amp-boilerplate>
body{
-webkit-animation:
-amp-start 8s steps(1,end) 0s 1 normal both;-moz-animation:
-amp-start 8s steps(1,end) 0s 1 normal both;-ms-animation:
-amp-start 8s steps(1,end) 0s 1 normal both;animation:
-amp-start 8s steps(1,end) 0s 1 normal both
}
@-webkit-keyframes
-amp-start{from{visibility:hidden}to{visibility:visible}}@-moz-keyframes
-amp-start{from{visibility:hidden}to{visibility:visible}}@-ms-keyframes
-amp-start{from{visibility:hidden}to{visibility:visible}}@-o-keyframes
-amp-start{from{visibility:hidden}to{visibility:visible}}@keyframes
-amp-start{from{visibility:hidden}to{visibility:visible}}
</style>
<noscript>
<style amp-boilerplate>
body{
-webkit-animation:none;
-moz-animation:none;
-ms-animation:none;
animation:none}
</style>
</noscript>
</head>
<body>
<h3>Google AMP - Tracking Pixel</h3>
<amp-pixel src = "https://www.trackerurlhere.com/tracker/foo"
layout = "nodisplay">
</amp-pixel>
</body>
</html>Вывод
Вы увидите, что URL-адрес срабатывает на вкладке сети браузера. Здесь мы использовали фиктивный пиксель, чтобы показать работу amp-pixel. В реальной среде вы должны увидеть, как данные отслеживаются по сработавшему пикселю. Поскольку каждый раз, когда пиксель запускается на действующей веб-странице, данные на нем подсчитываются на стороне сервера. Позже данные могут быть проанализированы с точки зрения бизнеса.
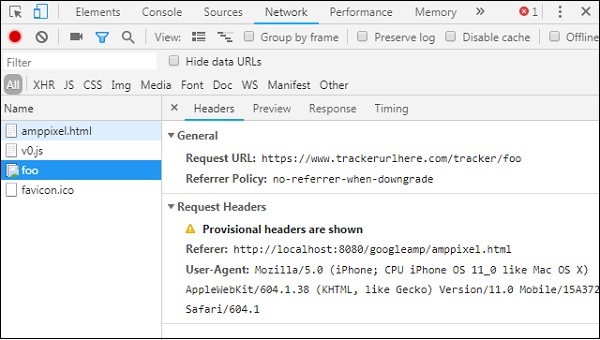
Липкое объявление
Sticky AD - это тип формата для отображения рекламы. Объявление будет прикреплено к нижней части страницы, что вызоветamp-adкомпонент как ребенок. Это в основном похоже на объявление в нижнем колонтитуле, которое мы чаще всего видим на страницах.
Для работы с amp-sticky-ad нам нужно добавить следующий скрипт -
<script async custom-element = "amp-sticky-ad" src = "
https://cdn.ampproject.org/v0/amp-sticky-ad-1.0.js">
</script>Условия, связанные с amp-sticky-ad, следующие:
Вы можете использовать только одно объявление amp-sticky-ad на странице.
amp-ad должен быть прямым потомком amp-sticky-ad. Например -
<amp-sticky-ad>
<amp-ad></amp-ad>
</amp-sticky-ad>Прикрепленный рекламный компонент всегда будет располагаться внизу страницы.
Прикрепленное объявление займет всю ширину контейнера и заполнит пространство шириной и высотой amp-ad.
Высота прикрепленного объявления составляет 100 пикселей. Если высота amp-ad меньше 100 пикселей, прикрепленное объявление будет иметь высоту amp-ad. Если высота amp-ad более 100 пикселей, то высота останется равной 100 пикселей с переполнение содержимого скрыто. Невозможно изменить высоту прикрепленного объявления выше 100 пикселей.
Цвет фона липкой рекламы можно изменить. Но прозрачный фон недопустим.
Когда пользователь прокручивает и достигает нижней части страницы, реклама будет видна в конце страницы, так что нижнее содержимое не будет скрыто.
В альбомном режиме прикрепленное объявление будет выровнено по центру.
Если нет рекламы для показа, контейнер с липкой рекламой рухнет и не будет виден.
Давайте посмотрим на рабочий пример amp-sticky-ad на странице, как показано ниже -
пример
<!doctype html>
<html amp lang = "en">
<head>
<meta charset = "utf-8">
<script async src = "https://cdn.ampproject.org/v0.js">
</script>
<title>Google AMP - AD</title>
<link rel = "canonical" href =
"http://example.ampproject.org/article-metadata.html">
<meta name = "viewport" content = "width = device-width,
minimum-scale = 1,initial-scale = 1">
<style amp-boilerplate>
body{
-webkit-animation:
-amp-start 8s steps(1,end) 0s 1 normal both;-moz-animation:
-amp-start 8s steps(1,end) 0s 1 normal both;-ms-animation:
-amp-start 8s steps(1,end) 0s 1 normal both;animation:
-amp-start 8s steps(1,end) 0s 1 normal both
}
@-webkit-keyframes
-amp-start{from{visibility:hidden}to{visibility:visible}}@-moz-keyframes
-amp-start{from{visibility:hidden}to{visibility:visible}}@-ms-keyframes
-amp-start{from{visibility:hidden}to{visibility:visible}}@-o-keyframes
-amp-start{from{visibility:hidden}to{visibility:visible}}@keyframes
-amp-start{from{visibility:hidden}to{visibility:visible}}
</style>
<noscript>
<style amp-boilerplate>
body{
-webkit-animation:none;
-moz-animation:none;
-ms-animation:none;
animation:none}
</style>
</noscript>
<script async custom-element = "amp-sticky-ad" src =
"https://cdn.ampproject.org/v0/amp-sticky-ad-1.0.js">
</script>
<style amp-custom>
div, p{
text-align:center;
}
amp-ad {
border : solid 1px black;
}
</style>
</head>
<body>
<h3>Google AMP - Sticky AD</h3>
<p>This is a example of adnetwork doubleclick banner ad</p>
<p>This is a example of adnetwork doubleclick banner ad</p>
<p>This is a example of adnetwork doubleclick banner ad</p>
<p>This is a example of adnetwork doubleclick banner ad</p>
<p>This is a example of adnetwork doubleclick banner ad</p>
<p>This is a example of adnetwork doubleclick banner ad</p>
<div>
<amp-sticky-ad layout = "nodisplay">
<amp-ad
width = "320"
height = "50"
type = "doubleclick"
data-slot = "/35096353/amptesting/formats/sticky">
</amp-ad>
</amp-sticky-ad>
</div>
<p>This is a example of adnetwork doubleclick banner ad</p>
<p>This is a example of adnetwork doubleclick banner ad</p>
<p>This is a example of adnetwork doubleclick banner ad</p>
<p>This is a example of adnetwork doubleclick banner ad</p>
<p>This is a example of adnetwork doubleclick banner ad</p>
<p>This is a example of adnetwork doubleclick banner ad</p>
<p>This is a example of adnetwork doubleclick banner ad</p>
<p>This is a example of adnetwork doubleclick banner ad</p>
<p>This is a example of adnetwork doubleclick banner ad</p>
<p>This is a example of adnetwork doubleclick banner ad</p>
<p>This is a example of adnetwork doubleclick banner ad</p>
<p>This is a example of adnetwork doubleclick banner ad</p>
<p>This is a example of adnetwork doubleclick banner ad</p>
<p>This is a example of adnetwork doubleclick banner ad</p>
<p>This is a example of adnetwork doubleclick banner ad</p>
<p>This is a example of adnetwork doubleclick banner ad</p>
<p>This is a example of adnetwork doubleclick banner ad</p>
<p>This is a example of adnetwork doubleclick banner ad</p>
<p>This is a example of adnetwork doubleclick banner ad</p>
<p>This is a example of adnetwork doubleclick banner ad</p>
<p>This is a example of adnetwork doubleclick banner ad</p>
<p>This is a example of adnetwork doubleclick banner ad</p>
<p>This is a example of adnetwork doubleclick banner ad</p>
<p>This is a example of adnetwork doubleclick banner ad</p>
<p>This is a example of adnetwork doubleclick banner ad</p>
<p>This is a example of adnetwork doubleclick banner ad</p>
<p>This is a example of adnetwork doubleclick banner ad</p>
<p>This is a example of adnetwork doubleclick banner ad</p>
<p>This is a example of adnetwork doubleclick banner ad</p>
<p>This is a example of adnetwork doubleclick banner ad</p>
<p>This is a example of adnetwork doubleclick banner ad</p>
<p>This is a example of adnetwork doubleclick banner ad</p>
<p>This is a example of adnetwork doubleclick banner ad</p>
<p>This is a example of adnetwork doubleclick banner ad</p>
<p>This is a example of adnetwork doubleclick banner ad</p>
<p>This is a example of adnetwork doubleclick banner ad</p>
<p>This is a example of adnetwork doubleclick banner ad</p>
<p>This is a example of adnetwork doubleclick banner ad</p>
<p>This is a example of adnetwork doubleclick banner ad</p>
<p>This is a example of adnetwork doubleclick banner ad</p>
<p>This is a example of adnetwork doubleclick banner ad</p>
<p>This is a example of adnetwork doubleclick banner ad</p>
<p>This is a example of adnetwork doubleclick banner ad</p>
<p>This is a example of adnetwork doubleclick banner ad</p>
<p>This is a example of adnetwork doubleclick banner ad</p>
<p>This is a example of adnetwork doubleclick banner ad</p>
<p>This is a example of adnetwork doubleclick banner ad</p>
<p>This is a example of adnetwork doubleclick banner ad</p>
<p>This is a example of adnetwork doubleclick banner ad</p>
<p>This is a example of adnetwork doubleclick banner ad</p>
<p>This is a example of adnetwork doubleclick banner ad</p>
<p>This is a example of adnetwork doubleclick banner ad</p>
<p>This is a example of adnetwork doubleclick banner ad</p>
<h2>END OF PAGE IS VISIBLE AND CONTENT IS NOT COVERED</h2>
</body>
</html>Вывод
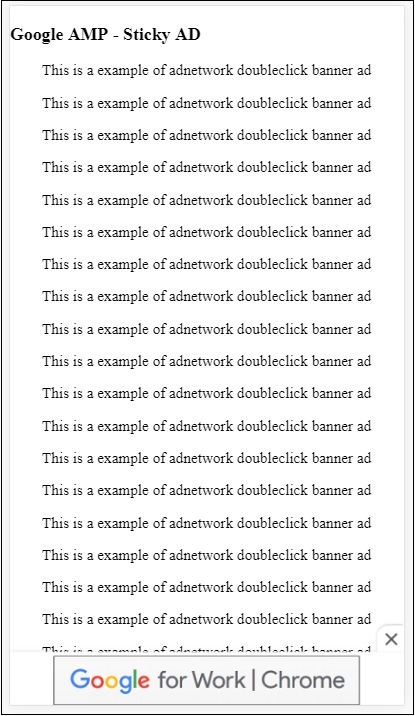
Вот как это выглядит, когда пользователь прокручивает страницу до конца -
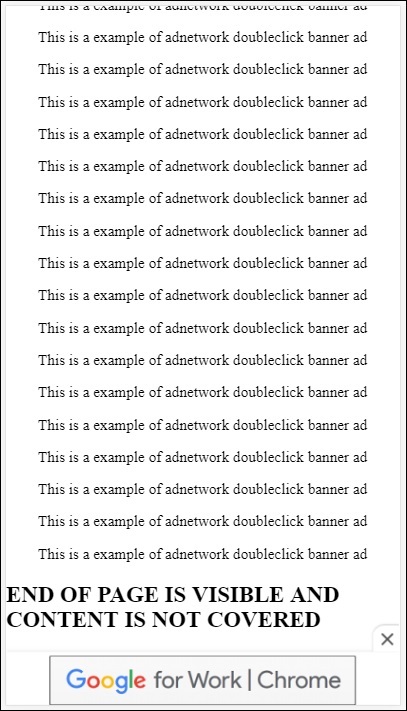
Объявление не перекрывает содержимое, когда вы доходите до конца страницы. Доступна кнопка закрытия, которая позволяет пользователям закрывать объявление.
Если вы хотите изменить что-либо, связанное с кнопкой закрытия, то есть изображение, ширину и т. Д., Это можно сделать с помощью .amp-sticky-ad-close-button в компоненте стиля.
Пример изменения цвета фона кнопки закрытия
<!doctype html>
<html amp lang = "en">
<head>
<meta charset = "utf-8">
<script async src = "https://cdn.ampproject.org/v0.js">
</script>
<title>Google AMP - AD</title>
<link rel = "canonical" href =
"http://example.ampproject.org/article-metadata.html">
<meta name = "viewport" content = "width = device-width,
minimum-scale = 1,initial-scale = 1">
<style amp-boilerplate>
body{
-webkit-animation:
-amp-start 8s steps(1,end) 0s 1 normal both;-moz-animation:
-amp-start 8s steps(1,end) 0s 1 normal both;-ms-animation:
-amp-start 8s steps(1,end) 0s 1 normal both;animation:
-amp-start 8s steps(1,end) 0s 1 normal both
}
@-webkit-keyframes
-amp-start{from{visibility:hidden}to{visibility:visible}}@-moz-keyframes
-amp-start{from{visibility:hidden}to{visibility:visible}}@-ms-keyframes
-amp-start{from{visibility:hidden}to{visibility:visible}}@-o-keyframes
-amp-start{from{visibility:hidden}to{visibility:visible}}@keyframes
-amp-start{from{visibility:hidden}to{visibility:visible}}
</style>
<noscript>
<style amp-boilerplate>
body{
-webkit-animation:none;
-moz-animation:none;
-ms-animation:none;
animation:none}
</style>
</noscript>
<script async custom-element = "amp-sticky-ad"
src = "https://cdn.ampproject.org/v0/amp-sticky-ad-1.0.js">
</script>
<style amp-custom>
div, p{
text-align:center;
}
amp-ad {
border : solid 1px black;
}
.amp-sticky-ad-close-button {
background-color: red;
}
</style>
</head>
<body>
<h3>Google AMP - Sticky AD</h3>
<p>This is a example of adnetwork doubleclick banner ad</p>
<p>This is a example of adnetwork doubleclick banner ad</p>
<p>This is a example of adnetwork doubleclick banner ad</p>
<p>This is a example of adnetwork doubleclick banner ad</p>
<p>This is a example of adnetwork doubleclick banner ad</p>
<p>This is a example of adnetwork doubleclick banner ad</p>
<div>
<amp-sticky-ad layout = "nodisplay">
<amp-ad
width = "320"
height = "50"
type = "doubleclick"
data-slot = "/35096353/amptesting/formats/sticky">
</amp-ad>
</amp-sticky-ad>
</div>
<p>This is a example of adnetwork doubleclick banner ad</p>
<p>This is a example of adnetwork doubleclick banner ad</p>
<p>This is a example of adnetwork doubleclick banner ad</p>
<p>This is a example of adnetwork doubleclick banner ad</p>
<p>This is a example of adnetwork doubleclick banner ad</p>
<p>This is a example of adnetwork doubleclick banner ad</p>
<p>This is a example of adnetwork doubleclick banner ad</p>
<p>This is a example of adnetwork doubleclick banner ad</p>
<p>This is a example of adnetwork doubleclick banner ad</p>
<p>This is a example of adnetwork doubleclick banner ad</p>
<p>This is a example of adnetwork doubleclick banner ad</p>
<p>This is a example of adnetwork doubleclick banner ad</p>
<p>This is a example of adnetwork doubleclick banner ad</p>
<p>This is a example of adnetwork doubleclick banner ad</p>
<p>This is a example of adnetwork doubleclick banner ad</p>
<p>This is a example of adnetwork doubleclick banner ad</p>
<p>This is a example of adnetwork doubleclick banner ad</p>
<p>This is a example of adnetwork doubleclick banner ad</p>
<p>This is a example of adnetwork doubleclick banner ad</p>
<p>This is a example of adnetwork doubleclick banner ad</p>
<p>This is a example of adnetwork doubleclick banner ad</p>
<p>This is a example of adnetwork doubleclick banner ad</p>
<p>This is a example of adnetwork doubleclick banner ad</p>
<p>This is a example of adnetwork doubleclick banner ad</p>
<p>This is a example of adnetwork doubleclick banner ad</p>
<p>This is a example of adnetwork doubleclick banner ad</p>
<p>This is a example of adnetwork doubleclick banner ad</p>
<p>This is a example of adnetwork doubleclick banner ad</p>
<p>This is a example of adnetwork doubleclick banner ad</p>
<p>This is a example of adnetwork doubleclick banner ad</p>
<p>This is a example of adnetwork doubleclick banner ad</p>
<p>This is a example of adnetwork doubleclick banner ad</p>
<p>This is a example of adnetwork doubleclick banner ad</p>
<p>This is a example of adnetwork doubleclick banner ad</p>
<p>This is a example of adnetwork doubleclick banner ad</p>
<p>This is a example of adnetwork doubleclick banner ad</p>
<p>This is a example of adnetwork doubleclick banner ad</p>
<p>This is a example of adnetwork doubleclick banner ad</p>
<p>This is a example of adnetwork doubleclick banner ad</p>
<p>This is a example of adnetwork doubleclick banner ad</p>
<p>This is a example of adnetwork doubleclick banner ad</p>
<p>This is a example of adnetwork doubleclick banner ad</p>
<p>This is a example of adnetwork doubleclick banner ad</p>
<p>This is a example of adnetwork doubleclick banner ad</p>
<p>This is a example of adnetwork doubleclick banner ad</p>
<p>This is a example of adnetwork doubleclick banner ad</p>
<p>This is a example of adnetwork doubleclick banner ad</p>
<p>This is a example of adnetwork doubleclick banner ad</p>
<p>This is a example of adnetwork doubleclick banner ad</p>
<p>This is a example of adnetwork doubleclick banner ad</p>
<p>This is a example of adnetwork doubleclick banner ad</p>
<p>This is a example of adnetwork doubleclick banner ad</p>
<p>This is a example of adnetwork doubleclick banner ad</p>
<h2>END OF PAGE IS VISIBLE AND CONTENT IS NOT COVERED</h2>
</body>
</html>Вывод
Пример добавления липкой рекламы на странице издателя

AMPHTML-объявления
Мы видели <amp-ad>, который используется для загрузки рекламы. Рекламный контент, загруженный с помощью <amp-ad>, может использовать стиль загрузки без amp. В случае, если <amp-ad> загружает объявление, которое использует спецификацию amp для рекламы, тогда оно называется amphtml ads. Объявления AmpHTML быстрее по сравнению с объявлениями без AMP, поскольку они соответствуют спецификации AMP.
Используя доступные компоненты amp, такие как лайтбокс и карусель, мы можем формировать многие типы форматов объявлений amphtml, которые могут помочь в отображении рекламы.
В настоящее время следующие объявления поддерживают объявления amphtml -
DoubleClick for Publishers
TripleLift
Dianomi
Adzerk
Google AdSense
Объявления amphtml будут показываться из компонента <amp-ad>, как показано ниже -
пример
<!doctype html>
<html amp lang = "en">
<head>
<meta charset = "utf-8">
<script async src = "https://cdn.ampproject.org/v0.js">
</script>
<title>Google AMP - Amp HTMLAds</title>
<link rel = "canonical" href=
"http://example.ampproject.org/article-metadata.html">
<meta name = "viewport" content = "width=device-width,
minimum-scale = 1,initial-scale = 1">
<style amp-boilerplate>
body{
-webkit-animation:
-amp-start 8s steps(1,end) 0s 1 normal both;-moz-animation:
-amp-start 8s steps(1,end) 0s 1 normal both;-ms-animation:
-amp-start 8s steps(1,end) 0s 1 normal both;animation:
-amp-start 8s steps(1,end) 0s 1 normal both
}
@-webkit-keyframes
-amp-start{from{visibility:hidden}to{visibility:visible}}@-moz-keyframes
-amp-start{from{visibility:hidden}to{visibility:visible}}@-ms-keyframes
-amp-start{from{visibility:hidden}to{visibility:visible}}@-o-keyframes
-amp-start{from{visibility:hidden}to{visibility:visible}}@keyframes
-amp-start{from{visibility:hidden}to{visibility:visible}}
</style>
<noscript>
<style amp-boilerplate>
body{
-webkit-animation:none;
-moz-animation:none;
-ms-animation:none;
animation:none}
</style>
</noscript>
<script async custom-element = "amp-ad" src =
"https://cdn.ampproject.org/v0/amp-ad-0.1.js">
</script>
<style amp-custom>
.ad-container {
background: #FFFFFF;
margin: 0;
padding: 0px;
text-align:center;
}
.article-body{
font-family: avenir, Helvetica, arial, serif, sans-serif !important;
font-weight: 400;
text-align:center;
}
.adv {
text-align:center;
}
</style>
</head>
<body>
<div>
<p>Amphtml ads are faster in comparison to the non
amp ones as they follow the amp specification.</p>
<p>Amphtml ads work fine in amp pages as well as non amp pages</p>
<div class = "ad-container">
<div>Advertising</div>
<amp-ad layout = "fixed"
width = "300"
height = "250"
type = "fake"
id = "i-amphtml-demo-fake"
src = "ampimg.html">
</amp-ad>
</div>
<p>Amphtml ads are faster in comparison to the non amp
ones as they follow the amp specification.</p>
<p>Amphtml ads work fine in amp pages as well as non amp pages</p>
</div>
</body>
</html>Мы звоним в amp-ad, чтобы показать рекламу. Src, используемый в amp-ad, является другой страницей amp. Мы использовали type = "fake" и id = "i-amphtml-demo-fake". Здесь показаны сведения о странице amp или файл ampimg.html, используемый в теге amp-ad -
ampimg.html
<!doctype html>
<html amp lang = "en">
<head>
<meta charset = "utf-8">
<script async src = "https://cdn.ampproject.org/v0.js">
</script>
<title>Google AMP - Image</title>
<link rel = "canonical" href =
"http://example.ampproject.org/article-metadata.html">
<meta name = "viewport" content="width = device-width,
minimum-scale = 1,initial-scale = 1">
<style amp-boilerplate>
body{
-webkit-animation:
-amp-start 8s steps(1,end) 0s 1 normal both;-moz-animation:
-amp-start 8s steps(1,end) 0s 1 normal both;-ms-animation:
-amp-start 8s steps(1,end) 0s 1 normal both;animation:
-amp-start 8s steps(1,end) 0s 1 normal both
}
@-webkit-keyframes
-amp-start{from{visibility:hidden}to{visibility:visible}}@-moz-keyframes
-amp-start{from{visibility:hidden}to{visibility:visible}}@-ms-keyframes
-amp-start{from{visibility:hidden}to{visibility:visible}}@-o-keyframes
-amp-start{from{visibility:hidden}to{visibility:visible}}@keyframes
-amp-start{from{visibility:hidden}to{visibility:visible}}
</style>
<noscript>
<style amp-boilerplate>
body{
-webkit-animation:none;
-moz-animation:none;
-ms-animation:none;
animation:none}
</style>
</noscript>
<style amp-custom>
amp-img {
border: 1px solid black;
border-radius: 4px;
padding: 5px;
}
</style>
</head>
<body>
<amp-img alt = "Beautiful Flower"
src = "images/bannerad.png"
width = "246"
height = "205">
</amp-img>
</body>
</html>Вывод
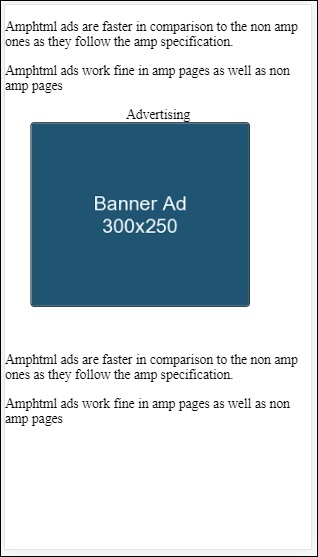
Мы показываем страницу amp внутри amp-ad. Точно так же мы можем использовать amp-video, amp-carousel, чтобы показывать рекламу на странице amp. Указанный сервер объявлений поддерживает вызов соответствующей страницы amp для показа рекламы под объявлениями amphtml.
Amp Analytics - это компонент amp, используемый для отслеживания данных на странице. Все действия пользователя на странице могут быть записаны и сохранены для анализа данных для дальнейших улучшений или бизнес-целей.
Для работы с компонентом amp-analytics нам нужно добавить следующий скрипт внутри раздела заголовка -
<script async custom-element = "amp-analytics"
src = "https://cdn.ampproject.org/v0/amp-analytics-0.1.js">
</script>Для записи событий, используемых в amp-analytics, мы можем использовать стороннего поставщика или иметь собственную систему отслеживания.
Пример amp-analytics с использованием поставщика GoogleAnalytics -
<amp-analytics type = googleanalytics>
<script type = application/json>{
"requests": {
"pageview": "${eventId}"
},
"vars": {
"account": "UA-44450152-1"
},
"triggers": {
"trackPageview" : {
"on": "visible",
"request": "pageview",
"vars": {
"eventId": "pageview"
}
}
}
}
</script>
</amp-analytics>Пример amp-analytics с использованием comscore vendor
<amp-analytics type = comscore>
<script type = application/json>
{"vars": {"c2":"7922264"}}
</script>
</amp-analytics>Пример amp-analytics с использованием Chartbeat vendor
<amp-analytics type = chartbeat>
<script type = application/json>{
"vars": {
"uid": "230",
"domain": "dummyurl.com",
"sections": "us",
"authors": "Hello World"
}
}</script>
</amp-analytics>Подробный список производителей доступен здесь .
Ниже приведен рабочий пример использования внутреннего поставщика аналитики.
пример
<!doctype html>
<html amp>
<head>
<meta charset = "utf-8">
<title>amp-analytics</title>
<script async src = "https://cdn.ampproject.org/v0.js">
</script>
<script async custom-element = "amp-analytics"
src = "https://cdn.ampproject.org/v0/amp-analytics-0.1.js">
</script>
<link rel = "canonical" href = "ampanalytics.html">
<meta name = "viewport" content = "width = device-width,
minimum-scale = 1,initial-scale = 1">
<style amp-boilerplate>
body{
-webkit-animation:
-amp-start 8s steps(1,end) 0s 1 normal both;-moz-animation:
-amp-start 8s steps(1,end) 0s 1 normal both;-ms-animation:
-amp-start 8s steps(1,end) 0s 1 normal both;animation:
-amp-start 8s steps(1,end) 0s 1 normal both}
@-webkit-keyframes
-amp-start{from{visibility:hidden}to{visibility:visible}}@-moz-keyframes
-amp-start{from{visibility:hidden}to{visibility:visible}}@-ms-keyframes
-amp-start{from{visibility:hidden}to{visibility:visible}}@-o-keyframes
-amp-start{from{visibility:hidden}to{visibility:visible}}@keyframes
-amp-start{from{visibility:hidden}to{visibility:visible}}
</style>
<noscript>
<style amp-boilerplate>
body{
-webkit-animation:none;
-moz-animation:none;
-ms-animation:none;
animation:none}
</style>
</noscript>
</head>
<body>
<h1>Google Amp - Analytics</h1>
<amp-analytics>
<script type = "application/json">
{
"requests": {
"event": "http://localhost:8080/googleamp/tracking.php?
user=test&account=localhost&event=${eventId}"
},
"triggers": {
"trackPageview": {
"on": "visible",
"request": "event",
"vars": {
"eventId": "pageview"
}
}
}
}
</script>
</amp-analytics>
</body>
</html>Когда страница открывается в браузере, трекер запускается для просмотра страницы. Его можно увидеть на вкладке сети Google, как показано ниже.
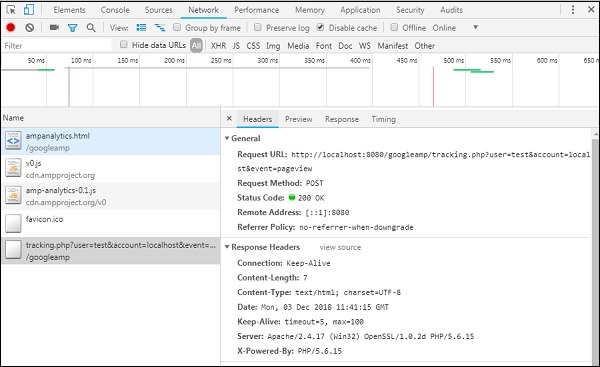
Вы также можете запускать событие amp-analytics, когда на странице виден определенный элемент. Рабочий пример для того же показан здесь -
пример
<!doctype html>
<html amp>
<head>
<meta charset = "utf-8">
<title>amp-analytics</title>
<script async src = "https://cdn.ampproject.org/v0.js">
</script>
<script async custom-element = "amp-analytics"
src = "https://cdn.ampproject.org/v0/amp-analytics-0.1.js">
</script>
<link rel = "canonical" href = "ampanalytics.html">
<meta name = "viewport" content = "width = device-width,
minimum-scale = 1,initial-scale = 1">
<style amp-boilerplate>
body{
-webkit-animation:
-amp-start 8s steps(1,end) 0s 1 normal both;-moz-animation:
-amp-start 8s steps(1,end) 0s 1 normal both;-ms-animation:
-amp-start 8s steps(1,end) 0s 1 normal both;animation:
-amp-start 8s steps(1,end) 0s 1 normal both
}
@-webkit-keyframes
-amp-start{from{visibility:hidden}to{visibility:visible}}@-moz-keyframes
-amp-start{from{visibility:hidden}to{visibility:visible}}@-ms-keyframes
-amp-start{from{visibility:hidden}to{visibility:visible}}@-o-keyframes
-amp-start{from{visibility:hidden}to{visibility:visible}}@keyframes
-amp-start{from{visibility:hidden}to{visibility:visible}}
</style>
<noscript>
<style amp-boilerplate>
body{
-webkit-animation:none;
-moz-animation:none;
-ms-animation:none;
animation:none}
</style>
</noscript>
<script async custom-element = "amp-video"
src = "https://cdn.ampproject.org/v0/amp-video-0.1.js">
</script>
</head>
<body>
<h1>Google Amp - Analytics</h1>
<amp-video controls
id = "videoplayer"
width = "640"
height = "360"
layout = "responsive"
poster = "images/videoposter.png"
autoplay>
<source src = "video/bunny.webm" type = "video/webm" />
<source src = "video/samplevideo.mp4" type = "video/mp4" />
<div fallback>
<p>This browser does not support the video element.</p>
</div>
</amp-video>
<amp-analytics>
<script type = "application/json">
{
"requests": {
"event": "http://localhost:8080/googleamp/tracking.php?
user=test&account=localhost&event=${eventId}"
},
"triggers": {
"trackPageview": {
"on": "visible",
"request": "event",
"visibilitySpec": {
"selector": "#videoplayer",
"visiblePercentageMin": 20,
"totalTimeMin": 2000,
"continuousTimeMin": 200
},
"vars": {
"eventId": "video"
}
}
}
}
</script>
</amp-analytics>
</body>
</html>Вывод
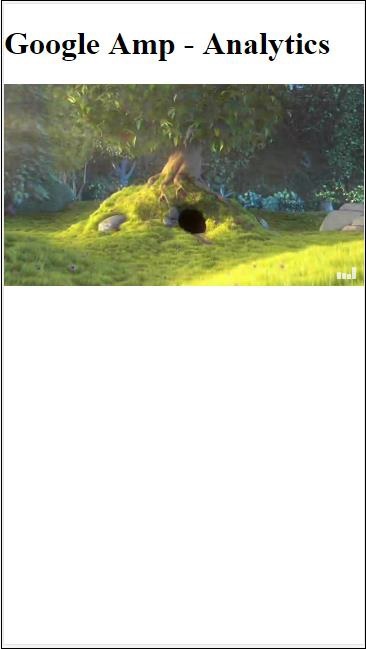
Компонент Amp-analytics требует, чтобы в тег скрипта был передан объект json. Формат json следующий -
{
"requests": {
request-name: request-value,
...
},
"vars": {
var-name: var-value,
...
},
"extraUrlParams": {
extraurlparam-name: extraurlparam-value,
...
},
"triggers": {
trigger-name: trigger-object,
...
},
"transport": {
"beacon": *boolean*,
"xhrpost": *boolean*,
"image": *boolean*,
}
}Все указанные выше объекты не обязательно передавать в amp-analytics. Если вы используете стороннего поставщика, у поставщика будет его формат, и пользователю нужно будет передать данные в таком виде.
Разберемся подробно с каждым объектом -
Запросы
У объекта запросов есть URL-адрес, который используется для срабатывания при выполнении условий. Здесь показан пример объекта запросов -
"requests": {
"request-name": "http://localhost:8080/googleamp/tracking.php?
user=test&account=localhost&event=${eventId}"
},Имя запроса будет указано в объекте триггера, и для него должно использоваться то же имя.
Варс
Все переменные, которые будут использоваться в объекте запроса, указаны в объекте vars.
"requests": {
"event": "http://localhost:8080/googleamp/tracking.php?
user=test&account=localhost&event=${eventId}"
},
"vars": {
"eventId": "video"
}Дополнительные параметры URL
В этом объекте можно определить любые дополнительные параметры, добавляемые к URL-адресу запроса в виде строки запроса. Обратите внимание на следующий пример
"requests": {
"event": "http://localhost:8080/googleamp/tracking.php?
user=test&account=localhost&event=${eventId}&x=1&y=2&z=3"
},
"vars": {
"eventId": "video"
},
"extraUrlParams": {
"x": "1",
"y": "2",
"z": "3"
}Триггеры
Этот объект сообщит, когда должен быть запущен URL-адрес запроса. Пары ключ-значение, доступные внутри объекта триггера, приведены ниже:
on- Вы должны упомянуть событие, которое хотите прослушать. Доступные значения дляonявляются запуском рендеринга, загрузкой, щелчком, прокруткой, таймером, видимым, скрытым, ошибкой пользователя, доступом- * и видео- *
request- Это название запроса. Это должно совпадать с именем запроса в объекте запросов .
vars - Это объект с переменными ключ-значение, определенными для использования внутри объекта триггера или для переопределения определенных ключей-значений vars.
selector - Здесь показаны детали элемента, на котором установлен триггер.
scrollSpec - Здесь будет информация о триггере прокрутки.
timerSpec - Здесь будет подробно указано время.
videoSpec - Здесь будут детали, которые нужно использовать для видео.
Вот пример, в котором мы добавили amp-video. Amp-analytics будет запускать трекер, когда элемент видео доступен на странице, не менее 20% видимых на странице, видео должно воспроизводиться не менее 2 секунд и непрерывно отображается в течение 200 мс. При выполнении всех этих условий увольняется только трекер. Детали показаны ниже -
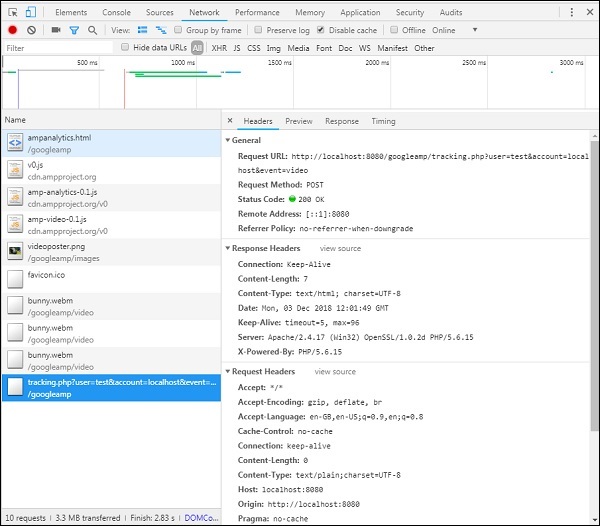
Чтобы добавить условия видимости элемента и другие условия, например, элемент должен быть видимым минимум на 20%, видео должно воспроизводиться 2 секунды, все эти условия должны быть указаны внутри visibilitySpec как показано ниже -
<amp-analytics>
<script type = "application/json">
{
"requests": {
"event": "http://localhost:8080/googleamp/tracking.php?
user=test&account=localhost&event=${eventId}"
},
"triggers": {
"trackPageview": {
"on": "visible",
"request": "event",
"visibilitySpec": {
"selector": "#videoplayer",
"visiblePercentageMin": 20,
"totalTimeMin": 2000,
"continuousTimeMin": 200
},
"vars": {
"eventId": "video"
}
}
}
}
</script>
</amp-analytics>videoSpecпозволяет вам определять условия, при которых вы хотите запустить срабатывание трекера. Условия перечислены здесь -
waitFor
Это свойство используется для триггера видимости, чтобы дождаться определенного случая перед срабатыванием. Варианты, доступные для waitFor:none, ini-load и render-start. По умолчанию значение waitFor равно ini-load.
reportWhen
Это свойство используется для триггера видимости, чтобы дождаться определенного случая перед срабатыванием. Поддерживаемое значение - documentExit. Вы не можете использоватьreportWhen и repeat собственность вместе внутри visibilitySpec
continuousTimeMin and continuousTimeMax
Это свойство указывает, что трекер видимости, чтобы активировать его, должен постоянно находиться в окне просмотра между continuousTimeMin и continuousTimeMax. Если ContinousTimeMin не указан, по умолчанию будет установлено значение 0. Значение указывается в миллисекундах.
totalTimeMin and totalTimeMin
Это свойство указывает, что для срабатывания средства отслеживания видимости необходимо, чтобы элемент находился в области просмотра в течение всего времени между totalTimeMin и totalTimeMin. Если totalTimeMin не указан, по умолчанию будет равно 0. Значение указывается в миллисекундах.
visiblePercentageMin and visiblePercentageMax
Это свойство указывает, что средство отслеживания видимости для активации требует, чтобы элемент был видимым в области просмотра между процентом, присвоенным visiblePercetageMin и visiblePercentageMax. Значения по умолчанию дляvisiblePercentageMin равно 0 и 100 для visibilePercentageMaxУ обоих есть значения 0, тогда триггер видимости сработает, когда элемент не виден, а если оба имеют значение 100, то он сработает, когда элемент полностью виден.
Repeat
Если установлено значение true, триггер будет срабатывать каждый раз, когда выполняются условия visibilitySpec. По умолчанию значение повторения ложно. Его нельзя использовать вместе со свойством reportWhen.
Пример для триггера клика показан здесь -
<!doctype html>
<html amp>
<head>
<meta charset = "utf-8">
<title>amp-analytics</title>
<script async src = "https://cdn.ampproject.org/v0.js">
</script>
<script async custom-element = "amp-analytics"
src="https://cdn.ampproject.org/v0/amp-analytics-0.1.js">
</script>
<link rel = "canonical" href = "ampanalytics.html">
<meta name = "viewport" content = "width = device-width,
minimum-scale = 1,initial-scale = 1">
<style amp-boilerplate>
body{
-webkit-animation:
-amp-start 8s steps(1,end) 0s 1 normal both;-moz-animation:
-amp-start 8s steps(1,end) 0s 1 normal both;-ms-animation:
-amp-start 8s steps(1,end) 0s 1 normal both;animation:
-amp-start 8s steps(1,end) 0s 1 normal both
}
@-webkit-keyframes
-amp-start{from{visibility:hidden}to{visibility:visible}}@-moz-keyframes
-amp-start{from{visibility:hidden}to{visibility:visible}}@-ms-keyframes
-amp-start{from{visibility:hidden}to{visibility:visible}}@-o-keyframes
-amp-start{from{visibility:hidden}to{visibility:visible}}@keyframes
-amp-start{from{visibility:hidden}to{visibility:visible}}
</style>
<noscript>
<style amp-boilerplate>
body{
-webkit-animation:none;
-moz-animation:none;
-ms-animation:none;
animation:none}
</style>
</noscript>
<script async custom-element = "amp-video"
src = "https://cdn.ampproject.org/v0/amp-video-0.1.js">
</script>
<style amp-custom>
a {
color: blue;
}
</style>
</head>
<body>
<h1>Google Amp - Analytics</h1>
<a>Click Here</a>
<amp-analytics>
<script type = "application/json">
{
"requests": {
"event": "http://localhost:8080/googleamp/tracking.php?
user=test&account=localhost&event=${eventId}"
},
"triggers": {
"trackAnchorClicks": {
"on": "click",
"selector": "a",
"request": "event",
"vars": {
"eventId": "clickonlink"
}
}
}
}
</script>
</amp-analytics>
</body>
</html>Вывод
При нажатии на ссылку событие запускается, как показано ниже -
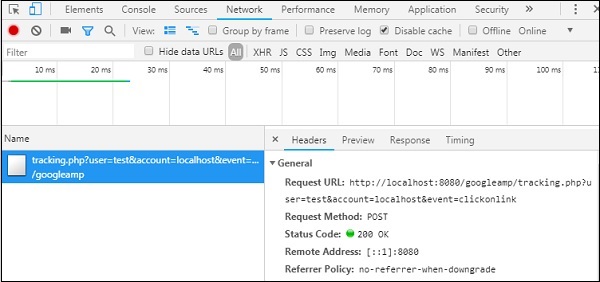
Amp поддерживает отображение виджетов социальных сетей на странице без необходимости загрузки какой-либо внешней библиотеки. В этой главе мы собираемся обсудить некоторые популярные социальные виджеты, перечисленные здесь -
Google AMP - Facebook
Google AMP - Twitter
Google AMP - Pinterest
Google Amp - Facebook
Используя компонент amp-facebook, мы можем подключиться к facebook и отображать сообщения, видео, комментарии на странице amp.
Чтобы использовать amp-facebook, нам нужно добавить на страницу следующий скрипт -
<script async custom-element = "amp-facebook"
src = "https://cdn.ampproject.org/v0/amp-facebook-0.1.js">
</script>Формат тега amp-facebook
<amp-facebook
width = "552"
height = "310"
layout = "responsive"
data-href = "https://www.facebook.com/tutorialspointindia/
posts/1784197988358159">
</amp-facebook>Здесь показан рабочий пример для amp-facebook -
Пример: показ сообщения из facebook
<!doctype html>
<html amp lang = "en">
<head>
<meta charset = "utf-8">
<script async src = "https://cdn.ampproject.org/v0.js">
</script>
<title>Google AMP - Amp Facebook</title>
<link rel = "canonical" href =
"http://example.ampproject.org/article-metadata.html">
<meta name = "viewport" content = "width = device-width,
minimum-scale = 1,initial-scale = 1">
<style amp-boilerplate>
body{
-webkit-animation:
-amp-start 8s steps(1,end) 0s 1 normal both;-moz-animation:
-amp-start 8s steps(1,end) 0s 1 normal both;-ms-animation:
-amp-start 8s steps(1,end) 0s 1 normal both;animation:
-amp-start 8s steps(1,end) 0s 1 normal both
}
@-webkit-keyframes
-amp-start{from{visibility:hidden}to{visibility:visible}}@-moz-keyframes
-amp-start{from{visibility:hidden}to{visibility:visible}}@-ms-keyframes
-amp-start{from{visibility:hidden}to{visibility:visible}}@-o-keyframes
-amp-start{from{visibility:hidden}to{visibility:visible}}@keyframes
-amp-start{from{visibility:hidden}to{visibility:visible}}
</style>
<noscript>
<style amp-boilerplate>
body{
-webkit-animation:none;
-moz-animation:none;
-ms-animation:none;
animation:none}
</style>
</noscript>
<script async custom-element = "amp-facebook"
src = "https://cdn.ampproject.org/v0/amp-facebook-0.1.js">
</script>
</head>
<body>
<h3>Google AMP - Amp Facebook</h3>
<h2>Learn Python webscrapping</h2>
<amp-facebook
width = "552"
height = "310"
layout = "responsive"
data-href = "https://www.facebook.com/tutorialspointindia/posts/1784197988358159">
</amp-facebook>
</body>
</html>Вывод
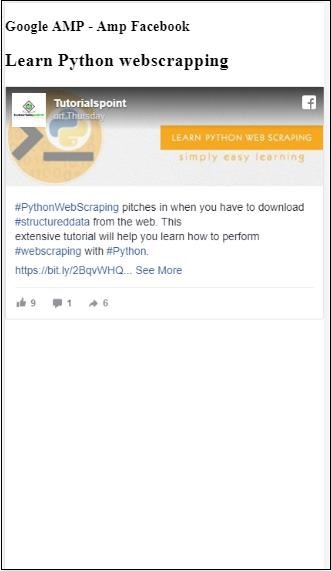
Пример: показ видео из facebook
<!doctype html>
<html amp lang = "en">
<head>
<meta charset = "utf-8">
<script async src = "https://cdn.ampproject.org/v0.js">
</script>
<title>Google AMP - Amp Facebook>/title>
<link rel = "canonical" href =
"http://example.ampproject.org/article-metadata.html">
<meta name = "viewport" content = "width = device-width,
minimum-scale = 1,initial-scale = 1">
<style amp-boilerplate>
body{
-webkit-animation:
-amp-start 8s steps(1,end) 0s 1 normal both;-moz-animation:
-amp-start 8s steps(1,end) 0s 1 normal both;-ms-animation:
-amp-start 8s steps(1,end) 0s 1 normal both;animation:
-amp-start 8s steps(1,end) 0s 1 normal both
}
@-webkit-keyframes
-amp-start{from{visibility:hidden}to{visibility:visible}}@-moz-keyframes
-amp-start{from{visibility:hidden}to{visibility:visible}}@-ms-keyframes
-amp-start{from{visibility:hidden}to{visibility:visible}}@-o-keyframes
-amp-start{from{visibility:hidden}to{visibility:visible}}@keyframes
-amp-start{from{visibility:hidden}to{visibility:visible}}
</style>
<noscript>
<style amp-boilerplate>
body{
-webkit-animation:none;
-moz-animation:none;
-ms-animation:none;
animation:none}
</style>
</noscript>
<script async custom-element = "amp-facebook"
src = "https://cdn.ampproject.org/v0/amp-facebook-0.1.js">
</script>
</head>
<body>
<h3<Google AMP - Amp Facebook Video</h3>
<h2<Learn Python</h2>
<amp-facebook
width = "476"
height = "316"
layout = "responsive"
data-embed-as = "video"
data-href = "https://www.facebook.com/thetutorialkings/videos/701545820223256">
</amp-facebook>
</body>
</html>Вывод
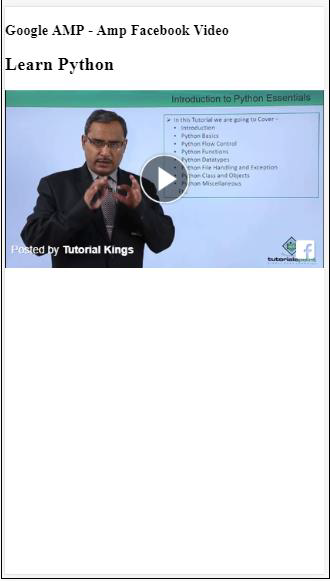
Пример: отображение комментариев к публикации в Facebook
<!doctype html>
<html amp lang = "en">
<head>
<meta charset = "utf-8">
<script async src = "https://cdn.ampproject.org/v0.js">
</script>
<title>Google AMP - Amp Facebook</title>
<link rel = "canonical" href =
"http://example.ampproject.org/article-metadata.html">
<meta name = "viewport" content = "width = device-width,
minimum-scale = 1,initial-scale = 1">
<style amp-boilerplate>
body{
-webkit-animation:
-amp-start 8s steps(1,end) 0s 1 normal both;-moz-animation:
-amp-start 8s steps(1,end) 0s 1 normal both;-ms-animation:
-amp-start 8s steps(1,end) 0s 1 normal both;animation:
-amp-start 8s steps(1,end) 0s 1 normal both
}
@-webkit-keyframes
-amp-start{from{visibility:hidden}to{visibility:visible}}@-moz-keyframes
-amp-start{from{visibility:hidden}to{visibility:visible}}@-ms-keyframes
-amp-start{from{visibility:hidden}to{visibility:visible}}@-o-keyframes
-amp-start{from{visibility:hidden}to{visibility:visible}}@keyframes
-amp-start{from{visibility:hidden}to{visibility:visible}}
</style>
<noscript>
<style amp-boilerplate>
body{
-webkit-animation:none;
-moz-animation:none;
-ms-animation:none;
animation:none}
</style>
</noscript>
<script async custom-element = "amp-facebook"
src = "https://cdn.ampproject.org/v0/amp-facebook-0.1.js">
</script>
</head>
<body>
<h3>Google AMP - Amp Facebook comment for post</h3>
<h2>Learn Microprocessor</h2>
<amp-facebook
width = "552"
height = "500"
layout = "responsive"
data-embed-type = "comment"
data-href = "https://www.facebook.com/tutorialspointindia/posts/1744145745696717?
comment_id=1744179789026646&include_parent=false">
</amp-facebook>
</body>
</html>Вывод
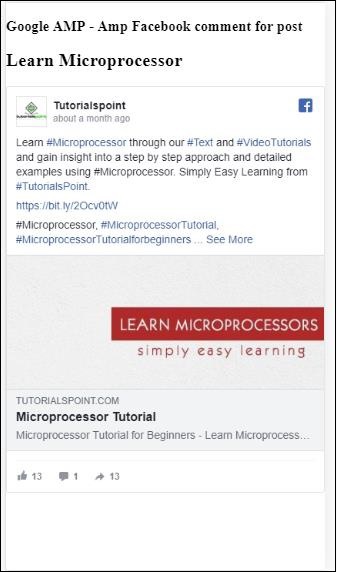
Атрибуты, доступные на amp-facebook находятся
data-href (обязательно) - Здесь нужно указать url facebook.
data-embed-as- Доступные варианты: публикация, видео и комментарий. По умолчанию это сообщение.
data-locale (обязательно) - отображение на языке локали, вы можете изменить его по своему усмотрению.
data-include-comment-parent- Принимает значения true или false. По умолчанию - false. Когда вы используете опцию data-embed-as в качестве комментария, если вам нужен родительский ответ на комментарий, вы можете установить для этой опции значение true.
До сих пор мы видели, как добавить запись / видео и комментарий на страницу amp. Если нам нужно добавить страницу facebook, в amp есть компонент под названиемamp-facebook-page.
Плагин Amp Facebook Page
Компонент Amp-facebook-page предоставляет нам нужную информацию о странице facebook. Для работы с amp-facebook-page нам нужно добавить следующий скрипт:
<script async custom-element = "amp-facebook-page" src = "
https://cdn.ampproject.org/v0/amp-facebook-page-0.1.js">
</script>Рабочий пример с использованием amp-facebook-page показан здесь -
пример
<!doctype html>
<html amp lang = "en">
<head>
<meta charset = "utf-8">
<script async src = "https://cdn.ampproject.org/v0.js">
</script>
<title>Google AMP - Amp Facebook</title>
<link rel = "canonical" href =
"http://example.ampproject.org/article-metadata.html">
<meta name = "viewport" content = "width = device-width,
minimum-scale = 1,initial-scale = 1">
<style amp-boilerplate>
body{
-webkit-animation:
-amp-start 8s steps(1,end) 0s 1 normal both;-moz-animation:
-amp-start 8s steps(1,end) 0s 1 normal both;-ms-animation:
-amp-start 8s steps(1,end) 0s 1 normal both;animation:
-amp-start 8s steps(1,end) 0s 1 normal both
}
@-webkit-keyframes
-amp-start{from{visibility:hidden}to{visibility:visible}}@-moz-keyframes
-amp-start{from{visibility:hidden}to{visibility:visible}}@-ms-keyframes
-amp-start{from{visibility:hidden}to{visibility:visible}}@-o-keyframes
-amp-start{from{visibility:hidden}to{visibility:visible}}@keyframes
-amp-start{from{visibility:hidden}to{visibility:visible}}
</style>
<noscript>
<style amp-boilerplate>
body{
-webkit-animation:none;
-moz-animation:none;
-ms-animation:none;
animation:none}
</style>
</noscript>
<script async custom-element = "amp-facebook-page"
src = "https://cdn.ampproject.org/v0/amp-facebook-page-0.1.js">
</script>
</head>
<body>
<h3>Google AMP - Amp Facebook Page</h3>
<h3>Welcome to Tutorialspoint Facebook Page</h3>
<amp-facebook-page
width = "340"
height = "130"
layout = "responsive"
data-href = "https://www.facebook.com/tutorialspointindia/">
</amp-facebook-page>
</body>
</html>Вывод

Амп-фейсбук
Чтобы встроить страницу facebook как плагин кнопки, мы можем использовать компонент amp-facebook-like. Для работы с amp-facebook-подобным нам нужно добавить следующий скрипт -
"<script async custom-element = "amp-facebook-like"
src = "https://cdn.ampproject.org/v0/amp-facebook-like-0.1.js">
</script>пример
<!doctype html>
<html amp lang = "en">
<head>
<meta charset = "utf-8">
<script async src = "https://cdn.ampproject.org/v0.js">
</script>
<title>Google AMP - Amp Facebook</title>
<link rel = "canonical"
href = "http://example.ampproject.org/article-metadata.html">
<meta name = "viewport" content = "width = device-width,
minimum-scale = 1,initial-scale = 1">
<style amp-boilerplate>
body{
-webkit-animation:
-amp-start 8s steps(1,end) 0s 1 normal both;-moz-animation:
-amp-start 8s steps(1,end) 0s 1 normal both;-ms-animation:
-amp-start 8s steps(1,end) 0s 1 normal both;animation:
-amp-start 8s steps(1,end) 0s 1 normal both
}
@-webkit-keyframes
-amp-start{from{visibility:hidden}to{visibility:visible}}@-moz-keyframes
-amp-start{from{visibility:hidden}to{visibility:visible}}@-ms-keyframes
-amp-start{from{visibility:hidden}to{visibility:visible}}@-o-keyframes
-amp-start{from{visibility:hidden}to{visibility:visible}}@keyframes
-amp-start{from{visibility:hidden}to{visibility:visible}}
</style>
<noscript>
<style amp-boilerplate>
body{
-webkit-animation:none;
-moz-animation:none;
-ms-animation:none;
animation:none}
</style>
</noscript>
<script async custom-element = "amp-facebook-like"
src = "https://cdn.ampproject.org/v0/amp-facebook-like-0.1.js">
</script>
<style amp-custom>
amp-facebook-like {
margin: 1rem
}
</style>
</head>
<body>
<h3>Google AMP - Amp Facebook Likes</h3>
<h3>Welcome to Tutorialspoint Facebook Likes</h3>
<amp-facebook-like
width = "110"
height = "20"
layout = "fixed"
data-layout = "button_count"
data-href = "https://www.facebook.com/tutorialspointindia">
</amp-facebook-like>
</body>
</html>Вывод
Плагин комментариев AMP facebook
Компонент Amp-facebook-comments предоставит комментарии к данной странице.
Для работы с amp-facebook-comments нам нужно добавить следующий скрипт -
<script async custom-element = "amp-facebook-comments"
src = "https://cdn.ampproject.org/v0/amp-facebook-comments-0.1.js">
</script>пример
<!doctype html>
<html amp lang = "en">
<head>
<meta charset = "utf-8">
<script async src = "https://cdn.ampproject.org/v0.js">
</script>
<title>Google AMP - Amp Facebook</title>
<link rel = "canonical" href =
"http://example.ampproject.org/article-metadata.html">
<meta name = "viewport" content = "width = device-width,
minimum-scale = 1,initial-scale = 1">
<style amp-boilerplate>
body{
-webkit-animation:
-amp-start 8s steps(1,end) 0s 1 normal both;-moz-animation:
-amp-start 8s steps(1,end) 0s 1 normal both;-ms-animation:
-amp-start 8s steps(1,end) 0s 1 normal both;animation:
-amp-start 8s steps(1,end) 0s 1 normal both
}
@-webkit-keyframes
-amp-start{from{visibility:hidden}to{visibility:visible}}@-moz-keyframes
-amp-start{from{visibility:hidden}to{visibility:visible}}@-ms-keyframes
-amp-start{from{visibility:hidden}to{visibility:visible}}@-o-keyframes
-amp-start{from{visibility:hidden}to{visibility:visible}}@keyframes
-amp-start{from{visibility:hidden}to{visibility:visible}}
</style>
<noscript>
<style amp-boilerplate>
body{
-webkit-animation:none;
-moz-animation:none;
-ms-animation:none;
animation:none}
</style>
</noscript>
<script async custom-element = "amp-facebook-comments"
src = "https://cdn.ampproject.org/v0/amp-facebook-comments-0.1.js">
</script>
<style amp-custom>
amp-facebook-like {
margin: 1rem
}
</style>
</head>
<body>
<h3>Google AMP - Amp Facebook Likes</h3>
<amp-facebook-comments
width = 486
height = 657
layout = "responsive"
data-numposts = "2"
data-href = "https://developers.facebook.com/docs/plugins/comments">
</amp-facebook-comments>
</body>
</html>Вывод
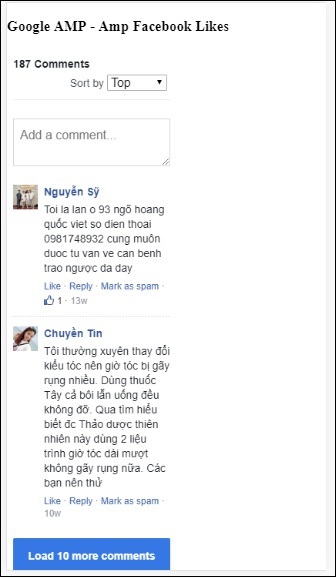
Атрибут data-numpostsопределяет количество комментариев, отображаемых на экране. Если вы хотите получить все комментарии, вы можете удалить атрибут.
Google AMP - Pinterest
Amp предоставляет виджет pinterest, используя компонент amp-pinterest. Мы можем использовать этот компонент для отображения виджета pinterest, кнопки сохранения pinterest и кнопки отслеживания pinterest.
Чтобы начать работу с amp-pinterest, нам нужно добавить следующий скрипт -
<script async custom-element="amp-pinterest" src="https://cdn.ampproject.org/v0/amp-pinterest-0.1.js">
</script>Тег amp-pinterest
<amp-pinterest width = 300 height = 450 data-do = "embedPin"
data-url = "https://in.pinterest.com/pin/856739529089490354/">
</amp-pinterest>Виджет Pinterest
Example
Чтобы показать виджет pinterest, нам нужно использовать атрибут data-do = "embedPin". Рабочий пример для того же показан здесь -
<!doctype html>
<html amp lang = "en">
<head>
<meta charset = "utf-8">
<script async src = "https://cdn.ampproject.org/v0.js">
</script>
<title>Google AMP - Amp Pinterest Widget</title>
<link rel = "canonical" href =
"http://example.ampproject.org/article-metadata.html">
<meta name = "viewport" content = "width = device-width,
minimum-scale = 1,initial-scale = 1">
<style amp-boilerplate>
body{
-webkit-animation:
-amp-start 8s steps(1,end) 0s 1 normal both;-moz-animation:
-amp-start 8s steps(1,end) 0s 1 normal both;-ms-animation:
-amp-start 8s steps(1,end) 0s 1 normal both;animation:
-amp-start 8s steps(1,end) 0s 1 normal both}@-webkit-keyframes
-amp-start 8s steps(1,end) 0s 1 normal both
}
@-webkit-keyframes
-amp-start{from{visibility:hidden}to{visibility:visible}}@-moz-keyframes
-amp-start{from{visibility:hidden}to{visibility:visible}}@-ms-keyframes
-amp-start{from{visibility:hidden}to{visibility:visible}}@-o-keyframes
-amp-start{from{visibility:hidden}to{visibility:visible}}@keyframes
-amp-start{from{visibility:hidden}to{visibility:visible}}
</style>
<noscript>
<style amp-boilerplate>
body{
-webkit-animation:none;
-moz-animation:none;
-ms-animation:none;
animation:none}
</style>
</noscript>
<script async custom-element = "amp-pinterest"
src = "https://cdn.ampproject.org/v0/amp-pinterest-0.1.js">
</script>
<style amp-custom>
amp-facebook-like {
margin: 1rem
}
</style>
</head>
<body>
<h3>Google AMP - Amp Pinterest Widget</h3>
<amp-pinterest
width = 300
height = 450
data-do = "embedPin"
data-url = "https://in.pinterest.com/pin/856739529089490354/">
</amp-pinterest>
</body>
</html>Output
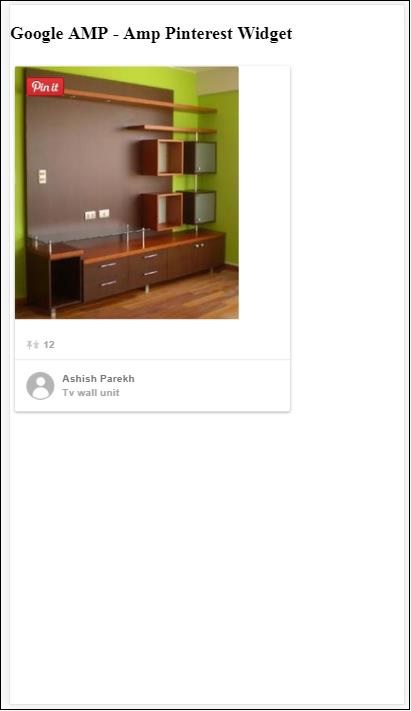
Кнопка "Сохранить" в Pinterest
Чтобы показать кнопку сохранения для pinterest, нам нужно использовать атрибут data-do="buttonPin". Здесь показан рабочий пример кнопки сохранения pinterest -
Example
<!doctype html>
<html amp lang = "en">
<head>
<meta charset = "utf-8">
<script async src = "https://cdn.ampproject.org/v0.js">
</script>
<title>Google AMP - Amp Pinterest Widget</title>
<link rel = "canonical" href =
"http://example.ampproject.org/article-metadata.html">
<meta name = "viewport" content = "width = device-width,
minimum-scale = 1,initial-scale = 1">
<style amp-boilerplate>
body{
-webkit-animation:
-amp-start 8s steps(1,end) 0s 1 normal both;-moz-animation:
-amp-start 8s steps(1,end) 0s 1 normal both;-ms-animation:
-amp-start 8s steps(1,end) 0s 1 normal both;animation:
-amp-start 8s steps(1,end) 0s 1 normal both
}
@-webkit-keyframes
-amp-start{from{visibility:hidden}to{visibility:visible}}@-moz-keyframes
-amp-start{from{visibility:hidden}to{visibility:visible}}@-ms-keyframes
-amp-start{from{visibility:hidden}to{visibility:visible}}@-o-keyframes
-amp-start{from{visibility:hidden}to{visibility:visible}}@keyframes
-amp-start{from{visibility:hidden}to{visibility:visible}}
</style>
<noscript>
<style amp-boilerplate>
body{
-webkit-animation:none;
-moz-animation:none;
-ms-animation:none;
animation:none}
</style>
</noscript>
<script async custom-element = "amp-pinterest"
src = "https://cdn.ampproject.org/v0/amp-pinterest-0.1.js">
</script>
<style amp-custom>
amp-facebook-like {
margin: 1rem
}
</style>
</head>
<body>
<h3>Google AMP - Amp Pinterest Save Button</h3>
<h3>TutorialsPoint - ReactJS</h3>
<amp-img
src = "images/reactjs.png"
width = "100"
height = "100"
alt = "blockchain image">
</amp-img>
<amp-pinterest
height = "18"
width = "56"
data-do = "buttonPin"
data-url = "https://www.tutorialspoint.com/"
data-media = "https://www.tutorialspoint.com/images/tp-logo-diamond.png"
data-description = "amp-pinterest in action">
</amp-pinterest>
</body>
</html>Output
Кнопка Pinterest Follow
Чтобы показать кнопку сохранения подписки для Pinterest, нам нужно использовать атрибут data-do="buttonFollow". Здесь показан рабочий пример кнопки сохранения Pinterest -
Example
<!doctype html>
<html amp lang = "en">
<head>
<meta charset = "utf-8">
<script async src = "https://cdn.ampproject.org/v0.js">
</script>
<title>Google AMP - Amp Pinterest Widget</title>
<link rel = "canonical" href =
"http://example.ampproject.org/article-metadata.html">
<meta name = "viewport" content = "width = device-width,
minimum-scale = 1,initial-scale = 1">
<style amp-boilerplate>
body{
-webkit-animation:
-amp-start 8s steps(1,end) 0s 1 normal both;-moz-animation:
-amp-start 8s steps(1,end) 0s 1 normal both;-ms-animation:
-amp-start 8s steps(1,end) 0s 1 normal both;animation:
-amp-start 8s steps(1,end) 0s 1 normal both
}
@-webkit-keyframes
-amp-start{from{visibility:hidden}to{visibility:visible}}@-moz-keyframes
-amp-start{from{visibility:hidden}to{visibility:visible}}@-ms-keyframes
-amp-start{from{visibility:hidden}to{visibility:visible}}@-o-keyframes
-amp-start{from{visibility:hidden}to{visibility:visible}}@keyframes
-amp-start{from{visibility:hidden}to{visibility:visible}}
</style>
<noscript>
<style amp-boilerplate>
body{
-webkit-animation:none;
-moz-animation:none;
-ms-animation:none;
animation:none}
</style>
</noscript>
<script async custom-element = "amp-pinterest"
src = "https://cdn.ampproject.org/v0/amp-pinterest-0.1.js">
</script>
<style amp-custom>
amp-facebook-like {
margin: 1rem
}
</style>
</head>
<body>
<h3>Google AMP - Amp Pinterest Follow Button</h3>
<amp-pinterest
height = 50
width = 130
data-do = "buttonFollow"
data-href = "https://in.pinterest.com/wedgehairstyles/"
data-label = "wedgehairstyles">
</amp-pinterest>
</body>
</html>Output

Google Amp - Twitter
В Amp есть компонент для отображения каналов Twitter с помощью amp-twitter.
Для работы с amp-twitter нам нужно добавить следующий скрипт -
<script async custom-element = "amp-twitter"
src = "https://cdn.ampproject.org/v0/amp-twitter-0.1.js">
</script>Тег AMP-Twitter
<amp-twitter width = "375" height = "472"
layout = "responsive" data-tweetid = "885634330868850689">
</amp-twitter>Здесь показан рабочий пример, показывающий твиты.
Example
<!doctype html>
<html amp lang = "en">
<head>
<meta charset = "utf-8">
<script async src = "https://cdn.ampproject.org/v0.js">
</script>
<title>Google AMP - Amp Twitter</title>
<link rel = "canonical" href =
"http://example.ampproject.org/article-metadata.html">
<meta name = "viewport" content = "width = device-width,
minimum-scale = 1,initial-scale = 1">
<style amp-boilerplate>
body{
-webkit-animation:
-amp-start 8s steps(1,end) 0s 1 normal both;-moz-animation:
-amp-start 8s steps(1,end) 0s 1 normal both;-ms-animation:
-amp-start 8s steps(1,end) 0s 1 normal both;animation:
-amp-start 8s steps(1,end) 0s 1 normal both
}
@-webkit-keyframes
-amp-start{from{visibility:hidden}to{visibility:visible}}@-moz-keyframes
-amp-start{from{visibility:hidden}to{visibility:visible}}@-ms-keyframes
-amp-start{from{visibility:hidden}to{visibility:visible}}@-o-keyframes
-amp-start{from{visibility:hidden}to{visibility:visible}}@keyframes
-amp-start{from{visibility:hidden}to{visibility:visible}}
</style>
<noscript>
<style amp-boilerplate>
body{
-webkit-animation:none;
-moz-animation:none;
-ms-animation:none;
animation:none}
</style>
</noscript>
<script async custom-element = "amp-twitter" src =
"https://cdn.ampproject.org/v0/amp-twitter-0.1.js">
</script>
<style amp-custom>
amp-facebook-like {
margin: 1rem
}
</style>
</head>
<body>
<h3>Google AMP - Amp Twitter</h3>
<amp-twitter
width = "375"
height = "472"
layout = "responsive"
data-tweetid = "885634330868850689">
</amp-twitter>
</body>
</html>Output
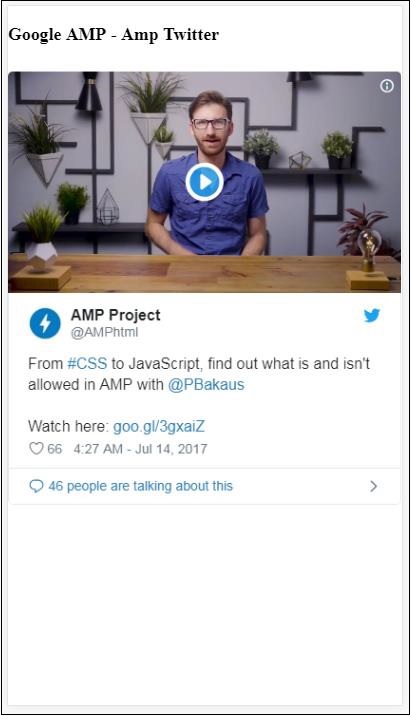
В этой главе мы обсудим, как отображать видео и аудио от сторонних партнеров, таких как jwplayer и Youtube. Давайте узнаем подробно о следующем -
Google AMP - JwPlayer
Google AMP - YouTube
Google AMP - Аудио
Google AMP - JwPlayer
Если вы хотите использовать jwplayer для отображения видео на странице, для этого в amp-jwplayer есть amp-jwplayer.
Для работы с amp-jwplayer добавьте на свою страницу следующий скрипт -
<script async custom-element = "amp-jwplayer" src = "
https://cdn.ampproject.org/v0/amp-jwplayer-0.1.js">
</script>Тег Amp-jwplayer
<amp-jwplayer
data-playlist-id = "482jsTAr"
data-player-id = "uoIbMPm3"
layout = "responsive"
width = "16"
height = "9">
</amp-jwplayer>Рабочий пример jwplayer на странице amp показан ниже -
пример
<!doctype html>
<html amp lang = "en">
<head>
<meta charset = "utf-8">
<script async src = "https://cdn.ampproject.org/v0.js">
</script>
<title>Google AMP - Amp Jwplayer</title>
<link rel = "canonical" href =
"http://example.ampproject.org/article-metadata.html">
<meta name = "viewport" content = "width = device-width,
minimum-scale = 1,initial-scale = 1">
<style amp-boilerplate>
body{
-webkit-animation:
-amp-start 8s steps(1,end) 0s 1 normal both;-moz-animation:
-amp-start 8s steps(1,end) 0s 1 normal both;-ms-animation:
-amp-start 8s steps(1,end) 0s 1 normal both;animation:
-amp-start 8s steps(1,end) 0s 1 normal both
}
@-webkit-keyframes
-amp-start{from{visibility:hidden}to{visibility:visible}}@-moz-keyframes
-amp-start{from{visibility:hidden}to{visibility:visible}}@-ms-keyframes
-amp-start{from{visibility:hidden}to{visibility:visible}}@-o-keyframes
-amp-start{from{visibility:hidden}to{visibility:visible}}@keyframes
-amp-start{from{visibility:hidden}to{visibility:visible}}
</style>
<noscript>
<style amp-boilerplate>
body{
-webkit-animation:none;
-moz-animation:none;
-ms-animation:none;
animation:none}
</style>
</noscript>
<script async custom-element = "amp-jwplayer" src =
"https://cdn.ampproject.org/v0/amp-jwplayer-0.1.js">
</script>
</head>
<body>
<h3>Google AMP - Amp Jwplayer</h3>
<amp-jwplayer
data-playlist-id = "482jsTAr"
data-player-id = "uoIbMPm3"
layout = "responsive"
width = "16"
height = "9">
</amp-jwplayer>
</body>
</html>Вывод

Для amp-jwplayer есть три важных атрибута.
data-player-id
data-media-id
data-playlist-id
Чтобы получить идентификаторы плеера, медиа и плейлиста, вам необходимо иметь логин в jwplayer, что можно сделать отсюда - https://dashboard.jwplayer.com/#/players
Идентификатор игрока будет доступен в разделе jwplayer player. Идентификатор медиа будет доступен вjwplayer playlist section.
Jwplayer предоставляет восьмизначный буквенно-цифровой идентификатор, который необходимо использовать в amp-jwplayer для соответствующего атрибута.
Google AMP - Youtube
Если вы хотите показывать видео Youtube на своей странице amp, у amp-youtube есть amp-youtube для встраивания видео YouTube на страницу.
Чтобы использовать amp-youtube, вам необходимо добавить на свою страницу следующий скрипт -
<script async custom-element = "amp-youtube" src = "
https://cdn.ampproject.org/v0/amp-youtube-0.1.js">
</script>Тег AMP-YouTube
<amp-youtube
width = "480"
height = "270"
layout = "responsive"
autoplay = "true"
data-videoid = "fWZ6-p7mGK0">
</amp-youtube>Давайте теперь поработаем над примером, показывающим работу amp-youtube на странице.
пример
<!doctype html>
<html amp lang = "en">
<head>
<meta charset = "utf-8">
<script async src = "https://cdn.ampproject.org/v0.js">
</script>
<title>Google AMP - Youtube</title>
<link rel = "canonical" href =
"http://example.ampproject.org/article-metadata.html">
<meta name = "viewport" content = "width = device-width,
minimum-scale = 1,initial-scale = 1">
<style amp-boilerplate>
body{
-webkit-animation:
-amp-start 8s steps(1,end) 0s 1 normal both;-moz-animation:
-amp-start 8s steps(1,end) 0s 1 normal both;-ms-animation:
-amp-start 8s steps(1,end) 0s 1 normal both;animation:
-amp-start 8s steps(1,end) 0s 1 normal both
}
@-webkit-keyframes
-amp-start{from{visibility:hidden}to{visibility:visible}}@-moz-keyframes
-amp-start{from{visibility:hidden}to{visibility:visible}}@-ms-keyframes
-amp-start{from{visibility:hidden}to{visibility:visible}}@-o-keyframes
-amp-start{from{visibility:hidden}to{visibility:visible}}@keyframes
-amp-start{from{visibility:hidden}to{visibility:visible}}
</style>
<noscript>
<style amp-boilerplate>
body{
-webkit-animation:none;
-moz-animation:none;
-ms-animation:none;
animation:none}
</style>
</noscript>
<script async custom-element = "amp-youtube" src =
"https://cdn.ampproject.org/v0/amp-youtube-0.1.js">
</script>
</head>
<body>
<h3>Google AMP - Youtube</h3>
<h3>Youtube Videos from Tutorialspoint</h3>
<amp-youtube
width = "480"
height = "270"
layout = "responsive"
autoplay = "true"
data-videoid = "fWZ6-p7mGK0">
</amp-youtube>
</body>
</html>Вывод
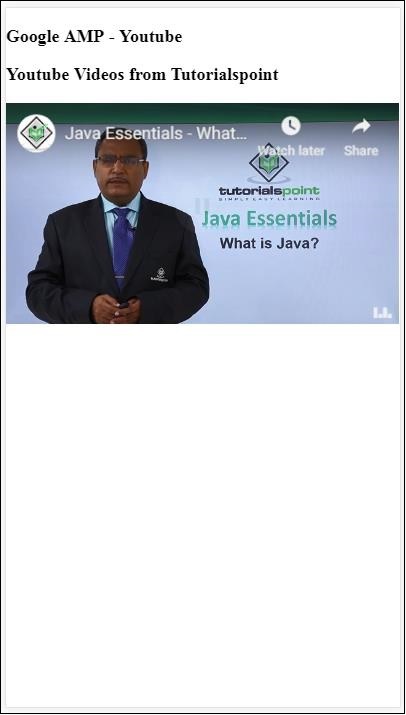
Чтобы показать видео на YouTube, вам необходимо указать видеоидентификатор amp-youtube, как показано ниже -
<amp-youtube
width = "480"
height = "270"
layout = "responsive"
autoplay = "true"
data-videoid = "fWZ6-p7mGK0">
</amp-youtube>Как получить data-videoid?
Рассмотрим, например, любой URL-адрес Youtube - https://www.youtube.com/watch?v=fWZ6-p7mGK0. Выделенная часть - это идентификатор, который будет использоваться в вашем amp-youtube.
Мы использовали атрибут autoplayкак правда. Видео будет воспроизводиться автоматически, как это поддерживается браузером, а также видео будет воспроизводиться в беззвучном режиме. Вам нужно будет нажать на видео, чтобы включить его. Видео будет приостановлено, когда оно исчезнет из поля зрения, и возобновится из приостановленного состояния, когда дело доходит до просмотра. Если пользователь ставит видео на паузу и переходит в / из просмотра, видео останется только в состоянии паузы. То же самое применимо для отключения / включения звука.
Google Amp - Аудио
У Amp есть тег для воспроизведения звука, который является заменой тега html5 audio. Для воспроизведения звука на странице усилителя мы можем использовать amp-audio.
Для работы с amp-audio нам нужно добавить следующий скрипт -
<script async custom-element = "amp-audio" src = "
https://cdn.ampproject.org/v0/amp-audio-0.1.js">
</script>Тег Amp-audio
<amp-audio
width = "auto"
height = "50"
src = "audio/test.mp3">
<div fallback>
<p>HTML5 audio is not supported on your browser!</p>
</div>
</amp-audio>Следовательно, amp-audio примет атрибут src, который является HTTP-запросом к аудиофайлу. Причина, по которой мы используем amp-audio вместо стандартного аудио html5, заключается в том, что amp использует концепцию отложенной загрузки для элементов, требующих HTTP-запроса.
Он начнет загрузку запроса в зависимости от приоритета. Он будет загружен непосредственно перед или когда он собирается достичь области просмотра.
Рабочий пример использования amp-audio на вашей странице показан здесь -
пример
<!doctype html>
<html amp lang = "en">
<head>
<meta charset = "utf-8">
<script async src = "https://cdn.ampproject.org/v0.js">
</script>
<title>Google AMP - Audio</title>
<link rel = "canonical" href =
"http://example.ampproject.org/article-metadata.html">
<meta name = "viewport" content = "width = device-width,
minimum-scale = 1,initial-scale = 1">
<style amp-boilerplate>
body{
-webkit-animation:
-amp-start 8s steps(1,end) 0s 1 normal both;-moz-animation:
-amp-start 8s steps(1,end) 0s 1 normal both;-ms-animation:
-amp-start 8s steps(1,end) 0s 1 normal both;animation:
-amp-start 8s steps(1,end) 0s 1 normal both
}
@-webkit-keyframes
-amp-start{from{visibility:hidden}to{visibility:visible}}@-moz-keyframes
-amp-start{from{visibility:hidden}to{visibility:visible}}@-ms-keyframes
-amp-start{from{visibility:hidden}to{visibility:visible}}@-o-keyframes
-amp-start{from{visibility:hidden}to{visibility:visible}}@keyframes
-amp-start{from{visibility:hidden}to{visibility:visible}}
</style>
<noscript>
<style amp-boilerplate>
body{
-webkit-animation:none;
-moz-animation:none;
-ms-animation:none;
animation:none}
</style>
</noscript>
<script async custom-element = "amp-audio"
src = "https://cdn.ampproject.org/v0/amp-audio-0.1.js">
</script>
</head>
<body>
<h3>Google AMP - Audio</h3>
<amp-audio
width = "auto"
height = "50"
src="audio/test.mp3">
<div fallback>
<p>HTML5 audio is not supported on your browser!</p>
</div>
</amp-audio>
</body>
</html>Вывод
Здесь показан тег для amp-audio, в котором указаны такие атрибуты, как ширина, высота, src. Мы также добавили div сfallback attribute который будет действовать как запасной вариант, если браузер не поддерживает amp-audio.
<amp-audio
width = "auto"
height = "50"
src = "audio/test.mp3">
<div fallback>
<p>HTML5 audio is not supported on your browser!</p>
</div>
</amp-audio>Обратите внимание, что элементы управления добавляются по умолчанию к тегу аудио и могут использоваться для воспроизведения / паузы, а также для отключения / включения звука. Вы получаете вариант загрузки для аудио тега, как показано ниже -
При нажатии на загрузку вы можете загрузить используемый медиафайл. Чтобы отключить загрузку, вы можете использовать атрибут -controlsList="nodownload" как показано в примере ниже -
пример
<!doctype html>
<html amp lang = "en">
<head>
<meta charset = "utf-8">
<script async src = "https://cdn.ampproject.org/v0.js">
</script>
<title>Google AMP - Audio</title>
<link rel = "canonical" href =
"http://example.ampproject.org/article-metadata.html">
<meta name = "viewport" content = "width = device-width,
minimum-scale = 1,initial-scale = 1">
<style amp-boilerplate>
body{
-webkit-animation:
-amp-start 8s steps(1,end) 0s 1 normal both;-moz-animation:
-amp-start 8s steps(1,end) 0s 1 normal both;-ms-animation:
-amp-start 8s steps(1,end) 0s 1 normal both;animation:
-amp-start 8s steps(1,end) 0s 1 normal both
}
@-webkit-keyframes
-amp-start{from{visibility:hidden}to{visibility:visible}}@-moz-keyframes
-amp-start{from{visibility:hidden}to{visibility:visible}}@-ms-keyframes
-amp-start{from{visibility:hidden}to{visibility:visible}}@-o-keyframes
-amp-start{from{visibility:hidden}to{visibility:visible}}@keyframes
-amp-start{from{visibility:hidden}to{visibility:visible}}
</style>
<noscript>
<style amp-boilerplate>
body{
-webkit-animation:none;
-moz-animation:none;
-ms-animation:none;
animation:none}
</style>
</noscript>
<script async custom-element = "amp-audio"
src = "https://cdn.ampproject.org/v0/amp-audio-0.1.js">
</script>
</head>
<body>
<h3>Google AMP - Audio</h3>
<amp-audio
width = "auto"
height = "50"
src = "audio/test.mp3"
controlsList = "nodownload">
<div fallback>
<p>HTML5 audio is not supported on your browser!</p>
</div>
</amp-audio>
</body>
</html>Вывод

С помощью controlsList="nodownload" три вертикальные точки справа исчезнут.
Есть такие атрибуты, как preload и autoplay, если они добавлены в тег аудио, аудиофайл будет загружен при загрузке страницы и будет автоматически воспроизводиться, если браузер поддерживает это. В следующем примере показано автовоспроизведение аудио.
пример
<!doctype html>
<html amp lang = "en">
<head>
<meta charset="utf-8">
<script async src = "https://cdn.ampproject.org/v0.js">
</script>
<title>Google AMP - Audio</title>
<link rel = "canonical" href =
"http://example.ampproject.org/article-metadata.html">
<meta name = "viewport" content = "width = device-width,
minimum-scale = 1,initial-scale = 1">
<style amp-boilerplate>
body{
-webkit-animation:
-amp-start 8s steps(1,end) 0s 1 normal both;-moz-animation:
-amp-start 8s steps(1,end) 0s 1 normal both;-ms-animation:
-amp-start 8s steps(1,end) 0s 1 normal both;animation:
-amp-start 8s steps(1,end) 0s 1 normal both
}
@-webkit-keyframes
-amp-start{from{visibility:hidden}to{visibility:visible}}@-moz-keyframes
-amp-start{from{visibility:hidden}to{visibility:visible}}@-ms-keyframes
-amp-start{from{visibility:hidden}to{visibility:visible}}@-o-keyframes
-amp-start{from{visibility:hidden}to{visibility:visible}}@keyframes
-amp-start{from{visibility:hidden}to{visibility:visible}}
</style>
<noscript>
<style amp-boilerplate>
body{
-webkit-animation:none;
-moz-animation:none;
-ms-animation:none;
animation:none}
</style>
</noscript>
<script async custom-element = "amp-audio"
src = "https://cdn.ampproject.org/v0/amp-audio-0.1.js">
</script>
</head>
<body>
<h3>Google AMP - Audio</h3>
<amp-audio
width = "auto"
height = "50"
src = "audio/test.mp3" preload autoplay>
<div fallback>
<p>HTML5 audio is not supported on your browser!</p>
</div>
</amp-audio>
</body>
</html>Вывод
Атрибут loop, если есть, заставит звук воспроизводиться снова после его завершения.
пример
<amp-audio
width = "auto"
height = "50"
src = "audio/test.mp3" loop>
<div fallback>
<p>HTML5 audio is not supported on your browser!</p>
</div>
</amp-audio>В этой главе мы поймем, как преобразовать обычную страницу html в страницу amp. Мы также проверим страницу для amp и, наконец, проверим вывод.
Для начала возьмем обычную html-страницу, как показано ниже -
test.html
<!DOCTYPE html>
<html>
<head>
<meta charset = "utf-8">
<title>Tutorials</title>
<link href = "style.css" rel = "stylesheet" />
<meta name = "viewport" content = "width = device-width, initial-scale = 1.0">
<script src = "js/jquery.js"></script>
</head>
<body>
<header role = "banner">
<h2>Tutorials</h2>
</header>
<h2>Some Important Tutorials List</h2>
<article>
<section>
<img src = "images/tut1.png" width="90%" height = "90%"/>
</section>
<section>
<img src = "images/tut2.png" width="90%" height = "90%"/>
</section>
<section>
<img src = "images/tut3.png" width="90%" height = "90%"/>
</section>
<section>
<img src = "images/tut4.png" width="90%" height = "90%"/>
</section>
</article>
<footer>
<p>For More tutorials Visit <a href =
"https://tutorialspoint.com/">Tutorials Point</a></p>
</footer>
</body>
</html>Обратите внимание, что мы используем в нем style.css, а подробности файла css приведены здесь -
h1 {color: blue;text-align: center;}
h2 {text-align: center;}
img {
border: 1px solid #ddd;
border-radius: 4px;
padding: 5px;
}
article {
text-align: center;
}
header{
width: 100%;
height: 50px;
margin: 5px auto;
border: 1px solid #000000;
text-align: center;
background-color: #ccc;
}
footer {
width: 100%;
height: 35px;
margin: 5px auto;
border: 1px solid #000000;
text-align: center;
background-color: yellow;
}Обратите внимание, что мы также использовали файл jquery.js в указанном выше .html.
Теперь разместите test.html локально и посмотрите результат, показанный в приведенной здесь ссылке -
http://localhost:8080/googleamp/test.html
Теперь давайте перейдем к пошаговой замене указанного выше файла test.html на файл test_amp.html.
Во-первых, мы должны сохранить test.html как test_amp.html и выполнить шаги, указанные ниже.
Step 1 - Добавьте библиотеку усилителя в раздел головы, как показано ниже -
<script async src = "https://cdn.ampproject.org/v0.js">
</script>Например, после добавления в test_amp.html он будет следующим:
<head>
<meta charset = "utf-8">
<title>Tutorials</title>
<script async src = "https://cdn.ampproject.org/v0.js">
</script>
<link href = "style.css" rel = "stylesheet" />
<meta name = "viewport" content = "width = device-width, initial-scale = 1.0">
<script src = "js/jquery.js"></script>
</head>Теперь запустите страницу test_amp.html в браузере и откройте консоль браузера. Он отобразит консольное сообщение, как показано ниже -

Чтобы узнать, является ли ваш html-файл допустимым, добавьте # development = 1 к URL-адресу вашей html-страницы в конце, как показано ниже -
http://localhost:8080/googleamp/test_amp.html#development=1Нажмите на указанный выше URL-адрес в браузере и в консоли Google Chrome. Он перечислит вам ошибки, которые, по мнению усилителя, недопустимы с точки зрения спецификации усилителя.
Ошибки, которые мы получили для test_amp.html, показаны здесь -
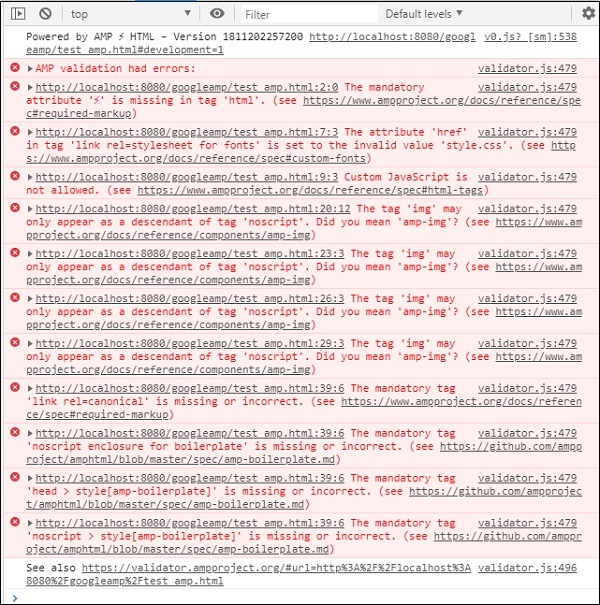
Давайте теперь исправим их один за другим, пока не получим сообщение об успешном выполнении amp.
Step 2 - В консоли мы видим следующую ошибку -

Мы можем исправить это, добавив ⚡ или amp для тега html. Мы добавим amp в тег html, как показано ниже -
<html amp>Step 3 - Убедитесь, что у вас есть метатег с кодировкой и name = ”viewport” в теге заголовка, как показано ниже -
<head>
<meta charset = "utf-8">
<meta name = "viewport" content = "width = device-width, initial-scale = 1.0">
</head>Step 4 - Следующая ошибка, которая у нас есть, показана здесь -

В ссылке rel = stylesheet указано href, т.е. следующая ссылка выдает ошибку. Это связано с тем, что amp не позволяет размещать внешние таблицы стилей, использующие ссылку с href, внутри страниц.
<link href = "style.css" rel = "stylesheet" />We can add the all the css in style.css as follows −<style amp-custom>
/*All styles from style.css please add here */
</style>Таким образом, данные css, представленные в style.css, должны быть добавлены в стиле с атрибутом amp-custom.
<style amp-custom>
h1 {color: blue;text-align: center;}
h2 {text-align: center;}
img {
border: 1px solid #ddd;
border-radius: 4px;
padding: 5px;
}
article {
text-align: center;
}
header{
width: 100%;
height: 50px;
margin: 5px auto;
border: 1px solid #000000;
text-align: center;
background-color: #ccc;
}
footer {
width: 100%;
height: 35px;
margin: 5px auto;
border: 1px solid #000000;
text-align: center;
background-color: yellow;
}
</style>Добавьте тег стиля на свою страницу amp. Давайте теперь проверим то же самое с указанным выше тегом стиля в браузере. Изменения, которые мы внесли в test_amp.html, показаны здесь -
<!DOCTYPE html>
<html amp>
<head>
<meta charset = "utf-8">
<title>Tutorials</title>
<script async src = "https://cdn.ampproject.org/v0.js">
</script>
<meta name = "viewport" content = "width = device-width, initial-scale = 1.0">
<script src = "js/jquery.js"></script>
<style amp-custom>
h1 {color: blue;text-align: center;}
h2 {text-align: center;}
img {
border: 1px solid #ddd;
border-radius: 4px;
padding: 5px;
}
article {
text-align: center;
}
header{
width: 100%;
height: 50px;
margin: 5px auto;
border: 1px solid #000000;
text-align: center;
background-color: #ccc;
}
footer {
width: 100%;
height: 35px;
margin: 5px auto;
border: 1px solid #000000;
text-align: center;
background-color: yellow;
}
</style>
</head>
<body>
<header role = "banner">
<h2>Tutorials</h2>
</header>
<h2>Some Important Tutorials List</h2>
<article>
<section>
<img src = "images/tut1.png" width = "90%" height = "90%"/>
</section>
<section>
<img src = "images/tut2.png" width = "90%" height = "90%"/>
</section>
<section>
<img src = "images/tut3.png" width = "90%" height = "90%"/>
</section>
<section>
<img src = "images/tut4.png" width="90%" height = "90%"/>
</section>
</article>
<footer>
<p>For More tutorials Visit <a href =
"https://tutorialspoint.com/">Tutorials Point</a></p>
</footer>
</body>
</html>Давайте посмотрим на вывод и ошибки в консоли для вышеуказанной страницы. Обратите внимание на следующий снимок экрана -
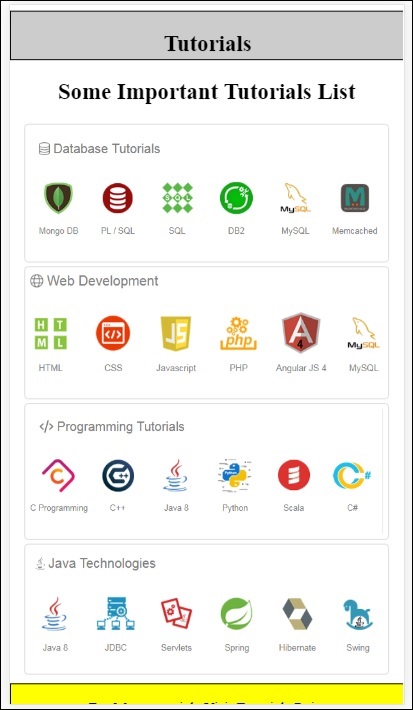
Ошибка, отображаемая в консоли, выглядит следующим образом -
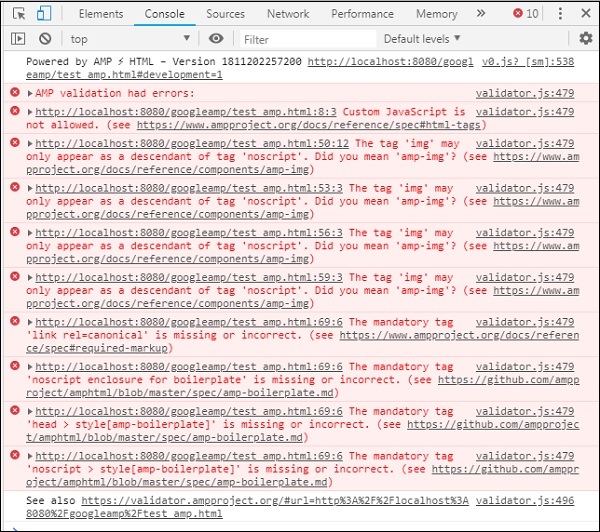
Теперь вы можете видеть, что для некоторых ошибок amp, стиль удален. Исправим сейчас оставшиеся ошибки.
Step 5 - Следующая ошибка, которую мы видим в списке, выглядит следующим образом -

Мы добавили тег скрипта, вызывающий файл jquery. Обратите внимание, что на страницах amp не допускается использование пользовательского javascript на странице. Придется удалить его и обязательно использовать имеющийся amp-компонент.
Например, у нас есть amp-animation, если требуется какая-либо анимация, amp-analytics, если мы хотим добавить на страницу код Google Analytics. Точно так же у нас есть компонент amp-ad для показа рекламы на странице. Также существует компонент amp-iframe, который мы можем указать src на тот же источник и вызвать любой пользовательский JavaScript, если это необходимо в amp-iframe.
Теперь давайте удалим тег скрипта со страницы.
Step 6 - Здесь отображается следующая отображаемая ошибка -

Вышеупомянутые ошибки указывают на тег изображения, который мы использовали на странице. Amp не позволяет использовать теги <img src = ”” /> внутри страницы. Обратите внимание, что вместо этого нам нужно использовать тег amp-img.
Давайте заменим тег <img> на <amp-img>, как показано здесь -
<section>
<amp-img alt = "Beautiful Flower"
src = "images/tut1.png"
width = "500"
height = "160"
layout = "responsive">
</amp-img>
</section>
<section>
<amp-img alt = "Beautiful Flower"
src = "images/tut2.png"
width = "500"
height = "160"
layout = "responsive">
</amp-img>
</section>
<section>
<amp-img alt = "Beautiful Flower"
src = "images/tut3.png"
width = "500"
height = "160"
layout = "responsive">
</amp-img>
</section>
<section>
<amp-img alt = "Beautiful Flower"
src = "images/tut4.png"
width = "500"
height = "160"
layout = "responsive">
</amp-img>
</section>Мы заменили весь тег <img> на <amp-img>, как показано выше. Теперь давайте запустим страницу в браузере, чтобы увидеть результат и ошибки -
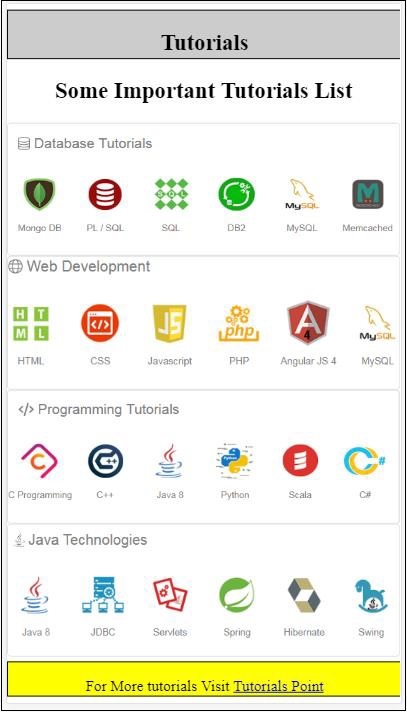
Ошибки
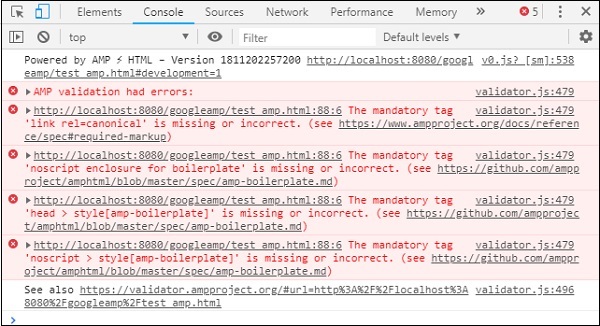
Обратите внимание, что ошибок теперь становится меньше.
Step 7 - Следующая ошибка, отображаемая в консоли, выглядит следующим образом -

Нам нужно добавить тег link rel = canonical в заголовок. Обратите внимание, что это обязательный тег, и его всегда следует добавлять в заголовок следующим образом:
<link rel = "canonical" href =
"http://example.ampproject.org/article-metadata.html">Step 8 - Следующая ошибка отображается в случае отсутствия noscript tag в консоли, как показано здесь -

Нам нужно добавить тег <noscript> в разделе заголовка, заключенный в amp-cabinplate, следующим образом:
<noscript>
<style amp-boilerplate>
body{
-webkit-animation:none;
-moz-animation:none;
-ms-animation:none;
animation:none}
</style>
</noscript>Step 9 - Следующая отображаемая ошибка приведена ниже -

Еще один обязательный тег - это тег стиля с amp-markerplate, который необходимо разместить перед тегом noscript. Тег стиля с amp-шаблона показан здесь -
<style amp-boilerplate>
body{
-webkit-animation:
-amp-start 8s steps(1,end) 0s 1 normal both;-moz-animation:
-amp-start 8s steps(1,end) 0s 1 normal both;-ms-animation:
-amp-start 8s steps(1,end) 0s 1 normal both;animation:
-amp-start 8s steps(1,end) 0s 1 normal both
}
@-webkit-keyframes
-amp-start{from{visibility:hidden}to{visibility:visible}}@-moz-keyframes
-amp-start{from{visibility:hidden}to{visibility:visible}}@-ms-keyframes
-amp-start{from{visibility:hidden}to{visibility:visible}}@-o-keyframes
-amp-start{from{visibility:hidden}to{visibility:visible}}@keyframes
-amp-start{from{visibility:hidden}to{visibility:visible}}
</style>Добавьте указанный выше тег стиля на страницу test_amp.html.
После этого проверьте страницу в браузере, чтобы увидеть вывод и консоль -

Детали консоли показаны здесь -

Таким образом, мы наконец-то решили все ошибки, и теперь страница test_amp.html является действующей страницей amp.
По мере того, как верхний и нижний колонтитулы усекаются, необходимо добавить некоторые стили, мы можем обновить их в добавленном нами собственном стиле. Итак, мы удалили ширину: 100% из верхнего и нижнего колонтитула.
Вот окончательный результат -
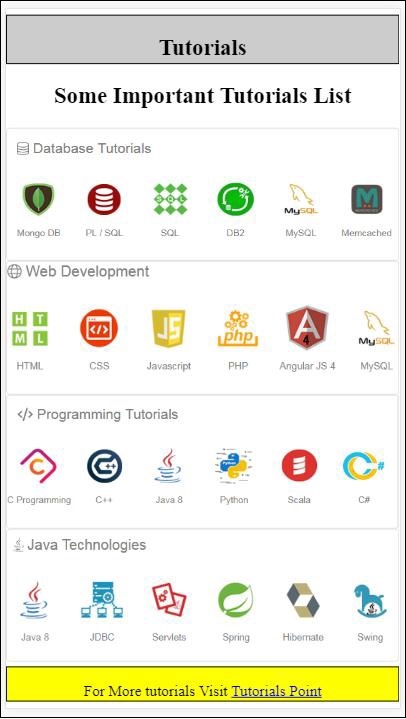
Окончательный файл test_amp.html
<!DOCTYPE html>
<html amp>
<head>
<meta charset = "utf-8">
<title>Tutorials</title>
<link rel = "canonical" href=
"http://example.ampproject.org/article-metadata.html">
<script async src = "https://cdn.ampproject.org/v0.js">
</script>
<meta name = "viewport" content = "width = device-width,
initial-scale = 1.0">
<style amp-boilerplate>
body{
-webkit-animation:
-amp-start 8s steps(1,end) 0s 1 normal both;-moz-animation:
-amp-start 8s steps(1,end) 0s 1 normal both;-ms-animation:
-amp-start 8s steps(1,end) 0s 1 normal both;animation:
-amp-start 8s steps(1,end) 0s 1 normal both
}
@-webkit-keyframes
-amp-start{from{visibility:hidden}to{visibility:visible}}@-moz-keyframes
-amp-start{from{visibility:hidden}to{visibility:visible}}@-ms-keyframes
-amp-start{from{visibility:hidden}to{visibility:visible}}@-o-keyframes
-amp-start{from{visibility:hidden}to{visibility:visible}}@keyframes
-amp-start{from{visibility:hidden}to{visibility:visible}}
</style>
<noscript>
<style amp-boilerplate>
body{
-webkit-animation:none;
-moz-animation:none;
-ms-animation:none;
animation:none}
</style>
</noscript>
<style amp-custom>
h1 {color: blue;text-align: center;}
h2 {text-align: center;}
amp-img {
border: 1px solid #ddd;
border-radius: 4px;
padding: 5px;
}
article {
text-align: center;
}
header{
height: 50px;
margin: 5px auto;
border: 1px solid #000000;
text-align: center;
background-color: #ccc;
}
footer {
height: 35px;
margin: 5px auto;
border: 1px solid #000000;
text-align: center;
background-color: yellow;
}
</style>
</head>
<body>
<header role = "banner">
<h2>Tutorials</h2>
</header>
<h2>Some Important Tutorials List</h2>
<article>
<section>
<amp-img
alt = "Beautiful Flower"
src = "images/tut1.png"
width = "500"
height = "160"
layout = "responsive">
</amp-img>
</section>
<section>
<amp-img
alt = "Beautiful Flower"
src = "images/tut2.png"
width = "500"
height = "160"
layout = "responsive">
</amp-img>
</section>
<section>
<amp-img
alt = "Beautiful Flower"
src = "images/tut3.png"
width = "500"
height = "160"
layout = "responsive">
</amp-img>
</section>
<section>
<amp-img
alt = "Beautiful Flower"
src = "images/tut4.png"
width = "500"
height = "160"
layout = "responsive">
</amp-img>
</section>
</article>
<footer>
<p>For More tutorials Visit <a href =
"https://tutorialspoint.com/">
Tutorials Point</a>
</p>
</footer>
</body>
</html>Итак, наконец, мы закончили преобразование обычного html-файла в amp.
В этой главе мы обсудим основные требования для начала работы со страницами Google AMP.
Пример страницы усилителя
Базовый пример для страницы amp показан ниже -
<!doctype html>
<html amp>
<head>
<meta charset = "utf-8">
<title>Amp Sample Page</title>
<link rel = "canonical" href = "./regular-html-version.html">
<meta name = "viewport" content = "width = device-width,
minimum-scale = 1,initial-scale = 1">
<style amp-custom>
h1 {color: red}
</style>
<style amp-boilerplate>
body{
-webkit-animation:
-amp-start 8s steps(1,end) 0s 1 normal both;-moz-animation:
-amp-start 8s steps(1,end) 0s 1 normal both;-ms-animation:
-amp-start 8s steps(1,end) 0s 1 normal both;animation:
-amp-start 8s steps(1,end) 0s 1 normal both
}
@-webkit-keyframes
-amp-start{from{visibility:hidden}to{visibility:visible}}@-moz-keyframes
-amp-start{from{visibility:hidden}to{visibility:visible}}@-ms-keyframes
-amp-start{from{visibility:hidden}to{visibility:visible}}@-o-keyframes
-amp-start{from{visibility:hidden}to{visibility:visible}}@keyframes
-amp-start{from{visibility:hidden}to{visibility:visible}}
</style>
<noscript>
<style amp-boilerplate>
body{
-webkit-animation:none;
-moz-animation:none;
-ms-animation:none;
animation:none}
</style>
</noscript>
<script async src = "https://cdn.ampproject.org/v0.js">
</script>
</head>
<body>
<h1>Amp Sample Page</h1>
<p>
<amp-img
src = "images/christmas1.jpg"
width = "300"
height = "300"
layout = "responsive">
</amp-img>
</p>
</body>
</html>Обязательные теги
Есть несколько обязательных тегов, которые нужно включить в страницу amp. В этом разделе они подробно обсуждаются -
Мы должны убедиться, что добавляем amp или ⚡ к тегу html, как показано ниже
<html amp>
OR
<html ⚡>Мы должны добавить теги <head> и <body> на страницу html.
Проверка усилителя может завершиться ошибкой, если вы пропустите любой из обязательных метатегов. Здесь показаны некоторые обязательные теги mets, которые должны быть добавлены в головной раздел страницы -
<meta charset="utf-8">
<meta name = "viewport"
content = "width = device-width,
minimum-scale = 1,
initial-scale = 1">Ссылка rel = "canonical" будет добавлена внутри тега заголовка
<link rel = "canonical" href = "./regular-html-version.html">Тег стиля с amp-котелком -
<style amp-boilerplate>
body{
-webkit-animation:
-amp-start 8s steps(1,end) 0s 1 normal both;-moz-animation:
-amp-start 8s steps(1,end) 0s 1 normal both;-ms-animation:
-amp-start 8s steps(1,end) 0s 1 normal both;animation:
-amp-start 8s steps(1,end) 0s 1 normal both
}
@-webkit-keyframes
-amp-start{from{visibility:hidden}to{visibility:visible}}@-moz-keyframes
-amp-start{from{visibility:hidden}to{visibility:visible}}@-ms-keyframes
-amp-start{from{visibility:hidden}to{visibility:visible}}@-o-keyframes
-amp-start{from{visibility:hidden}to{visibility:visible}}@keyframes
-amp-start{from{visibility:hidden}to{visibility:visible}}
</style>Тег Noscript с amp-шаблона -
<noscript>
<style amp-boilerplate>
body{
-webkit-animation:none;
-moz-animation:none;
-ms-animation:none;
animation:none}
</style>
</noscript>Тег сценария amp с асинхронным добавлением к нему, как показано ниже. Это самый важный тег из всех -
<script async src = "https://cdn.ampproject.org/v0.js">
</script>Вы должны использовать этот тег, если хотите добавить на страницу собственный CSS. Обратите внимание, что мы не можем вызывать внешнюю таблицу стилей на страницах amp. Чтобы добавить собственный css, весь ваш css должен быть здесь -
<style amp-custom>
   //all your styles here
</style>Вы можете проверить указанную выше страницу в своем браузере, используя # developement = 1 в конце URL-адреса страницы.
Теперь давайте проверим то же самое в браузере. Я разместил страницу локально и сохранил ее как amppage.html.
URL-адрес для проверки выше:
http://localhost/googleamp/amppage.html#development=1
пример
<!doctype html>
<html amp>
<head>
<meta charset = "utf-8">
<title>Amp Sample Page</title>
<link rel = "canonical" href = "./regular-html-version.html">
<meta name = "viewport" content = "width=device-width,
minimum-scale = 1,initial-scale = 1">
<style amp-custom>
h1 {color: red}
</style>
<style amp-boilerplate>
body{
-webkit-animation:
-amp-start 8s steps(1,end) 0s 1 normal both;-moz-animation:
-amp-start 8s steps(1,end) 0s 1 normal both;-ms-animation:
-amp-start 8s steps(1,end) 0s 1 normal both;animation:
-amp-start 8s steps(1,end) 0s 1 normal both
}
@-webkit-keyframes
-amp-start{from{visibility:hidden}to{visibility:visible}}@-moz-keyframes
-amp-start{from{visibility:hidden}to{visibility:visible}}@-ms-keyframes
-amp-start{from{visibility:hidden}to{visibility:visible}}@-o-keyframes
-amp-start{from{visibility:hidden}to{visibility:visible}}@keyframes
-amp-start{from{visibility:hidden}to{visibility:visible}}
</style>
<noscript>
<style amp-boilerplate>
body{
-webkit-animation:none;
-moz-animation:none;
-ms-animation:none;
animation:none}
</style>
</noscript>
<script async src = "https://cdn.ampproject.org/v0.js">
</script>
</head>
<body>
<h1>Amp Sample Page</h1>
<p>
<amp-img
src = "images/christmas1.jpg"
width = "300"
height = "250"
layout = "responsive">
</amp-img>
</p>
</body>
</html>Вывод

Вы можете увидеть статус проверки amp в консоли разработчика следующим образом:

Это дает нам успешную проверку AMP, поскольку мы добавили все необходимые обязательные теги для действующей страницы amp.
Google AMP - это способ ускорить загрузку веб-страниц на устройствах. Для работы с amp мы можем использовать HTML5, CSS и amp-компоненты.
Google Amp предоставляет множество способов проверки страницы amp. Некоторые из важных из них, которые мы собираемся обсудить в этой главе:
Использование # development = 1
Использование валидатора усилителя
Используя командную строку
Обсудим подробно каждый из них.
Использование #development = 1
Как только вы узнаете, что ваша страница готова к проверке, просто добавьте # development = 1 в конец URL-адреса страницы и проверьте то же самое в инструментах разработчика Chrome.
Можете добавить #development=1 на URL-адрес вашей html-страницы в конце, как показано в примере, приведенном ниже -
http://localhost:8080/googleamp/test_amp.html#development=1Нажмите на указанный выше URL-адрес в браузере и в консоли Google Chrome. В нем будут перечислены ошибки, которые, по мнению усилителя, недопустимы с точки зрения спецификации усилителя.
Вот ошибки, которые мы получили для test_amp.html.
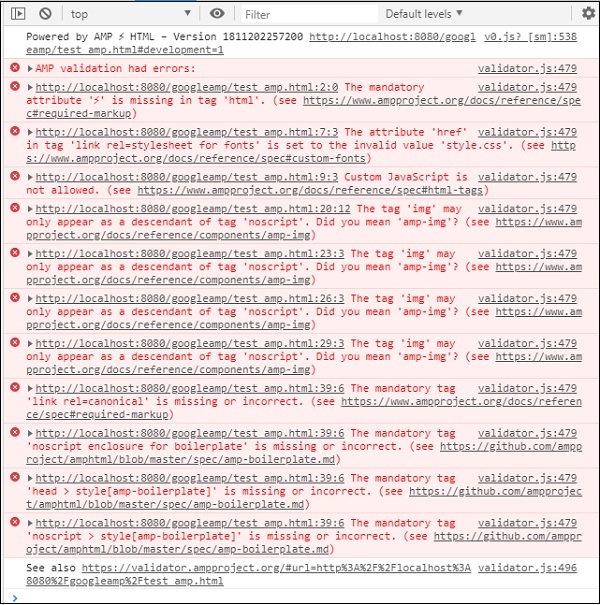
Вы можете исправить отображаемые ошибки, и как только все ошибки будут исправлены, они будут отображаться следующим образом:

Использование валидатора усилителя
У Amp есть инструмент проверки, с помощью которого мы можем вводить HTML-контент, и он отображает статус PASS или ERROR, а также показывает ошибку на странице. Ссылка -https://validator.ampproject.org/
Дисплей для инструмента проверки усилителя показан ниже -
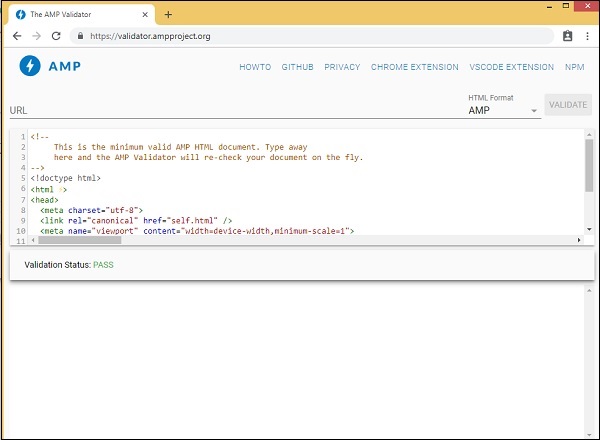
Пример ошибки в содержимом страницы показан ниже -
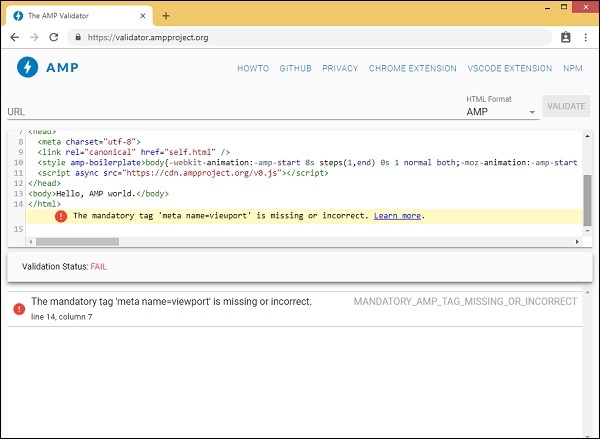
Использование командной строки
Вы можете установить пакет npm, используя следующую команду -
npm install -g amphtml-validator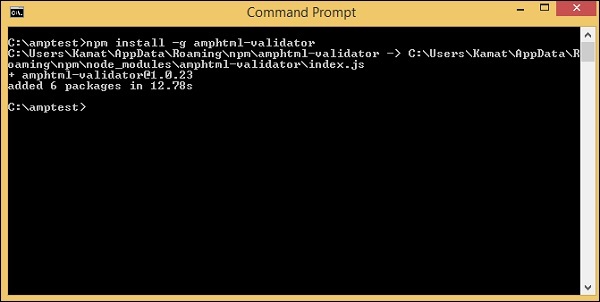
Мы создали папку amptest / и сохранили в ней файл amp_test.html. Давайте проверим файл amp_test.html с помощью следующей команды в командной строке.
amphtml-validator youramppage.html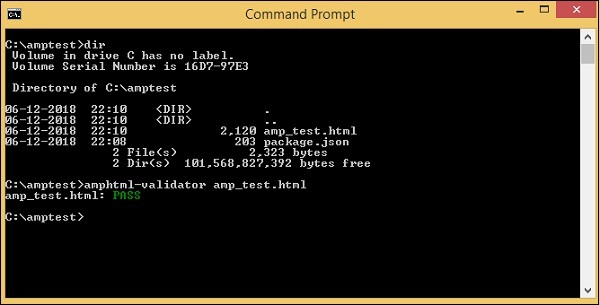
Давайте удалим некоторые теги со страницы, чтобы увидеть, отображает ли она ошибку.
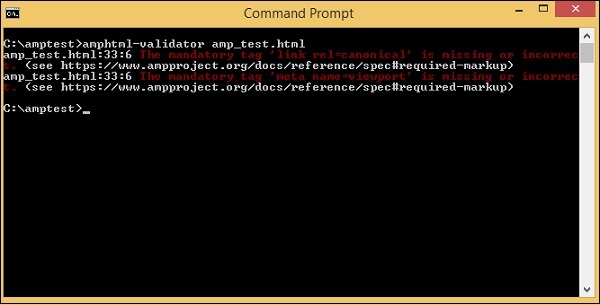
Отображаемую ошибку можно исправить, пока мы не получим статус PASS.
Google amp предоставляет средство кеширования, которое представляет собой сеть доставки контента на основе прокси для обслуживания страниц только с усилителем. Кэш Amp доступен по умолчанию для всех допустимых страниц AMP. Это помогает быстрее отображать страницы по сравнению со страницами без AMP.
В настоящее время существует 2 поставщика кеш-памяти amp Google AMP Cache и Cloudflare AMP Cache. Как было сказано ранее, кэширование amp доступно для всех допустимых страниц amp. В случае, если пользователь не хочет использовать функцию кеширования amp, вам необходимо сделать страницу amp недействительной. Кэш усилителя не применяется к недопустимым страницам amp.
В тот момент, когда поисковая система Google сканирует и находит amp () для содержания html, он учитывает кеширование.
В этом разделе мы обсудим различные компоненты URL-адреса кэша Google amp.
Поддомен
Google AMP добавляет субдомен к запрошенному URL. Для URL-адреса поддомена кеш-памяти усилителя соблюдаются некоторые правила. Они показаны здесь -
Правила для URL кеша поддомена
Преобразование домена документа AMP из IDN (Punycode) в UTF-8.
Тире (-) в URL заменяется двумя дефисами (-).
Точка (.) В URL-адресе заменяется тире (-).
Преобразование обратно в IDN (Punycode).
Например pub.mypage будет заменен на pub-mypage.cdn.ampproject.com. Здесь cdn.ampproject.com - это субдомен, добавленный google amp. Теперь кешированный URL-адрес - Pub-mypage.cdn.ampproject.com.
Тип содержимого
Доступные типы контента: c для HTML-документа AMP, i для изображения и r для ресурса, например шрифта. Вы получите ошибку 404, если тип контента не совпадает с указанным.
Необязательный 's'
Если s присутствует, содержимое будет извлечено из источника https: //; в противном случае он будет загружен с http: //
Пример запроса к кэшированному изображению с https и http показан здесь -
пример
https://pub-mypage-com.cdn.ampproject.org/i/s/examples/images/testimage.pngИтак, в приведенном выше примере URL-адрес имеет i, что означает изображение и s для https -
пример
http://pub-mypage-com.cdn.ampproject.org/i/examples/images/testimage.pngТаким образом, в приведенном выше примере URL-адрес имеет i, что означает изображение, и нет s, поэтому URL-адрес будет извлечен из http.
Для кэшированного файла шрифта URL-адрес будет следующим:
пример
https://pub-mypage-com.cdn.ampproject.org/r/s/examples/themes/lemon/fonts/Genericons.ttfТип содержимого r используется для таких ресурсов, как шрифты и s для безопасного URL.
Для html-документа URL-адрес выглядит следующим образом -
пример
https://pub-mypage-com.cdn.ampproject.org/c/s/trends/main.htmlВ URL-адресе есть c для HTML-документа, за которым следует s для https: //
Кеш Google AMP использует заголовки http, например Max-age чтобы решить, является ли кеш содержимого устаревшим или свежим, и автоматически отправляет новые запросы и обновляет содержимое, чтобы следующий пользователь обновил содержимое.
В предыдущих главах мы изучили множество компонентов amp. Мы также видели, что для работы каждого компонента нам нужно добавить файл javascript.
Например, для amp-iframe добавленный скрипт выглядит следующим образом:
<script async custom-element="amp-iframe"
src="https://cdn.ampproject.org/v0/amp-iframe-0.1.js">
</script>У нас есть asyncдобавлен в тег скрипта. Это стандарт для amp, поскольку они загружают все файлы javascript асинхронно. Существуетcustom-element добавлен атрибут, в котором указано имя компонента, для которого он используется.
Чтобы использовать любой amp-компонент, если он не является частью основного файла javascript amp, необходимо добавить скрипт, как показано выше.
В основном мы привыкли писать много кода javascript внутри страниц, а также включать файл javascript с помощью тега script.
Как это сделать в усилителе? Поэтому AMP не позволяет писать код сценария или загружать тег сценария извне.
У Amp есть собственный компонент, который позаботится о работе, которая должна выполняться дополнительным скриптом, который добавляется на страницу. В основном это делается из соображений производительности, чтобы быстрее загружать содержимое страницы и чтобы javascript не задерживал рендеринг или вносил какие-либо изменения в DOM.
Это спецификация, предоставленная AMP на их официальном сайте для тегов сценариев -
Запрещено, если тип не является application / ld + json. (Другие неисполняемые значения могут быть добавлены по мере необходимости.) Исключение - это обязательный тег сценария для загрузки среды выполнения AMP и теги сценария для загрузки расширенных компонентов.
Рабочий пример, где мы можем использовать application/ld+jsonвнутри наших страниц amp. Обратите внимание, что мы используем тег script с type = ”application / ld + json” для компонента amp-analytics для запуска трекера.
Точно так же мы можем использовать тег скрипта с type = ”application / ld + json” на других компонентах amp, где это необходимо.
пример
<!doctype html>
<html amp>
<head>
<meta charset = "utf-8">
<title>amp-analytics</title>
<script async src = "https://cdn.ampproject.org/v0.js">
</script>
<script async custom-element = "amp-analytics"
src = "https://cdn.ampproject.org/v0/amp-analytics-0.1.js">
</script>
<link rel = "canonical" href = "ampanalytics.html">
<meta name = "viewport" content = "width=device-width,
minimum-scale = 1,initial-scale = 1">
<style amp-boilerplate>
body{
-webkit-animation:
-amp-start 8s steps(1,end) 0s 1 normal both;-moz-animation:
-amp-start 8s steps(1,end) 0s 1 normal both;-ms-animation:
-amp-start 8s steps(1,end) 0s 1 normal both;animation:
-amp-start 8s steps(1,end) 0s 1 normal both
}
@-webkit-keyframes
-amp-start{from{visibility:hidden}to{visibility:visible}}@-moz-keyframes
-amp-start{from{visibility:hidden}to{visibility:visible}}@-ms-keyframes
-amp-start{from{visibility:hidden}to{visibility:visible}}@-o-keyframes
-amp-start{from{visibility:hidden}to{visibility:visible}}@keyframes
-amp-start{from{visibility:hidden}to{visibility:visible}}
</style>
<noscript>
<style amp-boilerplate>
body{
-webkit-animation:none;
-moz-animation:none;
-ms-animation:none;
animation:none}
</style>
</noscript>
</head>
<body>
<h1>Google Amp - Analytics</h1>
<amp-analytics>
<script type = "application/json">
{
"requests": {
"event": "http://localhost:8080/googleamp/tracking.php?
user=test&account=localhost&event=${eventId}"
},
"triggers": {
"trackPageview": {
"on": "visible",
"request": "event",
"vars": {
"eventId": "pageview"
}
}
}
}
</script>
</amp-analytics>
</body>
</html>Когда страница открывается в браузере, трекер запускается для просмотра страницы. Его можно увидеть на вкладке сети Google, как показано ниже.
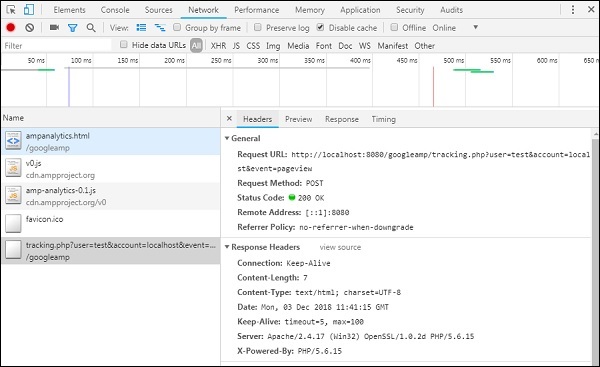
В этой главе мы попытаемся понять CORS в AMP. Прежде чем углубляться в детали, давайте разберемся в основах CORS и в том, чем это полезно.
Что такое CORS?
CORS расшифровывается как Cross Origin Resource Sharing. CORS - это процесс, которому требуются дополнительные данные HTTP-заголовка, чтобы сообщить браузеру, следует ли предоставить запросу, отправляемому по URL-адресу веб-страницей, запущенной, скажем, в источнике xyz.com, разрешение на доступ к данным с запрошенного URL-адреса. Мы делаем много HTTP-запросов с веб-страницы, и для этого нам нужно иметь CORS для получения необходимых данных.
Когда мы делаем http-запрос к серверу, отличному от хоста, мы называем это запросом с перекрестным источником, что означает, что либо домен, либо протокол, либо порт отличаются от источника хоста. В таком случае должно быть разрешение от запрошенного URL для доступа к данным; это означает, что сделан запрос GET / PUT / POST / DELETE.
Эти дополнительные данные доступны в заголовке браузера для выполненного HTTP-запроса. Этот шаг разрешения в основном требуется по соображениям безопасности, чтобы ни одна веб-страница не могла создавать или получать данные из другого домена без необходимого разрешения.
Заголовок браузера должен содержать такие сведения, как Access-Control-Allow-Origin которые могут иметь значения, как показано ниже -
Access-Control-Allow-Origin : *Наличие значения * для заголовка URL-адреса запроса означает, что он сообщает браузерам разрешить запрашивать данные из любого источника для доступа к ресурсу.
Access-Control-Allow-Origin: https://www.example.comПриведенное выше значение сообщает браузеру, что запрос, сделанный с веб-страницы www.example.com, будет разрешен только для получения данных для запрошенного URL.
Конфигурация сервера для CORS должна выполняться с учетом того, как будут использоваться совместно используемые данные. В зависимости от этого требуемые заголовки должны быть установлены на стороне сервера.
Теперь, когда мы знаем, что такое CORS, давайте сделаем еще один шаг вперед. В случае amp, у нас есть такие компоненты, как amp-form, amp-list, которые используют конечные точки http для динамической загрузки данных.
В случае страниц amp, даже если HTTP-запрос сделан из того же источника, нам необходимо иметь настройку CORS. Здесь возникают вопросы - зачем нам включать CORS, даже если запрос и ответ будут исходить из одного источника. Технически нам не нужно включать CORS в таком случае, потому что мы запрашиваем и отображаем данные для одного и того же домена, происхождения и т. Д.
В Amp есть функция, называемая кэшированием, которая добавляется, чтобы быстрее передавать данные пользователю, который попадает на страницу. В случае, если пользователь уже посетил страницу, данные будут кэшированы на google cdn, следующий пользователь получит данные, обслуживаемые из кеша.
Данные хранятся на конце усилителя, который теперь имеет другой домен. Когда пользователь нажимает любую кнопку, чтобы получить свежие данные, URL-адрес кэша amp сравнивается с доменом веб-страницы для получения новых данных. Теперь, если CORS не включен, поскольку он имеет дело с кешированным URL-адресом amp и доменом веб-страницы, запрос будет недействительным и не будет иметь разрешения CORS. Это причина, по которой нам нужно включить CORS даже для одного и того же источника в случае страниц amp.
Рабочий пример работы с формами с включенным CORS показан здесь -
<!doctype html>
<html amp lang = "en">
<head>
<meta charset = "utf-8">
<script async src = "https://cdn.ampproject.org/v0.js">
</script>
<title>Google AMP - Form</title>
<link rel = "canonical" href = "ampform.html">
<meta name = "viewport" content = "width = device-width,
minimum-scale = 1,initial-scale = 1">
<style amp-boilerplate>
body{
-webkit-animation:
-amp-start 8s steps(1,end) 0s 1 normal both;-moz-animation:
-amp-start 8s steps(1,end) 0s 1 normal both;-ms-animation:
-amp-start 8s steps(1,end) 0s 1 normal both;animation:
-amp-start 8s steps(1,end) 0s 1 normal both
}
@-webkit-keyframes
-amp-start{from{visibility:hidden}to{visibility:visible}}@-moz-keyframes
-amp-start{from{visibility:hidden}to{visibility:visible}}@-ms-keyframes
-amp-start{from{visibility:hidden}to{visibility:visible}}@-o-keyframes
-amp-start{from{visibility:hidden}to{visibility:visible}}@keyframes
-amp-start{from{visibility:hidden}to{visibility:visible}}
</style>
<noscript>
<style amp-boilerplate>
body{
-webkit-animation:none;
-moz-animation:none;
-ms-animation:none;
animation:none}
</style>
</noscript>
<script async custom-element = "amp-form"
src = "https://cdn.ampproject.org/v0/amp-form-0.1.js">
</script>
<script async custom-template = "amp-mustache"
src = "https://cdn.ampproject.org/v0/amp-mustache-0.2.js">
</script>
<style amp-custom>
form.amp-form-submit-success [submit-success],
form.amp-form-submit-error [submit-error]{
margin-top: 16px;
}
form.amp-form-submit-success [submit-success] {
color: white;
background-color:gray;
}
form.amp-form-submit-error [submit-error] {
color: red;
}
form.amp-form-submit-success.hide-inputs > input {
display: none;
}
</style>
</head>
<body>
<h3>Google AMP - Form</h3>
<form
method = "post"
class = "p2"
action-xhr = "submitform.php"
target = "_top">
<p>AMP - Form Example</p>
<div>
<input
type = "text"
name = "name"
placeholder = "Enter Name" required>
<br/>
<br/>
<input
type = "email"
name = "email"
placeholder = "Enter Email"
required>
<br/>
<br/>
</div>
<input type = "submit" value = "Submit">
<div submit-success>
<template type = "amp-mustache">
Form Submitted! Thanks {{name}}.
</template>
</div>
<div submit-error>
<template type = "amp-mustache">
Error! {{name}}, please try again.
</template>
</div>
</form>
</body>
</html>submitform.php
<?php
   if(!empty($_POST)){ $domain_url = (isset($_SERVER['HTTPS']) ? "https" : "http") . "://$_SERVER[HTTP_HOST]";
      header("Content-type: application/json");
      header("AMP-Access-Control-Allow-Source-Origin: " . $domain_url); header("Access-Control-Expose-Headers: AMP-Access-Control-Allow-Source-Origin"); $myJSON = json_encode($_POST); echo $myJSON;
   }
?>Вывод
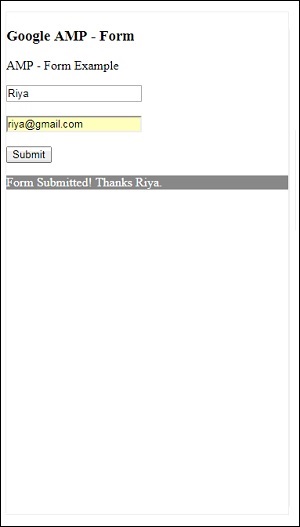
Детали заголовков ответов добавлены в submitform.php -
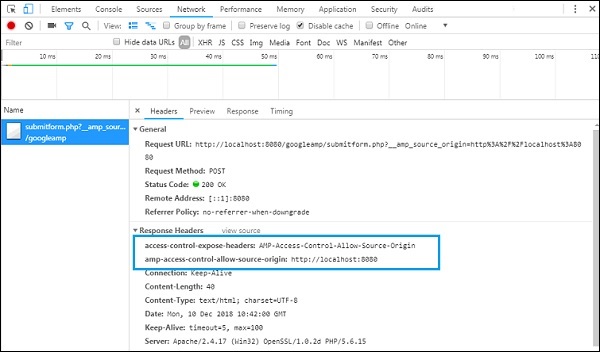
Чтобы форма работала, нам нужно добавить заголовки, такие как access-control-expose-headers, со значением AMP-Access-Control-Allow-Source-Origin и amp-access-control-allow-source-origin - http://localhost:8080.
Здесь мы используем файл php, а apache - используемый сервер. В файл php мы добавили необходимые заголовки, как показано ниже -
<?php
if(!empty($_POST)){ $domain_url = (isset($_SERVER['HTTPS']) ? "https" : "http") . "://$_SERVER[HTTP_HOST]";
header("Content-type: application/json");
header("AMP-Access-Control-Allow-Source-Origin: " . $domain_url); header("Access-Control-Expose-Headers: AMP-Access-Control-Allow-Source-Origin"); $myJSON = json_encode($_POST); echo $myJSON;
}
?>Когда требуемые заголовки добавлены, происхождение http://localhost:8080 будет разрешено взаимодействовать и получать данные обратно.,