Android - Chuyển văn bản thành giọng nói
Android cho phép bạn chuyển văn bản của mình thành giọng nói. Bạn không chỉ có thể chuyển đổi nó mà còn cho phép bạn nói văn bản bằng nhiều ngôn ngữ khác nhau.
Android cung cấp TextToSpeechlớp cho mục đích này. Để sử dụng lớp này, bạn cần khởi tạo một đối tượng của lớp này và cũng chỉ địnhinitListener. Cú pháp của nó được đưa ra dưới đây:
private EditText write;
ttobj=new TextToSpeech(getApplicationContext(), new TextToSpeech.OnInitListener() {
   @Override
   public void onInit(int status) {
   }
});
Trong trình nghe này, bạn phải chỉ định các thuộc tính cho đối tượng TextToSpeech, chẳng hạn như ngôn ngữ của nó, cao độ, v.v. Ngôn ngữ có thể được đặt bằng cách gọi setLanguage()phương pháp. Cú pháp của nó được đưa ra dưới đây:
ttobj.setLanguage(Locale.UK);Phương thức setLanguage nhận một đối tượng Locale làm tham số. Dưới đây là danh sách một số ngôn ngữ có sẵn:
| Sr.No | Ngôn ngữ |
|---|---|
| 1 | CHÚNG TA |
| 2 | CANADA_FRENCH |
| 3 | NƯỚC ĐỨC |
| 4 | NƯỚC Ý |
| 5 | NHẬT BẢN |
| 6 | TRUNG QUỐC |
Khi bạn đã đặt ngôn ngữ, bạn có thể gọi speakphương pháp của lớp để nói văn bản. Cú pháp của nó được đưa ra dưới đây:
ttobj.speak(toSpeak, TextToSpeech.QUEUE_FLUSH, null);Ngoài phương thức nói, có một số phương thức khác có sẵn trong lớp TextToSpeech. Chúng được liệt kê dưới đây -
| Sr.No | Phương pháp & mô tả |
|---|---|
| 1 | addSpeech(String text, String filename) Phương pháp này thêm một ánh xạ giữa một chuỗi văn bản và một tệp âm thanh. |
| 2 | getLanguage() Phương thức này trả về một cá thể Locale mô tả ngôn ngữ. |
| 3 | isSpeaking() Phương pháp này kiểm tra xem công cụ TextToSpeech có bận nói hay không. |
| 4 | setPitch(float pitch) Phương pháp này đặt cao độ giọng nói cho công cụ TextToSpeech. |
| 5 | setSpeechRate(float speechRate) Phương pháp này đặt tốc độ giọng nói. |
| 6 | shutdown() Phương pháp này giải phóng các tài nguyên được sử dụng bởi công cụ TextToSpeech. |
| 7 | stop() Phương pháp này dừng nói. |
Thí dụ
Ví dụ dưới đây minh họa việc sử dụng lớp TextToSpeech. Nó đóng một ứng dụng cơ bản cho phép bạn thiết lập viết văn bản và nói nó.
Để thử nghiệm với ví dụ này, bạn cần chạy nó trên một thiết bị thực tế.
| Các bước | Sự miêu tả |
|---|---|
| 1 | Bạn sẽ sử dụng Android studio để tạo ứng dụng Android theo gói com.example.sairamkrishna.myapplication. |
| 2 | Sửa đổi tệp src / MainActivity.java để thêm mã TextToSpeech. |
| 3 | Sửa đổi tệp XML bố cục res / layout / activity_main.xml thêm bất kỳ thành phần GUI nào nếu cần. |
| 4 | Chạy ứng dụng và chọn một thiết bị Android đang chạy và cài đặt ứng dụng trên đó và xác minh kết quả. |
Đây là nội dung của src/MainActivity.java.
package com.example.sairamkrishna.myapplication;

import android.app.Activity;
import android.os.Bundle;
import android.speech.tts.TextToSpeech;
import android.view.View;
import android.widget.Button;
import android.widget.EditText;
import java.util.Locale;
import android.widget.Toast;

public class MainActivity extends Activity {
   TextToSpeech t1;
   EditText ed1;
   Button b1;

   @Override
   protected void onCreate(Bundle savedInstanceState) {
      super.onCreate(savedInstanceState);
      setContentView(R.layout.activity_main);
      ed1=(EditText)findViewById(R.id.editText);
      b1=(Button)findViewById(R.id.button);

      t1=new TextToSpeech(getApplicationContext(), new TextToSpeech.OnInitListener() {
         @Override
         public void onInit(int status) {
            if(status != TextToSpeech.ERROR) {
               t1.setLanguage(Locale.UK);
            }
         }
      });

      b1.setOnClickListener(new View.OnClickListener() {
         @Override
         public void onClick(View v) {
            String toSpeak = ed1.getText().toString();
            Toast.makeText(getApplicationContext(), toSpeak,Toast.LENGTH_SHORT).show();
            t1.speak(toSpeak, TextToSpeech.QUEUE_FLUSH, null);
         }
      });
   }

   public void onPause(){
      if(t1 !=null){
         t1.stop();
         t1.shutdown();
      }
      super.onPause();
   }
}
Đây là nội dung của activity_main.xml
Trong đoạn mã sau abccho biết logo của tutorialspoint.com
<?xml version="1.0" encoding="utf-8"?>
<RelativeLayout xmlns:android="http://schemas.android.com/apk/res/android"
   xmlns:tools="http://schemas.android.com/tools" android:layout_width="match_parent"
   android:layout_height="match_parent" android:paddingLeft="@dimen/activity_horizontal_margin"
   android:paddingRight="@dimen/activity_horizontal_margin"
   android:paddingTop="@dimen/activity_vertical_margin"
   android:paddingBottom="@dimen/activity_vertical_margin"
   tools:context=".MainActivity"
   android:transitionGroup="true">

   <TextView android:text="Text to Speech" android:layout_width="wrap_content"
      android:layout_height="wrap_content"
      android:id="@+id/textview"
      android:textSize="35dp"
      android:layout_alignParentTop="true"
      android:layout_centerHorizontal="true" />

   <TextView
      android:layout_width="wrap_content"
      android:layout_height="wrap_content"
      android:text="Tutorials point"
      android:id="@+id/textView"
      android:layout_below="@+id/textview"
      android:layout_centerHorizontal="true"
      android:textColor="#ff7aff24"
      android:textSize="35dp" />

   <ImageView
      android:layout_width="wrap_content"
      android:layout_height="wrap_content"
      android:id="@+id/imageView"
      android:src="@drawable/abc"
      android:layout_below="@+id/textView"
      android:layout_centerHorizontal="true"
      android:theme="@style/Base.TextAppearance.AppCompat" />

   <EditText
      android:layout_width="wrap_content"
      android:layout_height="wrap_content"
      android:id="@+id/editText"
      android:layout_below="@+id/imageView"
      android:layout_marginTop="46dp"
      android:hint="Enter Text"
      android:layout_alignParentRight="true"
      android:layout_alignParentEnd="true"
      android:layout_alignParentLeft="true"
      android:layout_alignParentStart="true"
      android:textColor="#ff7aff10"
      android:textColorHint="#ffff23d1" />

   <Button
      android:layout_width="wrap_content"
      android:layout_height="wrap_content"
      android:text="Text to Speech"
      android:id="@+id/button"
      android:layout_below="@+id/editText"
      android:layout_centerHorizontal="true"
      android:layout_marginTop="46dp" />

</RelativeLayout>
Đây là nội dung của Strings.xml.
<resources>
   <string name="app_name">My Application</string>
</resources>
Đây là nội dung của AndroidManifest.xml
<?xml version="1.0" encoding="utf-8"?>
<manifest xmlns:android="http://schemas.android.com/apk/res/android"
   package="com.example.sairamkrishna.myapplication" >
   <application
      android:allowBackup="true"
      android:icon="@mipmap/ic_launcher"
      android:label="@string/app_name"
      android:theme="@style/AppTheme" >

      <activity
         android:name=".MainActivity"
         android:label="@string/app_name" >

         <intent-filter>
            <action android:name="android.intent.action.MAIN" >
            <category android:name="android.intent.category.LAUNCHER" />
         </intent-filter>

      </activity>

   </application>
</manifest>
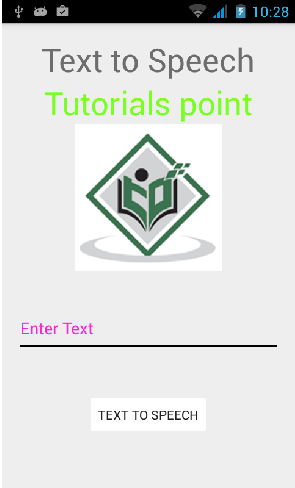
Hãy thử chạy ứng dụng của bạn. Tôi giả sử bạn đã kết nối thiết bị di động Android thực tế với máy tính của mình. Để chạy ứng dụng từ Android studio, hãy mở một trong các tệp hoạt động của dự án của bạn và nhấp vào


Chọn thiết bị di động của bạn làm tùy chọn và sau đó kiểm tra thiết bị di động của bạn sẽ hiển thị màn hình sau.

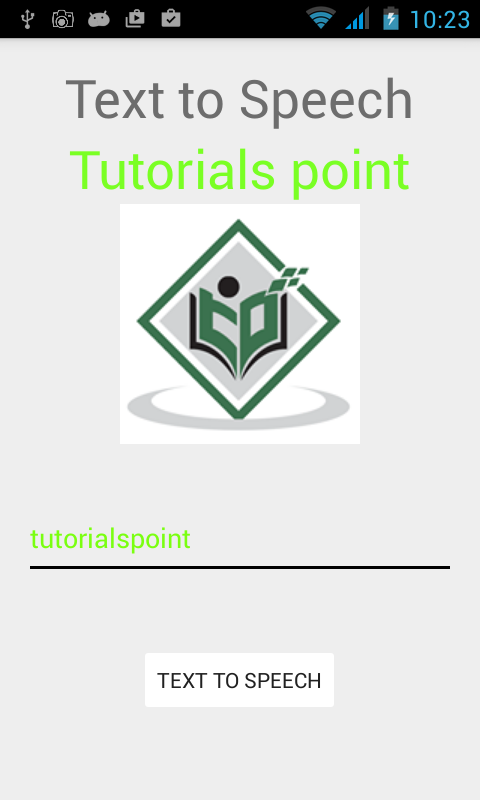
Bây giờ chỉ cần nhập một số văn bản vào trường và nhấp vào nút chuyển văn bản thành giọng nói bên dưới. Một thông báo sẽ xuất hiện và văn bản sẽ được đọc. Nó được hiển thị trong hình ảnh bên dưới -

Bây giờ gõ một cái gì đó khác và lặp lại bước một lần nữa với ngôn ngữ khác. Bạn sẽ lại nghe thấy âm thanh. Điều này được hiển thị bên dưới -
