GoogleAMP-アクションとイベント
アンプコンポーネントでアクションまたはイベントを使用するには、on属性を使用できます。この章では、それらについて詳しく説明します。
イベント
イベントを処理するための構文は次のとおりです-
on = "eventName:elementId[.methodName[(arg1 = value, arg2 = value)]]"に渡された詳細 on 属性は次のとおりです-
eventName−これは、amp-componentで使用可能なイベントの名前を取ります。たとえば、フォームの場合、submit-success、submit-erroreventNamesを使用できます。
elementId−これは、イベントを呼び出す必要がある要素のIDを取ります。これは、成功またはエラーについて知りたいフォームのIDにすることができます。
methodName −これは、イベントの発生時に呼び出されるメソッドの名前を取ります。
arg=value −これは、メソッドに渡されたkey = value形式の引数を取ります。
on属性に複数のイベントを渡すことも可能で、次のように実行されます。
on = "submit-success:lightbox;submit-error:lightbox1"複数のイベントがある場合、それらはon属性に渡され、セミコロン(;)を使用して区切られます。
行動
アクションは基本的にon属性で使用され、構文は次のとおりです。
on = "tab:elementid.hide;"次のように複数のアクションを渡すことができます-
on = "tab:elementid.open;tab:elementid.hide;”Elementid アクションが実行される要素のIDです。
Ampには、グローバルに定義されたイベントとアクションがいくつかあり、これらは任意のampコンポーネントで使用できます。 tap event そして行動は hide, show そして togglevisibility。
HTMLまたはアンプコンポーネントでtogglevisibilityを非表示/表示または使用する場合は、次を使用できます。 on=”tap:elementid.[hide/show/togglevisibility]”
イベントとアクションの実際の例をいくつか見てみましょう。
入力要素について
実例の助けを借りて、これをよりよく理解しましょう-
例
<!doctype html>
<html amp lang = "en">
   <head>
      <meta charset = "utf-8">
      <script async src = "https://cdn.ampproject.org/v0.js"></script>
      <title>Google AMP - Amp Bind</title>
      <link rel = "canonical" href = "http://example.ampproject.org/article-metadata.html">
      <meta name = "viewport" content = "width = device-width,minimum-scale = 1,initial-scale = 1">

      <style amp-boilerplate>
         body{
            -webkit-animation:
            -amp-start 8s steps(1,end) 0s 1 normal both;-moz-animation:
            -amp-start 8s steps(1,end) 0s 1 normal both;-ms-animation:
            -amp-start 8s steps(1,end) 0s 1 normal both;animation:
            -amp-start 8s steps(1,end) 0s 1 normal both
         }
         @-webkit-keyframes
         -amp-start{from{visibility:hidden}to{visibility:visible}}@-moz-keyframes
         -amp-start{from{visibility:hidden}to{visibility:visible}}@-ms-keyframes
         -amp-start{from{visibility:hidden}to{visibility:visible}}@-o-keyframes
         -amp-start{from{visibility:hidden}to{visibility:visible}}@keyframes
         -amp-start{from{visibility:hidden}to{visibility:visible}}
      </style>

      <noscript>
         <style amp-boilerplate>
            body {
               -webkit-animation:none;
               -moz-animation:none;
               -ms-animation:none;
               animation:none
            }
         </style>
      </noscript>

      <script async custom-element = "amp-bind" src = "
         https://cdn.ampproject.org/v0/amp-bind-0.1.js">
      </script>

      <script async custom-element = "amp-lightbox" src = "
         https://cdn.ampproject.org/v0/amp-lightbox-0.1.js">
      </script>

      <style amp-custom>
         button{
            background-color: #ACAD5C;
            color: white;
            padding: 12px 20px;
            border: none;
            border-radius: 4px;
            cursor: pointer;
            float: left;}

         .lightbox {
            background: rgba(211,211,211,0.8);
            width: 100%;
            height: 100%;
            position: absolute;
            display: flex;
            align-items: center;
            justify-content: center;
         }
         #txtname{
            width: 100%;
            padding: 12px 20px;
            margin: 8px 0;
            display: inline-block;
            border: 1px solid #ccc;
            border-radius: 4px;
            box-sizing: border-box;
         }
         div {
            font-size:25px;
         }
      </style>
   </head>
   <body>
      <h3>Google AMP - Amp Bind</h3>
      <button on = "tap:AMP.setState({displaylightbox: true})">
         Click Here
      </button>
      <br/>
      <br/>

      <h3>AMP - Input Element</h3>
      <input id = "txtname" placeholder = "Type here" on =
         "input-throttled:AMP.setState({name: event.value})">
      <div [text] = "name"></div>
   </body>
</html>
出力
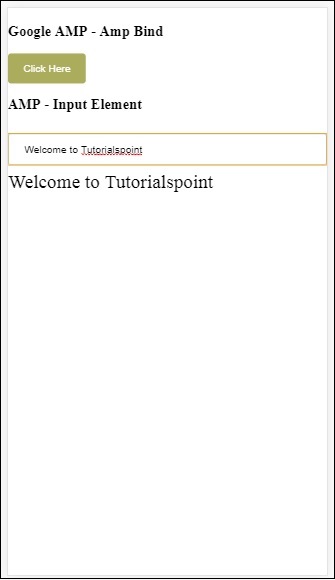
上記の例では、入力フィールドで次のようにイベントを使用していることに注意してください。
<input id = "txtname" placeholder = "Type here"
on = "input-throttled:AMP.setState({name: event.value})">
使用されるイベントは input-throlled。
次のように変更を使用することもできます-
<input id = "txtname" placeholder = "Type here" on =
"change:AMP.setState({name: event.value})">
ユーザーが入力ボックスから出ると、出力が表示されます。ラジオ、チェックボックスなどの入力タイプ、および選択要素で変更イベントを使用できます。
<input id = "txtname" placeholder = "Type here" on =
"input-debounced:AMP.setState({name: event.value})">
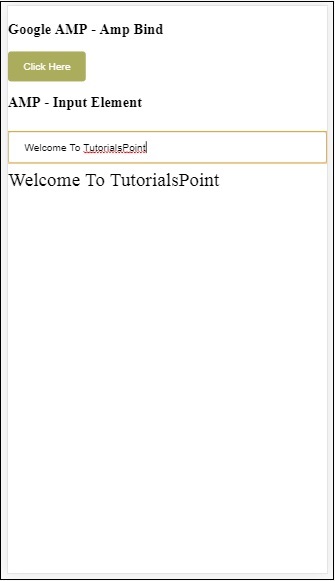
イベント input-debounced と同じです changeイベントですが、ユーザーが入力してから300ms後に出力が表示されます。
例
<!doctype html>
<html amp lang = "en">
   <head>
      <meta charset = "utf-8">
      <script async src = "https://cdn.ampproject.org/v0.js"></script>
      <title>Google AMP - Amp Bind</title>
      <link rel = "canonical" href = " http://example.ampproject.org/article-metadata.html">
      <meta name = "viewport" content = "width = device-width,minimum-scale = 1,initial-scale = 1">

      <style amp-boilerplate>
         body{
            -webkit-animation:
            -amp-start 8s steps(1,end) 0s 1 normal both;-moz-animation:
            -amp-start 8s steps(1,end) 0s 1 normal both;-ms-animation:
            -amp-start 8s steps(1,end) 0s 1 normal both;animation:
            -amp-start 8s steps(1,end) 0s 1 normal both
         }
         @-webkit-keyframes
         -amp-start{from{visibility:hidden}to{visibility:visible}}@-moz-keyframes
         -amp-start{from{visibility:hidden}to{visibility:visible}}@-ms-keyframes
         -amp-start{from{visibility:hidden}to{visibility:visible}}@-o-keyframes
         -amp-start{from{visibility:hidden}to{visibility:visible}}@keyframes
         -amp-start{from{visibility:hidden}to{visibility:visible}}
      </style>
      <noscript>
         <style amp-boilerplate>
            body{
            -webkit-animation:none;
            -moz-animation:none;
            -ms-animation:none;
            animation:none}
         </style>
      </noscript>

      <script async custom-element = "amp-bind"
         src = "https://cdn.ampproject.org/v0/amp-bind-0.1.js">
      </script>

      <script async custom-element = "amp-lightbox"
         src = "https://cdn.ampproject.org/v0/amp-lightbox-0.1.js">
      </script>
      <style amp-custom>
         button{
            background-color: #ACAD5C;
            color: white;
            padding: 12px 20px;
            border: none;
            border-radius: 4px;
            cursor: pointer;
            float: left;
         }
         .lightbox {
            background: rgba(211,211,211,0.8);
            width: 100%;
            height: 100%;
            position: absolute;
            display: flex;
            align-items: center;
            justify-content: center;
         }
         #txtname{
            width: 100%;
            padding: 12px 20px;
            margin: 8px 0;
            display: inline-block;
            border: 1px solid #ccc;
            border-radius: 4px;
            box-sizing: border-box;
         }
         div {
            font-size:25px;
         }
      </style>
   </head>
   <body>
      <h3>Google AMP - Amp Bind</h3>
      <button on = "tap:AMP.setState({displaylightbox: true})">
         Click Here
      </button>
      <br/>
      <br/>

      <h3>AMP - Input Element</h3>
         <input id = "txtname" placeholder = "Type here" on =
         "input-debounced:AMP.setState({name: event.value})">
      <div [text] = "name"></div>
   </body>
</html>
出力
アンプライトボックス上
このセクションでは、ライトボックスで次のイベントをテストします-
- lightboxOpen
- lightboxClose
例
<!doctype html>
<html amp lang = "en">
   <head>
      <meta charset = "utf-8">
      <script async src = "https://cdn.ampproject.org/v0.js"></script>
      <title>Google AMP - Amp Lightbox</title>
      <link rel = "canonical" href = " http://example.ampproject.org/article-metadata.html">
      <meta name = "viewport" content = "width = device-width,minimum-scale = 1,initial-scale = 1">

      <style amp-boilerplate>
         body{
            -webkit-animation:
            -amp-start 8s steps(1,end) 0s 1 normal both;-moz-animation:
            -amp-start 8s steps(1,end) 0s 1 normal both;-ms-animation:
            -amp-start 8s steps(1,end) 0s 1 normal both;animation:
            -amp-start 8s steps(1,end) 0s 1 normal both
         }
         @-webkit-keyframes
         -amp-start{from{visibility:hidden}to{visibility:visible}}@-moz-keyframes
         -amp-start{from{visibility:hidden}to{visibility:visible}}@-ms-keyframes
         -amp-start{from{visibility:hidden}to{visibility:visible}}@-o-keyframes
         -amp-start{from{visibility:hidden}to{visibility:visible}}@keyframes
         -amp-start{from{visibility:hidden}to{visibility:visible}}
      </style>

      <noscript>
         <style amp-boilerplate>
            body{
               -webkit-animation:none;
               -moz-animation:none;
               -ms-animation:none;
               animation:none}
         </style>
      </noscript>

      <script async custom-element = "amp-bind"
         src = "https://cdn.ampproject.org/v0/amp-bind-0.1.js">
      </script>

      <script async custom-element = "amp-lightbox"
         src = "https://cdn.ampproject.org/v0/amp-lightbox-0.1.js">
      </script>

      <style amp-custom>
         amp-img {
            border: 1px solid #ddd;
            border-radius: 4px;
            padding: 5px;
         }
         button {
            background-color: #ACAD5C;
            color: white;
            padding: 12px 20px;
            border: none;
            border-radius: 4px;
            cursor: pointer;
            float: left;
         }
         .lightbox {
            background: rgba(211,211,211,0.8);
            width: 100%;
            height: 100%;
            position: absolute;
            display: flex;
            align-items: center;
            justify-content: center;
         }
         p{font-size:30px;}
      </style>
   </head>
   <body>
      <h3>Google AMP - Amp Lightbox</h3>
      <p [text] = "'Lightbox is ' + lightboxstatus + '.'">
         Lightbox Event Testing
      </p>
      <button on = "tap:my-lightbox.open">
         Show LightBox
      </button>
      <amp-lightbox id = "my-lightbox" layout = "nodisplay"
      close-button on = "lightboxOpen:AMP.setState({lightboxstatus:'opened'});
      lightboxClose:AMP.setState({lightboxstatus:'closed'});">
         <div class = "lightbox">
            <amp-img alt = "Beautiful Flower" src = "images/loreal.gif"
               width = "246"
               height = "205">
            </amp-img>
         </div>
      </amp-lightbox>
   </body>
</html>
出力
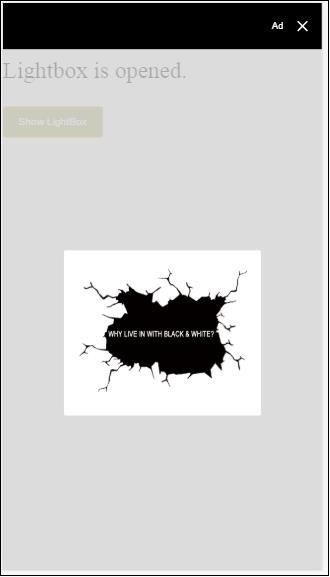
次のコードは、イベントのオープンとクローズがライトボックスにどのように実装されるかを示しています-
<p [text]="'Lightbox is ' + lightboxstatus + '.'">Lightbox Event Testing</p>
<button on = "tap:my-lightbox.open">Show LightBox</button>
<amp-lightbox id = "my-lightbox" layout = "nodisplay"
   close-button on = "lightboxOpen:AMP.setState({lightboxstatus:'opened'});
   lightboxClose:AMP.setState({lightboxstatus:'closed'});">

   <div class = "lightbox">
      <amp-img alt = "Beautiful Flower" src = "images/loreal.gif"
         width = "246"
         height = "205">
      </amp-img>
   </div>
</amp-lightbox>
アンプセレクターのイベント
amp-selectorで利用できるイベントは select。
例
<!doctype html>
<html amp lang = "en">
   <head>
      <meta charset = "utf-8">
      <script async src  = "https://cdn.ampproject.org/v0.js"></script>
      <title>Google AMP - Amp Selector</title>
      <link rel = "canonical" href = "http://example.ampproject.org/article-metadata.html">
      <meta name = "viewport" content = "width = device-width,minimum-scale = 1,initial-scale = 1">

      <style amp-boilerplate>
         body{
            -webkit-animation:
            -amp-start 8s steps(1,end) 0s 1 normal both;-moz-animation:
            -amp-start 8s steps(1,end) 0s 1 normal both;-ms-animation:
            -amp-start 8s steps(1,end) 0s 1 normal both;animation:
            -amp-start 8s steps(1,end) 0s 1 normal both
         }
         @-webkit-keyframes
         -amp-start{from{visibility:hidden}to{visibility:visible}}@-moz-keyframes
         -amp-start{from{visibility:hidden}to{visibility:visible}}@-ms-keyframes
         -amp-start{from{visibility:hidden}to{visibility:visible}}@-o-keyframes
         -amp-start{from{visibility:hidden}to{visibility:visible}}@keyframes
         -amp-start{from{visibility:hidden}to{visibility:visible}}
      </style>

      <noscript>
         <style amp-boilerplate>
            body {
               -webkit-animation:none;
               -moz-animation:none;
               -ms-animation:none;
               animation:none
            }
         </style>
      </noscript>

      <script async custom-element = "amp-bind"
         src = "https://cdn.ampproject.org/v0/amp-bind-0.1.js">
      </script>

      <script async custom-element = "amp-selector"
         src = "https://cdn.ampproject.org/v0/amp-selector-0.1.js">
      </script>

      <style amp-custom>
         .radio-menu {
            list-style: none;
         }
         .radio-menu [option][selected] {
            outline: none;
         }
         .radio-menu [option] {
            display: flex;
            align-items: center;
         }
         .radio-menu [option]:before {
            transition: background 0.25s ease-in-out;
            content: "";
            display: inline-block;
            width: 24px;
            height: 24px;
            margin: 8px;
            border-radius: 100%;
            border: solid 1px black;
         }
         .radio-menu [option = red][selected]:before {
            text-align: center;
            content: "✓";
            color: white;
            background: red;
         }
         .radio-menu [option = green][selected]:before {
            text-align: center;
            content: "✓";
            color: white;
            background: green;
         }
         .radio-menu [option = blue][selected]:before {
            text-align: center;
            content: "✓";
            color: white;
            background: blue;
         }
         p{font-size:30px;}
      </style>
   </head>
   <body>
      <h3>Google AMP - Amp Selector</h3>
      <p [text] = "'Color selected is ' + ampselectorstatus + '.'">
         Amp Selector Event Testing
      <p>
      <amp-selector
         class = "radio-menu"
         layout = "container"
         name = "my-selector"
         on = "select:AMP.setState({ampselectorstatus:event.selectedOptions})">
         <div option = "red">
            Red
         </div>
         <div option = "green">
            Green
         </div>
         <div option = "blue">
            Blue
         </div>
      </amp-selector>
   </body>
</html>
出力
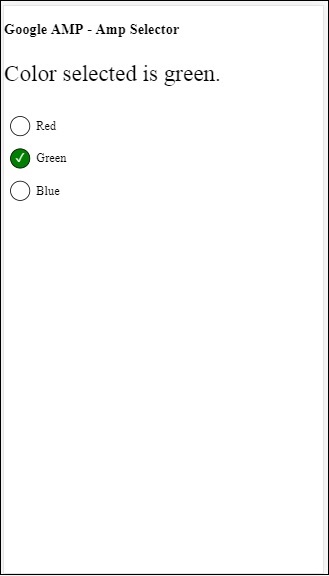
イベント選択は次のように使用されます-
<p [text]="'Color selected is ' + ampselectorstatus + '.'">
   Amp Selector Event Testing
</p>
<amp-selector
   class = "radio-menu"
   layout  ="container"
   name =" my-selector"
   on = "select:AMP.setState({ampselectorstatus:event.selectedOptions})">
   <div option = "red">
      Red
   </div>
   <div option = "green">
      Green
   </div>
   <div option = "blue">
      Blue
   </div>
</amp-selector>
アンプサイドバーのイベント
利用可能なイベントは sidebarOpen そして sidebarClose。
例
<!doctype html>
<html amp lang = "en">
   <head>
      <meta charset = "utf-8">
      <script async src = "https://cdn.ampproject.org/v0.js"></script>
      <title>Google AMP - Amp Sidebar</title>
      <link rel = "canonical" href = "http://example.ampproject.org/article-metadata.html">
      <meta name = "viewport" content = "width = device-width,minimum-scale = 1,initial-scale = 1">

      <style amp-boilerplate>
         body{
            -webkit-animation:
            -amp-start 8s steps(1,end) 0s 1 normal both;-moz-animation:
            -amp-start 8s steps(1,end) 0s 1 normal both;-ms-animation:
            -amp-start 8s steps(1,end) 0s 1 normal both;animation:
            -amp-start 8s steps(1,end) 0s 1 normal both
         }
         @-webkit-keyframes
         -amp-start{from{visibility:hidden}to{visibility:visible}}@-moz-keyframes
         -amp-start{from{visibility:hidden}to{visibility:visible}}@-ms-keyframes
         -amp-start{from{visibility:hidden}to{visibility:visible}}@-o-keyframes
         -amp-start{from{visibility:hidden}to{visibility:visible}}@keyframes
         -amp-start{from{visibility:hidden}to{visibility:visible}}
      </style>

      <noscript>
         <style amp-boilerplate>
            body{
               -webkit-animation:none;
               -moz-animation:none;
               -ms-animation:none;
               animation:none
            }
         </style>
      </noscript>
      <script async custom-element = "amp-bind"
         src = "https://cdn.ampproject.org/v0/amp-bind-0.1.js">
      </script>
      <script async custom-element = "amp-sidebar"
         src = "https://cdn.ampproject.org/v0/amp-sidebar-0.1.js">
      </script>
      <style amp-custom>
         amp-img {
            border: 1px solid #ddd;
            border-radius: 4px;
            padding: 5px;
         }
         button{
            background-color: #ACAD5C;
            color: white;
            padding: 12px 20px;
            border: none;
            border-radius: 4px;
            cursor: pointer;
            float: left;
         }
         .amp-sidebar-toolbar-target-shown {
            display: none;
         }
         p{font-size:30px;}
      </style>
   </head>
   <body>
      <h3>Google AMP - Amp Sidebar</h3>
      <p [text] = "'Sidebar is ' + ampsidebarstatus + '.'">
         Amp Sidebar Event Testing
      </p>
      <button on = "tap:sidebar1">
         Show Sidebar
      </button>
      <amp-sidebar
         id = "sidebar1"
         layout = "nodisplay"
         side = "right"
         on = "sidebarOpen:AMP.setState({ampsidebarstatus: 'Opened'});
         sidebarClose:AMP.setState({ampsidebarstatus: 'Closed'})">
         <ul>
            <li>Nav item 1</li>
            <li>
               <a href = "#idTwo" on = "tap:idTwo.scrollTo">Nav item 2</a>
            </li>
            <li>Nav item 3</li>
            <li>
               <a href = "#idFour" on="tap:idFour.scrollTo">Nav item 4</a>
            </li>
            <li>Nav item 5</li>
            <li>Nav item 6</li>
         </ul>
      </amp-sidebar>
      <div id = "target-element">
      </div>
   </body>
</html>
出力
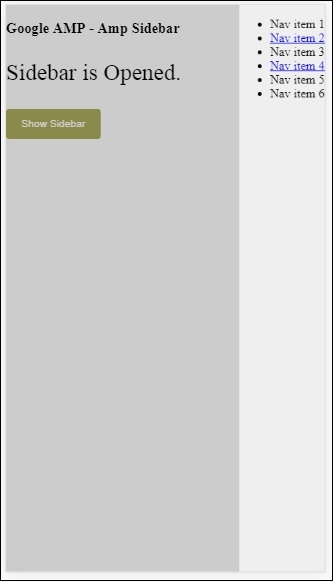
イベントは次のように使用されます-
<p [text] = "'Sidebar is ' + ampsidebarstatus + '.'">
   Amp Sidebar Event Testing
</p>
<button on = "tap:sidebar1">
   Show Sidebar
</button>
<amp-sidebar
   id = "sidebar1"
   layout = "nodisplay"
   side = "right"
   on = "sidebarOpen:AMP.setState({ampsidebarstatus: 'Opened'});
   sidebarClose:AMP.setState({ampsidebarstatus: 'Closed'})">
   <ul>
      <li>Nav item 1</li>
      <li>
         <a href = "#idTwo" on = "tap:idTwo.scrollTo">Nav item 2</a>
      </li>
      <li>Nav item 3</li>
      <li>
         <a href = "#idFour" on = "tap:idFour.scrollTo">Nav item 4</a>
      </li>
      <li>Nav item 5</li>
      <li>Nav item 6</li>
   </ul>
</amp-sidebar>