Google AMP - Veri Bağlama
Amp-bind, veri bağlama ve JS benzeri ifadeler kullanan bir eyleme dayalı olarak amp-bileşenlerine ve html etiketlerine etkileşim eklemeye yardımcı olur. Bu bölüm veri bağlamayı ayrıntılı olarak tartışmaktadır.
Amp-bind ile çalışmak için aşağıdaki komut dosyasını sayfamıza eklememiz gerekir -
<script async custom-element = "amp-bind"
   src = "https://cdn.ampproject.org/v0/amp-bind-0.1.js">
</script>
Gösterildiği gibi çalışan bir örnek yardımıyla bunu tam olarak anlayalım -
Misal
<!doctype html>
<html amp lang = "en">
   <head>
      <meta charset = "utf-8">
      <script async src = "https://cdn.ampproject.org/v0.js"></script>
      <title>Google AMP - Amp Bind</title>
      <link rel = "canonical" href =
         "http://example.ampproject.org/article-metadata.html">
      <meta name = "viewport" content = "width = device-width,
         minimum-scale = 1,initial-scale = 1">
      <style amp-boilerplate>
         body{
            -webkit-animation:
            -amp-start 8s steps(1,end) 0s 1 normal both;-moz-animation:
            -amp-start 8s steps(1,end) 0s 1 normal both;-ms-animation:
            -amp-start 8s steps(1,end) 0s 1 normal both;animation:
            -amp-start 8s steps(1,end) 0s 1 normal both
         }
         @-webkit-keyframes
         -amp-start{from{visibility:hidden}to{visibility:visible}}@-moz-keyframes
         -amp-start{from{visibility:hidden}to{visibility:visible}}@-ms-keyframes
         -amp-start{from{visibility:hidden}to{visibility:visible}}@-o-keyframes
         -amp-start{from{visibility:hidden}to{visibility:visible}}@keyframes
         -amp-start{from{visibility:hidden}to{visibility:visible}}
      </style>
      <noscript>
         <style amp-boilerplate>
            body{
               -webkit-animation:none;
               -moz-animation:none;
               -ms-animation:none;
               animation:none
            }
         </style>
      </noscript>
      <script async custom-element = "amp-bind"
         src = "https://cdn.ampproject.org/v0/amp-bind-0.1.js"></script>
      <style amp-custom>
         button{
            background-color: #ACAD5C;
            color: white;
            padding: 12px 20px;
            border: none;
            border-radius: 4px;
         }
      </style>
   </head>
   <body>
      <h3>Google AMP - Amp Bind</h3>
      <p [text] = "'Hello ' + world + '.'">
         Click on the button to change the text
      </p>
      <button on = "tap:AMP.setState({world: 'This is amp-bind example'})">
      Click Here
      </button>
   </body>
</html>
Çıktı
Metnin aşağıda gösterildiği gibi değiştiğini görmek için düğmeye tıklayın -
Bu nedenle, yukarıda gösterilen örnekte, düğme tıklandığında metni değiştirmek için amp-bind kullandık.
Amp-bind'in üç bileşeni vardır -
State- Başlangıçta eyalet boştur. Düğmeye tıkladığınızda durum değişir. Örneğin,
<button on = "tap:AMP.setState({world: 'This is amp-bind example'})">
   Click Here
</button>
Durumu değiştirmek için AMP.setState yöntemi kullanılır. Değişkenworld değer atanır This is amp-bind example. Değişkenworld html etiketinin içinde kullanılır -
<p [text] = "'Hello ' + world + '.'">
   Click on the button to change the text
</p>
Düğmeye tıklandığında dünyaya yeni bir değer atanır: Bu amp-bind örneğidir.
Amp-state'i bağlama ile aşağıda gösterildiği gibi kullanabiliriz -
<amp-state id = "myState">
   <script type = "application/json">
      {
         "foo": "bar"
      }
   </script>
</amp-state>
İfade atanacak bmyState.foo bağlama sırasında.
Expressions - amp-bind to work ifadeleri aşağıdaki gibidir -
'Hello ' + worldworld olduğu söyleniyor state variable.
Bindings- Bağlamalar [öznitelikler] biçimindeki özel özniteliklere uygulanır. Örneğin -
<p [text] = "'Hello ' + world + '.'">
   Click on the button to change the text
</p>
Yukarıdaki örnekte, [text] bağlanmak için kullanılan ifadeye sahiptir p etiket.
Bağlamalar için aşağıdaki özniteliği kullanabiliriz -
- [text]
- [class]
- [hidden]
- [width]
- [height]
Bağlamaların amp-bileşenleri üzerinde yapılması da mümkündür ve yalnızca belirli özelliklere izin verilir. Aşağıdaki liste suh bileşenlerini ve özniteliklerini gösterir -
| Sr.No | Amp bileşeni | Öznitelikler ve Açıklama |
|---|---|---|
| 1 | <amp-carousel type = slides> | [slide]* Bu bağlama davranışını kullanarak slaydı değiştirin |
| 2 | <amp-date-picker> | [min] min -> Seçilebilir en erken tarihi ayarlar [max]max -> Seçilebilir en son tarihi ayarlar |
| 3 | <amp-iframe> | [src] İframe'in src'sini değiştir |
| 4 | <amp-img> | [alt] [attribution] [src] [srcset] Alt, attribution, src ve srcset'i değiştirebiliriz. Src değiştirilirse srcset'i önbelleğe almak için kullanıldığı gibi değiştirin |
| 5 | <amp-lightbox> | [open]* Lightbox'ı açmak için bağlayarak gösterebilir / gizleyebilirsiniz |
| 6 | <amp-list> | [src] İfade bir dizeyse, dize URL'sinden JSON'u alır ve oluşturur. İfade bir nesne veya diziyse, ifade verilerini oluşturur. |
| 7 | <amp-selector> | [selected]* [disabled] Seçenek özellik değerleriyle tanımlanan şu anda seçili olan alt öğeleri değiştirir. Birden çok seçim için virgülle ayrılmış bir değerler listesini destekler |
Amp-State kullanarak bağlama
Html öğesi veya amp-bileşeni üzerinde kullanmak istediğimiz tüm verilerle amp-state'i tanımlayabiliriz.
Amp-state içinde kullanılan veriler, aşağıda gösterildiği gibi json biçiminde olmalıdır -
<amp-state id = "myCarsList">
   <script type = "application/json">
      {
         "currentcar" : "bmw",
         "audi": {
            "imageUrl": "images/audi.jpg"
         },
         "bmw": {
            "imageUrl": "images/bmw.jpg"
         }
      }
   </script>
</amp-state>
Bu nedenle, arabanın adı ve araba için kullanılan görüntü ile anahtar-değer çiftlerini tanımladık.
Metin ve Amp-Görüntü üzerinde Amp-bind
Aşağıda amp-bind ile amp-state kullanan çalışan bir örnek gösterilmektedir -
<!doctype html>
<html amp lang = "en">
   <head>
      <meta charset = "utf-8">
      <script async src = "https://cdn.ampproject.org/v0.js"></script>
      <title>Google AMP - Amp Bind</title>
      <link rel = "canonical" href =
         "http://example.ampproject.org/article-metadata.html">
      <meta name = "viewport" content = "width = device-width,
         minimum-scale = 1,initial-scale = 1">
      <style amp-boilerplate>
         body{
            -webkit-animation:
            -amp-start 8s steps(1,end) 0s 1 normal both;-moz-animation:
            -amp-start 8s steps(1,end) 0s 1 normal both;-ms-animation:
            -amp-start 8s steps(1,end) 0s 1 normal both;animation:
            -amp-start 8s steps(1,end) 0s 1 normal both
         }
         @-webkit-keyframes
         -amp-start{from{visibility:hidden}to{visibility:visible}}@-moz-keyframes
         -amp-start{from{visibility:hidden}to{visibility:visible}}@-ms-keyframes
         -amp-start{from{visibility:hidden}to{visibility:visible}}@-o-keyframes
         -amp-start{from{visibility:hidden}to{visibility:visible}}@keyframes
         -amp-start{from{visibility:hidden}to{visibility:visible}
         }
      </style>
      <noscript>
         <style amp-boilerplate>
            body{
               -webkit-animation:none;
               -moz-animation:none;
               -ms-animation:none;
               animation:none
            }
         </style>
      </noscript>
      <script async custom-element = "amp-bind" src =
         "https://cdn.ampproject.org/v0/amp-bind-0.1.js"></script>
      <style amp-custom>
         button{
            background-color: #ACAD5C;
            color: white;
            padding: 12px 20px;
            border: none;
            border-radius: 4px;
            cursor: pointer;
            float: left;
         }
      </style>
   </head>
   <body>
      <h3>Google AMP - Amp Bind</h3>
      <amp-state id = "myCarsList">
         <script type = "application/json">
            {
               "currentcar" : "bmw",
               "audi": {
               "imageUrl": "images/audi.jpg",
               "style": "greenBackground"
               },
               "bmw": {
               "imageUrl": "images/bmw.jpg",
               "style": "redBackground"
               }
            }
         </script>
      </amp-state>
      <amp-img
         width = "300"
         height = "200"
         src = "images/bmw.jpg"
         [src] = "myCarsList[currentcar].imageUrl">
      </amp-img>
      <p [text] = "'This is a ' + currentcar + '.'">
         This is a BMW.
      </p>
      <br/>
      <button on = "tap:AMP.setState({currentcar: 'audi'})">
         Change Car
      </button>
   </body>
</html>
Çıktı
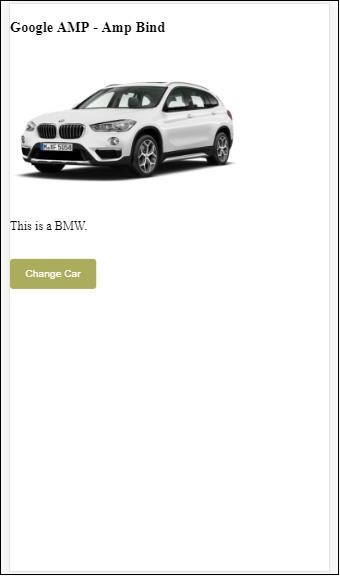
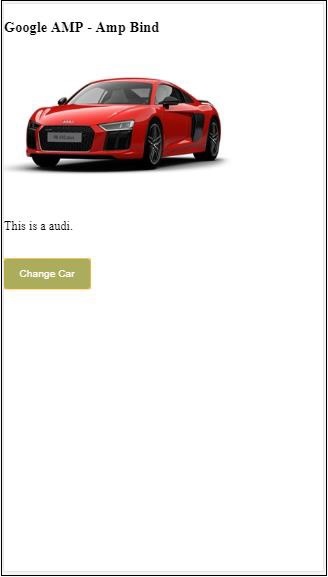
Araba değişim resmini ve ayrıca aşağıdaki metni görmek için butona tıklayın.
Video ve IFrame'de Amp-bind
Şimdi amp-iframe ve amp-video src'yi değiştirecek bir çalışma örneği göreceğiz.
<!doctype html>
<html amp lang = "en">
   <head>
      <meta charset = "utf-8">
      <script async src = "https://cdn.ampproject.org/v0.js"></script>
      <title>Google AMP - Amp Bind</title>
      <link rel = "canonical" href =
         "http://example.ampproject.org/article-metadata.html">
      <meta name = "viewport" content = "width = device-width,
         minimum-scale = 1,initial-scale = 1">
      <style amp-boilerplate>
         body{
            -webkit-animation:
            -amp-start 8s steps(1,end) 0s 1 normal both;-moz-animation:
            -amp-start 8s steps(1,end) 0s 1 normal both;-ms-animation:
            -amp-start 8s steps(1,end) 0s 1 normal both;animation:
            -amp-start 8s steps(1,end) 0s 1 normal both
         }
         @-webkit-keyframes
         -amp-start{from{visibility:hidden}to{visibility:visible}}@-moz-keyframes
         -amp-start{from{visibility:hidden}to{visibility:visible}}@-ms-keyframes
         -amp-start{from{visibility:hidden}to{visibility:visible}}@-o-keyframes
         -amp-start{from{visibility:hidden}to{visibility:visible}}@keyframes
         -amp-start{from{visibility:hidden}to{visibility:visible}}
      </style>
      <noscript>
         <style amp-boilerplate>
            body{
               -webkit-animation:none;
               -moz-animation:none;
               -ms-animation:none;
               animation:none
            }
         </style>
      </noscript>
      <script async custom-element = "amp-bind" src =
         "https://cdn.ampproject.org/v0/amp-bind-0.1.js"></script>
      <script async custom-element = "amp-video" src =
         "https://cdn.ampproject.org/v0/amp-video-0.1.js"></script>
      <script async custom-element = "amp-iframe" src =
         "https://cdn.ampproject.org/v0/amp-iframe-0.1.js"></script>
      <style amp-custom>
         button{
            background-color: #ACAD5C;
            color: white;
            padding: 12px 20px;
            border: none;
            border-radius: 4px;
            cursor: pointer;
            float: left;
         }
      </style>
   </head>
   <body>
      <h3>Google AMP - Amp Bind</h3>
      <button on = "tap:AMP.setState({currentlist: 'list1'})">
      Click Here
      </button>
      <br/>
      <br/>
      <amp-state id = "myList">
         <script type = "application/json">
            {
               "currentlist" : "",
               "list1": {
                  "url": "video/m.mp4",
                  "style": "greenBackground",
                  "iframeurl":"https://maps.google.com/maps?q=hyderabad&t=&z=13&ie=UTF8&iwloc=&output=embed"
               }
            }
         </script>
      </amp-state>
      <h3>AMP - IFRAME</h3>
      <amp-iframe
         width = "600"
         title = "Google map"
         height = "400"
         layout = "responsive"
         sandbox = "allow-scripts allow-same-origin allow-popups"
         frameborder = "0"
         src = "https://maps.google.com/maps?q=telangana&t=&z=13&ie=UTF8&iwloc=&output=embed"
         [src] = "myList[currentlist].iframeurl">
         <amp-img
            layout = "fill"
            src = "images/loading.jpg"
            placeholder
            >
         /amp-img>
      </amp-iframe>
      <h3>AMP - VIDEO</h3>
      <amp-video
         id = "amp-video"
         src = "video/samplevideo.mp4"
         layout="responsive"
         [src] = "myList[currentlist].url"
         width = "300"
         height = "170" autoplay controls>
      </amp-video>
   </body>
</html>
Burada iframesrc ve video src ile amp-state kullandığımızı unutmayın.
<amp-state id = "myList">
   <script type = "application/json">
      {
         "currentlist" : "",
         "list1": {
            "url": "video/m.mp4",
            "style": "greenBackground",
            "iframeurl":"
            https://maps.google.com/maps?q=hyderabad&t=&z=13&ie=UTF8&iwloc=&output=embed"
         }
      }
   </script>
</amp-state>
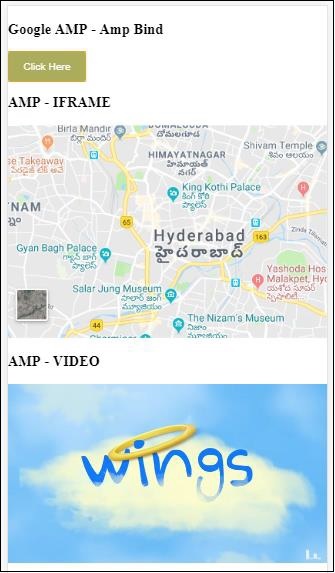
Geçerli liste boş olarak ayarlanır ve düğmeye dokunulduğunda liste1 olarak ayarlanır. Geçerli liste değişkeni, aşağıda gösterildiği gibi iframe ve videonun src'si için kullanılır -
<amp-iframe width="600"
   title = "Google map"
   height = "400"
   layout = "responsive"
   sandbox = "allow-scripts allow-same-origin allow-popups"
   frameborder = "0" src = "https://maps.google.com/maps?q=telangana&t=&z=13&ie=UTF8&iwloc=&output=embed"
   [src] = "myList[currentlist].iframeurl">
      <amp-img layout = "fill" src = "images/loading.jpg" placeholder>
      </amp-img>
</amp-iframe>
<amp-video id = "amp-video" src = "video/samplevideo.mp4"
   layout = "responsive" [src] = "myList[currentlist].url" width = "300"
   height = "170" autoplay controls>
</amp-video>
Çıktı
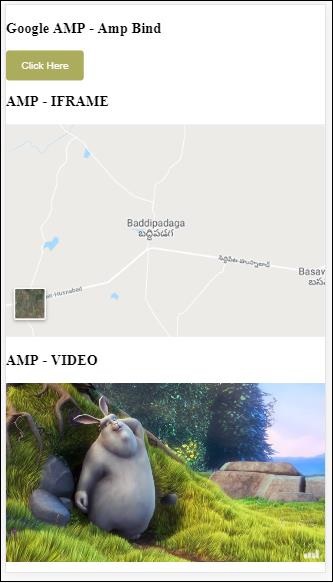
Video ve iframe src'nin değiştiğini görmek için düğmeyi tıklayın.
Amp-lightbox ile amp-bind
Şimdi, bağlama ve amp-lightbox'ın birlikte kullanıldığında nasıl çalıştığını görelim.
Misal
<!doctype html>
<html amp lang = "en">
   <head>
      <meta charset = "utf-8">
      <script async src="https://cdn.ampproject.org/v0.js"></script>
      <title>Google AMP - Amp Bind</title>
      <link rel = "canonical" href =
         "http://example.ampproject.org/article-metadata.html">
      <meta name = "viewport" content = "width = device-width,
         minimum-scale = 1,initial-scale = 1">
      <style amp-boilerplate>
         body{
            -webkit-animation:
            -amp-start 8s steps(1,end) 0s 1 normal both;-moz-animation:
            -amp-start 8s steps(1,end) 0s 1 normal both;-ms-animation:
            -amp-start 8s steps(1,end) 0s 1 normal both;animation:
            -amp-start 8s steps(1,end) 0s 1 normal both
         }
         @-webkit-keyframes
         -amp-start{from{visibility:hidden}to{visibility:visible}}@-moz-keyframes
         -amp-start{from{visibility:hidden}to{visibility:visible}}@-ms-keyframes
         -amp-start{from{visibility:hidden}to{visibility:visible}}@-o-keyframes
         -amp-start{from{visibility:hidden}to{visibility:visible}}@keyframes
         -amp-start{from{visibility:hidden}to{visibility:visible}}
      </style>
      <noscript>
         <style amp-boilerplate>
            body{
               -webkit-animation:none;
               -moz-animation:none;
               -ms-animation:none;
               animation:none
            }
         </style>
      </noscript>
      <script async custom-element = "amp-bind" src =
         "https://cdn.ampproject.org/v0/amp-bind-0.1.js"></script>
      <script async custom-element = "amp-lightbox" src =
         "https://cdn.ampproject.org/v0/amp-lightbox-0.1.js"></script>
      <style amp-custom>
         button{
            background-color: #ACAD5C;
            color: white;
            padding: 12px 20px;
            border: none;
            border-radius: 4px;
            cursor: pointer;
            float: left;
         }
         .lightbox {
            background: rgba(211,211,211,0.8);
            width: 100%;
            height: 100%;
            position: absolute;
            display: flex;
            align-items: center;
            justify-content: center;
         }
      </style>
   </head>
   <body>
      <h3>Google AMP - Amp Bind</h3>
      <button on = "tap:AMP.setState({displaylightbox: true})">
      Click Here
      </button>
      <br/>
      <br/>
      <h3>AMP - Lightbox</h3>
      <amp-lightbox
         id = "my-lightbox"
         [open] = "displaylightbox"
         layout = "nodisplay"
         close-button>
         <div class = "lightbox" on = "tap:AMP.setState({displaylightbox: false})">
            <amp-img alt = "Beautiful Flower"
               src = "images/loreal.gif"
               width = "246"
               height = "205">
            </amp-img>
         </div>
      </amp-lightbox>
   </body>
</html>
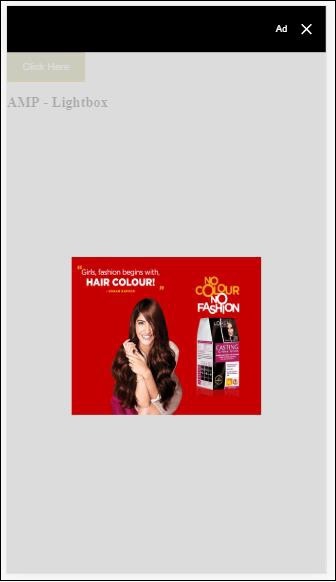
Amp-lightbox'ta bağlamayı kullanmak için aşağıda gösterildiği gibi amp-lightbox'ta [open] kullandık -
<amp-lightbox id = "my-lightbox" [open] = "displaylightbox"
   layout = "nodisplay" close-button>
   <div class = "lightbox" on="tap:AMP.setState({displaylightbox: false})">
      <amp-img alt = "Beautiful Flower"
         src = "images/loreal.gif"
         width = "246"
         height = "205">
      </amp-img>
   </div>
</amp-lightbox>
[Open] = "displaylightbox" değişken bir durumdur, düğmeye tıklandığında ve lightbox div dokunulduğunda true / false olarak değiştirilir -
<button on = "tap:AMP.setState({displaylightbox: true})">
   Click Here
</button>

<div class = "lightbox" on = "tap:AMP.setState({displaylightbox: false})">
   <amp-img alt = "Beautiful Flower"
      src = "images/loreal.gif"
      width = "246"
      height = "205">
   </amp-img>
</div>
Çıktı
Giriş öğesine amp bağlama
Gösterildiği gibi çalışan bir örnek yardımıyla giriş öğesine amp-bağlamanın çalışmasını anlayalım -
<!doctype html>
<html amp lang = "en">
   <head>
      <meta charset = "utf-8">
      <script async src = "https://cdn.ampproject.org/v0.js"></script>
      <title>Google AMP - Amp Bind</title>
      <link rel = "canonical" href=
         "http://example.ampproject.org/article-metadata.html">
      <meta name = "viewport" content = "width = device-width,
         minimum-scale = 1,initial-scale = 1">
      <style amp-boilerplate>
         body{
            -webkit-animation:
            -amp-start 8s steps(1,end) 0s 1 normal both;-moz-animation:
            -amp-start 8s steps(1,end) 0s 1 normal both;-ms-animation:
            -amp-start 8s steps(1,end) 0s 1 normal both;animation:
            -amp-start 8s steps(1,end) 0s 1 normal both
         }
         @-webkit-keyframes
         -amp-start{from{visibility:hidden}to{visibility:visible}}@-moz-keyframes
         -amp-start{from{visibility:hidden}to{visibility:visible}}@-ms-keyframes
         -amp-start{from{visibility:hidden}to{visibility:visible}}@-o-keyframes
         -amp-start{from{visibility:hidden}to{visibility:visible}}@keyframes
         -amp-start{from{visibility:hidden}to{visibility:visible}}
      </style>
      <noscript>
      <style amp-boilerplate>
         body{
            -webkit-animation:none;
            -moz-animation:none;
            -ms-animation:none;
            animation:none
         }
      </style>
      <noscript>
      <script async custom-element = "amp-bind"
         src = "https://cdn.ampproject.org/v0/amp-bind-0.1.js">
         <script>
         <script async custom-element = "amp-lightbox"
            src = "https://cdn.ampproject.org/v0/amp-lightbox-0.1.js">
      </script>
      <style amp-custom>
         button{
            background-color: #ACAD5C;
            color: white;
            padding: 12px 20px;
            border: none;
            border-radius: 4px;
            cursor: pointer;
            float: left;
         }
         .lightbox {
            background: rgba(211,211,211,0.8);
            width: 100%;
            height: 100%;
            position: absolute;
            display: flex;
            align-items: center;
            justify-content: center;
         }
         #txtname{
            width: 100%;
            padding: 12px 20px;
            margin: 8px 0;
            display: inline-block;
            border: 1px solid #ccc;
            border-radius: 4px;
            box-sizing: border-box;
         }
         div {
            font-size:25px;
         }
      </style>
   </head>
   <body>
      <h3>Google AMP - Amp Bind</h3>
      <button on = "tap:AMP.setState({displaylightbox: true})">
         Click Here
      </button>
      <br/>
      <br/>
      <h3>
         AMP - Input Element
      <h3>
      <input id = "txtname" placeholder = "Type here"
         on = "input-throttled:AMP.setState({name: event.value})">
      <div [text] = "name">
      </div>
   </body>
</html>
Çıktı
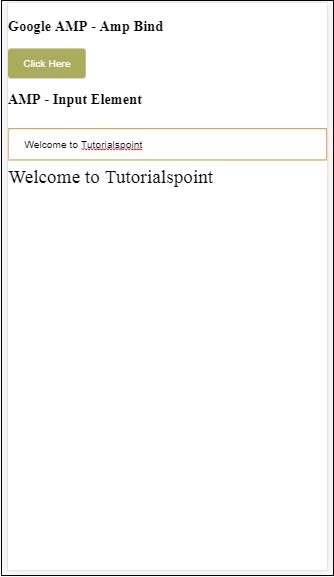
Metin kutusuna girilen veriler altta görüntülenir. Durum değişkenini değiştirerek yapılabilirname giriş olayında gösterildiği gibi -
<input id = "txtname" placeholder = "Type here" on =
"input-throttled:AMP.setState({name: event.value})">
<div [text] = "name">
</div>