Google AMP - Hızlı Kılavuz
Google Accelerated Mobile Pages(Google-AMP), Google'ın amp html kullanarak hafif web sayfaları oluşturmak için özel olarak tasarlanmış yeni açık kaynaklı projesidir. Bu projenin temel amacı, amfi kodunun iyi çalıştığından ve akıllı telefonlar, tabletler vb. Gibi olası tüm cihazlarda hızlı yüklenmesini sağlamaktır.
AMP nedir?
Aktarılan Mobil Sayfalar (AMP), Google'ın web sayfalarını herhangi bir tarayıcıda daha hızlı, daha sorunsuz ve duyarlı hale getirerek mobil uyumlu hale getirmek için özel olarak tasarlanmış açık kaynaklı projesidir.
Google amp'in resmi sitesi - https://www.ampproject.org/
NEDEN AMP?
Herhangi bir kullanıcı, web sitelerinin içeriği çok hızlı yüklemesini bekler. Bununla birlikte, sayfaların görseller, videolar, animasyonlar, sosyal widget'larla neredeyse dolup taştığı durumlarda durum böyle olmayabilir, bu da sayfayı çok ağır hale getirir ve dolayısıyla yükleme süresini artırır. Böyle bir senaryo, uzun vadede web sitesine kullanıcı kaybına neden olabilir.
Google AMP, bu sorunu çözmek için tasarlanmıştır. AMP, resimler, iframe'ler, javascript'ler, reklamlar, videolar, animasyonlar, css, yazı tipi yüklenen vb. Konularla ilgilenmek için özel bir yönteme sahiptir. AMP sayfalarının içeriği Google'ın sonunda önbelleğe alınır, bu nedenle kullanıcı arama sonuçlarını her tıkladığında içerik önbellekten sunulur. Önbellek sürümü de zamanında güncellenir, böylece kullanıcı her zaman yeni bir güncellenmiş sayfa alır.
Neden AMP'yi Seçmelisiniz?
Bu bölüm, siteniz için neden AMP'yi seçmeniz gerektiğini anlatır -
Google Arama'da öncelikli
Bugün, Google'da bir şey aradığınızda, sayfaların en üstünde görüntülenen bir Google atlı karıncasını ve ardından aramanıza yanıt olarak sayfaların listesini göreceksiniz. Görüntülenen haber bandı, tüm geçerli AMP siteleridir. Bu, Google'ın amp sayfalarına öncelik verdiği ve bunları haber karuselindeki sıralamaya göre görüntülediği anlamına gelir.
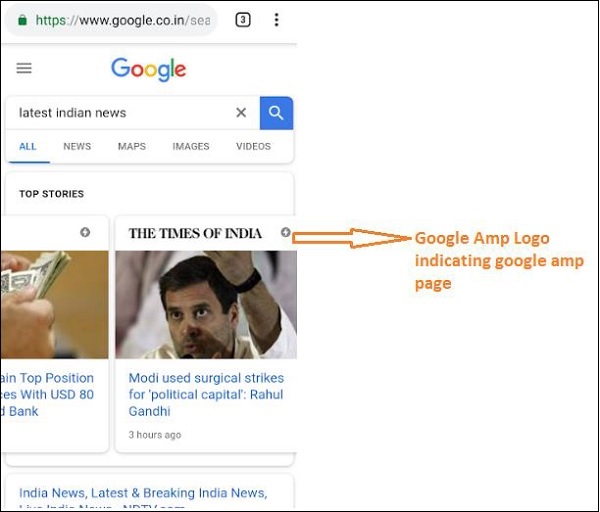
Google’da "anahtar kelime" ile yapılan aramaya bir örneklatest indian news"Burada verilmiştir -

AMP sayfaları olan tüm yüksek dereceli sayfalar, yukarıdaki resimde gösterildiği gibi Google atlı karıncasında başlangıçta görüntülenir.
Bir Google AMP sayfası, kullanıcı Google aramada bir şey aradığında aşağıda gösterildiği gibi görünür. AMP sayfalarında bir Google AMP logosu olduğunu unutmayın.
Daha Hızlı Yükleme Süresi
Sayfanız AMP'ye dönüştürüldüğünde, yükleme süresi amp olmayan bir sayfaya kıyasla çok daha iyi olacaktır. Daha hızlı yükleme süresi de Google aramada sayfa sıralamasında önemli bir faktördür.
Pop-up yok
Google AMP'yi kullanmak, kullanıcı Google AMP ile tasarlanmış sayfalarda istenmeyen açılır pencereleri görmeyeceğinden hoş bir web tarama deneyimi sağlar.
Trafik Oluşturur
Sayfaların yükleme hızı hızlı olduğunda izleyici sayısını otomatik olarak artırır ve böylece sayfaya gelen trafik artar.
AMP nasıl çalışır?
Web sitesi oluşturmak için kullanılan en önemli bileşenler javascript, resimler, videolar, yazı tipleri, css vb .'dir. AMP sayfa tasarımı, tüm bu faktörlere benzersiz bir şekilde dikkat edilerek yapılır. Bu bölümde, sayfaları daha hızlı hale getirmek için AMP'nin tam olarak ne yaptığını kısaca tartışalım.
Eşzamansız JavaScript
Javascript, sayfaya animasyonlar, DOM değişiklikleri vb. Şeklinde etkileşim eklemeye yardımcı olduğu için sayfada önemli bir rol oynar. Ayrıca sayfaya yavaşlık ekler ve diğer içeriklerin sayfada görüntülenmesini engelleyebilir.
AMP, JavaScript'le nasıl mücadele eder?
AMP, JavaScript'i eşzamansız olarak yükler. AMP sayfasında özel JavaScript'e kesinlikle izin verilmez. AMP'nin birçok bileşen eklendiğini ve bunlardan bazıları mevcut html etiketlerinin yerini aldığını unutmayın; örneğin amp-img, amp-iframe, amp-video, amp-lightbox, amp-animations vb.
Bu bileşenin her biri için, kod etiketine async niteliği eklenmiş yüklenecek bir JavaScript dosyası vardır. Sayfada yalnızca amp-bileşenleriyle ilgili JavaScript dosyalarına izin verilir ve bir AMP sayfası veya üçüncü taraf javascript dosyası içindeki diğer JavaScript'lere izin verilmez. AMP, Google AMP önbelleğini kullandığından, dosyalar önbellekten önceden yüklenir ve daha hızlı yüklenmeleri sağlanır.
HTML Etiketleri için Boyutlar
Resim, iframe, video etiketleri için boyut verilmesi zorunludur, böylece amp sayfası, kaynağı yüklemeye gerek kalmadan sayfadaki alanı bulabilir. Yüklenecek kaynaklar, amp sayfası tarafından önceliklendirilir. İçeriğe yüklenecek kaynaklara göre daha fazla öncelik verilir.
Sosyal Widget'lar / REKLAM'lar
Amp, sayfada gösterilecek sosyal widget'larla ilgilenmek için amp-facebook, amp-twitter, amp-ad, amp-sticky gibi özel bileşenler sağlar. Sayfada reklam sunmak için AMP reklam bileşeni kullanılır. AMP, bileşenlerin işlenmesine özel önem verir ve içeriği gereksinimlere göre bir öncelik sırasına göre yükler.
CSS
AMP sayfalarında harici CSS'ye izin verilmez. Özel CSS, varsa, amp-custom özelliği kullanılarak stil etiketinin içine eklenebilir. Satır içi CSS'ye de izin verilir. AMP, http isteklerini olası tüm şekillerde azaltır.
Yazı tipleri
Yazı tiplerine amp sayfalarında izin verilir ve yazı tiplerini yükleme önceliği AMP tarafından belirlenir.
Animasyon
AMP, amp-animasyon bileşenlerini destekler ve modern tarayıcılar tarafından desteklenen geçişe izin verir.
Yukarıda listelenen tüm noktaları göz önünde bulundurarak AMP, yazı tipleri, resimler, iç çerçeveler, sunulacak reklamlar vb. İçin yapılan HTTP isteğine çok özel bir özen gösterir. Sayfanın üst kısmındaki kaynaklar önce oluşturulur ve daha sonra ekranın alt kısmında bulunan kaynaklar tercih edilir. .
Diğer noktalar
Google AMP Önbelleği, içerikler önbellekten getirilirken içeriğin daha hızlı oluşturulmasına yardımcı olan bir başka önemli faktördür.
Yayıncının iki site amp ve non-amp sayfası tutması gerekir. Örneğin, sitenin adresine sahip olduğunu düşünün -https://www.mypage.com. Ardından, amfi olmayanların masaüstünde sunulacağı dahili sayfalarhttps://www.mypage/com/news/amp/
Google, AMP ve AMP olmayan sayfayı nasıl tanımlar?
Şimdi, Google'ın AMP ve AMP olmayan sayfayı nasıl tanımladığını anlayalım.
Google arama sayfayı taradığında, html veya <html amp> veya <html ⚡> içinde amp alırsa, bunun bir AMP sayfası olduğunu bilir.
Ayrıca, Google'ın amp olmayan bir sayfaya rastlaması durumunda, öncelikle amp sayfası hakkında bilgi sahibi olmak için, hem amp hem de amp olmayan sayfalar için html sayfasının head bölümüne aşağıdaki bağlantı etiketlerinin eklenmesi zorunludur.
Non amp-page için sayfa-url'si
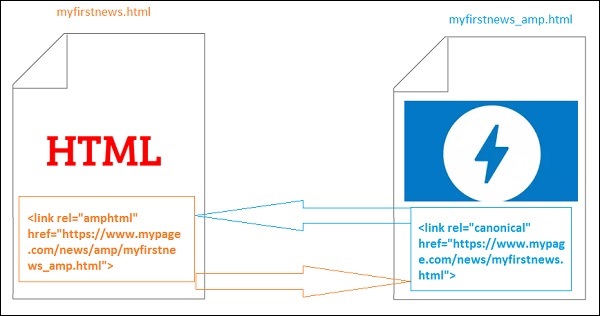
<link rel = "amphtml" href = "https://www.mypage.com/news/amp/myfirstnews_amp.html">Burada , amp olmayan bir sayfanın amp sürümüne işaret etmesi için rel = ”amphtml” belirtilmiştir, böylece Google platforma bağlı olarak doğru olanı gösterir.
Amp-page için sayfa-url'si
<link rel = "canonical" href = "https://www.mypage.com/news/myfirstnews.html">Burada rel = ”canonical” , amp sayfasında html'nin standart sürümünü gösterecek şekilde belirtilmiştir, böylece Google platforma bağlı olarak doğru olanı gösterir.
Sitenizde yalnızca bir amp sayfası varsa, yine de kendisine işaret edecek olan rel = ”canonical” ifadesini eklemeyi unutmamalısınız -
<link rel = "canonical" href = "https://www.mypage.com/news/amp/myfirstnews_amp.html">Aşağıdaki diyagram, amp sayfasını işaret eden rel = ”amphtml” ve standart html sayfasını işaret eden rel = ”canonical” referansını göstermektedir.
Google AMP'nin özellikleri
Bu bölümde, Google AMP ile kullanılabilen önemli özellikleri tartışalım -
Amp Önbelleğe Alma
Google Amp önbelleğe alma, amp'e eklenen temel özelliklerden biridir. Saf amp sayfalarına hizmet etmek için proxy tabanlı bir içerik dağıtım ağı sağlar.Amp önbelleği varsayılan olarak tüm geçerli amp sayfalarında kullanılabilir. Sayfaların amfi olmayan sayfalara kıyasla daha hızlı oluşturulmasına yardımcı olur. Şu anda 2 amp önbellek sağlayıcısı var Google AMP Önbelleği ve Cloudflare AMP Önbelleği. Kullanıcı tıklayıp amp sayfasına yönlendirildiğinde, içerik google önbelleğinden sunulur.
Amp Bileşenleri
Amp, çeşitli amaçlar için tasarlanmış büyük bir bileşen listesine sahiptir. Bazıları aşağıda listelenmiştir -
amp-img - Amp sayfalarında görüntüleri göstermek için kullanılır.
amp-iframe- Sayfalarda gösterilecek harici içeriğe sahip iframe'i göstermek için kullanılır. Lütfen kullanılan iframe'in korumalı alana alındığını, yani verileri amp sayfasında göstermek için izne ihtiyacı olduğunu unutmayın. Bu nedenle, korumalı alan özelliği için çapraz başlangıç ayrıntılarının belirtilmesi gerekir.
amp-video - Sayfada video göstermek için.
amp-audio - Sayfada ses göstermek için.
amp-datepicker- Sayfada tarih widget'larını göstermek için kullanılır. Doğrudan mevcut olduğu için herhangi bir üçüncü taraf veri seçici için gitmenize gerek yoktur.
amp-story - Hikayelerinizi sayfada göstermek için bir araç.
amp-selector- Seçenekler menüsünü görüntüleyen ve kullanıcının seçenekler arasından seçim yapabildiği bir amp bileşenidir. Görüntülenen seçenekler metin, resim veya diğer herhangi bir amp bileşeni olabilir.
amp-list - Bir CORS json uç noktasını çağıran ve json dosyasındaki veriler bir şablon içinde görüntülenen bir amp bileşenidir.
Reklâm
Gelirleri tamamen sayfada sunulan reklamlara bağlı olduğu için reklam yayıncılar için çok önemlidir. Amp, sayfaya herhangi bir harici javascript eklenmesine izin vermez, ancak sayfada reklamların sunulmasını sağlayan amp-ad adlı özel bir amp bileşenine sahiptir.
Yayıncının sayfasında sunmak istediği reklam ağının amp-ad destekli olması gerekir. Örneğin, sayfada çift tıklama reklamları sunmak için, çift tıklamanın reklamların amp-ad bileşeni kullanılarak sunulmasını desteklemesi gerekir. Aşağıdaki kod, doubleclick'in bir amp-ad etiketini gösterir.
<amp-ad width = "300"
   height = "200"
   type = "doubleclick"
   data-slot = "/4119129/ad-layout">
   <div placeholder>
      <b>Placeholder here!!!</b>
   </div>
</amp-ad>
Amp ayrıca, AMP bileşenleri ve html'den geliştirilmiş saf amfiler olan amphtmlad'leri de destekler. Amp ayrıca sayfanın alt kısmında görüntülenen bir alt bilgi reklamı olan amp-sticky-ads'ı da destekler. Amp'deki reklamların ayrıntıları amp ads bölümünde tartışılmıştır.
Sosyal Widget'lar
Facebook, Twitter, Instagram gibi sosyal gereçlerin yayıncı sayfasında gösterilmesi çok önemli hale geldi, böylece sayfalar sosyal medyada paylaşılıyor. AMP, amp-facebook, amp-twitter, amp-instagram, amp-pinterest vb. AMP bileşenlerini geliştirerek sayfada kullanılacak tüm önemli sosyal medya widget'larına desteğini genişletti.
Amp Media
Sayfalardaki bir diğer önemli bileşen, videoları gösteren ve ayrıca videonun ortasında videonun ortasında reklamlar olarak reklam sunan medyadır. AMP, amp-jwplayer, amp-youtube vb. Kullanarak bunu yapmak için bir araç sağlar. Sayfanızda jwplayer, youtube'a sahip olmak için fazladan üçüncü taraf dosyaları yüklemenize gerek yoktur.
Amp Analitiği
Amp analizi, belirli bir sayfadaki verileri izlemek için kullanılan bir AMP bileşenidir. Sayfadaki tüm kullanıcı etkileşimi kaydedilebilir ve verileri daha fazla iyileştirme veya iş amacıyla analiz etmek için kaydedilebilir.
Amp Animasyonları
Amp-animation, diğer amp bileşenlerinde kullanılacak animasyonları tanımlayan bir amp bileşenidir. BT, modern tarayıcıyla iyi çalışan animasyonu, geçişi destekler. Animasyonu gerçekleştirmek için herhangi bir harici CSS kitaplığı kullanmanız gerekmez ve amp-animation bileşeninden yararlanabilirsiniz.
Amp Düzenleri
AMP-Layout, google-amp'de bulunan önemli özelliklerden biridir. Amp Layout, sayfa yüklendiğinde herhangi bir titreme veya kaydırma sorununa neden olmadan amp bileşenlerinin düzgün şekilde oluşturulmasını sağlar.
Google AMP, görüntülerin http isteği, veri çağrıları gibi diğer uzak kaynaklardan önce sayfada düzen oluşturmanın yapıldığından emin olur. Düzen için kullanılabilen özellikler, tüm amp bileşenlerine yönelik genişlik / yükseklik, duyarlı, dolgu, sabit vb. Değerlere sahip düzen özelliği, kaynak yüklenmesi zaman aldığında veya herhangi bir hata olduğunda gösterilecek yer tutucu özelliği, ne zaman gösterilecek yedek özniteliğidir. kaynakta herhangi bir hata var.
Amp Ekran Düzenleri
Amp, herhangi bir üçüncü taraf kitaplığına ihtiyaç duymadan veya sayfada herhangi bir yoğun CSS oluşturmaya gerek kalmadan sayfadaki içeriği görüntülemek için kullanılan birçok bileşeni destekler. Liste şunları içerir:
Accordion- Amp-akordeon, içeriği genişletme-daraltma biçiminde görüntülemek için kullanılan bir amp bileşenidir. Kullanıcıların, akordeondan kendi seçimlerine göre bölümü seçebilecekleri mobil cihazlarda görüntülemesi kolaylaşıyor.
Carousel - Amp-carousel, ekranda bir dizi benzer içeriği göstermek ve içerik arasında geçiş yapmak için okları kullanmak için bir amp bileşenidir.
Lightbox - Amp-lightbox, tüm görüntü alanını kaplayacak ve bir kaplama gibi görüntüleyecek bir amp bileşenidir.
Slider - Amp-image-slider, 2 görüntüyü görüntünün üzerinde dikey olarak hareket ettirirken kaydırıcı ekleyerek karşılaştırmak için kullanılan bir amp bileşenidir.
Sidebar - Amp kenar çubuğu, bir düğmeye dokunarak pencerenin kenarlarından kayan içeriği görüntülemek için kullanılan bir amp bileşenidir.
AMP'nin avantajları
AMP sayfaları hafiftir ve daha hızlı yüklenir
Google, Google aramada AMP sayfalarına öncelik verir. AMP sayfaları, sayfanın üst kısmındaki atlı karınca biçiminde listelenir. Daha yüksek bir sıralama elde etmek için sayfalarınızın AMP'de olması iyi bir avantajdır.
AMP sayfaları, içerik duyarlı olduğundan ve herhangi bir ek stile ihtiyaç duymadan tüm tarayıcılarda iyi ayarlanabildiğinden mobil uyumludur.
Sayfa yükleme hızı amfi olmayan sayfalara göre daha hızlı olduğundan AMP sayfalarında kullanıcı memnuniyeti artar, böylece bant genişlikleri ve mobil pil tasarrufu sağlanır.
AMP'nin dezavantajları
Amp aşağıdaki dezavantajlara sahiptir -
Yayıncı, sayfaları için amp ve non-amp için iki sürüm bulundurmalıdır.
Kullanıcı, amfi olmayan sayfaları amper'e dönüştürmek için ek çaba sarf etmelidir. Amp, özel javascript'i veya harici javascript yüklemeyi desteklemediğinden, aynı şeyin amp'de mevcut olanlarla gerçekleştirilmesi gerekir.
Google Accelerated Mobile Pages(Google-AMP), Google'ın amp html kullanarak hafif web sayfaları oluşturmak için özel olarak tasarlanmış yeni açık kaynaklı projesidir. Bu projenin temel amacı, AMP kodunun akıllı telefonlar ve tabletler gibi tüm olası cihazlarda iyi çalıştığından ve hızlı yüklenmesini sağlamaktır.
AMP, standart HTML'nin yalnızca bir uzantısıdır. Birkaç HTML etiketi değişti ve AMP kullanımlarına kısıtlama ekledi. Bu bölümde, değiştirilen html etiketlerini ve bunlara eklenen kısıtlamaları listeleyeceğiz. Örneğin resimler, css, js, form gönderme, video, ses vb. Gibi harici kaynakların yüklenmesiyle ilgilenen etiketler değiştirilir.
Ayrıca amp'e eklenen birçok yeni özellik vardır; örneğin, amp-date-picker, amp-facebook, amp-ad, amp-analytics, amp-ad, amp-lightbox ve daha fazlası, doğrudan html sayfalarında kullanılabilir. Diğerleri olduğu gibi sergilenmek için kullanılır.
Tüm bu değişiklikler ve yeni özelliklerle AMP, canlı ortamda kullanıldığında sayfalar için daha hızlı yükleme, daha iyi performans sunmayı vaat ediyor.
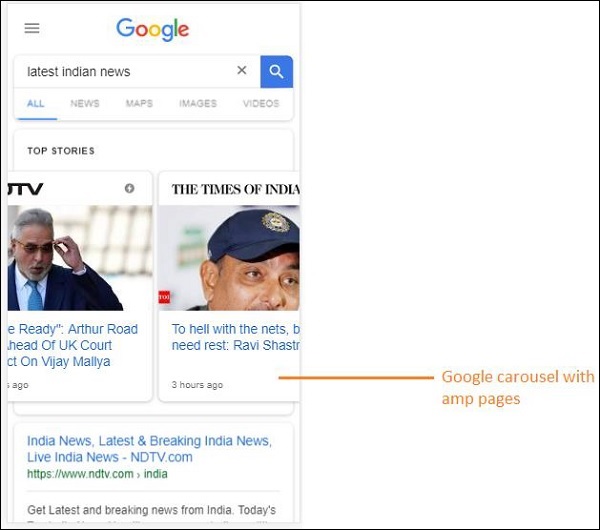
Mobil cihazınızda Google aramada herhangi bir şey aradığınızda, en üstteki google atlı karıncasında görülen ekran çoğunlukla aşağıda gösterildiği gibi amp sayfalarıdır -
AMP sayfasını tıkladığınızda, adres çubuğuna girdiğiniz URL aşağıdaki gibidir -
https://www.google.co.in/amp/s/m.timesofindia.com/sports/cricket/india-in-australia/to-hell-with-the-nets-boys-need-rest-ravi-shastri/amp_articleshow/67022458.cms
URL doğrudan yayıncıdan gelmez, ancak Google bunu, önbelleğe alınmış bir sürüm olan ve içeriğin amp olmayan bir sayfaya kıyasla daha hızlı oluşturulmasına yardımcı olan Google sunucusundaki kendi kopyasına yönlendirir. Bu yalnızca cihazlarda veya Google emülatör modunda gerçekleşir.
Örnek Amp Sayfası
Aşağıda bir amp sayfası örneği gösterilmektedir -
<!doctype html>
<html amp>
   <head>
      <meta charset = "utf-8">
      <title>Amp Sample Page</title>
      <link rel = "canonical" href = "./regular-html-version.html">
      <meta name = "viewport" content = "width = device-width,
         minimum-scale = 1,initial-scale = 1">
      <style amp-custom>
         h1 {color: red}
      </style>
      <script type = application/json>{
         "vars": {
            "uid": "23870",
            "domain": "dummyurl.com",
            "sections": "us",
            "authors": "Hello World"
         }
      }
      </script>
      <style amp-boilerplate>
         body{
            -webkit-animation:
            -amp-start 8s steps(1,end) 0s 1 normal both;-moz-animation:
            -amp-start 8s steps(1,end) 0s 1 normal both;-ms-animation:
            -amp-start 8s steps(1,end) 0s 1 normal both;animation:
            -amp-start 8s steps(1,end) 0s 1 normal both
         }
         @-webkit-keyframes
         -amp-start{from{visibility:hidden}to{visibility:visible}}@-moz-keyframes
         -amp-start{from{visibility:hidden}to{visibility:visible}}@-ms-keyframes
         -amp-start{from{visibility:hidden}to{visibility:visible}}@-o-keyframes
         -amp-start{from{visibility:hidden}to{visibility:visible}}@keyframes
         -amp-start{from{visibility:hidden}to{visibility:visible}}
      </style>
      <noscript>
         <style amp-boilerplate>
            body{
               -webkit-animation:none;
               -moz-animation:none;
               -ms-animation:none;
               animation:none}
         </style>
      </noscript>

      <script async src = "https://cdn.ampproject.org/v0.js"></script>
   </head>
   <body>
      <h1>Amp Sample Page</h1>
      <p>
         <amp-img src = "imgurl.jpg" width = "300" height = "300"
            layout = "responsive"></amp-img>
      </p>
      <amp-ad width = "300" height = "250" type = "doubleclick"
         data-slot = "/4119129/no-ad">
         <div fallback>
            <p style = "color:green;font-size:25px;">No ads to Serve!</p>
         </div>
      </amp-ad>
   </body>
</html>
AMP Sayfasında Yapılması ve Yapılmaması Gerekenler
Bir programcının bir AMP sayfasında izlemesi gereken bazı yapılması ve yapılmaması gerekenleri anlayalım.
Zorunlu Etiketler
Aşağıda verildiği gibi bir amp sayfasına dahil edilmesi gereken bazı zorunlu etiketler vardır -
Aşağıda gösterildiği gibi html etiketine amp veya ⚡ eklendiğinden emin olmalıyız -
<html amp>
   OR
<html ⚡>
<head> ve <body> etiketleri html sayfasına eklenmelidir.
Aşağıdaki zorunlu meta etiketler sayfanın baş bölümüne eklenmelidir; aksi takdirde amp doğrulaması için başarısız olur
<meta charset = "utf-8">
<meta name = "viewport" content = "width=device-width, minimum-scale = 1, initial-scale = 1">
Head etiketi içine eklenecek rel = "canonical" bağlantısı
<link rel = "canonical" href = "./regular-html-version.html">Amp-boilerplate içeren stil etiketi -
<style amp-boilerplate>
   body{
      -webkit-animation:
      -amp-start 8s steps(1,end) 0s 1 normal both;-moz-animation:
      -amp-start 8s steps(1,end) 0s 1 normal both;-ms-animation:
      -amp-start 8s steps(1,end) 0s 1 normal both;animation:
      -amp-start 8s steps(1,end) 0s 1 normal both
   }
   @-webkit-keyframes
   -amp-start{from{visibility:hidden}to{visibility:visible}}@-moz-keyframes
   -amp-start{from{visibility:hidden}to{visibility:visible}}@-ms-keyframes
   -amp-start{from{visibility:hidden}to{visibility:visible}}@-o-keyframes
   -amp-start{from{visibility:hidden}to{visibility:visible}}@keyframes
   -amp-start{from{visibility:hidden}to{visibility:visible}}
</style>
Amp-boilerplate içeren Noscript etiketi -
<noscript>
   <style amp-boilerplate>
      body{
         -webkit-animation:none;
         -moz-animation:none;
         -ms-animation:none;
         animation:none
      }
   </style>
</noscript>
Aşağıda gösterildiği gibi eşzamansız eklenen amp komut dosyası etiketi çok önemlidir -
<script async src = "https://cdn.ampproject.org/v0.js"> </script>Sayfaya özel CSS eklemek istemeniz durumunda, lütfen buraya not edin, amp sayfalarında harici stil sayfası diyemeyiz. Özel CSS eklemek için, tüm CSS'niz gösterildiği gibi buraya gitmelidir -
<style amp-custom>
   //all your styles here
</style>
Stil etiketinin kendisine eklenmiş amp-custom özniteliği olmalıdır.
AMP bileşenleri için komut dosyaları
Src ve type = ”text / javascript” içeren komut dosyalarına amp sayfasında kesinlikle izin verilmediğini unutmayın. Head bölümüne yalnızca eşzamansız ve amp-bileşenleri ile ilgili komut dosyası etiketlerinin eklenmesine izin verilir.
Bu bölümde, aşağıda verildiği gibi amp bileşenleri için kullanılan birkaç komut dosyası listelenmektedir -
amp-ad
<script async custom-element = "amp-ad"
   src = "https://cdn.ampproject.org/v0/amp-ad-0.1.js">
</script>
amp-iframe
<script async custom-element = "amp-iframe"
   src = "https://cdn.ampproject.org/v0/amp-iframe-0.1.js">
</script>
Komut dosyasının, yüklenecek amp bileşeninin adıyla eşzamansız ve özel öğe özniteliğine sahip olduğuna dikkat edin. Amp, kod etiketlerini zaman uyumsuz ve özel öğe özelliğine göre doğrular ve başka hiçbir komut dosyasının yüklenmesine izin vermez. Alırtype=application/json aşağıda gösterildiği gibi örnek dosyaya eklediğimiz
<type = application/json>
{
   "vars": {
      "uid": "23870",
      "domain": "dummyurl.com",
      "sections": "us",
      "authors": "Hello World"
   }
}
</script>
Yukarıdaki komut dosyası, gerekirse diğer amp bileşenleri ile birlikte kullanılabilir, örneğin amp-analytics için.
HTML Etiketleri
Şimdiye kadar amp sayfasında gerekli olan zorunlu etiketleri gördük. Şimdi izin verilen / verilmeyen HTML öğelerini ve bunlara uygulanan kısıtlamaları tartışacağız.
İzin verilen / verilmeyen HTML etiketlerinin listesi aşağıdadır -
| Sr.No | HTML Etiketi ve Açıklama |
|---|---|
| 1 | img Bu etiket amp-img ile değiştirilmiştir. AMP sayfasında doğrudan img etiketi kullanımına izin verilmez |
| 2 | video Amp-video ile değiştirildi |
| 3 | audio Amp-audio ile değiştirildi |
| 4 | iframe Amp-iframe ile değiştirildi |
| 5 | object İzin verilmedi |
| 6 | embed İzin verilmedi |
| 7 | form <form> olarak kullanılabilir. Bir AMP sayfasında formla çalışmak için komut dosyasını eklememiz gerekiyor. Example − |
| 8 | Input elements |
| 9 | <fieldset> İzin veriliyor |
| 10 | <label> İzin veriliyor |
| 11 | P, div, header,footer,section İzin veriliyor |
| 12 | button İzin veriliyor |
| 13 | a <a> etiketine aşağıdaki koşulda izin verilir, href javascript ile başlamamalıdır. Varsa, hedef özellik değeri _blank olmalıdır. |
| 14 | svg İzin verilmedi |
| 15 | meta İzin veriliyor |
| 16 | Link İzin verilir. Ancak harici stil sayfasının yüklenmesine izin vermez. |
| 17 | style İzin verilir. Amp-boilerplate veya amp-custom özelliğine sahip olması gerekir. |
| 18 | base İzin verilmedi |
| 19 | noscript İzin verilird |
Yorumlar
Koşullu html yorumlarına izin verilmez. Örneğin -
<!--[if Chrome]>
This browser is chrome (any version)
<![endif]-->HTML Etkinlikleri
Onclick, onmouseover gibi html sayfalarında kullandığımız etkinliklere AMP sayfasında izin verilmez.
Olayları şu şekilde kullanabiliriz -
on = "eventName:elementId[.methodName[(arg1 = value, arg2 = value)]]"İşte giriş öğesinde kullanılan bir olay örneği -
<input id = "txtname" placeholder = "Type here"
on = "inputthrottled:
AMP.setState({name: event.value})">Kullanılan olay girdiye göre belirlenir.
Sınıflar
Sayfalarınızda şu ön eke sahip sınıflar olamaz: -amp- or i-amp-. Ayrıca, sınıf adını ihtiyacınıza göre kullanabilirsiniz.
Kimlikler
Html öğelerinizin önüne -amp veya i-amp- eklenmiş kimlikleriniz olamaz. Ayrıca, html öğenize kimliklerini ihtiyacınıza göre kullanabilirsiniz.
Bağlantılar
Amp sayfalarında JavaScript'in href'e sahip olmasına izin verilmez.
Example
<a href = "javascript:callfunc();">click me</a>Stil Sayfaları
AMP sayfasında harici stil sayfalarına izin verilmez. İçerideki sayfa için gerekli stilleri eklemek mümkündür -
<style amp-custom>
//all your styles here
</style>Stil etiketinde olmalıdır amp-custom öznitelik eklendi.
@ -kurallar
Aşağıdaki @ kurallarına stil sayfalarında izin verilir -
@ font-face, @keyframes, @media, @page, @ destekler. @ içe aktarmaya izin verilmeyecektir. Aynı destek gelecekte eklenecek.
@keyframes'in <style içinde kullanılmasına izin veriliramp-custom> . Çok fazla @keyframe varsa, <style oluşturmak iyi oluramp-keyframes> etiketleyin ve bu etiketi amp belgesinin sonunda çağırın.
Sınıf adları, kimlikleri, etiket adları ve özniteliklerinin önüne -amp- ve i-amp- amp kodunda dahili olarak kullanıldıklarından, sayfada da çalışma zamanında tanımlanırsa çakışmalara neden olabilir.
!important amp, gerektiğinde öğe boyutlandırmasını kontrol etmek istediğinden stil içinde özelliğe izin verilmez.
Özel yazı tipleri
AMP sayfalarında özel yazı tipleri için stil sayfasına izin verilir.
Example
<link rel = "stylesheet"
href = "https://fonts.googleapis.com/css?family=Tangerine">Yazı tipleri, AMP sayfalarında kullanılabilen aşağıdaki kaynaklardan beyaz listeye alınır.
Fonts.com - https://fast.fonts.net
Google Yazı Tipleri - https://fonts.googleapis.com
Font Awesome - https://maxcdn.bootstrapcdn.com
Typekit - https://use.typekit.net/kitId.css (kitId'yi uygun şekilde değiştirin)
Note - @ font-face özel yazı tiplerine amp sayfalarında izin verilir.
Example
@font-face {
font-family: myFirstFont;
src: url(dummyfont.woff);
}AMP Çalışma Zamanı
Amp çalışma zamanı ortamı, amp core dosyası yüklendikten sonra kararlaştırılır -
<script async src = "https://cdn.ampproject.org/v0.js"></script>Çekirdek dosya harici kaynakların yüklenmesiyle ilgilenir, bunların ne zaman yükleneceğinin önceliklendirilmesine karar verir ve ayrıca amp URL'sine # development = 1 eklendiğinde amp belgesinin doğrulanmasına yardımcı olur.
Example
http://localhost:8080/googleamp/amppage.html#development=1Tarayıcıda çalıştırıldığında yukarıdaki URL, amp doğrulaması başarısız olursa hataları listeler veya hata yoksa amp doğrulaması başarılı mesajını görüntüler.
AMP Bileşenleri
Amp'de birçok amp bileşeni eklenmiştir. Temelde kaynağın verimli bir şekilde yüklenmesini sağlamak için kullanılırlar. Ayrıca animasyon, görüntüleme verileri, reklamların görüntülenmesi, sosyal gereçler vb. İle ilgilenen bileşenler içerir.
AMP'de 2 tür bileşen vardır.
- Built-in
- External
Note- <amp-img> yerleşik bir bileşendir ve çekirdek amp js dosyası eklenirse kullanılabilir. <amp-ad>, <amp-facebook>, <amp-video> gibi harici bileşenler ve daha pek çoğu, eklenecek bileşenle ilgili js dosyasına ihtiyaç duyar.
Ortak Özellikler
Genişlik, yükseklik, düzen, yer tutucu ve yedek gibi özellikler, neredeyse tüm AMP bileşenleri için kullanılabilir olacaktır. Bu öznitelikler, bileşenin AMP sayfasında görüntülenmesine karar verdiği için herhangi bir AMP bileşeni için çok önemlidir.
AMP için listelenen yukarıdaki tüm özellikler, bu eğiticinin sonraki bölümlerinde ayrıntılı olarak tartışılmaktadır.
Bu eğiticideki tüm örneklerin cihazlar için test edildiğini ve Google Mobile Emulator modunu kullandığını unutmayın. Şimdi bunu detaylı olarak öğrenelim.
Google Mobile Emulator
Google mobil öykünücüsünü kullanmak için Chrome tarayıcıyı açın, sağ tıklayın ve aşağıda gösterildiği gibi geliştirici konsolunu açın -

Yukarıda gösterildiği gibi Chrome için geliştirici aracını görebiliriz. Tarayıcıda test etmek istediğiniz bağlantıya tıklayın. Sayfanın Masaüstü modunda görüntülendiğini gözlemleyin.
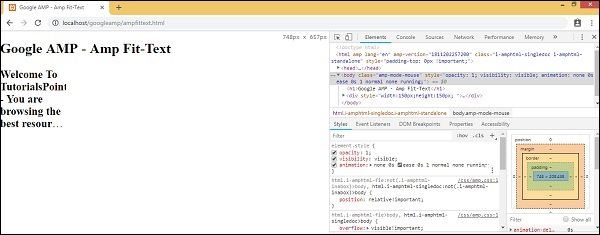
Cihazları test etmek üzere yukarıdaki sayfayı almak için, aşağıda gösterildiği gibi Cihaz değiştir araç çubuğunu tıklayın -

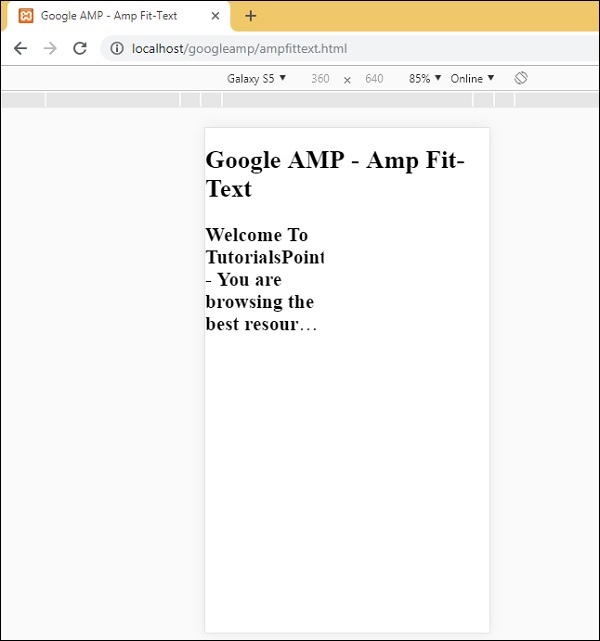
Ctrl + shift + M kısayol tuşunu da kullanabilirsiniz. Bu, masaüstü modunu aşağıda gösterildiği gibi cihaz moduna değiştirecektir -
Aşağıda gösterildiği gibi cihazların bir listesi görülebilir -
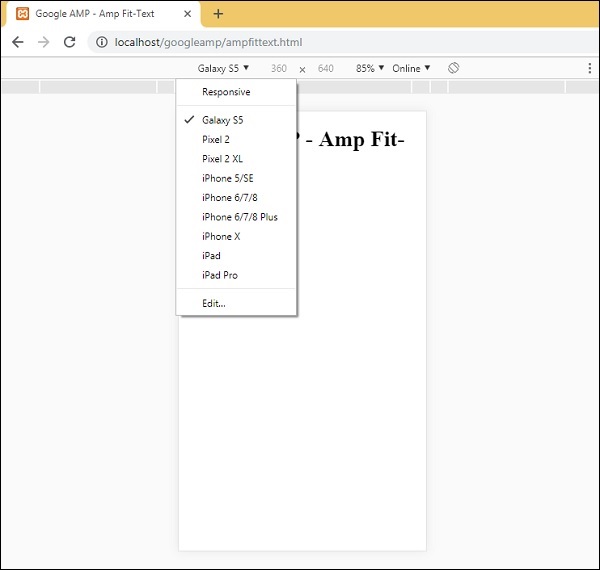
Sayfayı test etmek istediğiniz cihazı seçebilirsiniz. Lütfen bu eğitimlerdeki tüm sayfaların yukarıda gösterildiği gibi Google Mobile Emulator'da test edildiğini unutmayın. Aynı özellik Firefox ve son Internet Explorer tarayıcıları için de mevcuttur.
Google AMP sayfasında kullanılan resimler, standart bir html sayfasında nasıl kullanıldığına benzer, ancak tek fark, etiket adının bazı ek özelliklerle kullanılma şeklidir. Bu bölüm bunları ayrıntılı olarak tartışmaktadır.
Aşağıda gösterilen sözdizimlerine uyun -
Standart HTML
<img src = ”example.jpg” width = ”300” height = ”250” alt = ”Example” ></img>AMP sayfasında
<amp-img src = "example.jpg" alt = "Example" height = "300" width = "250" ><//amp-img>Etiketinin img olarak değiştirildi amp-img.
Neden img yerine amp-img kullanılmalı?
İmg'yi amp-img olarak değiştirmenin arkasındaki sebep, sayfa düzeni ve görüntüyü yüklemek için yapılan ağ isteği üzerinde daha fazla kontrole sahip olmaktır. Amp, görüntü kaynağına geç yükleme ekler ve sayfadaki diğer kaynaklara göre yüklemeye öncelik verir.
Misal
Daha iyi anlamak için aşağıdaki kodu inceleyin -
<!doctype html>
<html amp lang = "en">
<head>
<meta charset = "utf-8">
<script async src = "https://cdn.ampproject.org/v0.js"></script>
<title>Google AMP - Image</title>
<link rel = "canonical" href = "http://example.ampproject.org/articlemetadata.html">
<meta name = "viewport" content = "width = device-width,
minimum-scale = 1,initialscale = 1">
<style amp-boilerplate>
body{
-webkit-animation:
-amp-start 8s steps(1,end) 0s1 normal both;-moz-animation:
-amp-start 8s steps(1,end) 0s 1 normal both;-msanimation:
- amp-start 8s steps(1,end) 0s 1 normal both;animation:
-amp-start 8s steps(1,end) 0s 1 normal both
}
@-webkit-keyframes
-ampstart{from{visibility:hidden}to{visibility:visible}}@-moz-keyframes
-ampstart{from{visibility:hidden}to{visibility:visible}}@-ms-keyframes
-ampstart{from{visibility:hidden}to{visibility:visible}}@-o-keyframes
-ampstart{from{visibility:hidden}to{visibility:visible}}@keyframes
amp-start{from{visibility:hidden}to{visibility:visible}}
</style>
<noscript>
<style amp-boilerplate>
body{
-webkit-animation:none;
-moz-animation:none;
-msanimation:none;
animation:none
}
</style>
</noscript>
</head>
<body>
<h1>Google AMP - Image Example</h1>
<amp-img alt = "Beautiful Flower" src = "images/flower.jpg"
width = "246"
height = "205">
</amp-img>
</body>
</html>Çıktı
Yukarıda gösterilen kodu çalıştırdığınızda, sonucu aşağıda gösterildiği gibi bulacaksınız -

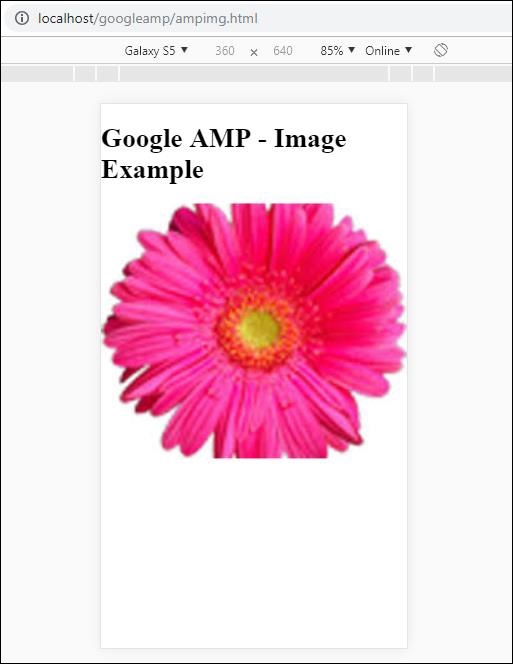
Ayrıca, aşağıda gösterildiği gibi amp-img etiketine layout = ”responsive” özelliğini ekleyerek de görüntüyü duyarlı hale getirebilirsiniz.
Misal
Daha iyi anlamak için aşağıdaki kodu inceleyin -
<amp-img alt = "Beautiful Flower" src = "images/flower.jpg"
width = "246"
height = "205"
layout = "responsive">
</amp-img>Çıktı
Yukarıda gösterilen kodu çalıştırdığınızda, sonucu aşağıda gösterildiği gibi bulacaksınız -
Bu bölüm, Google AMP'de formla nasıl çalışılacağını açıklar.
Forms etiketinin standart HTML'deki ile aynı kaldığını unutmayın. AMP, formlarla çalışmak için amp-form JavaScript dosyasını eklememiz gerektiğinden, formların kullanımına özel bir kısıtlama getirdi.
Amp-form için komut dosyası
<script async custom-element = "amp-form"
src = "https://cdn.ampproject.org/v0/ampform-0.1.js"></script>Formları bir AMP sayfasında kullanmak için yukarıdaki komut dosyasını .html dosyasına eklememiz gerekir. Amp-form JavaScript dosyası,http ve xmlhttprequestform gönderme için. HTTP isteği kullanılarak sayfa yeniden yüklenir vexmlhttprequest sayfayı yeniden yüklemez, ajax isteği gibi davranır.
AMP'de form etiketi
For xmlhttprequest :
<form method = "post" class = "p2" action-xhr = "submitform.php" target = "_top">
//Input fields here
</form>
For http :
<form method = "post" class = "p2" action = "submitform.php" target = "_top">
//Input fields here
</form>Amp-form özel nitelikler sağlar, ör. submit-error ve submit-success Form gönderildiğinde hatayı ve başarıyı işlemek için.
Example
Aşağıda amp-form için bir örnek gösterilmektedir -
<!doctype html>
<html amp lang = "en">
<head>
<meta charset = "utf-8">
<script async src = "https://cdn.ampproject.org/v0.js"></script>
<title>Google AMP - Form</title>
<link rel = "canonical" href = "ampform.html">
<meta name = "viewport" conten t = "width = device-width,
minimum-scale = 1,initialscale = 1">
<style amp-boilerplate>
body{
-webkit-animation:
-amp-start 8s steps(1,end) 0s1 normal both;-moz-animation:
-amp-start 8s steps(1,end) 0s 1 normal both;-msanimation:
-amp-start 8s steps(1,end) 0s 1 normal both;animation:
-amp-start 8s steps(1,end) 0s 1 normal both
}
@-webkit-keyframes
-ampstart{from{visibility:hidden}to{visibility:visible}}@-moz-keyframes
-ampstart{from{visibility:hidden}to{visibility:visible}}@-ms-keyframes
-ampstart{from{visibility:hidden}to{visibility:visible}}@-o-keyframes
-ampstart{from{visibility:hidden}to{visibility:visible}}@keyframes
-ampstart{from{visibility:hidden}to{visibility:visible}}
</style>
<noscript>
<style amp-boilerplate>
body{
-webkit-animation:none;
-moz-animation:none;
-msanimation:none;
animation:none
}
</style>
</noscript>
<script async custom-element = "amp-form"
   src = "https://cdn.ampproject.org/v0/amp-form-0.1.js">
</script>
<script async custom-template = "amp-mustache"
src = "https://cdn.ampproject.org/v0/amp-mustache-0.2.js">
</script>
<style amp-custom>
form.amp-form-submit-success [submit-success],
form.amp-form-submit-error [submit-error]{
margin-top: 16px;
}
form.amp-form-submit-success [submit-success] {
color: white;
background-color:gray;
}
form.amp-form-submit-error [submit-error] {
color: red;
}
form.amp-form-submit-success.hide-inputs > input {
display: none;
}
</style>
</head>
<body>
<h3>Google AMP - Form</h3>
<form method = "post"
class = "p2"
action-xhr = "submitform.php"
target = "_top">
<p>AMP - Form Example</p>
<div>
<input type = "text" name = "name" placeholder = "Enter
Name" required><br/><br/>
<input type = "email" name = "email"
placeholder = "Enter Email" required>
<br/>
<br/>
</div>
<input type = "submit" value = "Submit">
<div submit-success>
<template type = "amp-mustache">
Form Submitted! Thanks {{name}}.
</template>
</div>
<div submit-error>
<template type = "amp-mustache">
Error! {{name}}, please try again.
</template>
</div>
</form>
</body>
</html>Output
Yukarıda gösterilen kodu çalıştırdığınızda, sonucu aşağıda gösterildiği gibi bulacaksınız -
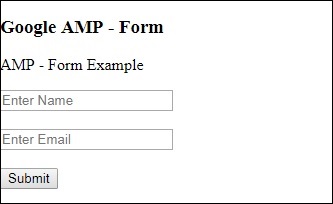
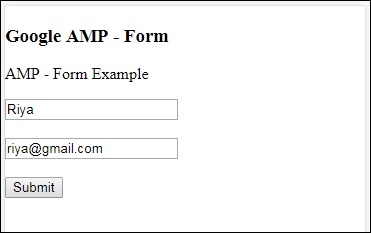
Şimdi ayrıntıları girin ve Gönder düğmesini tıklayın. Görüntülenen çıktı ekranı aşağıdaki gibidir -
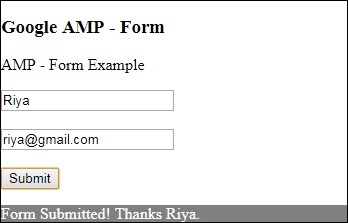
Veri bağlama için amp-mustache kullandığımızı gözlemleyin. Form, form göndermek için action-xhr yani xmlhttprequest kullanıyor. Kullandıksubmitform.php Verileri json formatında döndüren dosya.
<form method = "post" class = "p2" action-xhr = "submitform.php"
target = "_top">
</form>submitform.php
<?php
if(!empty($_POST)){ $domain_url = (isset($_SERVER['HTTPS']) ? "https" : "http") . "://$_SERVER[HTTP_HOST]";
header("Content-type: application/json");
header("AMP-Access-Control-Allow-Source-Origin: " . $domain_url); header("Access-Control-Expose-Headers: AMP-Access-Control-Allow-Source-Origin"); $myJSON = json_encode($_POST); echo $myJSON;
}
?>Formun xmlhttprequest kullanarak çalışması için, CORS belirtimine göre başlıklar eklememiz gerekir. Submitform.php dosyasına eklenen yanıt başlıklarının ayrıntıları aşağıda gösterilmiştir -
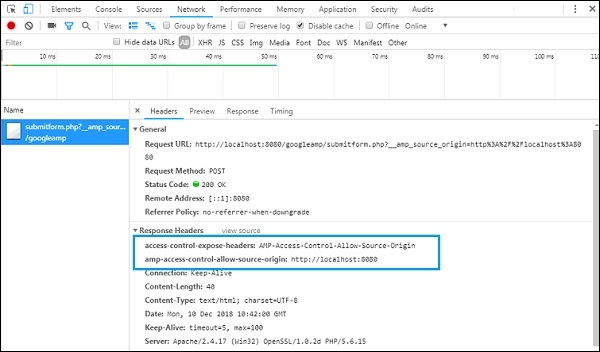
Formun çalışması için aşağıdaki gibi başlıklar eklememiz gerekir. access-control-expose-headers değerli AMP-Access-Control-Allow-Source-Origin ve amp-access-controlallow- source-origin -http://localhost:8080.
Bir php dosyası ve apache sunucusu kullandığımızı unutmayın. Php dosyasında, aşağıda gösterildiği gibi gerekli başlıkları ekledik -
<?php
if(!empty($_POST)){ $domain_url = (isset($_SERVER['HTTPS']) ? "https" : "http") . "://$_SERVER[HTTP_HOST]";
header("Content-type: application/json");
header("AMP-Access-Control-Allow-Source-Origin: " . $domain_url); header("Access-Control-Expose-Headers: AMP-Access-Control-Allow-Source-Origin"); $myJSON = json_encode($_POST); echo $myJSON;
}
?
?>Normal bir http isteği kullanmamız durumunda, sayfa aşağıda gösterildiği gibi yeniden yüklenecektir -
Http talebi için aşağıdaki formu kullandık -
<form method = "GET" class = "p2" action = "submitform.php"
target = "_top">
</form>Example
Daha iyi anlamak için aşağıdaki kodu inceleyin -
<!doctype html>
<html amp lang = "en">
<head>
<meta charset = "utf-8">
<script async src = "https://cdn.ampproject.org/v0.js"></script>
<title>Google AMP - Form</title>
<link rel = "canonical" href = "ampform.html">
<meta name = "viewport" content = "width = device-width,minimum-scale = 1,initialscale = 1">
<style amp-boilerplate>
body{
-webkit-animation:
-amp-start 8s steps(1,end) 0s1 normal both;-moz-animation:
-amp-start 8s steps(1,end) 0s 1 normal both;-msanimation:
-amp-start 8s steps(1,end) 0s 1 normal both;animation:
-amp-start 8s steps(1,end) 0s 1 normal both
}
@-webkit-keyframes
-ampstart{from{visibility:hidden}to{visibility:visible}}@-moz-keyframes
-ampstart{from{visibility:hidden}to{visibility:visible}}@-ms-keyframes
-ampstart{from{visibility:hidden}to{visibility:visible}}@-o-keyframes
-ampstart{from{visibility:hidden}to{visibility:visible}}@keyframes
-ampstart{from{visibility:hidden}to{visibility:visible}}
</style>
<noscript>
<style amp-boilerplate>
body {
-webkit-animation:none;
-moz-animation:none;
-msanimation:none;
animation:none}
>/style>
</noscript>
<script async custom-element = "amp-form"
src = "https://cdn.ampproject.org/v0/amp-form-0.1.js">
</script>
<script async custom-template = "amp-mustache"
src = "https://cdn.ampproject.org/v0/amp-mustache-0.2.js">
</script>
<style amp-custom>
form.amp-form-submit-success [submit-success],
form.amp-form-submit-error [submit-error]{
margin-top: 16px;
}
form.amp-form-submit-success [submit-success] {
color: white;
background-color:gray;
}
form.amp-form-submit-error [submit-error] {
color: red;
}
form.amp-form-submit-success.hide-inputs >
input {
display: none;
}
</style>
</head>
<body>
<h3>Google AMP - Form</h3>
<form method = "GET" class = "p2" action = "submitform.php" target = "_top">
<p>AMP - Form Example</p>
<div>
<input type = "text" name = "name" placeholder = "Enter Name" required>
<br/>
<br/>
<input type = "email" name = "email" placeholder = "Enter Email" required>
<br/>
<br/>
<div>
<input type = "submit" value = "Submit">
<div submit-success>
<template type = "amp-mustache">
Form Submitted! Thanks {{name}}.
</template>
</div>
<div submit-error>
<template type = "amp-mustache">
Error! {{name}}, please try again.
</template>
</div>
</form>
</body>
</html>Output
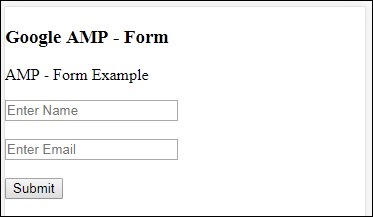
Yukarıda gösterilen kodu çalıştırdığınızda, sonucu aşağıda gösterildiği gibi bulacaksınız -

Google amp-iframesayfada iframe'leri göstermek için kullanılır. amp-iframe'e eklenecek bazı koşullar vardır ve bu nedenle sayfada normal iframe'leri kullanamayız. Bu bölüm bununla ilgili daha fazla tartışıyor.
İFrame'ler için İzlenecek Koşullar
AMP sayfalarında iframe kullanırken dikkat edilmesi gereken koşullar aşağıdaki gibidir -
Bir iframe üzerinde kullanılan url, bir https isteği veya data-URI olmalı ya da srcdoc özelliğini kullanmalıdır .
amp-iframe varsayılan olarak korumalı alan özelliğine sahip olacaktır. Korumalı alan özelliği boş olarak ayarlanacak. Korumalı alana boş bir değer, iframe'inmaximum sandboxed(iframe'de ekstra kısıtlama). Aşağıdaki bir örnek yardımıyla tartışacağımız sandbox'a değerler ekleyebiliriz.
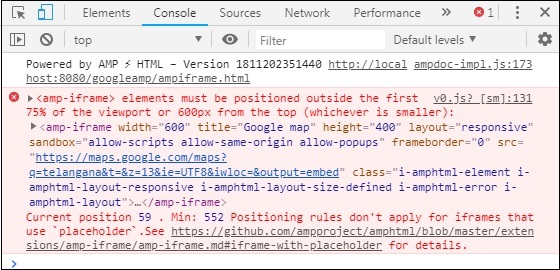
Bir amp-iframe sayfanın üst kısmında görüntülenemez; en üste kaydırıldığında, üstten neredeyse 600 piksel uzaklıkta veya görüntü alanının ilk% 75'i içinde olmalıdır. Başlangıçta iframe görüntülemeniz gerektiğinde, öğreticinin sonraki bölümlerinde örneklerin yardımıyla tartışacağımız iframe'e yer tutucu eklemeniz gerekir.
amp-iframe, kapsayıcıyla aynı kökene sahip olmamalıdır. Örneğin, ana siteniz www.xyz.com üzerindeyse, iframe src’ye sahip olamazsınız.www.xyz.com/urlname. .Xyz.com, example.xyz.com vb. Diğerlerini alabilir.
İç çerçevelerle çalışmak için aşağıdaki komut dosyasını eklememiz gerekir -
<script async custom-element = "amp-iframe"
src = "https://cdn.ampproject.org/v0/amp-iframe-0.1.js"></script>Amp-iframe biçimi aşağıdaki gibidir -
<amp-iframe width = "600" title = "Google map"
height = "400" layout = "responsive"
sandbox = "allow-scripts allow-same-origin allow-popups"
frameborder = "0"
src = "https://maps.google.com/maps?q=telangana&t=&z=13&ie=UTF8&iwloc=&output=embed">
</amp-iframe>Bunu, Google haritalarını aşağıda verildiği gibi görüntülemek için iframe kullanacak bir çalışma örneği yardımıyla anlayalım.
Misal
<!doctype html>
<html amp lang = "en">
<head>
<meta charset = "utf-8">
<script async src = "https://cdn.ampproject.org/v0.js"></script>
<title>Google AMP - Amp Iframe</title>
<link rel = "canonical" href = "http://example.ampproject.org/article-metadata.html">
<meta name = "viewport" content = "width = device-width,minimum-scale = 1,initial-scale = 1">
<style amp-boilerplate>
body{
-webkit-animation:-amp-start 8s steps(1,end) 0s
1 normal both;-moz-animation:
-amp-start 8s steps(1,end) 0s 1 normal both;-ms-animation:
-amp-start 8s steps(1,end) 0s 1 normal both;animation:
-amp-start 8s steps(1,end) 0s 1 normal both}
@-webkit-keyframes
-amp-start{from{visibility:hidden}to{visibility:visible}}@-moz-keyframes
-amp-start{from{visibility:hidden}to{visibility:visible}}@-ms-keyframes
-amp-start{from{visibility:hidden}to{visibility:visible}}@-o-keyframes
-amp-start{from{visibility:hidden}to{visibility:visible}}@keyframes
-amp-start{from{visibility:hidden}to{visibility:visible}}
</style><noscript>
<style amp-boilerplate>
body{-webkit-animation:none;-moz-animation:
none;-ms-animation:none;animation:none}
</style></noscript>
<script async custom-element = "amp-iframe"
src = "https://cdn.ampproject.org/v0/amp-iframe-0.1.js"
></script>
<style>
div {
height:850px;
text-align:center;
}
</style>
</head>
<body>
<h3>Google AMP - Amp Iframe</h3>
<div>
Google Maps in Iframe
</div>
<h3>Google AMP - Amp Iframe</h3>
<amp-iframe width = "600"
title = "Google map"
height = "400"
layout = "responsive"
sandbox = "allow-scripts allow-same-origin allow-popups"
frameborder = "0" src = "https://maps.google.com/maps?q=telangana&t=&z=13&ie=UTF8&iwloc=&output=embed">
</amp-iframe>
</body>
</html>Çıktı
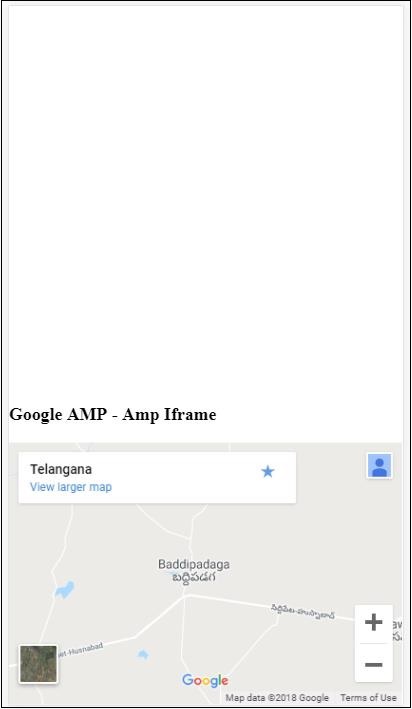
İframe'i üstten 600 pikselden fazla yerleştirdiğimizi gözlemleyin. Aşağıda gösterildiği gibi bir hata veriyor -
Yukarıdaki örnekte, aşağıda verilen değerlere sahip korumalı alanı kullandık -
sandbox = "allow-scripts allow-same-origin allow-popups"Sandbox özelliği, iframe içine yüklenecek içeriklere bir izin gibi davranır. Burada, Google haritaları bağlantılarından gelen tüm komut dosyalarının yüklenmesine izin veriyoruz. Korumalı alan niteliği vermediğimiz durumlarda, iframe'e yüklenecek içeriğin bloke edildiği görüntülenen hatadır -

Korumalı alana doğru izni vermemiz gerektiğini unutmayın. Sandbox'a verilecek tüm izinlerin ayrıntılarını burada bulabilirsiniz -https://developer.mozilla.org/en-US/docs/Web/HTML/Element/iframe#attr-sandbox.
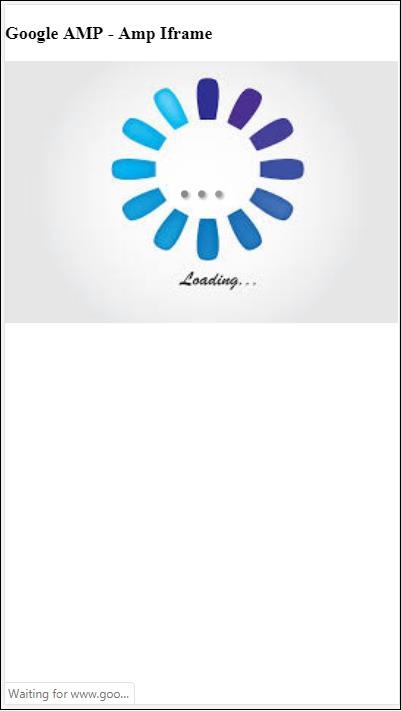
600 pikselden fazla koşuldan kurtulmak için bir amp-iframe içinde yer tutucu özelliğini kullanabiliriz.
Aynısı için çalışan bir örnek aşağıda verilmiştir -
<!doctype html>
<html amp lang = "en">
<head>
<meta charset = "utf-8">
<script async src = "https://cdn.ampproject.org/v0.js"></script>
<title>Google AMP - Amp Iframe</title>
<link rel = "canonical" href = "http://example.ampproject.org/article-metadata.html">
<meta name = "viewport" content = "width = device-width, minimum-scale=1,initial-scale=1">
<style amp-boilerplate>
body{
-webkit-animation:-amp-start 8s steps(1,end) 0s
1 normal both;-moz-animation:
-amp-start 8s steps(1,end) 0s 1 normal both;-ms-animation:
-amp-start 8s steps(1,end) 0s 1 normal both;animation:
-amp-start 8s steps(1,end) 0s 1 normal both
}
@-webkit-keyframes
-amp-start{from{visibility:hidden}to{visibility:visible}}@-moz-keyframes
-amp-start{from{visibility:hidden}to{visibility:visible}}@-ms-keyframes
-amp-start{from{visibility:hidden}to{visibility:visible}}@-o-keyframes
-amp-start{from{visibility:hidden}to{visibility:visible}}@keyframes
-amp-start{from{visibility:hidden}to{visibility:visible}}
</style>
<noscript>
<style amp-boilerplate>
body{
-webkit-animation:none;
-moz-animation:none;
-ms-animation:none;
animation:none
}
</style>
</noscript>
<script async custom-element = "amp-iframe"
src = "https://cdn.ampproject.org/v0/amp-iframe-0.1.js">
</script>
<style>
div {
height:850px;
text-align:center;
}
</style>
</head>
<body>
<h3>Google AMP - Amp Iframe</h3>
<amp-iframe width = "600"
title = "Google map"
height = "400"
layout = "responsive"
sandbox = "allow-scripts allow-same-origin allow-popups"
frameborder = "0"
src = "https://maps.google.com/maps?q=telangana&t=&z=13&ie=UTF8&iwloc=&output=embed">
<amp-img layout = "fill" src = "images/loading.jpg" placeholder></amp-img>
</amp-iframe>
</body>
</html>Aşağıdaki gibi bir yer tutucu olarak amp-img kullandık -
<amp-iframe width = "600"
title = "Google map"
height = "400"
layout = "responsive"
sandbox = "allow-scripts allow-same-origin allow-popups"
frameborder = "0"
src = "https://maps.google.com/maps?q=telangana&t=&z=13&ie = UTF8&iwloc = &output = embed">
<amp-img layout = "fill" src = "images/loading.jpg" placeholder></amp-img>
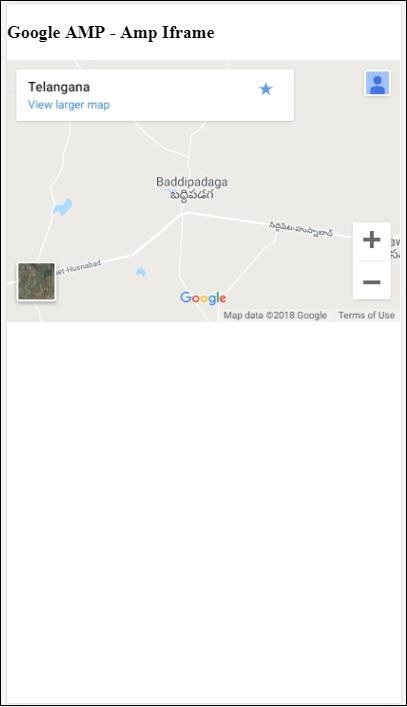
</amp-iframe>Bu durumda,% 75 görünüm alanında 600px ve amp-iframe kısıtlaması dikkate alınmaz. Resimde gösterilen bir yükleme göstergesi (üç nokta), temelde amp-iframe src için olan yer tutucu olarak kullanılır. İframe içerikleri yüklendikten sonra, görüntü kaldırılır ve iframe içeriği aşağıda gösterilen çıktıda görüntülendiği gibi gösterilir -
Çıktı
Amp-video in amp, doğrudan video yerleştirmelerini oynatmak için kullanılan standart bir html5 videosudur. Bu bölümde, amp-video ile nasıl çalışılacağını ve kullanılacağını anlayalım.
Amp-video ile çalışmak için aşağıdaki komut dosyasını eklememiz gerekir -
<script async custom-element = "amp-video"
src = "https://cdn.ampproject.org/v0/amp-video-0.1.js">
</script>Amp-video, yüklenecek video kaynağına sahip olan ve çalışma zamanında amp tarafından tembel olarak yüklenen src özelliğine sahiptir. Ayrıca tüm özellikler html5 video etiketiyle hemen hemen aynıdır.
Aşağıdakiler, amp videosuna eklenecek düğümlerdir -
Source - Bu etiketi kullanarak oynatılacak farklı medya dosyaları ekleyebilirsiniz.
Track - Bu etiket, video için altyazıları etkinleştirmenizi sağlar.
Placeholder - Bu yer tutucu etiketi, içeriği video başlamadan önce gösterecektir.
Fallback - Bu etiket, tarayıcı HTML5 videoyu desteklemediğinde çağrılacaktır.
Amp-video etiketinin biçimi
Amp-video etiketinin biçimi burada gösterilmektedir -
<amp-video controls width = "640" height = "360"
layout = "responsive" poster = "images/videoposter.png">
<source src = "video/bunny.webm" type = "video/webm" />
<source src = "video/samplevideo.mp4" type = "video/mp4" />
<div fallback>
<p>This browser does not support the video element.</p>
</div>
</amp-video>Aşağıda gösterildiği gibi çalışan bir örnek kullanarak amp-videoyu anlayalım -
Misal
<!doctype html>
<html amp lang = "en">
<head>
<meta charset = "utf-8">
<script async src = "https://cdn.ampproject.org/v0.js"></script>
<title>Google AMP - Amp Video</title>
<link rel = "canonical" href = "http://example.ampproject.org/article-metadata.html">
<meta name = "viewport" content = "width = device-width, minimum-scale = 1,initial-scale=1">
<style amp-boilerplate>
body {
-webkit-animation:
-amp-start 8s steps(1,end) 0s 1 normal both;-moz-animation:
-amp-start 8s steps(1,end) 0s 1 normal both;-ms-animation:
-amp-start 8s steps(1,end) 0s 1 normal both;animation:
-amp-start 8s steps(1,end) 0s 1 normal both}
@-webkit-keyframes
-amp-start{from{visibility:hidden}to{visibility:visible}}@-moz-keyframes
-amp-start{from{visibility:hidden}to{visibility:visible}}@-ms-keyframes
-amp-start{from{visibility:hidden}to{visibility:visible}}@-o-keyframes
-amp-start{from{visibility:hidden}to{visibility:visible}}@keyframes
-amp-start{from{visibility:hidden}to{visibility:visible}}
</style>
<noscript>
<style amp-boilerplate>
body {
-webkit-animation:none;
-moz-animation:none;
-ms-animation:none;
animation:none
}
</style>
</noscript>
<script async custom-element = "amp-video"
src = "https://cdn.ampproject.org/v0/amp-video-0.1.js">
</script>
</head>
<body>
<h3>Google AMP - Amp Video</h3>
<amp-video controls
width = "640"
height = "360"
layout = "responsive"
poster = "images/videoposter.png">
<source src = "video/bunny.webm" type = "video/webm" />
<source src = "video/samplevideo.mp4" type = "video/mp4" />
<div fallback>
<p>This browser does not support the video element.</p>
</div>
</amp-video>
</body>
</html>Çıktı
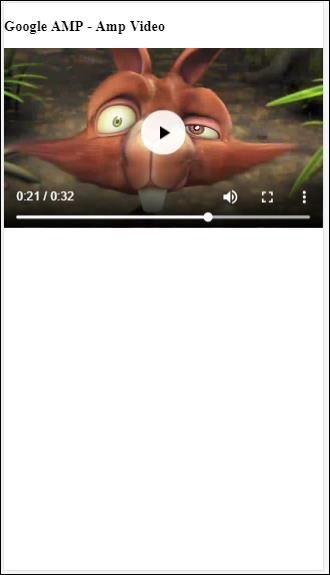
Yukarıda verilen kodun çıktısı aşağıda gösterildiği gibidir -
Amp-video için Kullanılabilen Özellikler
Amp-video için kullanılabilen özellikler, buradaki tabloda listelenmiştir -
| Sr.No | Öznitelikler ve Açıklama |
|---|---|
| 1 | src <source> düğümü yoksa, src belirtilmeli ve https: // url olmalıdır. |
| 2 | poster Poster, video başlamadan önce görüntülenen img url'sini alır. |
| 3 | autoplay Bu özelliğin amp-video üzerinde olması, tarayıcı destekliyorsa videoyu otomatik olarak oynatır. Video, sessiz modda oynatılır ve kullanıcının sesini açmak için videoya dokunması gerekir. |
| 4 | controls Bu özelliğin amp-video üzerinde olması, videoda html5 videosuna benzer kontrolleri gösterir. |
| 5 | loop Bu özellik amp-video'da mevcutsa, video bittikten sonra tekrar oynatılır. |
| 6 | crossorigin Bu özellik, video oynatma kaynağı farklı bir kaynaktan geliyorsa ortaya çıkar. |
| 7 | rotate-to-fullscreen Video görünüyorsa, kullanıcı cihazını yatay moda döndürdükten sonra video tam ekran görüntülenir |
Otomatik AMP Video Oynatma
Videoyu otomatik oynatmamız gerektiğinde otomatik oynatma özelliğini kullanabiliriz. Bu özellik, tarayıcı desteğine göre çalışacaktır. Otomatik oynatılırken videonun sessiz durumda olacağını unutmayın. Kullanıcı videoya dokunduğunda sesi açılacaktır.
Otomatik oynatma özelliğini aşağıda verilen bir çalışma örneği yardımıyla yapalım -
Misal
<!doctype html>
<html amp lang = "en">
<head>
<meta charset = "utf-8">
<script async src = "https://cdn.ampproject.org/v0.js"></script>
<title>Google AMP - Amp Video</title>
<link rel = "canonical" href = "http://example.ampproject.org/article-metadata.html">
<meta name = "viewport" content = "width=device-width,minimum-scale = 1, initial-scale = 1">
<style amp-boilerplate>
body {
-webkit-animation:
-amp-start 8s steps(1,end) 0s 1 normal both;
-moz-animation:-amp-start 8s steps(1,end) 0s 1 normal both;-ms-animation:
-amp-start 8s steps(1,end) 0s 1 normal both;animation:
-amp-start 8s steps(1,end) 0s 1 normal both
}
@-webkit-keyframes
-amp-start{from{visibility:hidden}to{visibility:visible}}@-moz-keyframes
-amp-start{from{visibility:hidden}to{visibility:visible}}@-ms-keyframes
-amp-start{from{visibility:hidden}to{visibility:visible}}@-o-keyframes
-amp-start{from{visibility:hidden}to{visibility:visible}}@keyframes
-amp-start{from{visibility:hidden}to{visibility:visible}}
</style>
<noscript>
<style amp-boilerplate>
body{
-webkit-animation:none;
-moz-animation:none;
-ms-animation:none;
animation:none
}
</style>
</noscript>
<script async custom-element = "amp-video" src = "
https://cdn.ampproject.org/v0/amp-video-0.1.js">
</script>
</head>
<body>
<h3>Google AMP - Amp Video Autoplay</h3>
<amp-video controls
width = "640"
height = "360"
layout = "responsive"
poster = "images/videoposter.png" autoplay>
<source src = "video/bunny.webm" type = "video/webm" />
<source src = "video/samplevideo.mp4" type = "video/mp4" />
<div fallback>
<p>This browser does not support the video element.</p>
</div>
</amp-video>
</body>
</html>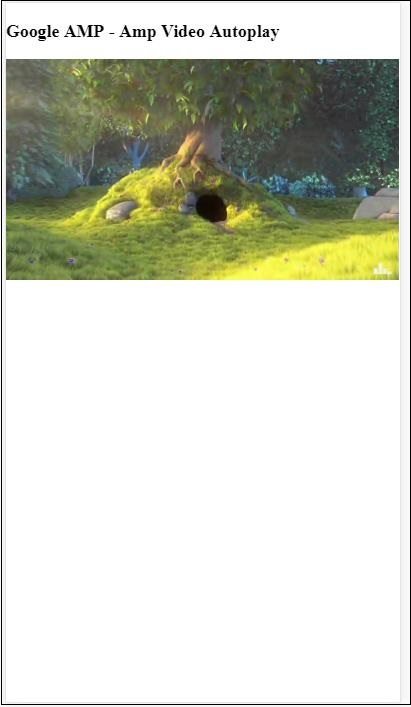
Aşağıdaki kodda gösterildiği gibi kontroller özelliğini ekleyerek videoya kontrolleri etkinleştirebilirsiniz -
<amp-video controls
width = "640"
height = "360"
layout = "responsive"
poster = "images/videoposter.png" autoplay>
<source src = "video/bunny.webm" type = "video/webm" />
<source src = "video/samplevideo.mp4" type = "video/mp4" />
<div fallback>
<p>This browser does not support the video element.</p>
</div>
</amp-video>Düğmeler, AMP'nin başka bir özelliğidir. AMP'de düğmeler için herhangi bir değişiklik olmadığını ve standart bir HTML düğme etiketi gibi kullanıldıklarını unutmayın. AMP sayfasındaki düğmelerle olan tek fark, üzerindeki etkinliklerin çalışmasıdır.
Bu bölümde, düğmenin çalışmasını ve AMP bileşenleriyle nasıl kullanılacağını gösteren bazı örnekler göreceğiz.
Işık Kutusu için Örnek Kod
Aşağıdaki örnek, aşağıda gösterildiği gibi amp-lightbox'ı göstermek / gizlemek için düğmenin nasıl kullanılacağını gösterir -
<!doctype html>
<html amp lang = "en">
<head>
<meta charset = "utf-8">
<script async src = "https://cdn.ampproject.org/v0.js"></script>
<title>Google AMP - Amp Lightbox</title>
<link rel = "canonical" href = "http://example.ampproject.org/article-metadata.html">
<meta name = "viewport" content ="width = device-width,minimum-scale = 1,initial-scale = 1">
<style amp-boilerplate>
body{
-webkit-animation:-amp-start 8s steps(1,end) 0s 1 normal both;-moz-animation:
-amp-start 8s steps(1,end) 0s 1 normal both;-ms-animation:
-amp-start 8s steps(1,end) 0s 1 normal both;animation:
-amp-start 8s steps(1,end) 0s 1 normal both
}
@-webkit-keyframes
-amp-start{from{visibility:hidden}to{visibility:visible}}@-moz-keyframes
-amp-start{from{visibility:hidden}to{visibility:visible}}@-ms-keyframes
-amp-start{from{visibility:hidden}to{visibility:visible}}@-o-keyframes
-amp-start{from{visibility:hidden}to{visibility:visible}}@keyframes
-amp-start{from{visibility:hidden}to{visibility:visible}}
</style>
<noscript>
<style amp-boilerplate>
body{
-webkit-animation:none;-moz-animation:none;-ms-an
imation:none;animation:none
}
</style>
</noscript>
<script async custom-element = "amp-lightbox"
src = "https://cdn.ampproject.org/v0/amp-lightbox-0.1.js">
</script>
<style amp-custom>
amp-img {
border: 1px solid #ddd;
border-radius: 4px;
padding: 5px;
}
button{
background-color:
#ACAD5C; color: white;
padding: 12px 20px;
border: none;
border-radius: 4px;
cursor: pointer;
float: left;
}
.lightbox {
background: rgba(211,211,211,0.8);
width: 100%;
height: 100%;
position: absolute;
display: flex;
align-items: center;
justify-content: center;
}
</style>
</head>
<body>
<h3>Google AMP - Amp Lightbox</h3>
<button on = "tap:my-lightbox">
Show LightBox
</button>
<amp-lightbox id = "my-lightbox" layout = "nodisplay">
<div class = "lightbox" on = "tap:my-lightbox.close" tabindex = "0">
<amp-img alt = "Beautiful Flower"
src = "images/flower.jpg"
width = "246"
height = "205">
</amp-img>
</div>
</amp-lightbox>
</body>
</html>Çıktı
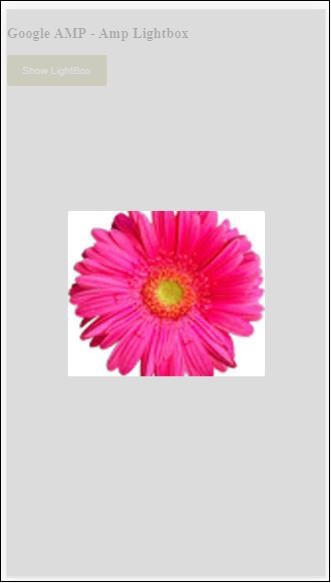
Artık ışık kutusunu kapatmak için ekranda herhangi bir yeri tıklayabilirsiniz.
Yukarıdaki örnekte, aşağıda gösterildiği gibi kodu kullanan bir düğme kullandık -
<button on = "tap:my-lightbox">
Show LightBox
</button>
Next, we have added action on the button using on attribute as shown:
on = "tap:my-lightbox"Düğmeye dokunduğunuzda eylem gerçekleşecektir. Lightbox kimliğinin kendisine verildiğini unutmayın. Kullanıcı düğmeye dokunduğunda, ışık kutusu açılacaktır. Benzer şekilde, onunla etkileşim kurmak için herhangi bir bileşenle eylemde düğmesini kullanabilirsiniz.
Timeago, zaman damgası ayrıntılarını geçmişle, örneğin 'x' saat öncesiyle karşılaştırarak verir. Bu bölümde, bu özelliği ayrıntılı olarak tartışalım.
Bu özelliği çalışmamıza eklemek için, aşağıda verilen script'i .html sayfasına eklememiz gerekiyor -
<script async custom-element = "amp-timeago"
src = "https://cdn.ampproject.org/v0/amp-timeago-0.1.js">
</script>Amp-timeago etiketi aşağıda gösterildiği gibi görünür -
<amp-timeago layout = "fixed" width = "160" height = "20"
datetime = "2018-10-01T00:37:33.809Z"
locale = "en">Monday 01 October 2018 00.37
</amp-timeago>Bunu, aşağıda gösterildiği gibi çalışan bir örnek yardımıyla anlayalım -
Misal
<!doctype html>
<html amp lang = "en">
<head>
<meta charset = "utf-8">
<script async src = "https://cdn.ampproject.org/v0.js"></script>
<title>Google AMP - TimeAgo</title>
<link rel = "canonical" href = " http://example.ampproject.org/article-metadata.html">
<meta name = "viewport" content = "width = device-width,minimum-scale = 1,initial- scale = 1">
<style amp-boilerplate>
body{
-webkit-animation:-amp-start 8s steps(1,end)
0s 1 normal both;-moz-animation:
-amp-start 8s steps(1,end) 0s 1 normal both;-ms-animation:
-amp-start 8s steps(1,end) 0s 1 normal both;animation:
-amp-start 8s steps(1,end) 0s 1 normal both
}
@-webkit-keyframes
-amp-start{from{visibility:hidden}to{visibility:visible}}@-moz-keyframes
-amp-start{from{visibility:hidden}to{visibility:visible}}@-ms-keyframes
-amp-start{from{visibility:hidden}to{visibility:visible}}@-o-keyframes
-amp-start{from{visibility:hidden}to{visibility:visible}}@keyframes
-amp-start{from{visibility:hidden}to{visibility:visible}}
</style>
<noscript>
<style amp-boilerplate>
body{
-webkit-animation:none;-moz-animation:none;-ms
-animation:none;animation:none
}
</style>
</noscript>
<script async custom-element="amp-timeago"
src = "https://cdn.ampproject.org/v0/amp-timeago-0.1.js">
</script>
</head>
<body>
<h1>Google AMP - TimeAgo Example</h1>
<amp-timeago
layout = "fixed"
width = "160"
height = "20"
datetime = "2018-10-01T00:37:33.809Z"
locale = "en">Monday 01 October 2018 00.37
</amp-timeago>
</body>
</html>Çıktı

Varsayılan olarak yerel ayar en olarak ayarlanmıştır. Aynı şeyi değiştirebilir ve gerektiğinde yerel ayarda timeago görüntüleyebiliriz. Timeago etiketi ile kullanılabilecek yerel ayarlar aşağıdaki tabloda verilmiştir.
| Sr.No | Yerel Ayar ve Açıklama |
|---|---|
| 1 | ar Arapça |
| 2 | be Belarusça |
| 3 | be Belarusça |
| 4 | bg Bulgarca |
| 5 | ca Katalanca |
| 6 | da Danimarka dili |
| 7 | de Almanca |
| 8 | el Yunan |
| 9 | en ingilizce |
| 10 | enShort İngilizce - kısa |
| 11 | es İspanyol |
| 12 | eu Bask dili |
| 13 | fi Fince |
| 14 | fr Fransızca |
| 15 | he İbranice |
| 16 | hu Macarca |
| 17 | inBG Bangla |
| 18 | inHI Hintçe |
| 19 | inID Malayca |
| 20 | it İtalyan |
| 21 | ja Japonca |
| 22 | ko Koreli |
| 23 | ml Malayalam dili |
| 24 | nbNO Norveççe Bokmål |
| 25 | nl Flemenkçe |
| 26 | nnNO Norveç Nynorsk |
| 27 | pl Lehçe |
| 28 | ptBR Portekizce |
| 29 | ro Romence |
| 30 | ru Rusça |
| 31 | sv İsveççe |
| 32 | ta Tamil |
| 33 | th Tay dili |
| 34 | tr Türk |
| 35 | uk Ukrayna |
| 36 | vi Vietnam |
| 37 | zhCN Çince |
| 38 | zhTW Tayvanlı |
Aşağıda verilen çalışma örneklerini kullanarak birkaç yerel ayarı tartışalım -
Misal
<!doctype html>
<html amp lang = "en">
<head>
<meta charset = "utf-8">
<script async src = "https://cdn.ampproject.org/v0.js"></script>
<title>Google AMP - TimeAgo Using Locale</title>
<link rel = "canonical" href = "http://example.ampproject.org/article-metadata.html">
<meta name = "viewport" content = "width = device-width,minimum-scale = 1, initial-scale = 1">
<style amp-boilerplate>
body{
-webkit-animation:
-amp-start 8s steps(1,end) 0s 1 normal both;-moz-animation:
-amp-start 8s steps(1,end) 0s 1 normal both;-ms-animation:
-amp-start 8s steps(1,end) 0s 1 normal both;animation:
-amp-start 8s steps(1,end) 0s 1 normal both
}
@-webkit-keyframes
-amp-start{from{visibility:hidden}to{visibility:visible}}@-moz-keyframes
-amp-start{from{visibility:hidden}to{visibility:visible}}@-ms-keyframes
-amp-start{from{visibility:hidden}to{visibility:visible}}@-o-keyframes
-amp-start{from{visibility:hidden}to{visibility:visible}}@keyframes
-amp-start{from{visibility:hidden}to{visibility:visible}}
</style>
<noscript>
<style amp-boilerplate>
body{
-webkit-animation:none;
-moz-animation:none;-ms
-animation:none;
animation:none
}
</style>
</noscript>
<script async custom-element = "amp-timeago"
src = "https://cdn.ampproject.org/v0/amp-timeago-0.1.js">
</script>
</head>
<body>
<h1>Google AMP - TimeAgo Example Using Locale</h1>
<h3>Locale : Russian</h3>
<amp-timeago layout = "fixed"
width = "160" height = "20"
datetime = "2018-10-01T00:37:33.809Z"
locale = "ru">
Monday 01 October 2018 00.37
</amp-timeago>
<h3>Locale : Korean</h3>
<amp-timeago
layout = "fixed"
width = "160"
height = "20"
datetime = "2018-10-01T00:37:33.809Z"
locale = "ko">
Monday 01 October 2018 00.37
</amp-timeago>
<h3>Locale : Hindi</h3>
<amp-timeago
layout = "fixed"
width = "160"
height = "20"
datetime = "2018-10-01T00:37:33.809Z"
locale = "inHI">
Monday 01 October 2018 00.37
</amp-timeago>
<h3>Locale : Spanish</h3>
<amp-timeago
layout = "fixed"
width = "160"
height = "20"
datetime = "2018-10-01T00:37:33.809Z"
locale = "es">
Monday 01 October 2018 00.37
</amp-timeago>
<h3>Locale : French</h3>
<amp-timeago
layout = "fixed"
width = "160"
height = "20"
datetime = "2018-10-01T00:37:33.809Z"
locale = "fr">
Monday 01 October 2018 00.3
</amp-timeago>
</body>
</html>Çıktı
Yukarıdaki kodun çıktısı aşağıda gösterildiği gibidir -
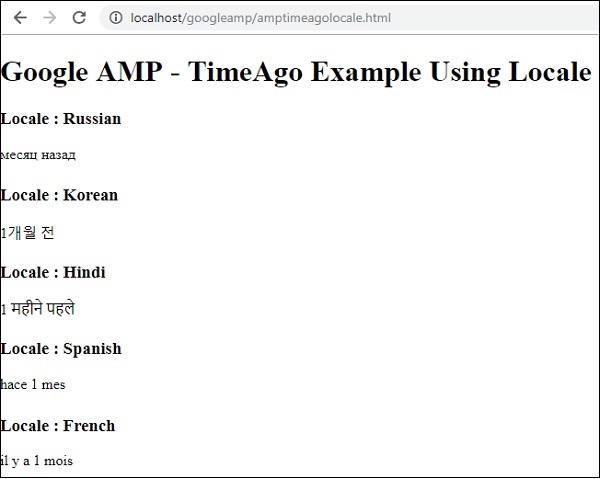
"X zaman önce" görüntüsünün değiştirilmesi gerektiğinde, "cutoff" özelliğini timeago ile kullanabiliriz. Kesme, önceki ekrandan kurtulmak için saniyeler içinde değerler alır.
Bunu, aşağıda verilen çalışan bir örnek yardımıyla anlayalım -
Misal
<!doctype html>
<html amp lang = "en">
<head>
<meta charset = "utf-8">
<script async src = "https://cdn.ampproject.org/v0.js"></script>
<title>Google AMP - TimeAgo</title>
<link rel = "canonical" href = "http://example.ampproject.org/article-metadata.html">
<meta name = "viewport" content = "width = device-width,minimum-scale=1, initial-scale=1">
<style amp-boilerplate>
body{
-webkit-animation:
-amp-start 8s steps(1,end) 0s 1 normal both;-moz-animation:
-amp-start 8s steps(1,end) 0s 1 normal both;-ms-animation:
-amp-start 8s steps(1,end) 0s 1 normal both;animation:
-amp-start 8s steps(1,end) 0s 1 normal both
}
@-webkit-keyframes
-amp-start{from{visibility:hidden}to{visibility:visible}}@-moz-keyframes
-amp-start{from{visibility:hidden}to{visibility:visible}}@-ms-keyframes
-amp-start{from{visibility:hidden}to{visibility:visible}}@-o-keyframes
-amp-start{from{visibility:hidden}to{visibility:visible}}@keyframes
-amp-start{from{visibility:hidden}to{visibility:visible}}
</style>
<noscript>
<style amp-boilerplate>
body{
-webkit-animation:none;
-moz-animation:none;
-ms-animation:none;
animation:none
}
</style>
</noscript>
<script async custom-element = "amp-timeago"
src = "https://cdn.ampproject.org/v0/amp-timeago-0.1.js">
</script>
</head>
<body>
<h1>Google AMP - TimeAgo Example</h1>
<amp-timeago
layout = "fixed"
width = "160"
height = "20"
datetime = "2018-10-01T00:37:33.809Z"
locale = "en"
cutoff = "300">
Monday 01 October 2018 00.37
</amp-timeago>
</body>
</html>Çıktı

MathML'yi kullanarak matematik formülünü görüntüleyebiliriz. Bu bölümde MathML'nin nasıl kullanılacağına dair çalışan bir örnek görelim ve aynısını görüntülemek için birkaç matematik formülle çalışalım.
MathML ile çalışmak için aşağıdaki javascript dosyasını eklememiz gerekir -
<script async custom-element = "amp-mathml"
src = "https://cdn.ampproject.org/v0/amp-mathml-0.1.js">
</script>MathML AMP etiketi
MathML amp etiketi, burada gösterilen biçime sahiptir -
<amp-mathml layout = "container"
data-formula = "\[x = {-b \pm \sqrt{b^2-4ac} \over 2a}.\]">
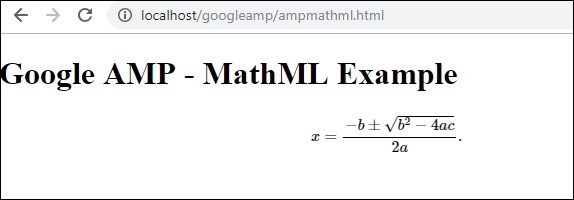
</amp-mathml>Unutmayın ki data-formula formülün verildiği zorunlu özelliktir.
Misal
Bir örnek yardımıyla bu etiketi daha iyi anlayalım.
<!doctype html>
<html amp lang = "en">
<head>
<meta charset = "utf-8">
<script async src = "https://cdn.ampproject.org/v0.js"></script>
<title>Google AMP - MathML</title>
<link rel = "canonical" href = " http://example.ampproject.org/article-metadata.html">
<meta name = "viewport" content = "width = device-width,minimum-scale = 1,initial-scale = 1">
<style amp-boilerplate>
body{
-webkit-animation:
-amp-start 8s steps(1,end) 0s 1 normal both;-moz-animation:
-amp-start 8s steps(1,end) 0s 1 normal both;-ms-animation:
-amp-start 8s steps(1,end) 0s 1 normal both;animation:
-amp-start 8s steps(1,end) 0s 1 normal both
}
@-webkit-keyframes
-amp-start{from{visibility:hidden}to{visibility:visible}}@-moz-keyframes
-amp-start{from{visibility:hidden}to{visibility:visible}}@-ms-keyframes
-amp-start{from{visibility:hidden}to{visibility:visible}}@-o-keyframes
-amp-start{from{visibility:hidden}to{visibility:visible}}@keyframes
-amp-start{from{visibility:hidden}to{visibility:visible}}
</style>
<noscript>
<style amp-boilerplate>
body{
-webkit-animation:none;
-moz-animation:none;
-ms-animation:none;
animation:none
}
</style>
</noscript>
<script async custom-element = "amp-mathml"
src = "https://cdn.ampproject.org/v0/amp-mathml-0.1.js">
</script>
</head>
<body>
<h1>Google AMP - MathML Example</h1>
<amp-mathml layout = "container"
data-formula = "\[x = {-b \pm \sqrt{b^2-4ac} \over 2a}.\]">
</amp-mathml>
</body>
</html>Çıktı
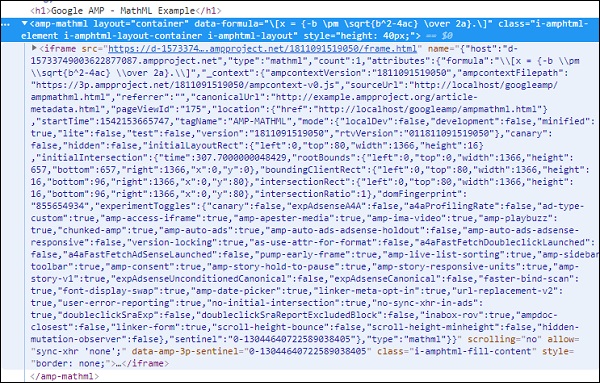
Amp-mathml etiketleri yürütüldüğünde, ekranı aşağıda gösterildiği gibi bir iframe içinde oluşturur -
Amp etiketi amp-fit-textboşluk, görüntüyü oluşturmak için yeterli değilse yazı tipi boyutunu küçültecektir. Bu bölümde bu etiket ayrıntılı olarak tartışılmaktadır.
Amp-fit-text'in çalışmasını sağlamak için aşağıdaki komut dosyasını eklememiz gerekir -
<script async custom-element = "amp-fit-text"
src = "https://cdn.ampproject.org/v0/amp-fit-text-0.1.js">
</script>Amp Fit-Text Etiketi
Amp-fit metin etiketinin biçimi aşağıda gösterilmiştir -
<amp-fit-text width = "200" height = "200" layout = "responsive">
Text here
</amp-fit-text>Misal
Bir örnek yardımıyla bu etiketi daha iyi anlayalım.
<!doctype html>
<html amp lang = "en">
<head>
<meta charset = "utf-8">
<script async src = "https://cdn.ampproject.org/v0.js"></script>
<title>Google AMP - Amp Fit-Text</title>
<link rel = "canonical" href = "http://example.ampproject.org/article-metadata.html">
<meta name = "viewport" content = "width = device-width,minimum-scale = 1, initial-scale = 1">
<style amp-boilerplate>
body{
-webkit-animation:-amp-start 8s steps(1,end)
0s 1 normal both;-moz-animation:
-amp-start 8s steps(1,end) 0s 1 normal both;-ms-animation:
-amp-start 8s steps(1,end) 0s 1 normal both;animation:
-amp-start 8s steps(1,end) 0s 1 normal both
}
@-webkit-keyframes
-amp-start{from{visibility:hidden}to{visibility:visible}}@-moz-keyframes
-amp-start{from{visibility:hidden}to{visibility:visible}}@-ms-keyframes
-amp-start{from{visibility:hidden}to{visibility:visible}}@-o-keyframes
-amp-start{from{visibility:hidden}to{visibility:visible}}@keyframes
-amp-start{from{visibility:hidden}to{visibility:visible}}
</style>
<noscript>
<style amp-boilerplate>
body{
-webkit-animation:none;-moz-animation:none;-ms
-animation:none;animation:none}
</style>
</noscript>
<script async custom-element = "amp-fit-text"
src = "https://cdn.ampproject.org/v0/amp-fit-text-0.1.js">
</script>
</head>
<body>
<h1>Google AMP - Amp Fit-Text</h1>
<div style = "width:150px;height:150px; ">
<amp-fit-text
width = "150"
height = "150"
layout = "responsive">
<b>Welcome To TutorialsPoint - You are browsing the best resource
for Online Education</b>
</amp-fit-text>
</div>
</body>
</html>Çıktı
Yukarıda verilen kodun çıktısı aşağıda gösterildiği gibidir -
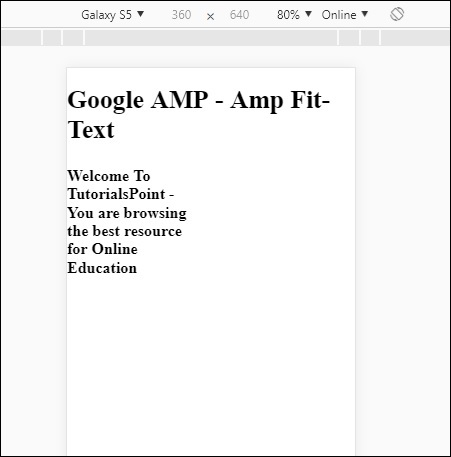
Ekranı amp-fit-text kullanarak görürseniz, içerik mevcut alana göre ayarlanmaya çalışır.
Amp-fit-text 2 öznitelikle gelir max-font-size ve min-font-size.
Max-font-size kullandığımızda ve alan metni oluşturmak için müsait değilse, boyutu küçültmeye ve mevcut alanın içinde ayarlama yapmaya çalışacaktır.
En küçük yazı tipi boyutunu belirleriz ve boşluk yoksa, metni kesecek ve metnin gizli olduğu noktaları gösterecektir.
Misal
Hem max-font-size hem de min-font-size değerini amp-fit-text olarak belirleyeceğimiz çalışan bir örnek görelim.
<!doctype html>
<html amp lang = "en">
<head>
<meta charset = "utf-8">
<script async src = "https://cdn.ampproject.org/v0.js"></script>
<title>Google AMP - Amp Fit-Text</title>
<link rel = "canonical" href = " http://example.ampproject.org/article-metadata.html">
<meta name = "viewport" content = "width = device-width,minimum-scale = 1,initial-scale = 1">
<style amp-boilerplate>
body{
-webkit-animation:
-amp-start 8s steps(1,end) 0s 1 normal both;-moz-animation:
-amp-start 8s steps(1,end) 0s 1 normal both;-ms-animation:
-amp-start 8s steps(1,end) 0s 1 normal both;animation:
-amp-start 8s steps(1,end) 0s 1 normal both
}
@-webkit-keyframes
-amp-start{from{visibility:hidden}to{visibility:visible}}@-moz-keyframes
-amp-start{from{visibility:hidden}to{visibility:visible}}@-ms-keyframes
-amp-start{from{visibility:hidden}to{visibility:visible}}@-o-keyframes
-amp-start{from{visibility:hidden}to{visibility:visible}}@keyframes
-amp-start{from{visibility:hidden}to{visibility:visible}}
</style>
<noscript>
<style amp-boilerplate>
body{
-webkit-animation:none;
-moz-animation:none;
-ms-animation:none;
animation:none}
</style>
</noscript>
<script async custom-element = "amp-fit-text" src =
"https://cdn.ampproject.org/v0/amp-fit-text-0.1.js">
</script>
</head>
<body>
<h1>Google AMP - Amp Fit-Text</h1>
<div style = "width:150px;height:150px; ">
<amp-fit-text
width = "150"
height = "150"
layout = "responsive"
max-font-size = "30"
min-font-size = "25">
<b>Welcome To TutorialsPoint - You are
browsing the best resource for Online Education</b>
</amp-fit-text>
</div>
</body>
</html>Çıktı

Belirli bir tarihe kadar günleri, saatleri, dakikaları, saniyeleri görüntülemek için kullanılan Amp Date geri sayımı adlı başka bir amp bileşeni, yani Y2K38 ( 2038)varsayılan olarak. Ekran, seçtiğiniz yerel ayarlara göre yapılabilir; varsayılan olarak tr'dir (İngilizce) .mp-date-countdown, verileri işlemek için amp-mustache şablonunu kullanır.
Bu bölümde, amp-date-countdown'u daha ayrıntılı olarak anlamak için bazı çalışma örneklerine göz atacağız.
Amp-date-countdown ile çalışmak için aşağıdaki komut dosyasını eklememiz gerekir
Amp-date-countdown için
<script async custom-element = "amp-date-countdown"
src = "https://cdn.ampproject.org/v0/amp-date-countdown-0.1.js">
</script>Amp-mustache için
<script async custom-template = "amp-mustache"
src = "https://cdn.ampproject.org/v0/amp-mustache-0.1.js">
</script>Amp-tarih-geri sayım Etiketi
Amp-date-countdown etiketi aşağıdaki gibidir -
<amp-date-countdown timestamp-seconds = "2100466648"
layout = "fixed-height"
height = "50">
<template type = "amp-mustache">
<p class = "p1">
{{d}} days, {{h}} hours, {{m}} minutes and {{s}} seconds until
<a href = "https://en.wikipedia.org/wiki/Year_2038_problem">
Y2K38
</a>.
</p>
</template>
</amp-date-countdown>Amp-date-countdown için özellikler
Amp-date-countdown özellikleri buradaki tabloda listelenmiştir -
| Sr.No | Öznitelik ve Açıklama |
|---|---|
| 1 | end-date Geri sayım için ISO biçimli bir tarih. Örneğin, 2025-08-01T00: 00: 00 + 08: 00 |
| 2 | timestamp-ms Milisaniye cinsinden bir POSIX epoch değeri; UTC saat dilimi olduğu varsayılır. Örneğin, timestamp-ms = "1521880470000" |
| 3 | timestamp-seconds Saniye cinsinden bir POSIX epoch değeri; UTC saat dilimi olduğu varsayılır. Örneğin, timestamp-seconds = "1521880470" |
| 4 | timeleft-ms Geri sayıma bırakılan milisaniye cinsinden bir değer. Örneğin, 50 saat sol timeleft-ms = "180.000.000" |
| 5 | offset-seconds (optional) Verilen bitiş tarihine eklenecek veya bu tarihten çıkarılacak saniye sayısını gösteren pozitif veya negatif bir sayı. Örneğin, offset-seconds = "60", bitiş tarihine 60 saniye ekler |
| 6 | when-ended (optional) 0 saniyeye ulaştığında zamanlayıcının durdurulup durdurulmayacağını belirtir. Değer, zamanlayıcının 0 saniyede duracağını ve son tarihi geçmeyeceğini veya zamanlayıcının 0 saniyeye ulaştıktan sonra devam etmesi gerektiğini göstermeye devam etmeyeceğini belirtmek için durdur (varsayılan) olarak ayarlanabilir. |
| 7 | locale (optional) Her bir zamanlayıcı birimi için bir uluslararasılaştırma dil dizesi. Varsayılan değer en'dir (İngilizce için). Desteklenen değerler aşağıda listelenmiştir. |
Biçim
Geri sayımı görüntülemek için amp-date-countdown'ın kullandığı biçimler aşağıdaki tabloda verilmiştir -
| Sr.No | Biçim ve Açıklama |
|---|---|
| 1 | d Günü 0,1,2,3 ... sonsuz olarak göster |
| 2 | dd Günü 00,01,02,03 ... sonsuz olarak göster |
| 3 | h Saati 0,1,2,3 ... sonsuz olarak göster |
| 4 | hh Saati 00,01,02,03 ... sonsuz olarak göster |
| 5 | m Dakikayı 0,1,2,3,4… sonsuz olarak göster |
| 6 | mm Dakikayı 00,01,02,03… .infinity olarak görüntüle |
| 7 | s 0,1,2,3 ... sonsuz olarak saniye göster |
| 8 | ss Saniyeyi 00,01,02,03… .infinity olarak görüntüle |
| 9 | days Yerel ayara göre gün veya gün dizesini görüntüleyin |
| 10 | hours Yerel ayara göre saat veya saat dizesini görüntüleyin |
| 11 | minutes Yerel ayara göre dakika veya dakika dizesini görüntüleyin |
| 12 | seconds Yerel ayara göre ikinci veya saniye dizesini görüntüle |
Misal
<!doctype html>
<html amp lang = "en">
<head>
<meta charset = "utf-8">
<script async src = "https://cdn.ampproject.org/v0.js"></script>
<title>Google AMP - Amp Date-Countdown</title>
<link rel = "canonical" href = " http://example.ampproject.org/article-metadata.html">
<meta name = "viewport" content = "width = device-width,minimum-scale = 1,initial-scale = 1">
<style amp-boilerplate>
body{-webkit-animation:-amp-start 8s steps(1,end)
0s 1 normal both;-moz-animation:
-amp-start 8s steps(1,end) 0s 1 normal both;-ms-animation:
-amp-start 8s steps(1,end) 0s 1 normal both;animation:
-amp-start 8s steps(1,end) 0s 1 normal both
}
@-webkit-keyframes
-amp-start{from{visibility:hidden}to{visibility:visible}}@-moz-keyframes
-amp-start{from{visibility:hidden}to{visibility:visible}}@-ms-keyframes
-amp-start{from{visibility:hidden}to{visibility:visible}}@-o-keyframes
-amp-start{from{visibility:hidden}to{visibility:visible}}@keyframes
-amp-start{from{visibility:hidden}to{visibility:visible}}
</style>
<noscript>
<style amp-boilerplate>
body{-webkit-animation:none;-moz-animation:none;-ms
-animation:none;animation:none}
</style>
</noscript>
<script async custom-element = "amp-date-countdown"
src = "https://cdn.ampproject.org/v0/amp-date-countdown-0.1.js">
</script>
<script async custom-template="amp-mustache" src=
"https://cdn.ampproject.org/v0/amp-mustache-0.1.js">
</script>
</head>
<body>
<h1>Google AMP - Amp Date-Countdown</h1>
<amp-date-countdown
timestamp-seconds = "2145683234"
layout = "fixed-height"
height = "50">
<template type = "amp-mustache">
<p class = "p1">
{{d}} days, {{h}} hours, {{m}} minutes and
{{s}} seconds until
<a href = "https://en.wikipedia.org/wiki/Year_2038_problem">
Y2K38
</a>.
</p>
</template>
</amp-date-countdown>
</body>
</html>Çıktı
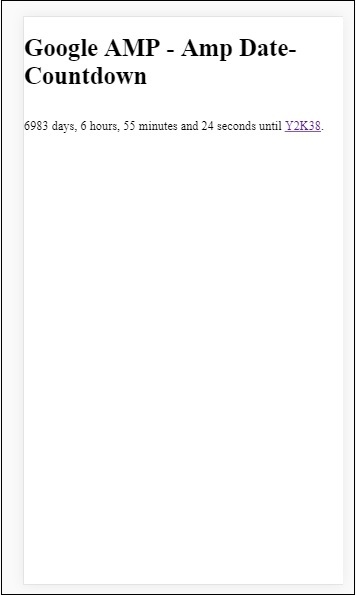
Misal
Çalışan bir örnekle amp-countdown özelliklerini offset-seconds anlayalım -
<!doctype html>
<html amp lang = "en">
<head>
<meta charset = "utf-8">
<script async src = "https://cdn.ampproject.org/v0.js"></script>
<title>Google AMP - Amp Date-Countdown</title>
<link rel = "canonical" href = " http://example.ampproject.org/article-metadata.html">
<meta name = "viewport" content = "width = device-width,minimum-scale = 1,initial-scale = 1">
<style amp-boilerplate>
body{
-webkit-animation:-amp-start 8s steps(1,end)
0s 1 normal both;-moz-animation:
-amp-start 8s steps(1,end) 0s 1 normal both;-ms-animation:
-amp-start 8s steps(1,end) 0s 1 normal both;animation:
-amp-start 8s steps(1,end) 0s 1 normal both
}
@-webkit-keyframes
-amp-start{from{visibility:hidden}to{visibility:visible}}@-moz-keyframes
-amp-start{from{visibility:hidden}to{visibility:visible}}@-ms-keyframes
-amp-start{from{visibility:hidden}to{visibility:visible}}@-o-keyframes
-amp-start{from{visibility:hidden}to{visibility:visible}}@keyframes
-amp-start{from{visibility:hidden}to{visibility:visible}}
</style>
<noscript>
<style amp-boilerplate>
body{
-webkit-animation:none;-moz-animation:none;-ms
-animation:none;animation:none}
</style>
</noscript>
<script async custom-element = "amp-date-countdown"
src = "https://cdn.ampproject.org/v0/amp-date-countdown-0.1.js">
</script>
<script async custom-template = "amp-mustache"
src = "https://cdn.ampproject.org/v0/amp-mustache-0.1.js">
</script>
</head>
<body>
<h1>Google AMP - Amp Date-Countdown</h1>
<amp-date-countdown
end-date = "2020-01-19T08:14:08.000Z"
offset-seconds = "-50"
layout = "fixed-height"
height = "100">
<template type = "amp-mustache">
<p class = "p1">
{{d}} days, {{h}} hours, {{m}}
minutes and {{s}} seconds until 50
seconds before 2020.
</p>
</template>
</amp-date-countdown>
</body>
</html>Çıktı
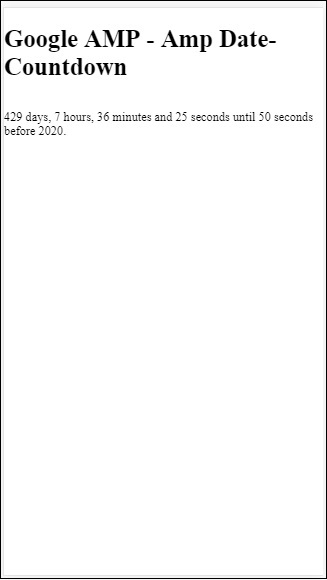
Desteklenen Yerel Ayarların Listesi
Aşağıda, amp-date-countdown tarafından desteklenen yerel ayarların listesi verilmiştir -
| Sr.No | Ad ve Yerel Ayar |
|---|---|
| 1 | en ingilizce |
| 2 | es İspanyol |
| 3 | fr Fransızca |
| 4 | de Almanca |
| 5 | id Endonezya dili |
| 6 | it İtalyan |
| 7 | ja Japonca |
| 8 | ko Koreli |
| 9 | nl Flemenkçe |
| 10 | pt Portekizce |
| 11 | ru Rusça |
| 12 | th Tay dili |
| 13 | tr Türk |
| 14 | vi Vietnam |
| 15 | zh-cn Basitleştirilmiş Çince |
| 16 | zh-tw Çin geleneği |
Şimdi, yukarıdaki yerel ayarlardan birini kullanarak geri sayımı görüntülemek için bir örnek deneyeceğiz.
Misal
<!doctype html>
<html amp lang = "en">
<head>
<meta charset = "utf-8">
<script async src = "https://cdn.ampproject.org/v0.js"></script>
<title>Google AMP - Amp Date-Countdown</title>
<link rel = "canonical" href = "http://example.ampproject.org/article-metadata.html">
<meta name="viewport" content="width = device-width, minimum-scale = 1,initial-scale = 1">
<style amp-boilerplate>
body{
-webkit-animation:
-amp-start 8s steps(1,end)0s 1 normal both;-moz-animation:
-amp-start 8s steps(1,end) 0s 1 normal both;-ms-animation:
-amp-start 8s steps(1,end) 0s 1 normal both;animation:
-amp-start 8s steps(1,end) 0s 1 normal both
}
@-webkit-keyframes
-amp-start{from{visibility:hidden}to{visibility:visible}}@-moz-keyframes
-amp-start{from{visibility:hidden}to{visibility:visible}}@-ms-keyframes
-amp-start{from{visibility:hidden}to{visibility:visible}}@-o-keyframes
-amp-start{from{visibility:hidden}to{visibility:visible}}@keyframes
-amp-start{from{visibility:hidden}to{visibility:visible}}
</style>
<noscript>
<style amp-boilerplate>
body{
-webkit-animation:none;
-moz-animation:none;
-ms-animation:none;
animation:none}
</style>
</noscript>
<script async custom-element = "amp-date-countdown"
src = "https://cdn.ampproject.org/v0/amp-date-countdown-0.1.js">
</script>
<script async custom-template = "amp-mustache"
src = "https://cdn.ampproject.org/v0/amp-mustache-0.1.js">
</script>
</head>
<body>
<h1>Google AMP - Amp Date-Countdown</h1>
<amp-date-countdown
locale = "ja"
end-date = "2020-01-19T08:14:08.000Z"
offset-seconds = "-50"
layout = "fixed-height"
height = "100">
<template type = "amp-mustache">
<p class = "p1">
{{d}} {{days}}, {{h}} {{hours}}, {{m}}
{{minutes}} and {{s}} {{seconds}} until
50 seconds before 2020.
</p>
</template>
</amp-date-countdown>
</body>
</html>Çıktı

AMP Datepicker, kullanıcının tarihleri seçebileceği sayfada takvimi görüntüleyen bir amp bileşenidir. AMP tarih seçici, statik bir takvim gibi veya tek bir düğmenin tıklanmasıyla giriş seçimine dayalı olarak görüntülenebilir.
Amp-date-picker'ın çalışmasını sağlamak için sayfaya aşağıdaki komut dosyasını eklememiz gerekir -
<script async custom-element = "amp-date-picker"
src = "https://cdn.ampproject.org/v0/amp-date-picker-0.1.js">
</script>Amp-tarih-seçici Etiketi
Amp-date-picker etiketi aşağıdaki gibi görünür -
<amp-date-picker layout = "fixed-height" height = "360"></amp-date-picker>Desteklenen Özellikler
Aşağıdaki özellikler amp-date-picker için desteklenir -
| Sr.No | Öznitelik ve Açıklama |
|---|---|
| 1 | mode Mevcut seçenekler statik ve kaplamadır. Statik için takvim varsayılan olarak sayfada açılacaktır. Kaplama için takvim etkileşim üzerine açılacaktır. |
| 2 | mode Mevcut seçenekler tek ve aralıklıdır. Tek ile takvimde yalnızca bir tarih seçebilirsiniz. Aralık ile, birden fazla tarih ancak sürekli bir aralıkta seçebilirsiniz. |
| 3 | input-selector Bu, tarih girişi için bir sorgu seçici olabilir. Örneğin, id, sınıf için #nameoftheid'dir. sınıfın adı. Kimliğin atandığı etiket için tarih güncellenecektir. |
| 4 | start-input-selector Bu, tarih girişi için bir sorgu seçici olabilir. Örneğin, id için sınıf için #nameoftheid, .nameoftheclass'dır. Kimliğin atandığı etiket için tarih güncellenecektir. |
| 5 | end-input-selector Bu, tarih girişi için bir sorgu seçici olabilir. Örneğin id için sınıf için #nameoftheid, .nameoftheclass'dır. Kimliğin atandığı etiket için tarih güncellenecektir. |
| 6 | min Kullanıcının seçebileceği en erken tarih. Bu, ISO 8601 tarihi olarak biçimlendirilmelidir. Min özelliği yoksa, geçerli tarih minimum tarih olacaktır. |
| 7 | max Kullanıcının seçebileceği en son tarih. Bu, ISO 8601 tarihi olarak biçimlendirilmelidir. Maksimum özellik yoksa, tarih seçicide maksimum tarih olmaz. |
| 8 | month-format Seçilen tarihi görüntülemek için ihtiyacınız olan ay biçimi. Varsayılan olarak değerler "MMMM YYYY" şeklindedir. |
| 9 | format Tarihin giriş kutusunda veya seçicisi kullanılan herhangi bir html öğesinde görüntülenmesini istediğiniz format. Varsayılan olarak "YYYY-AA-GG" şeklindedir |
| 10 | week-day-format Haftanın gününü görüntülemek için biçimlendirin. |
| 11 | locale Takvim görünümünü görüntülemek için yerel ayar. Varsayılan olarak en. |
| 12 | minimum-nights Bir tarih aralığında kullanıcının seçmesi gereken gece sayısı. Varsayılan "1" dir. "0" değeri, kullanıcıların başlangıç ve bitiş tarihleri için aynı tarihi seçmesine olanak tanır. |
| 13 | number-of-months Takvim görünümünde tek seferde görüntülenecek ay sayısı. Varsayılan "1" dir. |
| 14 | first-day-of-week Haftanın ilk günü (0-6) olarak belirlenecek gün. Varsayılan değer "0" dır (Pazar). |
| 15 | day-size Takvim görünümü tablosundaki tarih hücrelerinin piksel cinsinden boyutu. Varsayılan 39'dur. |
Ana özellikler type ve mode. İçinmode, sahibiz static ve overlaytakvimler yazın. İçintype Sahip olabiliriz single ve rangeseçenekler. İletype = ”single” takvimden yalnızca bir tarih seçebiliriz ve type = ”range” bir aralıkta birden fazla veri seçebiliriz.
Şimdi, statik ve yer paylaşımlı takvimler için amp-date-picker'ı bazı çalışma örnekleri aracılığıyla anlayalım.
AMP Statik tarih seçici
Statik tip tarih seçici için aşağıdaki örnekte gösterildiği gibi mod = statik belirtmemiz gerekir.
Misal
<!doctype html>
<html amp lang = "en">
<head>
<meta charset = "utf-8">
<script async src = "https://cdn.ampproject.org/v0.js"></script>
<title>Google AMP - Amp Date-Picker Static </title>
<link rel = "canonical" href = " http://example.ampproject.org/article-metadata.html">
<meta name = "viewport" content = "width = device-width, minimum-scale = 1,initial-scale = 1">
<style amp-boilerplate>
body{
-webkit-animation:
-amp-start 8s steps(1,end) 0s 1 normal both;-moz-animation:
-amp-start 8s steps(1,end) 0s 1 normal both;-ms-animation:
-amp-start 8s steps(1,end) 0s 1 normal both;animation:
-amp-start 8s steps(1,end) 0s 1 normal both
}
@-webkit-keyframes
-amp-start{from{visibility:hidden}to{visibility:visible}}@-moz-keyframes
-amp-start{from{visibility:hidden}to{visibility:visible}}@-ms-keyframes
-amp-start{from{visibility:hidden}to{visibility:visible}}@-o-keyframes
-amp-start{from{visibility:hidden}to{visibility:visible}}@keyframes
-amp-start{from{visibility:hidden}to{visibility:visible}}
</style>
<noscript>
<style amp-boilerplate>
body{-webkit-animation:
none;-moz-animation:none;-ms-animation:none;animation:none}
</style>
</noscript>
<script async custom-element = "amp-date-picker"
src = "https://cdn.ampproject.org/v0/amp-date-picker-0.1.js">
</script>
<script async custom-element = "amp-bind"
src = "https://cdn.ampproject.org/v0/amp-bind-0.1.js">
</script>
<script async custom-template = "amp-mustache"
src = "https://cdn.ampproject.org/v0/amp-mustache-0.1.js">
</script>
<style>
input[type = text]{
width: 50%;
padding: 12px;
border: 1px
solid #ccc;
border-radius: 4px;
resize: vertical;
}
label {
padding: 12px 12px 12px 0;display: inline-block;
}
.col-label {
float: left;width: 25%;margin-top: 6px;
}
.col-content {
float: left;width: 75%;margin-top: 6px;
}
.row:after {
content: "";display: table;clear: both;
}
.amp_example {
background-color: #f1f1f1;
padding: 0.01em 16px;
margin: 20px 0;
box-shadow: 0 2px 4px 0
rgba(0,0,0,0.16),0 2px 10px 0
rgba(0,0,0,0.12)!important;
}
h3{font-family: "Segoe UI",Arial,sans-serif;
font-weight: 400;margin: 10px 0;}
</style>
</head>
<body>
<div class = "amp_example">
<h3>Google AMP - Amp Date-Picker using type = single</h3>
<amp-date-picker
id = "static-date"
type = "single"
mode = "static"
layout = "fixed-height"
height = "600"
format = "YYYY-MM-DD"
input-selector = "#date">
<div class = "row">
<div class = "col-label">
<label for = "start">
Date is:
</label>
</div>
<div class = "col-content">
<input type = "text" id = "date" name = "date"
placeholder = "Date Selected Is...">
</div>
</div>
</amp-date-picker>
<div>
</body>
</html>Bu örnekte, ekranda varsayılan olarak takvim yani tarih seçici görüntülediğimizi gözlemleyin.
Kullanıcı tarafından seçilen tarih, aşağıda gösterilen demo ekranında gösterildiği gibi metin alanında gösterilir -
Çıktı
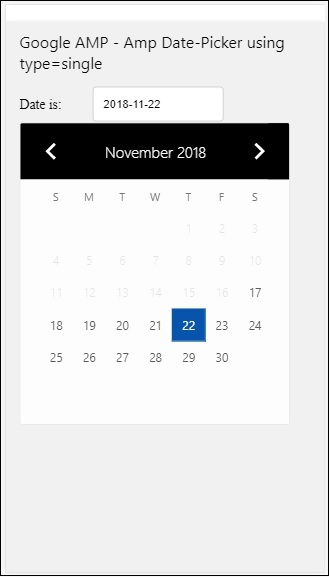
Amp-date-picker'dan seçilen tarih nasıl alınır?
Yukarıdaki örneğe bakarsanız, adında bir öznitelik vardır. input-selectormetin alanının kimliği verilir. Kullanıcı tarihi seçtiğinde, giriş alanında gösterilir.
<amp-date-picker
id = "static-date"
type = "single"
mode = "static"
layout = "fixed-height"
height = "600"
format = "YYYY-MM-DD"
input-selector = "#date"
<div class = "row">
<div class = "col-label">
<label for = "start">Date is:</label>
</div>
<div class = "col-content">
<input type = "text" id = "date" name = "date"
placeholder = "Date Selected Is...">
</div>
</div>
</amp-date-picker>Ayrıca input-selector özniteliğine aşağıdaki gibi name özelliğini de verebilirsiniz -
<amp-date-picker
type = "single"
mode = "static"
layout = "container"
input-selector = "[name = date]">
<input type = "text" id = "date" name = "date" placeholder = "Date Selected Is...">
</amp-date-picker>Girdi seçici verilmezse, amp-date-picker gizli bir girdi alanı oluşturur ve ona bir ad verirse date or ${id}-date amp-date seçicinin kimliğini kullanarak.
Tarih seçici ile kullanılabilen farklı niteliklere sahip birkaç örnek daha tartışacağız. Yukarıda bahsettiğimiz gibi tek tarihi seçebiliriztype=”single”ve statik olarak mod. Türünü şu şekilde vererek tarih aralığını da seçebiliriz:type=”range”.
Misal
<!doctype html>
<html amp lang = "en">
<head>
<meta charset = "utf-8">
<script async src = "https://cdn.ampproject.org/v0.js"></script>
<title>Google AMP - Amp Date-Picker Static </title>
<link rel = "canonical" href = "http://example.ampproject.org/article-metadata.html">
<meta name = "viewport" content = "width = device-width, minimum-scale = 1,initial-scale = 1">
<style amp-boilerplate>
body{-webkit-animation:
-amp-start 8s steps(1,end) 0s 1 normal both;-moz-animation:
-amp-start 8s steps(1,end) 0s 1 normal both;-ms-animation:
-amp-start 8s steps(1,end) 0s 1 normal both;animation:
-amp-start 8s steps(1,end) 0s 1 normal both
}
@-webkit-keyframes
-amp-start{from{visibility:hidden}to{visibility:visible}}@-moz-keyframes
-amp-start{from{visibility:hidden}to{visibility:visible}}@-ms-keyframes
-amp-start{from{visibility:hidden}to{visibility:visible}}@-o-keyframes
-amp-start{from{visibility:hidden}to{visibility:visible}}@keyframes
-amp-start{from{visibility:hidden}to{visibility:visible}}
</style>
<noscript>
<style amp-boilerplate>
body{
-webkit-animation:
none;-moz-animation:none;-ms-animation:none;animation:none}
</style>
</noscript>
<script async custom-element = "amp-date-picker"
src = "https://cdn.ampproject.org/v0/amp-date-picker-0.1.js">
</script>
<script async custom-element = "amp-bind"
src = "https://cdn.ampproject.org/v0/amp-bind-0.1.js">
</script>
<script async custom-template = "amp-mustache"
src = "https://cdn.ampproject.org/v0/amp-mustache-0.1.js">
</script>
<style>
input[type = text]{
width: 50%;
padding: 12px;
border: 1px solid #ccc;
border-radius: 4px;
resize: vertical;
}
label {padding: 12px 12px 12px 0;display: inline-block;}
.col-label {float: left;width: 25%;margin-top: 6px;}
.col-content {float: left;width: 75%;margin-top: 6px;}
.row:after {content: "";display: table;clear: both;}
.amp_example {
background-color: #f1f1f1;
padding: 0.01em 16px;
margin: 20px 0;
box-shadow: 0 2px 4px 0
rgba(0,0,0,0.16),0 2px 10px 0
rgba(0,0,0,0.12)!important;
}
h3{
font-family: "Segoe UI",Arial,sans-serif;
font-weight: 400;margin: 10px 0;
}
</style>
</head>
<body>
<div class = "amp_example">
<h3>Google AMP - Amp Date-Picker Static Multi Select Dates using type = range</h3>
<amp-date-picker
id = "static-date"
type = "range"
mode = "static"
layout = "fixed-height"
height = "600"
start-input-selector = "#start"
end-input-selector = "#end"
format = "YYYY-MM-DD"
input-selector = "#static-date-input">
<div class = "row">
<div class = "col-label">
<label for = "start">Start Date:</label>
</div>
<div class = "col-content">
<input type = "text" id = "start"
name = "start" placeholder = "Start Date">
</div>
</div>
<div class = "row">
<div class = "col-label">
<label for = "end">End Date:</label>
</div>
<div class = "col-content">
<input type = "text" id = "end"
name = "end" placeholder = "End Date">
</div>
</div>
</amp-date-picker>
</div>
</body>
</html>Çıktı
Yukarıda gösterilen kodun çıktısı aşağıdaki gibidir -
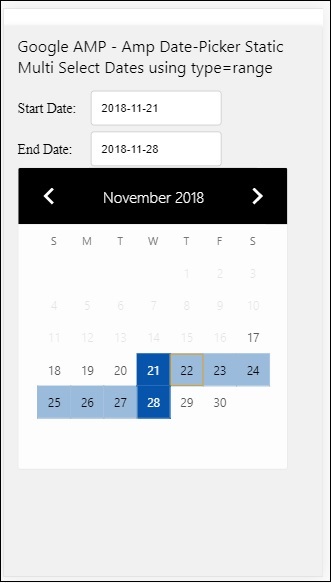
How to get the start and end date using type= ”range” selected from amp-date-picker?
Başlangıç ve bitiş tarihini öğrenmek için amp-date-picker özelliğini kullandık start-input-selector ve end-input-selector.
Sözdiziminin ayrıntıları burada gösterilmektedir -
<amp-date-picker
id = "static-date"
type = "range"
mode = "static"
layout = "fixed-height"
height = "600"
start-input-selector = "#start"
end-input-selector="#end"
format = "YYYY-MM-DD"
input-selector = "#static-date-input">
<input type = "text" id = "start" name = "start" placeholder="Start Date">
<input type = "text" id = "end" name = "end" placeholder = "End Date">
</amp-date-picker>Her iki seçicide de başlangıç ve bitiş tarihinin görüntülenmesini istediğimiz giriş alanı kimliği vardır. Burada tartışıldığı gibi giriş alanının adını da verebilirsiniz.
AMP Yer Paylaşımlı Tarih Seçici
Kaplama modu tarih seçici için takvim, giriş alanına yanıt olarak görüntülenir. Statik tarih seçicide gördüğümüz gibi type = "single" ve type = "range" ile bindirme yapabiliriz.
Şimdi Yer paylaşımlı tarih seçici için tarih aralığı seçmenin çalışan bir örneğini görelim.
Misal
<!doctype html>
<html amp lang = "en">
<head>
<meta charset = "utf-8">
<script async src = "https://cdn.ampproject.org/v0.js"></script>
<itle>Google AMP - Amp Date-Picker Static</title>
<link rel = "canonical" href = "http://example.ampproject.org/article-metadata.html">
<meta name = "viewport" content = "width = device-width,minimum-scale = 1,initial-scale = 1">
<style amp-boilerplate>
body{
-webkit-animation:
-amp-start 8s steps(1,end) 0s 1 normal both;-moz-animation:
-amp-start 8s steps(1,end) 0s 1 normal both;-ms-animation:
-amp-start 8s steps(1,end) 0s 1 normal both;animation:
-amp-start 8s steps(1,end) 0s 1 normal both
}
@-webkit-keyframes
-amp-start{from{visibility:hidden}to{visibility:visible}}@-moz-keyframes
-amp-start{from{visibility:hidden}to{visibility:visible}}@-ms-keyframes
-amp-start{from{visibility:hidden}to{visibility:visible}}@-o-keyframes
-amp-start{from{visibility:hidden}to{visibility:visible}}@keyframes
-amp-start{from{visibility:hidden}to{visibility:visible}}
</style>
<noscript>
<style amp-boilerplate>
body{
-webkit-animation:
none;-moz-animation:none;-ms-animation:none;animation:none}
</style>
</noscript>
<script async custom-element = "amp-date-picker"
src = "https://cdn.ampproject.org/v0/amp-date-picker-0.1.js">
</script>
<script async custom-element = "amp-bind"
src = "https://cdn.ampproject.org/v0/amp-bind-0.1.js">
</script>
<script async custom-template = "amp-mustache"
src = "https://cdn.ampproject.org/v0/amp-mustache-0.1.js">
</script>
<style>
input[type=text]{
width: 50%;
padding: 12px;border:
1px solid #ccc;
border-radius: 4px;resize: vertical;
}
label {
padding: 12px 12px 12px 0;
display: inline-block;
font-family: "Segoe UI",Arial,sans-serif;
font-weight: 400;
}
.col-label {float: left;width: 25%;margin-top: 6px;}
.col-content {float: left;width: 75%;margin-top: 6px;}
.row:after {content: "";display: table;clear: both;}
.amp_example {
background-color: #f1f1f1;
padding: 0.01em 16px;
margin: 20px 0;
box-shadow: 0 2px 4px 0
rgba(0,0,0,0.16),0 2px 10px 0
rgba(0,0,0,0.12)!important;
}
h3{font-family: "Segoe UI",Arial,sans-serif;font-weight: 400;margin: 10px 0;}
button { background-color: #ACAD5C;
color: white;
padding: 12px 20px;
border: none;
border-radius: 4px;
cursor: pointer;
float: right;
}
</style>
</head>
<body>
<div class = "amp_example">
<h3>Google AMP - Amp Date-Picker Overlay Multi Select Dates using type = rangelt;/h3>
<amp-date-picker id = "overlay-date"
type = "range"
mode = "overlay"
start-input-selector = "#start"
end-input-selector = "#end"
format = "YYYY-MM-DD"
open-after-select
input-selector = "#start">
<div class = "row">
<div class = "col-label">
<label for = "start">Start Date:lt;/label>
</div>
<div class = "col-content">
<input type = "text" id = "start"
name = "start" placeholder = "Start Date">
</div>
</div>
<div class = "row">
<div class = "col-label">
<label for = "end">End Date:lt;/label>
</div>
<div class = "col-content">
<input type = "text" id="end" name = "end"
placeholder = "End Date">
</div>
</div>
<div class = "row">
<div class = "col-label">
</div>
<div class = "col-content">
<button class = "ampstart-btn caps" on = "tap:overlay-date.clear">
Clear
</button>
</div>
</div>
</amp-date-picker>
</div>
</body>
</html>Çıktı
Yukarıda gösterilen kodun çıktısı aşağıdaki gibidir -
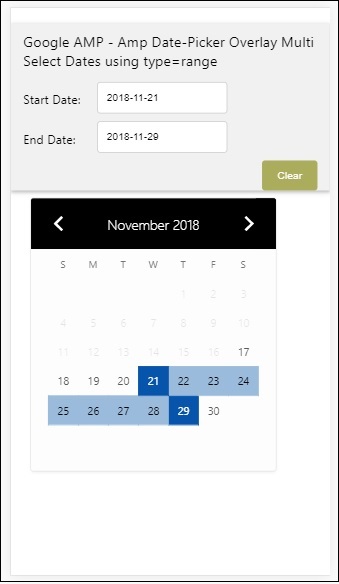
Başlangıç ve bitiş tarihini nasıl alacağımızı zaten görmüştük. Burada bir özellik daha kullandığımızı gözlemleyinopen-after-select. Bu özellik, seçimden sonra kaplamayı açık tutacaktır. Tarih seçicinin dışına tıklarsanız, kapanacaktır. Clear adlı bir buton da eklendi. Temizle düğmesine tıklandığında, seçilen tarihler silinir.
<button class = "ampstart-btn caps" on = "tap:overlay-date.clear">
Clear
</button>Etkinlik eklemek için kullanmalıyız onöznitelik. Olaylar hakkında daha fazla ayrıntı tartışılacaktır.EventsBu eğitimin bölümü. Etiket davranışını kullandık ve bunun için tarih seçicinin kimliği verildi ve olay seçildi - tarih aralığını temizlemekle ilgileniyor.
Ardından, amp-date-picker'ı bir lightbox olarak nasıl kullanacağımızı görelim.
AMP Işık Kutusu Tarih Seçici
Tarih seçici, kalıcı bir pencere içinde kullanılabilir. Aynı şekilde ışık kutusu tarih seçiciyi de kullanabiliriz. Bunu çalışan bir örnek yardımıyla anlayalım.
Işık kutusu içinde tarih seçiciyi kullanmak için, ışık kutusu komut dosyasını aşağıda gösterildiği gibi eklememiz gerekir -
<script async custom-element = "amp-lightbox"
src = "https://cdn.ampproject.org/v0/amp-lightbox-0.1.js">
</script>Misal
<!doctype html>
<html amp lang = "en">
<head>
<meta charset = "utf-8">
<script async src = "https://cdn.ampproject.org/v0.js"></script>
<title>Google AMP - Amp Date-Picker Static </title>
<link rel = "canonical" href = "http://example.ampproject.org/article-metadata.html">
<meta name = "viewport" content = "width=device-width,minimum-scale = 1,initial-scale = 1">
<style amp-boilerplate>
body{
-webkit-animation:
-amp-start 8s steps(1,end) 0s 1 normal both;-moz-animation:
-amp-start 8s steps(1,end) 0s 1 normal both;-ms-animation:
-amp-start 8s steps(1,end) 0s 1 normal both;animation:
-amp-start 8s steps(1,end) 0s 1 normal both
}
@-webkit-keyframes
-amp-start{from{visibility:hidden}to{visibility:visible}}@-moz-keyframes
-amp-start{from{visibility:hidden}to{visibility:visible}}@-ms-keyframes
-amp-start{from{visibility:hidden}to{visibility:visible}}@-o-keyframes
-amp-start{from{visibility:hidden}to{visibility:visible}}@keyframes
-amp-start{from{visibility:hidden}to{visibility:visible}}
</style>
<noscript>
<style amp-boilerplate>
body{
-webkit-animation:none;
-moz-animation:none;
-ms-animation:none;
animation:none}
</style>
</noscript>
<script async custom-element = "amp-date-picker"
src = "https://cdn.ampproject.org/v0/amp-date-picker-0.1.js">
</script>
<script async custom-element = "amp-bind" src = "
https://cdn.ampproject.org/v0/amp-bind-0.1.js">
<script>
<script async custom-template = "amp-mustache"
src = "https://cdn.ampproject.org/v0/amp-mustache-0.1.js">
</script>
<script async custom-element = "amp-lightbox"
src = "https://cdn.ampproject.org/v0/amp-lightbox-0.1.js">
</script>
<style>
input[type=text]{
width: 50%;
padding: 12px;
border: 1px solid #ccc;
border-radius: 4px;
resize: vertical;
}
label {
padding: 12px 12px 12px 0;
display: inline-block;
font-family: "Segoe UI",Arial,sans-serif;
font-weight: 400;
}
.col-label {
float: left;width: 25%;
margin-top: 6px;
}
.col-content {
float: left;
width: 75%;
margin-top: 6px;
}
.row:after {
content: "";
display: table;clear: both;
}
.amp_example {
background-color: #f1f1f1;
padding: 0.01em 16px;
margin: 20px 0;
box-shadow: 0 2px 4px 0 rgba(0,0,0,0.16),0 2px 10px 0rgba(0,0,0,0.12)!important;
}
h3{font-family: "Segoe UI",Arial,sans-serif;
font-weight: 400;
margin: 10px 0;
}
button {
background-color: #ACAD5C;
color: white;
padding: 12px 20px;
border: none;
border-radius: 4px;
cursor: pointer;
float: right;
}
.lightbox {background-color: rgba(100, 100, 100, 0.5);}
</style>
</head>
<body>
<div class = "amp_example">
<h3>Google AMP - Amp Date-Picker Overlay Multi Select Dates using type = range</h3>
<div class = "row">
<div class = "col-label">
<label for = "start">Start Date:</label>
<div>
<div class = "col-content">
<input type = "text" id = "start" name =
"start" placeholder = "Start Date" on = "tap:lightbox.open">
</div>
</div>
<div class = "row">
<div class = "col-label">
<label for = "end">End Date:</label>
</div>
<div class = "col-content">
<input type = "text" id = "end" name =
"end" placeholder = "End Date" on = "tap:lightbox.open">
</div>
</div>
<div class = "row">
<div class = "col-label"></div>
<div class = "col-content">
<button class = "ampstart-btn caps" on =
"tap:overlay-date.clear">Clear</button>
</div>
</div>
<amp-lightbox id = "lightbox" layout = "nodisplay" class = "lightbox">
<amp-date-picker id = "overlay-date"
type = "range"
layout = "fill"
start-input-selector = "#start"
end-input-selector = "#end"
format = "YYYY-MM-DD"
on = "activate: lightbox.open;deactivate: lightbox.close">
</amp-date-picker>
</amp-lightbox>
</div>
</body>
</html>Çıktı
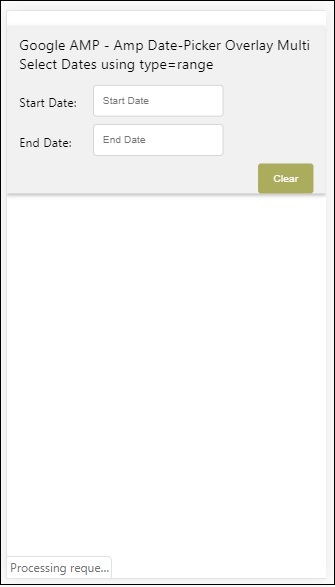
Bir kullanıcı giriş alanını tıkladığında, aşağıda gösterildiği gibi ışık kutusu içinde tarih seçici açılır -
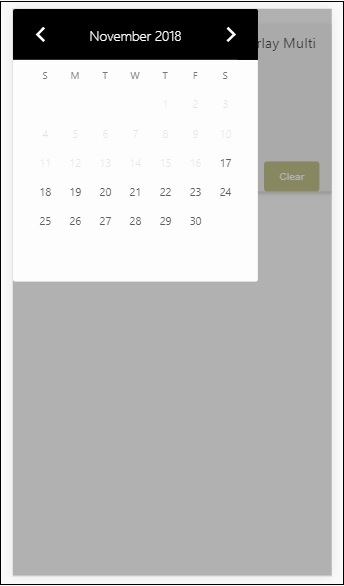
Bunu gerçekleştirmek için, aşağıda gösterildiği gibi giriş alanına eklenen bir olay vardır -
<input type = "text" id = "start" name = "start"
placeholder = "Start Date" on = "tap:lightbox.open">
<input type = "text" id = "end" name = "end"
placeholder = "End Date" on = "tap:lightbox.open">Bunu not et “on” çağırdığı olaydır dokunun - ışık kutusu.açık kutuyu açmak için.
Burada lightbox, aşağıda gösterildiği gibi amp-lightbox'a verilen kimliktir. Amp-date-picker, amp-lightbox içinde denir ve giriş alanlarına dokunulduğunda etkinleştirilir.
<amp-lightbox id = "lightbox" layout = "nodisplay" class = "lightbox">
<amp-date-picker id = "overlay-date"
type = "range"
layout = "fill"
start-input-selector = "#start"
end-input-selector = "#end"
format = "YYYY-MM-DD"
on = "activate: lightbox.open;deactivate: lightbox.close">
</amp-date-picker>
</amp-lightbox>Amp-story, kullanıcıyı hikayeyle meşgul tutan içeriği görüntülemek için kullanılan bir amp bileşenidir. Örneğin, bir markayı anlatan bir dizi resim kullanmak.
Amp-story ile çalışmaya başlamak için, komut dosyasını aşağıda gösterildiği gibi eklememiz gerekir -
<script async custom-element = "amp-story"
src = "https://cdn.ampproject.org/v0/amp-story-1.0.js">
</script>Bu bölümde, amp-story'nin ne olduğunu ve nasıl çalıştığını anlayalım. Bir resim galerimiz olduğunu ve sayfada aynısını görüntülemek istediğimizi varsayalım. Amp sayfasında, amp-story bileşenini kullanarak kullanıcının güzel ve etkileşimli görünmesini sağlayabiliriz.
Amp-story etiketinin biçimi aşağıda gösterildiği gibidir -
<amp-story standalone> ---> Main story Tag
<amp-story-page id = "page-1"> ---> Pages inside the story e.g page1
<amp-story-grid-layer template = "fill"> -->
Layers for the page1.You can have more than one layer.
//Add html elements here or amp components
</amp-story-grid-layer>
<amp-story-grid-layer template = "fill"> -->
Layers for the page1.You can have more than one layer.
//Add html elements here or amp components
</amp-story-grid-layer>
...
</amp-story-page>
<amp-story-page id = "page-2"> ---> Pages inside the story e.g page2
<amp-story-grid-layer template = "fill"> -->
Layers for the page2.You can have more than one layer.
//Add html elements here or amp components
</amp-story-grid-layer>
...
</amp-story-page>
...
</amp-story>Amp-story için aşağıdaki gibi eklenen bazı ek özellikler vardır -
<amp-story standalone title = "My Story"
publisher = "The AMP Team"
publisher-logo-src = "publisherlogo image here"
poster-portrait-src = "poster portrait here"
poster-square-src = "poster square image here"
poster-landscape-src = "poster landscape image here">Bu özellik, hikaye anlatımını amfi kullanarak çok etkileşimli hale getirir.
Aşağıdaki kod, amp-story için çalışan bir örneği gösterir. Aynı çıktı, masaüstü ve mobil mod için gösterilir.
Misal
<!doctype html>
<html amp lang = "en">
<head>
<meta charset = "utf-8">
<script async src = "https://cdn.ampproject.org/v0.js"></script>
<script async custom-element = "amp-story" src = "https://cdn.ampproject.org/v0/amp-story-1.0.js"></script>
<title>Google AMP - Story</title>
<meta name = "viewport" content = "width = device-width,minimum-scale = 1,initial-scale=1">
<link rel = "canonical" href = "/stories/introduction/amp_story_hello_world/">
<style amp-boilerplate>
body{
-webkit-animation:
-amp-start 8s steps(1,end) 0s 1 normal both;-moz-animation:
-amp-start 8s steps(1,end) 0s 1 normal both;-ms-animation:
-amp-start 8s steps(1,end) 0s 1 normal both;animation:
-amp-start 8s steps(1,end) 0s 1 normal both
}
@-webkit-keyframes
-amp-start{from{visibility:hidden}to{visibility:visible}}@-moz-keyframes
-amp-start{from{visibility:hidden}to{visibility:visible}}@-ms-keyframes
-amp-start{from{visibility:hidden}to{visibility:visible}}@-o-keyframes
-amp-start{from{visibility:hidden}to{visibility:visible}}@keyframes
-amp-start{from{visibility:hidden}to{visibility:visible}}
</style>
<noscript>
<style amp-boilerplate>
body{
-webkit-animation:
none;-moz-animation:none;
-ms-animation:none;
animation:none}
</style>
</noscript>
<style amp-custom>
amp-story {
font-family: Roboto, Helvetica, Arial, sans-serif;
}
amp-story-page * {
color: white;
text-align: center;
}
</style>
</head>
<body>
<amp-story standalone title = "Stories in AMP - Hello World" publisher = "AMP Project">
<amp-story-page id = "page-1">
<amp-story-grid-layer template = "fill">
<amp-img src = "images/christmas1.jpg"
width = "300" height = "250"
layout = "responsive">
</amp-img>
</amp-story-grid-layer>
<amp-story-grid-layer template = "vertical">
<h1>Hello World</h1>
<p>This is an AMP Story.</p>
</amp-story-grid-layer>
</amp-story-page>
<amp-story-page id = "page-2">
<amp-story-grid-layer template = "fill">
<amp-img src = "images/christmas5.jpg"
width = "300" height = "250"
layout = "responsive">
</amp-img>
</amp-story-grid-layer>
<amp-story-grid-layer template = "vertical">
<h1>Hello World</h1>
<p>This is an AMP Story.</p>
</amp-story-grid-layer>
</amp-story-page>
<amp-story-page id = "page-3">
<amp-story-grid-layer template = "fill">
<amp-img src = "images/christmas3.jpg"
width = "300" height = "250"
layout = "responsive">
</amp-img>
</amp-story-grid-layer>
<amp-story-grid-layer template = "vertical">
<h1>Hello World</h1>
<p>This is an AMP Story.</p>
</amp-story-grid-layer>
</amp-story-page>
<amp-story-page id = "page-4">
<amp-story-grid-layer template = "fill">
<amp-img src = "images/christmas4.jpg"
width = "300" height="250"
layout = "responsive">
</amp-img>
</amp-story-grid-layer>
<amp-story-grid-layer template = "vertical">
<h1>Hello World</h1>
<p>This is an AMP Story.</p>
</amp-story-grid-layer>
</amp-story-page>
<amp-story-bookend src = "ampstory.json" layout = "nodisplay">
</amp-story-bookend>
</amp-story>
<body>
</html>ampstory.json
{
"bookendVersion": "v1.0",
"shareProviders": [
"email",
"twitter",
"tumblr",
{
"provider": "facebook",
"app_id": "254325784911610"
}
],
"components": [
{
"type": "heading",
"text": "Introduction"
},
{
"type": "small",
"title": "Next Story is on Car Brands",
"url": "ampcarbrand.html",
"image": "images/audi.jpg"
}
]
}Masaüstünde Çıktı


Hikaye bölümü bu şekilde görüntülenir. Hikayeyi daha etkileşimli hale getirmek için videolar veya başka herhangi bir amfi bileşeni de ekleyebilirsiniz.
Hikayenin sonuna ulaştığında, aşağıda gösterildiği gibi amp-bookend'de verilenleri gösterecektir -
<amp-story-bookend
src = "ampstory.json" layout = "nodisplay">
</amp-story-bookend>Amp-bookend'e bir ampstory.json dosyası verdik. Json dosyası, aşağıda gösterildiği gibi sonraki öykünün önizlemesinin ayrıntılarını içerir. Bir kullanıcı sağ tarafta gösterilen üç noktayı tıkladığında, aşağıdaki ekran görüntülenecektir -
Hikayeyi tekrar yükleyecek olan bir yeniden oynatma düğmesi verir. Otomobil markalarının hikayesini gösterecek olan otomobilin görseline tıklayabilirsiniz.
Mobil moddaki çıktı aşağıdaki gibidir -


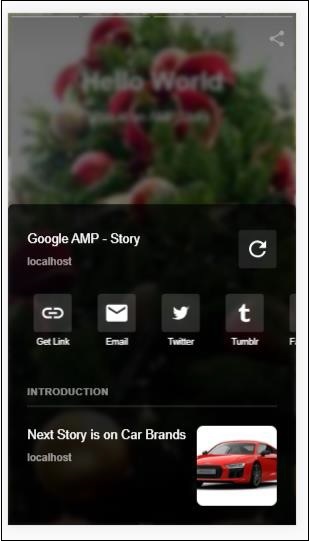
Amp-selector, seçenekler menüsünü görüntüleyen bir amp bileşenidir ve kullanıcı seçenekler arasında seçim yapabilir. Görüntülenen seçenekler metin, resim veya diğer herhangi bir amp bileşeni olabilir. Bu bölümde bunu detaylı olarak tartışalım.
Amp-selector ile çalışmak için aşağıdaki javascript dosyalarını eklememiz gerekir -
<script async custom-element = "amp-selector"
src = "https://cdn.ampproject.org/v0/amp-selector-0.1.js">
</script>Amp-selector biçimi
Aşağıdaki kod, amp-selector biçiminin örneğini gösterir -
<amp-selector layout = "container">
<amp-img src = "images/christmas1.jpg"
width = "60"
height = "40"
option = "1">
<amp-img src = "images/christmas2.jpg"
width = "60"
height = "40"
option = "2">
</amp-img>
<amp-img src = "images/christmas3.jpg"
width = "60"
height = "40"
option = "3">
</amp-img>
<amp-img src = "images/christmas4.jpg"
width = "60"
height = "40"
option = "4">
</amp-img>
</amp-selector>Amp-selector içinde standart html etiketlerini veya amp bileşenlerini kullanabilirsiniz. İçerik, ekrandaki menü gibi görüntülenir ve kullanıcı bunlar arasında seçim yapabilir. Görüntülenen menüler tek bir seçim veya çoklu seçim olabilir.
Bunu, aşağıda verilen tekli ve çoklu seçim örneği yardımıyla anlayalım.
Amp Seçici Tekli Seçim
Aşağıdaki kod, amp-selector single select için bir örnektir -
<!doctype html>
<html amp lang = "en">
<head>
<meta charset = "utf-8">
<script async src = "https://cdn.ampproject.org/v0.js"></script>
<title>Google AMP - Amp Selector</title>
<link rel = "canonical" href = "http://example.ampproject.org/article-metadata.html">
<meta name="viewport" content="width=device-width,minimum-scale = 1,initial-scale = 1">
<style amp-boilerplate>
body{-
webkit-animation:-amp-start 8s steps(1,end) 0s 1 normal both;-moz-animation:
-amp-start 8s steps(1,end) 0s 1 normal both;-ms-animation:
-amp-start 8s steps(1,end) 0s 1 normal both;animation:
-amp-start 8s steps(1,end) 0s 1 normal both
}
@-webkit-keyframes
-amp-start{from{visibility:hidden}to{visibility:visible}}@-moz-keyframes
-amp-start{from{visibility:hidden}to{visibility:visible}}@-ms-keyframes
-amp-start{from{visibility:hidden}to{visibility:visible}}@-o-keyframes
-amp-start{from{visibility:hidden}to{visibility:visible}}@keyframes
-amp-start{from{visibility:hidden}to{visibility:visible}}
</style>
<noscript>
<style amp-boilerplate>
body{
-webkit-animation:none;-moz-animation:none;
-ms-animation:none;animation:none}
</style>
</noscript>
<script async custom-element="amp-selector"
src = "https://cdn.ampproject.org/v0/amp-selector-0.1.js">
</script>
<style amp-custom>
amp-selector:not([disabled])
amp-img[option][selected]:not([disabled]) {
outline-color: #b6A848;
outline-width: 2px;
}
</style>
</head>
<body>
<h3>Google AMP - Amp Selector</h3>
<amp-selector layout = "container">
<amp-img src = "images/christmas1.jpg"
width = "60"
height = "40"
option="1">
</amp-img>
<amp-img src="images/christmas2.jpg"
widt h = 60"
height = "40"
option = "2">
</amp-img>
<amp-img src = "images/christmas3.jpg"
width = "60"
height = "40"
option = "3">
</amp-img>
<amp-img src = "images/christmas4.jpg"
width = "60"
height = "40"
option = "4">
</amp-img>
</amp-selector>
</body>
</html>Çıktı
Yukarıda verilen kodun çıktısı aşağıda gösterildiği gibidir -
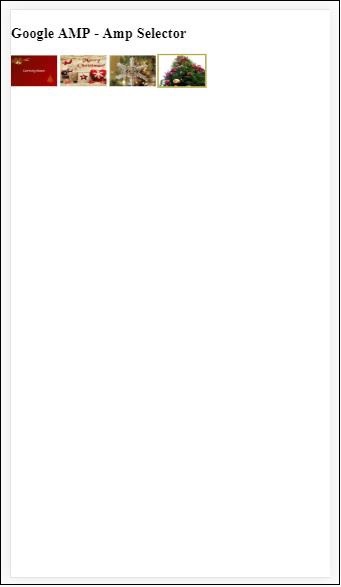
Yukarıdaki örnekte seçenekleri göstermek için amp-selector kullandığımızı ve içindeki resimleri kullandığımızı unutmayın. Çıktıda gösterildiği gibi herhangi bir görüntüyü seçebilmeniz için tek bir seçicidir.
Amp Seçici Çoklu Seçim
Bu örnekte, amp-selector'ı birden çok öznitelik kullanan resimlerle görüntüleyelim, seçiciden birden çok seçenek belirleyebiliriz.
Misal
<!doctype html>
<html amp lang = "en">
<head>
<meta charset = "utf-8 ">
<script async src = "https://cdn.ampproject.org/v0.js"></script>
<title>Google AMP - Amp Selector</title>
<link rel = "canonical" href = "http://example.ampproject.org/article-metadata.html">
<meta name = "viewport" content = "width = device-width,minimum-scale = 1,initial-scale =1">
<style amp-boilerplate>
body{-webkit-animation:
-amp-start 8s steps(1,end) 0s 1 normal both;-moz-animation:
-amp-start 8s steps(1,end) 0s 1 normal both;-ms-animation:
-amp-start 8s steps(1,end) 0s 1 normal both;animation:
-amp-start 8s steps(1,end) 0s 1 normal both}
@-webkit-keyframes
-amp-start{from{visibility:hidden}to{visibility:visible}}@-moz-keyframes
-amp-start{from{visibility:hidden}to{visibility:visible}}@-ms-keyframes
-amp-start{from{visibility:hidden}to{visibility:visible}}@-o-keyframes
-amp-start{from{visibility:hidden}to{visibility:visible}}@keyframes
-amp-start{from{visibility:hidden}to{visibility:visible}}
</style>
<noscript>
<style amp-boilerplate>
body{
-webkit-animation:none;-moz-animation:none;
-ms-animation:none;animation:none
}
</style>
</noscript>
<script async custom-element = "amp-selector"
src = "https://cdn.ampproject.org/v0/amp-selector-0.1.js">
</script>
<style amp-custom>
amp-selector:not([disabled])
amp-img[option][selected]:not([disabled]) {
outline-color: blue;
outline-width: 2px;
}
</style>
</head>
<body>
<h3>Google AMP - Amp Selector</h3>
<amp-selector layout = "container" multiple>
<amp-img src = "images/christmas1.jpg"
width = "60"
height ="40"
option = "1">
</amp-img>
<amp-img src="images/christmas2.jpg"
width = "60"
height = "40"
option = "2">
</amp-img>
<amp-img src ="images/christmas3.jpg"
width = "60"
height = "40"
option = "3">
</amp-img>
<amp-img src = "images/christmas4.jpg"
width = "60"
height = "40"
option = "4">
</amp-img>
</amp-selector>
</body>
</html>Çıktı
Yukarıda gösterilen kodun çıktısı aşağıda verilmiştir -
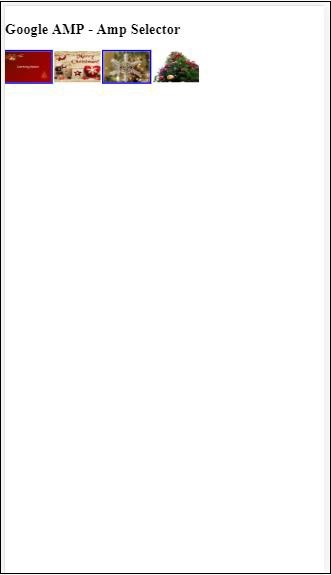
Aşağıda verilen kodda gösterildiği gibi radyo düğmelerini göstermek için amp-selector'ı da kullanabiliriz -
Misal
<!doctype html>
<html amp lang = "en">
<head>
<meta charset = "utf-8">
<script async src = "https://cdn.ampproject.org/v0.js"></script>
<title>Google AMP - Amp Selector</title>
<link rel = "canonical" href = "http://example.ampproject.org/article-metadata.html">
<meta name = "viewport" content ="width = device-width,minimum-scale = 1,initial-scale = 1">
<style amp-boilerplate>
body{
-webkit-animation:
-amp-start 8s steps(1,end) 0s 1 normal both;-moz-animation:
-amp-start 8s steps(1,end) 0s 1 normal both;-ms-animation:
-amp-start 8s steps(1,end) 0s 1 normal both;animation:
-amp-start 8s steps(1,end) 0s 1 normal both
}
@-webkit-keyframes
-amp-start{from{visibility:hidden}to{visibility:visible}}@-moz-keyframes
-amp-start{from{visibility:hidden}to{visibility:visible}}@-ms-keyframes
-amp-start{from{visibility:hidden}to{visibility:visible}}@-o-keyframes
-amp-start{from{visibility:hidden}to{visibility:visible}}@keyframes
-amp-start{from{visibility:hidden}to{visibility:visible}}
</style>
<noscript>
<style amp-boilerplate>
body{
-webkit-animation:none;
-moz-animation:none;
-ms-animation:none;
animation:none}
</style>
</noscript>
<script async custom-element = "amp-selector"
src = "https://cdn.ampproject.org/v0/amp-selector-0.1.js">
</script>
<style amp-custom>
.radio-menu {
list-style: none;
}
.radio-menu [option][selected] {
outline: none;
}
.radio-menu [option] {
display: flex;
align-items: center;
}
.radio-menu [option]:before {
transition: background 0.25s ease-in-out;
content: "";
display: inline-block;
width: 24px;
height: 24px;
margin: 8px;
border-radius: 100%;
border: solid 1px black;
}
.radio-menu [option = red][selected]:before {
text-align: center;
content: "✓";
color: white;
background: red;
}
.radio-menu [option = green][selected]:before {
text-align: center;
content: "✓";
color: white;
background: green;
}
.radio-menu [option = blue][selected]:before {
text-align: center;
content: "✓";
color: white;
background: blue;
}
</style>
</head>
<body>
<h3>Google AMP - Amp Selector</h3>
<amp-selector class = "radio-menu" layout = "container" name = "my-selector">
<div option = "red">Red</div>
<div option = "green">Green</div>
<div option = "blue">Blue</div>
</amp-selector>
</body>
</html>Çıktı
Amp içindeki Bağlantı etiketi, Google arama motoruna mevcut amfi ve amfi olmayan sayfalar hakkında bilgi vermek için kullanılır. Bu bölümde, Link etiketiyle ilgili yönleri ve Google'ın amp-page ve non amp-page hakkında nasıl karar verdiğini ayrıntılı olarak tartışalım.
AMP Sayfa Keşfi
Www.mypage.com adında bir siteniz olduğunu düşünün. Haber makalesi sayfaya bağlantılıdır - www.mypage.com/news/myfirstnews.html.
Bir kullanıcı Google arama motorunda arama yaptığında ve amp-olmayan sayfayı aldığında, amp sayfasına da referans almak için, aşağıda gösterildiği gibi link etiketini kullanarak amp url'sini belirtmemiz gerekir -
Misal
Page-url for Non amp-page
<link rel = "amphtml" href = "https://www.mypage.com/news/amp/myfirstnews_amp.html">Burada rel = ”amphtml” amp olmayan bir sayfanın amp sürümüne işaret etmesi için belirtilmiştir, böylece Google platforma göre doğru olanı gösterir
Page-url for amp-page
<link rel = "canonical" href = "https://www.mypage.com/news/myfirstnews.html">Burada rel = ”canonical” , amp sayfasında html'nin standart sürümünü işaret edecek şekilde belirtilmiştir, böylece Google platforma dayalı olarak doğru sürümü gösterir.
Sitenizde bir amp sayfası olan tek bir sayfa varsa, kendisine işaret edecek olan rel = ”canonical” ifadesini eklemeyi unutmamalısınız -
<link rel = "canonical" href = "https://www.mypage.com/news/amp/myfirstnews_amp.html">Aşağıdaki diyagram, amp sayfasına işaret eden rel = ”amphtml” ve standart html sayfasına işaret eden rel = ”canonical” referansını göstermektedir.
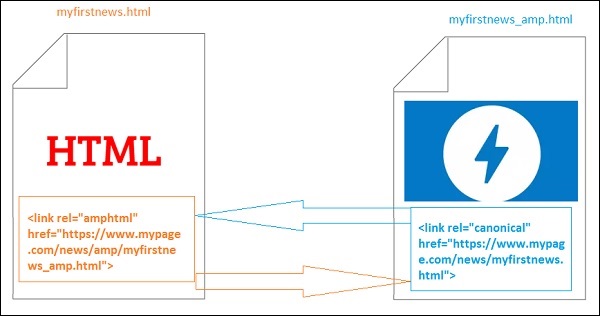
Bağlantı Kullanan Yazı Tipleri
Yazı tipleri, aşağıda gösterildiği gibi bağlantı kullanılarak harici olarak yüklenebilir -
<link rel = "stylesheet" href = "https://fonts.googleapis.com/css?family=Roboto">Yalnızca beyaz listedeki kaynaklara izin verildiğini unutmayın. Yazı tiplerini alabileceğimiz beyaz listeye alınan kaynak listesi burada gösterildiği gibidir -
Fonts.com - https://fast.fonts.net
Google Yazı Tipleri - https://fonts.googleapis.com
Font Awesome - https://maxcdn.bootstrapcdn.com
Typekit - https://use.typekit.net/kitId.css (kitId'yi uygun şekilde değiştirin)
Rel = ”canonical” ve rel = ”stil sayfası” kullanan bir çalışma örneği aşağıda gösterilmektedir -
Misal
<!doctype html>
<html amp>
<head>
<meta charset ="utf-8">
<title>Amp Sample Page</title>
<link rel = "canonical" href = "amppage.html">
<meta name = "viewport" content = "width = device-width,minimum-scale=1,initial-scale = 1">
<style amp-custom>
h1 {color: red}
</style>
<style amp-boilerplate>
body{
-webkit-animation:
-amp-start 8s steps(1,end) 0s 1 normal both;-moz-animation:
-amp-start 8s steps(1,end) 0s 1 normal both;-ms-animation:
-amp-start 8s steps(1,end) 0s 1 normal both;animation:
-amp-start 8s steps(1,end) 0s 1 normal both
}
@-webkit-keyframes
-amp-start{from{visibility:hidden}to{visibility:visible}}@-moz-keyframes
-amp-start{from{visibility:hidden}to{visibility:visible}}@-ms-keyframes
-amp-start{from{visibility:hidden}to{visibility:visible}}@-o-keyframes
-amp-start{from{visibility:hidden}to{visibility:visible}}@keyframes
-amp-start{from{visibility:hidden}to{visibility:visible}}
</style>
<noscript>
<style amp-boilerplate>
body{
-webkit-animation:none;
-moz-animation:none;
-ms-animation:none;
animation:none
}
</style>
</noscript>
<script async src = "https://cdn.ampproject.org/v0.js"></script>
<link rel = "stylesheet" href = "https://fonts.googleapis.com/css?family=Roboto">
</head>
<body>
<h1>Amp Sample Page</h1>
<p>
<amp-img src = "images/christmas1.jpg"
width = "300" height = "250"
layout = "responsive">
</amp-img>
</p>
<p style = "font-family: 'Roboto'; font-size:25px;">
Welcome to Amp Page
</p>
</body>
</html>Çıktı
Yukarıda gösterilen kodun çıktısı aşağıda gösterildiği gibidir -
Amp yazı tipi, temelde özel yazı tiplerini amp sayfasına tetiklemeye ve izlemeye yardımcı olan bir amp bileşenidir. Bu bölümde amp-font ayrıntılı olarak anlatılmaktadır.
Amp-font ile çalışmak için aşağıdaki javascript dosyasını eklememiz gerekir -
<script async custom-element = "amp-font"
src = "https://cdn.ampproject.org/v0/amp-font-0.1.js">
</script>Amp-font bileşeni, font yüklemesi için geçen süreyi kontrol etmek için kullanılır. Milisaniye cinsinden zaman alan bir zaman aşımı özelliğine sahiptir. Varsayılan olarak 3000 ms'dir. Bileşen, gerekli fontun yüklenmiş veya bir hata durumuna girmiş olmasına bağlı olarak document.documentElement veya document.body'den sınıflar eklemeye / kaldırmaya izin verir.
Amp-font etiketinin biçimi aşağıda gösterildiği gibidir -
<amp-font
layout = "nodisplay"
font-family = "Roboto Italic"
timeout = "2000"
on-error-remove-class = "robotoitalic-loading"
on-error-add-class = "robotoitalic-missing"
on-load-remove-class = "robotoitalic-loading"
on-load-add-class = "robotoitalic-loaded">
</amp-font>Amp sayfalarında amp-fontun nasıl kullanılacağına dair çalışan bir örnek burada gösterildiği gibidir -
Misal
<!doctype html>
<html amp lang = "en">
<head>
<meta charset = "utf-8">
<script async src = "https://cdn.ampproject.org/v0.js"></script>
<title>Google AMP - Amp Font</title>
<link rel = "canonical" href = "http://example.ampproject.org/article-metadata.html">
<meta name = "viewport" content = "width = device-width,minimum-scale = 1,initial-scale = 1">
<style amp-boilerplate>
body{
-webkit-animation:
-amp-start 8s steps(1,end) 0s 1 normal both;-moz-animation:
-amp-start 8s steps(1,end) 0s 1 normal both;-ms-animation:
-amp-start 8s steps(1,end) 0s 1 normal both;animation:
-amp-start 8s steps(1,end) 0s 1 normal both
}
@-webkit-keyframes
-amp-start{from{visibility:hidden}to{visibility:visible}}@-moz-keyframes
-amp-start{from{visibility:hidden}to{visibility:visible}}@-ms-keyframes
-amp-start{from{visibility:hidden}to{visibility:visible}}@-o-keyframes
-amp-start{from{visibility:hidden}to{visibility:visible}}@keyframes
-amp-start{from{visibility:hidden}to{visibility:visible}}
</style>
<noscript>
<style amp-boilerplate>
body{
-webkit-animation:none;
-moz-animation:none;
-ms-animation:none;
animation:none}
</style>
</noscript>
<cript async custom-element = "amp-font"
src = "https://cdn.ampproject.org/v0/amp-font-0.1.js"
></script>
<style amp-custom>
@font-face {
font-family: 'This font is not available';
font-style: normal;
font-weight: 300;
src: url(fonts/MissingFont.ttf) format('truetype');
}
.font-missing {
color:red;
font-size:25px;
}
</style>
</head>
<body>
<h1>Google AMP - Amp Font</h1>
<amp-font
layout = "nodisplay"
font-family = "Font Does Not exist"
timeout = "2000"
on-error-remove-class = "font-missing"
on-error-add-class = "font-error"
on-load-remove-class = "font-missing"
on-load-add-class = "font-loaded">
</amp-font>
<p class = "font-missing">
Example of amp-font component to show how
attributes on-error-remove-class,
on-error-add-class, on-load-remove-class
and on-load-add-class works when the font
file to be loaded does not exist.
</p>
</body>
</html>Çıktı
Yukarıda verilen örnek kodun çıktısı aşağıda gösterildiği gibidir -
Yazı tipi dosyası başarıyla yüklendiğinde bir amp-font örneği burada gösterilmektedir -
Misal
<!doctype html>
<html amp lang = "en">
<head>
<meta charset = "utf-8">
<script async src = "https://cdn.ampproject.org/v0.js"></script>
<title>Google AMP - Amp Font</title>
<link rel = "canonical" href = "http://example.ampproject.org/article-metadata.html">
<meta name = "viewport" content = "width = device-width,minimum-scale = 1,initial-scale = 1">
<style amp-boilerplate>
body{
-webkit-animation:
-amp-start 8s steps(1,end) 0s 1 normal both;-moz-animation:
-amp-start 8s steps(1,end) 0s 1 normal both;-ms-animation:
-amp-start 8s steps(1,end) 0s 1 normal both;animation:
-amp-start 8s steps(1,end) 0s 1 normal both
}
@-webkit-keyframes
-amp-start{from{visibility:hidden}to{visibility:visible}}@-moz-keyframes
-amp-start{from{visibility:hidden}to{visibility:visible}}@-ms-keyframes
-amp-start{from{visibility:hidden}to{visibility:visible}}@-o-keyframes
-amp-start{from{visibility:hidden}to{visibility:visible}}@keyframes
-amp-start{from{visibility:hidden}to{visibility:visible}}
</style>
<noscript>
<style amp-boilerplate>
body{
-webkit-animation:none;
-moz-animation:none;
-ms-animation:none;
animation:none}
</style>
</noscript>
<script async custom-element = "amp-font"
src = "https://cdn.ampproject.org/v0/amp-font-0.1.js">
</script>
<style amp-custom>
@font-face {
font-family: 'This font is not available';
font-style: normal;
font-weight: 300;
src: url(fonts/MissingFont.ttf)
format('truetype');
}
@font-face {
font-family: 'Roboto Italic';
font-style: normal;
font-weight: 300;
src:url(fonts/Roboto-Italic.ttf) format('truetype');
}
.font-missing {
color:red;
font-size:25px;
}
.robotoitalic-loading {
color: green;
}
.robotoitalic-loaded {
font-size:25px;
color: blue;
}
.robotoitalic-missing {
color: red;
}
.robotoitalic {
font-family: 'Roboto Italic';
}
</style>
</head>
<body>
<h1>Google AMP - Amp Font</h1>
<amp-font
layout = "nodisplay"
font-family = "Font Does Not exist"
timeout = "2000"
on-error-remove-class = "font-missing"
on-error-add-class = "font-error"
on-load-remove-class = "font-missing"
on-load-add-class = "font-loaded">
</amp-font>
<p class="font-missing">
Example of amp-font component to show
how attributes on-error-remove-class,
on-error-add-class, on-load-remove-class
and on-load-add-class works when the
font file to be loaded does not exist.
</p>
<amp-font
layout = "nodisplay"
font-family = "Roboto Italic"
timeout = "2000"
on-error-remove-class = "robotoitalic-
loading"
on-error-add-class = "robotoitalic-missing"
on-load-remove-class = "robotoitalic-loading"
on-load-add-class = "robotoitalic-loaded">
</amp-font>
<p class = "robotoitalic">
Example of amp-font component to show how
attributes on-error-remove-class,
on-error-add-class, on-load-remove-class
and on-load-add-class works when the font
file exists and loads fine.
</p>
</body>
</html>Çıktı
Yukarıda verilen örnek kodun çıktısı aşağıda gösterildiği gibidir -
Yukarıdaki örnek, aşağıdaki gibi yazı tipi nitelikleriyle nasıl çalışılacağını gösterir font-family,timeout,on-error-remove-class,on-error-add-class,on-load-remove-class,on-load-add-classSınıflar, yazı tipi yüklemede hata veya başarı olup olmadığına karar verir.
Amp-list, bir CORS json uç noktasını çağıran ve verileri bir şablon içinde bir json dosyası biçiminde görüntüleyen bir amp bileşenidir. Bunu çalışma örnekleri yardımıyla anlayalım.
Amp-list ile çalışmak için aşağıdaki komut dosyasını eklememiz gerekir -
<script async custom-element = "amp-list"
src = "https://cdn.ampproject.org/v0/amp-list-0.1.js">
</script>Bu, amp-list etiketinin biçimidir -
<amp-list width = "auto" height = "100"
layout = "fixed-height" src = "amplist.json" class = "m1">
<template type = "amp-mustache">
<div class = "images_for_display">
<amp-img width = "150"
height = "100"
alt = "{{title}}"
src = "{{url}}">
</amp-img>
</div>
</template>
</amp-list>Amp-list için kullanılan src, listelenecek ayrıntılara sahip bir json dosyasıdır. Json dosyasındaki verileri görüntülemek için normal html etiketlerini veya amp-bileşenlerini amp-list içinde kullanabiliriz. Şablon türü amp-mustache, görüntülenecek verileri veri bağlamak için kullanılır.
Bunu, aşağıda gösterildiği gibi çalışan bir örnek yardımıyla anlayalım -
Misal
<!doctype html>
<html amp lang = "en">
<head>
<meta charset = "utf-8">
<script async src = "https://cdn.ampproject.org/v0.js"></script>
<title>Google AMP - Amp List</title>
<link rel = "canonical" href = "http://example.ampproject.org/article-metadata.html">
<meta name = "viewport" content = "width = device-width,minimum-scale = 1,initial-scale = 1">
<style amp-boilerplate>
body{-webkit-animation:
-amp-start 8s steps(1,end) 0s 1 normal both;-moz-animation:
-amp-start 8s steps(1,end) 0s 1 normal both;-ms-animation:
-amp-start 8s steps(1,end) 0s 1 normal both;animation:
-amp-start 8s steps(1,end) 0s 1 normal both
}
@-webkit-keyframes
-amp-start{from{visibility:hidden}to{visibility:visible}}@-moz-keyframes
-amp-start{from{visibility:hidden}to{visibility:visible}}@-ms-keyframes
-amp-start{from{visibility:hidden}to{visibility:visible}}@-o-keyframes
-amp-start{from{visibility:hidden}to{visibility:visible}}@keyframes
-amp-start{from{visibility:hidden}to{visibility:visible}}
</style>
<noscript>
<style amp-boilerplate>
body{
-webkit-animation:none;-moz-animation:none;
-ms-animation:none;animation:none}
</style>
</noscript>
<script async custom-element = "amp-list"
src = "https://cdn.ampproject.org/v0/amp-list-0.1.js">
</script>
<script async custom-template = "amp-mustache"
src ="https://cdn.ampproject.org/v0/amp-mustache-0.2.js">
</script>
<style amp-custom>
amp-img {
border: 1px solid #ddd;
border-radius: 4px;
padding: 5px;
}
</style>
</head>
<body>
<h3>Google AMP - Amp List</h3>
<amp-list width = "auto" height = "100"
layout = "fixed-height" src = "amplist.json" class = "m1">
<template type = "amp-mustache">
<div class = "images_for_display">
<amp-img width = "150"
height = "100"
alt = "{{title}}"
src = "{{url}}">
</amp-img>
</div>
</template>
</amp-list>
</body>
</html>Çıktı
Yukarıda gösterilen çalışma örneğinin çıktısı aşağıda gösterildiği gibidir -
Yukarıda verilen çalışma örneğinde kullanılan json dosyası burada gösterilmektedir -
{
"items": [
{
"title": "Christmas Image 1",
"url": "images/christmas1.jpg"
},
{
"title": "Christmas Image 2",
"url": "images/christmas2.jpg"
},
{
"title": "Christmas Image 3",
"url": "images/christmas3.jpg"
},
{
"title": "Christmas Image 4",
"url": "images/christmas4.jpg"
}
]
}Listeyi, aşağıda verilen kodda gösterildiği gibi amp-list üzerindeki etkinliği kullanarak yenileyebiliriz -
Misal
<!doctype html>
<html amp lang = "en">
<head>
<meta charset = "utf-8">
<script async src = "https://cdn.ampproject.org/v0.js"></script>
<title>Google AMP - Amp List</title>
<link rel = "canonical" href = "http://example.ampproject.org/article-metadata.html">
<meta name = "viewport" content = "width = device-width,minimum-scale = 1,initial-scale = 1">
<style amp-boilerplate>
body{
-webkit-animation:
-amp-start 8s steps(1,end) 0s 1 normal both;-moz-animation:
-amp-start 8s steps(1,end) 0s 1 normal both;-ms-animation:
-amp-start 8s steps(1,end) 0s 1 normal both;animation:
-amp-start 8s steps(1,end) 0s 1 normal both
}
@-webkit-keyframes
-amp-start{from{visibility:hidden}to{visibility:visible}}@-moz-keyframes
-amp-start{from{visibility:hidden}to{visibility:visible}}@-ms-keyframes
-amp-start{from{visibility:hidden}to{visibility:visible}}@-o-keyframes
-amp-start{from{visibility:hidden}to{visibility:visible}}@keyframes
-amp-start{from{visibility:hidden}to{visibility:visible}}
</style>
<noscript>
<style amp-boilerplate>
body{
-webkit-animation:none;
-moz-animation:none;
-ms-animation:none;
animation:none}
</style>
</noscript>
<script async custom-element = "amp-list"
src = "https://cdn.ampproject.org/v0/amp-list-0.1.js">
</script>
<script async custom-template = "amp-mustache"
src = "https://cdn.ampproject.org/v0/amp-mustache-0.2.js">
</script>
<style amp-custom>
amp-img {
border: 1px solid #ddd;
border-radius: 4px;
padding: 5px;
}
button{
background-color: #ACAD5C;
color: white;
padding: 12px 20px;
border: none;
border-radius: 4px;
cursor: pointer;
float: right;
}
</style>
</head>
<body>
<h3>Google AMP - Amp List</h3>
<button on = "tap:amplist.refresh">Refresh Images</button>
<amp-list id = "amplist" width = "auto" height = "100"
layout = "fixed-height" src = "amplist.json" class = "m1">
<template type = "amp-mustache">
<div class = "images_for_display">
<amp-img width = "150"
height = "100"
alt = "{{title}}"
src = "{{url}}"></amp-img>
</div>
</template>
</amp-list>
</body>
</html>Çıktı
Yukarıda verilen çalışma örneğinin çıktısı burada gösterildiği gibidir -
Aşağıda gösterildiği gibi, tıklandığında on olayını kullanarak yenileme işlemini çağıran bir düğme eklenmiştir -
<button on = "tap:amplist.refresh">
Refresh Images
</button>
//amplist is the id used for amp-listDüğmeye tıklandığında json dosyası yeniden çağrılır ve içerik yüklenir. Zaten yüklenmiş görüntüler varsa, bunlar önbelleğe alınacaktır.
Google amp-user-notification, kullanıcıya kapatılamaz iletişim kutusu mesajlarını göstermek için kullanılır. Kullanıcıyı sayfadaki çerezler hakkında bilgilendirmek için kullanabiliriz.
Amp-user-notification ile çalışmak için sayfaya aşağıdaki komut dosyasını eklememiz gerekir -
<script async custom-element = "amp-user-notification"
src = "https://cdn.ampproject.org/v0/amp-user-notification-0.1.js">
</script>Amp-kullanıcı-bildirim etiketi biçimi -
<amp-user-notification id = "my-notification" layout = "nodisplay">
<div>Example of amp-user-notification.
<button on = "tap:my-notification.dismiss">I accept
</button>
</div>
</amp-user-notification>Çalışan bir örnek kullanarak amp-user-bildirimini anlayalım -
Misal
<!doctype html>
<html amp lang = "en">
<head>
<meta charset = "utf-8">
<script async src = "https://cdn.ampproject.org/v0.js"></script>
<title>Google AMP - Amp Selector</title>
<link rel = "canonical" href = " http://example.ampproject.org/article-metadata.html">
<meta name = "viewport" content = "width = device-width,minimum-scale = 1,initial-scale = 1">
<style amp-boilerplate>
body{
-webkit-animation:
-amp-start 8s steps(1,end) 0s 1 normal both;-moz-animation:
-amp-start 8s steps(1,end) 0s 1 normal both;-ms-animation:
-amp-start 8s steps(1,end) 0s 1 normal both;animation:
-amp-start 8s steps(1,end) 0s 1 normal both
}
@-webkit-keyframes
-amp-start{from{visibility:hidden}to{visibility:visible}}@-moz-keyframes
-amp-start{from{visibility:hidden}to{visibility:visible}}@-ms-keyframes
-amp-start{from{visibility:hidden}to{visibility:visible}}@-o-keyframes
-amp-start{from{visibility:hidden}to{visibility:visible}}@keyframes
-amp-start{from{visibility:hidden}to{visibility:visible}}
</style>
<noscript>
<style amp-boilerplate>
body{
-webkit-animation:none;
-moz-animation:none;
-ms-animation:none
animation:none
}
</style>
</noscript>
<script async custom-element = "amp-user-notification"
src = "https://cdn.ampproject.org/v0/amp-user-notification-0.1.js">
</script>
<style amp-custom>
div {
font-size: 15px;
background-color : #ccc;
padding: 10px 10px;
border-radius: 2px;
}
button{
background-color: #ACAD5C;
color: white;
cursor: pointer;
float: right;
}
</style>
</head>
<body>
<h3>Google AMP - Amp User Notification</h3>
<amp-user-notification
id = "my-notification"
layout = "nodisplay">
<div>Example of amp-user-notification.
<button on = "tap:my-notification.dismiss">I accept
</button>
</div>
</amp-user-notification>
</body>
</html>Çıktı
Yukarıda verilen çalışma örneği kodunun çıktısı aşağıda gösterildiği gibidir -
Kullanıcı düğmeyi tıkladığında bildirim reddedilir. Kapatıldıktan sonra, sayfayı yeniden yükleseniz bile bildirim görüntülenmeyecektir.
Kullanıcı bildiriminin verileri localStorage tarayıcısında saklanır. Yerel depolama temizlenir ve sayfa yenilenirse, bildirimi tekrar görebileceksiniz. Aynı şeyi kullanarak deneyebilirsinizlocalStorage.clear() tarayıcı konsolunda.
Kullanma dismiss aşağıdaki gibi bir düğme üzerindeki eylem kullanılarak bildirim reddedilebilir eylem
<button on = "tap:my-notification.dismiss">
I accept
</button>Kullanıcı düğmeye dokunduğunda bildirim reddedilecektir.
Amp next page, kullanıcı belgenin sonuna ulaştığında dinamik olarak daha fazla sayfa yükleyebilen bir amp bileşenidir. Bu bölüm, bu kavramı ayrıntılı olarak ele almaktadır.
Amp-next-page bileşeniyle çalışmak için aşağıdaki komut dosyasını eklememiz gerekir -
<script async custom-element = "amp-next-page"
src = "https://cdn.ampproject.org/v0/amp-next-page-0.1.js">
</script>Ayrıca amp-next-page tam olarak başlatılmadığından test sayfasının çalışmasını sağlamak için aşağıdaki meta etiketi ekleyin -
<meta name = "amp-experiments-opt-in" content = "amp-next-page">Sayfaları dinamik olarak yüklemek için, sayfa url'lerini aşağıda gösterildiği gibi type = ”application / json” komut dosyası etiketine vermemiz gerekir -
<amp-next-page>
<script type = "application/json">
{
"pages": [
{
"title": "Page 2",
"image": "images/christmas1.jpg",
"ampUrl": "ampnextpage1.html"
},
{
"title": "Page 3",
"image": "images/christmas1.jpg",
"ampUrl": "ampnextpage2.html"
}
]
}
</script>
</amp-next-page>Yukarıdaki etikette 2 sayfa yüklemeye çalışıyoruz ampnextpage1.html ve ampnextpage2.html.
Şimdi son çıktıyı görelim. Yüklenmesi gereken tüm sayfalar, başlık, resim ve ampUrl ile sayfalar dizisine eklenmelidir.
Misal
<!doctype html>
<html amp>
<head>
<meta charset = "utf-8">
<title>Google Amp - Next Page</title>
<link rel = "canonical" href = "ampnextpage.html">
<meta name = "amp-experiments-opt-in" content = "amp-next-page">
<meta name = "viewport" content ="width = device-width,
minimum-scale = 1,initial-scale = 1">
<style amp-boilerplate>
body {
-webkit-animation:
-amp-start 8s steps(1,end) 0s 1 normal both;-moz-animation:
-amp-start 8s steps(1,end) 0s 1 normal both;-ms-animation:
-amp-start 8s steps(1,end) 0s 1 normal both;animation:
-amp-start 8s steps(1,end) 0s 1 normal both
}
@-webkit-keyframes
-amp-start{from{visibility:hidden}to{visibility:visible}}@-moz-keyframes
-amp-start{from{visibility:hidden}to{visibility:visible}}@-ms-keyframes
-amp-start{from{visibility:hidden}to{visibility:visible}}@-o-keyframes
-amp-start{from{visibility:hidden}to{visibility:visible}}@keyframes
-amp-start{from{visibility:hidden}to{visibility:visible}}
</style>
<noscript>
<style amp-boilerplate>
body{
-webkit-animation:none;
-moz-animation:none;
-ms-animation:none;
animation:none
}
</style>
</noscript>
<script async src="https://cdn.ampproject.org/v0.js">
</script>
<script async custom-element = "amp-next-page"
src = "https://cdn.ampproject.org/v0/amp-next-page-0.1.js">
</script>
</head>
<body>
<h1>Google Amp - Next Page</h1>
<h1>Page 1</h1>
<p>Start of page 1</p>
<p>This content is loaded from page 1</p>
<p>This content is loaded from page 1</p>
<p>This content is loaded from page 1</p>
<p>This content is loaded from page 1</p>
<p>This content is loaded from page 1</p>
<p>This content is loaded from page 1</p>
<p>This content is loaded from page 1</p>
<p>This content is loaded from page 1</p>
<p>This content is loaded from page 1</p>
<p>This content is loaded from page 1</p>
<p>This content is loaded from page 1</p>
<p>This content is loaded from page 1</p>
<p>This content is loaded from page 1</p>
<p>This content is loaded from page 1</p>
<p>This content is loaded from page 1</p>
<p>This content is loaded from page 1</p>
<p>This content is loaded from page 1</p>
<p>This content is loaded from page 1</p>
<p>This content is loaded from page 1</p>
<p>This content is loaded from page 1</p>
<p>This content is loaded from page 1</p>
<p>This content is loaded from page 1</p>
<p>End of page 1</p>
<amp-next-page>
<script type = "application/json">
{
"pages": [
{
"title": "Page 2",
"image": "images/christmas1.jpg",
"ampUrl": "ampnextpage1.html"
},
{
"title": "Page 3",
"image": "images/christmas1.jpg",
"ampUrl": "ampnextpage2.html"
}
]
}
</script>
</amp-next-page>
</body>
</html>Çıktı


Kaydırırken, yüklenecek bir sonraki sayfanın görüntülendiğini, ayrıca adres çubuğundaki sayfa url'sinin de değiştiğini fark edebilirsiniz.
Bu bölümde, amp-components tarafından kullanılan tüm genel özellikler tartışılacaktır.
Ortak özniteliklerin listesi aşağıdaki gibidir -
- fallback
- heights
- layout
- media
- noloading
- on
- placeholder
- sizes
- genişlik ve yükseklik
geri dönüş özelliği
Fallback özniteliği çoğunlukla, tarayıcı kullanılan öğeyi desteklemediğinde veya dosya yüklemeyle ilgili sorunlar yaşadığında veya kullanılan dosyada hatalar olduğunda kullanılır.
Örneğin, amp-video kullanıyorsunuz ve medya dosyası tarayıcıda sorunlar yaşıyor, bu nedenle bu gibi durumlarda, yedek özniteliğini belirleyebilir ve medya dosyasının oynatılamayacağını veya tarayıcı tarafından desteklenmediğini belirten bir mesaj görüntüleyebiliriz. sayfadaki hata mesajı.
Amp-videoda kullanılan yedek
<amp-video controls
width = "640"
height = "360"
layout = "responsive"
poster = "images/videoposter.png">
<source src = "video/bunny.webm" type = "video/webm" />
<source src = "video/samplevideo.mp4" type = "video/mp4" />
<div fallback>
<p>This browser does not support the video element.</p>
</div>
</amp-video>Bir örnek kullanarak işletim sistemi geri dönüşünü anlayalım -
Misal
<!doctype html>
<html amp lang = "en">
<head>
<meta charset = "utf-8">
<script async src = "https://cdn.ampproject.org/v0.js"></script>
<title>Google AMP - Amp Video</title>
<link rel = "canonical" href = " http://example.ampproject.org/article-metadata.html">
<meta name = "viewport" content = "width = device-width,minimum-scale = 1,initial-scale = 1">
<style amp-boilerplate>
body{
-webkit-animation:
-amp-start 8s steps(1,end) 0s 1 normal both;-moz-animation:
-amp-start 8s steps(1,end) 0s 1 normal both;-ms-animation:
-amp-start 8s steps(1,end) 0s 1 normal both;animation:
-amp-start 8s steps(1,end) 0s 1 normal both
}
@-webkit-keyframes
-amp-start{from{visibility:hidden}to{visibility:visible}}@-moz-keyframes
-amp-start{from{visibility:hidden}to{visibility:visible}}@-ms-keyframes
-amp-start{from{visibility:hidden}to{visibility:visible}}@-o-keyframes
-amp-start{from{visibility:hidden}to{visibility:visible}}@keyframes
-amp-start{from{visibility:hidden}to{visibility:visible}}
</style>
<noscript>
<style amp-boilerplate>
body{
-webkit-animation:none;-moz-animation:none;
-ms-animation:none;animation:none
}
</style>
</noscript>
<script async custom-element = "amp-video"
src = "https://cdn.ampproject.org/v0/amp-video-0.1.js">
</script>
</head>
<body>
<h3>Google AMP - Amp Video</h3>
<amp-video controls
width = "640"
height = "360"
layout = "responsive"
poster = "images/videoposter.png">
<source src = "video/bunny.webm"type="video/webm" />
<source src = "video/samplevideo.mp4"type = "video/mp4" />
<div fallback>
<p>This browser does not support the video element.</p>
</div>
</amp-video>
</body>
</html>Çıktı

Yükseklik Özelliği
Bu özellik, temelde duyarlı bir düzen için desteklenir. Yükseklik özniteliği için bir medya ifadesi kullanabilirsiniz ve bu, öğenin yüksekliğine uygulanır. Yüzde değerlerini de alır, böylece yükseklik, verilen yüzde genişliğine göre hesaplanır.
Misal
<!doctype html>
<html amp lang = "en">
<head>
<meta charset = "utf-8">
<script async src = "https://cdn.ampproject.org/v0.js"></script>
<title>Google AMP - heights attribute</title>
<link rel = "canonical" href = "http://example.ampproject.org/article-metadata.html">
<meta name = "viewport" content = "width=device-width,minimum-scale = 1,initial-scale = 1">
<style amp-boilerplate>
body{
-webkit-animation:
-amp-start 8s steps(1,end) 0s 1 normal both;-moz-animation:
-amp-start 8s steps(1,end) 0s 1 normal both;-ms-animation:
-amp-start 8s steps(1,end) 0s 1 normal both;animation:
-amp-start 8s steps(1,end) 0s 1 normal both
}
@-webkit-keyframes
-amp-start{from{visibility:hidden}to{visibility:visible}}@-moz-keyframes
-amp-start{from{visibility:hidden}to{visibility:visible}}@-ms-keyframes
-amp-start{from{visibility:hidden}to{visibility:visible}}@-o-keyframes
-amp-start{from{visibility:hidden}to{visibility:visible}}@keyframes
-amp-start{from{visibility:hidden}to{visibility:visible}}
</style>
<noscript>
<style amp-boilerplate>
body{
-webkit-animation:none;-moz-animation:none;
-ms-animation:none;animation:none
}
</style>
</noscript>
<style amp-custom>
amp-img {
border: 1px solid black;
border-radius: 4px;
padding: 5px;
}
h1{font-family: "Segoe UI",Arial,sans-serif;font-weight: 400;margin: 10px 0;}
</style>
</head>
<body>
<h1>Google AMP - heights attribute</h1>
<amp-img src = "images/christmas1.jpg"
width = "320" height = "256"
heights = "(min-width:500px) 200px, 80%">
</amp-img>
</body>
</html>Çıktı

düzen özelliği
AMP-Layout, google-amp'de bulunan önemli özelliklerden biridir. Amp Layout, sayfa yüklendiğinde herhangi bir titreme veya kaydırma sorununa neden olmadan amp bileşenlerinin düzgün şekilde oluşturulmasını sağlar. Ayrıca, görüntülere yönelik http isteği, veri çağrıları yapılmadan önce sayfa oluşturmayı kontrol eder.
Amp tarafından desteklenen düzen listesi aşağıdaki gibidir -
- Mevcut değil
- Container
- fill
- fixed
- fixed-height
- flex-item
- intrinsic
- nodisplay
- Responsive
Aynı bölümde detaylı olarak öğreneceksiniz. Google AMP − Layout bu öğreticinin.
Gösterildiği gibi bir örnek yardımıyla layout = "responsive" çalışmasını anlayalım -
Misal
<!doctype html>
<html amp lang = "en">
<head>
<meta charset = "utf-8">
<script async src = "https://cdn.ampproject.org/v0.js"></script>
<title>Google AMP - Image>/title>
<link rel = "canonical" href = " http://example.ampproject.org/article-metadata.html">
<meta name = "viewport" content = "width = device-width,minimum-scale = 1,initial-scale = 1">
<style amp-boilerplate>
body {
-webkit-animation:
-amp-start 8s steps(1,end) 0s 1 normal both;-moz-animation:
-amp-start 8s steps(1,end) 0s 1 normal both;-ms-animation:
-amp-start 8s steps(1,end) 0s 1 normal both;animation:
-amp-start 8s steps(1,end) 0s 1 normal both
}
@-webkit-keyframes
-amp-start{from{visibility:hidden}to{visibility:visible}}@-moz-keyframes
-amp-start{from{visibility:hidden}to{visibility:visible}}@-ms-keyframes
-amp-start{from{visibility:hidden}to{visibility:visible}}@-o-keyframes
-amp-start{from{visibility:hidden}to{visibility:visible}}@keyframes
-amp-start{from{visibility:hidden}to{visibility:visible}}
</style>
<noscript>
<style amp-boilerplate>
body {
-webkit-animation:none;-moz-animation:none;
-ms-animation:none;animation:none
}
</style>
</noscript>
<style amp-custom>
amp-img {
border: 1px solid black;
border-radius: 4px;
padding: 5px;
}
displayitem {
display: inline-block;
width: 200px;
height:200px;
margin: 5px;
}
h1{font-family: "Segoe
UI",Arial,sans-serif;font-weight: 400;margin: 10px 0;}
</style>
</head>
<body>
<h1>Google AMP - Layout = responsive Image Example>/h1>
<div class = "displayitem">
<amp-img alt = "Beautiful Flower"
src = "images/flower.jpg"
width = "246"
height = "205"
layout = "responsive">
</amp-img>
</div>
</body>
</html>Çıktı
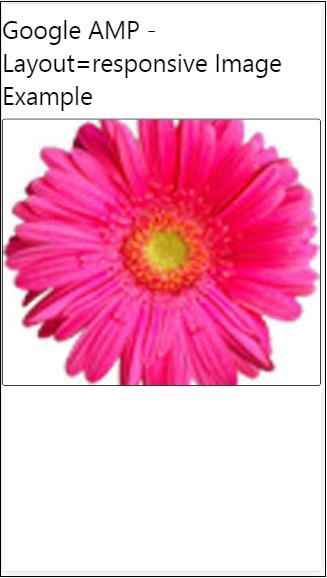
Medya Özniteliği
Bu özellik, amp bileşenlerinin çoğunda kullanılabilir. Bir medya sorgusu alır ve değer eşleşmezse bileşen işlenmez.
Bir örnek yardımıyla medya özniteliğinin işleyişini anlayalım -
Misal
<!doctype html>
<html amp lang = "en">
<head>
<meta charset = "utf-8">
<script async src = "https://cdn.ampproject.org/v0.js"></script>
<title>Google AMP - Image</title>
<link rel = "canonical" href = " http://example.ampproject.org/article-metadata.html">
<meta name = "viewport" content = "width = device-width,minimum-scale = 1,initial-scale = 1">
<style amp-boilerplate>
body{
-webkit-animation:
-amp-start 8s steps(1,end) 0s 1 normal both;-moz-animation:
-amp-start 8s steps(1,end) 0s 1 normal both;-ms-animation:
-amp-start 8s steps(1,end) 0s 1 normal both;animation:
-amp-start 8s steps(1,end) 0s 1 normal both
}
@-webkit-keyframes
-amp-start{from{visibility:hidden}to{visibility:visible}}@-moz-keyframes
-amp-start{from{visibility:hidden}to{visibility:visible}}@-ms-keyframes
-amp-start{from{visibility:hidden}to{visibility:visible}}@-o-keyframes
-amp-start{from{visibility:hidden}to{visibility:visible}}@keyframes
-amp-start{from{visibility:hidden}to{visibility:visible}}
</style>
<noscript>
<style amp-boilerplate>
body {
-webkit-animation:none;-moz-animation:none;
-ms-animation:none;animation:none
}
</style>
</noscript>
<style amp-custom>
amp-img {
border: 1px solid black;
border-radius: 4px;
padding: 5px;
}
h1{font-family: "Segoe
UI",Arial,sans-serif;font-weight: 400;margin: 10px 0;}
</style>
</head>
<body>
<h1>Google AMP - Media Attribute</h1>
<div class = "displayitem">
<amp-img
media = "(min-width: 600px)"
src = "images/christmas1.jpg"
width = "466"
height = "355"
layout = "responsive">
</amp-img>
</div>
</body>
</html>Aşağıda gösterildiği gibi <amp-img> etiketinde media niteliği kullandık -
<amp-img
media = "(min-width: 600px)"
src = "images/christmas1.jpg"
width = "466"
height = "355"
layout = "responsive">
</amp-img>Ekran genişliği 600 pikselden azsa görüntünün görüntülenmeyeceğini unutmayın. Örneği test etmek için Google emülatörü mobil modunu kullanacağız.
Akıllı Telefonda Çıktı
Cihazın genişliği 600 pikselden az olduğu için resmin görünmediğini cihazda kontrol ettik. Bir tableti kontrol edersek, çıktıyı aşağıda gösterildiği gibi alırız -
IPAD üzerinde çıktı

Noloading Attribute
<amp-img>, <amp-video>, <amp-facebook> gibi Amp bileşenleri, gerçek içerik yüklenmeden ve kullanıcıya gösterilmeden önce bir yükleme göstergesi gösterir.
Yükleme göstergesini göstermeyi durdurmak için, noloading özelliğini aşağıdaki gibi kullanabiliriz -
<amp-img src = "images/christmas1.jpg"
noloading
height = "300"
width = "250"
layout = "responsive">
</amp-img>Öznitelik Üzerine
On özelliği, olay işlemeye yönelik öğelerde ve amp-bileşenlerindeki eylemlerde kullanılır. Öznitelikte kullanılacak sözdizimi aşağıdaki gibidir -
Sözdizimi -
on = "eventName:elementId[.methodName[(arg1 = value, arg2 = value)]]"Detaylar geçti on nitelik aşağıdaki gibidir -
eventName- Bu, amp-bileşeni için mevcut olan etkinliğin adını alır. Örneğin, formlar için submit-success, submit-error eventNames kullanabiliriz.
elementId- Bu, olayın çağrılması gereken öğenin kimliğini alır. Başarı veya hata hakkında bilmek istediğimiz formun kimliği olabilir.
methodName - Bu, olay oluşumunda çağrılacak yöntemin adını alır.
arg=value - Bu, yönteme iletilen anahtar = değer biçimine sahip bağımsız değişkenleri alır.
Birden çok olayı Açık özniteliğine aşağıdaki gibi geçirmek de mümkündür -
on = "submit-success:lightbox;submit-error:lightbox1"Note - Birden fazla olay varsa, bunlar on niteliğine aktarılır ve noktalı virgül (;) kullanılarak ayrılır.
Eylemler Özniteliği
Eylemler temelde on niteliğiyle kullanılır ve sözdizimi aşağıdaki gibidir -
on = "tab:elementid.hide;"Birden çok işlemi aşağıdaki gibi gerçekleştirebiliriz -
on = "tab:elementid.open;tab:elementid.hide;”Elementid eylemin gerçekleştirileceği öğenin kimliğidir.
Amp, herhangi bir amp bileşeninde kullanılabilen bazı küresel olarak tanımlanmış olay ve eylemlere sahiptir ve bunlar tap events ve eylemler hide, show ve togglevisibility.
Note - Herhangi bir html veya amp bileşeninde gizlemek / göstermek veya togglevisibility kullanmak istiyorsanız, on=”tap:elementid.[hide/show/togglevisibility]”
Yer Tutucu Özelliği
Yer tutucu özelliği, bir giriş öğesi gibi herhangi bir html öğesinde kullanılabilir ve ayrıca bir amp bileşeninde de kullanılabilir. Yer tutucu, sayfada gösterilecek ilk şeydir ve içerik yüklendikten sonra yer tutucu kaldırılır ve görünmez yaptı.
Giriş öğesinde yer tutucu
<input type = "text" id = "date" name = "date" placeholder = "Start Date">Amp-component üzerindeki yer tutucu
<amp-anim src = "images/loreal.gif" width = "300" height = "250" layout = "responsive">
<amp-img placeholder src = "images/flower.jpg"
layout = "fill">
</amp-img>
</amp-anim>Boyutlar Özelliği
Bu, aynı yükseklik özelliği gibi kullanılır. Değer, aşağıda gösterildiği gibi bir ifadedir -
<amp-img src = "amp.png"
width = "400" height = "300"
layout = "responsive"
sizes = "(min-width: 250px) 250px, 100vw">
</amp-img>Genişlik ve Yükseklik Özellikleri
Hemen hemen tüm html öğelerinde ve amp bileşenlerinde kullanılırlar. Genişlik ve yükseklik, bir amp öğesinin sayfada kapladığı alanı belirtmek için kullanılır.
Misal
<amp-img src = "amp.png"
width = "400" height = "300"
layout = "responsive">
</amp-img>Amp, çok dikkatli bir değerlendirmeden sonra ekrandaki sayfaları oluşturur. Yüklenen sayfalar, daha çok http isteklerinden olan resimler, videolar, iframe'ler vb. İçerir. Böylece yapılacak http talebi geciktirilerek sayfadaki içeriğin görüntülenmesi ve ayrıca yüklenecek resimler, videolar, iframe'ler için gerekli alan yaratılır.
Amp, sayfaları duyarlı hale getirmek için yer tutucular, geri dönüşler, srcset ve düzen özniteliği gibi özelliklere sahiptir ve ayrıca sayfadaki içeriğin bozulmamasını sağlar. Bu bölümde tüm bunları detaylı olarak tartışalım.
Amp Tarzı Etiketi
Amp, amp-custom aşağıda gösterildiği gibi üzerinde -
<style amp-custom>
button{
background-color: #ACAD5C;
color: white;
padding: 12px 20px;
border: none;
border-radius: 4px;
cursor: pointer;
float: left;
}
amp-img {
border: 1px solid black;
border-radius: 4px;
padding: 5px;
}
p {
padding: 1rem;
font-size:25px;
}
largeText {
font-size:30px;
background-color:red;
}
</style>Temel olarak sayfa için gerekli olan özel css'i yazmak için kullanılır. Lütfen eklemeyi unutmayınızamp-customnitelik; aksi takdirde aşağıda gösterildiği gibi amp doğrulaması başarısız olur -

Amp, aşağıda gösterildiği gibi html öğeleri için satır içi css'yi de destekler -
<div style = "color:green;margin-left:30px;">
Welcome to TutorialsPoint</p>Harici Stil Sayfası Etiketi
Amp, harici stil sayfasını desteklemez ve amp için doğrulandığında doğrulama için başarısız olur.
Misal
<!doctype html>
<html amp lang = "en">
<head>
<meta charset = "utf-8">
<script async src = "https://cdn.ampproject.org/v0.js"></script>
<title>Google AMP - Dynamic Css Classes</title>
<link rel = "canonical" href = "
http://example.ampproject.org/article-metadata.html">
<meta name = "viewport" content = "width = device-width,minimum-scale = 1,initial-scale = 1">
<style amp-boilerplate>
body {
-webkit-animation:
-amp-start 8s steps(1,end) 0s 1 normal both;-moz-animation:
-amp-start 8s steps(1,end) 0s 1 normal both;-ms-animation:
-amp-start 8s steps(1,end) 0s 1 normal both;animation:
-amp-start 8s steps(1,end) 0s 1 normal both
}
@-webkit-keyframes
-amp-start{from{visibility:hidden}to{visibility:visible}}@-moz-keyframes
-amp-start{from{visibility:hidden}to{visibility:visible}}@-ms-keyframes
-amp-start{from{visibility:hidden}to{visibility:visible}}@-o-keyframes
-amp-start{from{visibility:hidden}to{visibility:visible}}@keyframes
-amp-start{from{visibility:hidden}to{visibility:visible}}
</style>
<noscript>
<style amp-boilerplate>
body {
-webkit-animation:none;
-moz-animation:none;
-ms-animation:none;
animation:none
}
</style>
</noscript>
<script async custom-element = "amp-bind" src = "
https://cdn.ampproject.org/v0/amp-bind-0.1.js">
</script>
<script async custom-element = "amp-dynamic-css-classes"
src = "https://cdn.ampproject.org/v0/amp-dynamic-css-classes-0.1.js">
</script>
<link rel = "stylesheet"
href = "https://cdnjs.cloudflare.com/ajax/libs/materialize/0.9 8.0/css/materialize.min.css">
<style amp-custom>
p {
padding: 1rem;
font-size:25px;
}
</style>
</head>
<body>
<h3>Google AMP - Dynamic Css Classes</h3>
<div style = "color:green;margin-left:30px;">
Welcome to TutorialsPoint</p>
</body>
</html>AMP doğrulayıcı ile doğrulandığında aşağıdaki hatayı alıyoruz.

Öğeleri sayfadaki duyarlı bir şekilde görüntülemek için amp öğelerinin, öğenin sayfada alacağı genişliği ve yüksekliği belirtmesi gerekir. Layout = "responsive" eklemek, en boy oranını koruyarak sayfadaki öğeyi duyarlı hale getirecektir.
Düzen özelliğinin ayrıntıları, bölümde ayrıntılı olarak tartışılmıştır. Google AMP – Layout.
Amp-dynamic-css-sınıfları, body etiketine dinamik sınıflar ekler. Bu bölümde, bu etiketin ayrıntılarını öğrenelim.
Amp-dynamic-css-sınıflarıyla çalışmak için aşağıdaki komut dosyasını eklememiz gerekir -
<script asynccustom-element="amp-dynamic-css-classes"
src = "https://cdn.ampproject.org/v0/amp-dynamic-css-classes-0.1.js">
</script>Amp-dynamic-css-classes tarafından bakılan iki önemli sınıf vardır -
- amp-referrer-*
- amp-viewer
Her birini ayrıntılı olarak tartışalım.
amp-referrer- *
Bu sınıflar, kullanıcıların nasıl geldiğine bağlı olarak belirlenir. Bu, eğer kullanıcı Google'dan geliyorsa, Google ile ilgili yönlendirme sınıfı belirlenecek demektir. Aynısı Twitter ve Pinterest için de geçerlidir.
Sınıflar, yönlendirenin türüne göre mevcuttur.
Örneğin, Google için, kullanıcı Google arama motorundan amp sayfalarını tıklarsa aşağıdaki sınıflar eklenecektir.
- amp-referrer-www-google-com
- amp-referrer-google-com
- amp-referrer-com
Benzer şekilde Twitter, Pinterest, Linkedin vb. İçin de sınıflar mevcuttur.
amp-viewer
Amp görüntüleyici, ayrıntıları Google önbelleğinden almak için temel olarak amp url'sini değiştirecek. Google aramada bir şey ararsanız, görüntülenen karusel tüm amp sayfalarına sahip olacaktır.
Onları tıkladığınızda, önek olarak Google url'si ile url'ye yönlendirilirler. Amp-viewer sınıfı, sayfa kullanıcı tarafından amp-viewer'da ve dinamik sınıflar kullanılarak görüntülendiğinde ayarlanacaktır.

Amp sayfasını tıkladığınızda, adres çubuğuna girdiğiniz url aşağıdaki gibidir -
https://www.google.co.in/amp/s/m.timesofindia.com/sports/cricket/india-in-australia/to-hell-with-the-nets-boys-need-rest-ravi-shastri/amp_articleshow/67022458.cms
Misal
<!doctype html>
<html amp lang = "en">
<head>
<meta charset = "utf-8">
<script async src = "https://cdn.ampproject.org/v0.js"></script>
<title>Google AMP - Dynamic Css Classes</title>
<link rel = "canonical" href = "http://example.ampproject.org/article-metadata.html">
<meta name = "viewport" content = "width = device-width,minimum-scale = 1,initial-scale = 1">
<style amp-boilerplate>
body{
-webkit-animation:
-amp-start 8s steps(1,end) 0s 1 normal both;-moz-animation:
-amp-start 8s steps(1,end) 0s 1 normal both;-ms-animation:
-amp-start 8s steps(1,end) 0s 1 normal both;animation:
-amp-start 8s steps(1,end) 0s 1 normal both
}
@-webkit-keyframes
-amp-start{from{visibility:hidden}to{visibility:visible}}@-moz-keyframes
-amp-start{from{visibility:hidden}to{visibility:visible}}@-ms-keyframes
-amp-start{from{visibility:hidden}to{visibility:visible}}@-o-keyframes
-amp-start{from{visibility:hidden}to{visibility:visible}}@keyframes
-amp-start{from{visibility:hidden}to{visibility:visible}}
</style>
<noscript>
<style amp-boilerplate>
body {
-webkit-animation:none;-moz-animation:none;
-ms-animation:none;animation:none
}
</style>
</noscript>
<script async custom-element = "amp-bind"
src = "https://cdn.ampproject.org/v0/amp-bind-0.1.js">
</script>
<script async custom-element = "amp-dynamic-css-classes"
src = "https://cdn.ampproject.org/v0/amp-dynamic-css-classes-0.1.js">
</script>
<link rel = "stylesheet" href = "https://cdnjs.cloudflare.com/ajax/libs/materialize/0.98.0/css/materialize.min.css">
<style amp-custom>
body:not(.amp-referrer-pinterest-com) .if-pinterest,
body:not(.amp-referrer-ampbyexample-com) .if-ampbyexample,
body:not(.amp-referrer-google-com) .if-google,
body:not(.amp-referrer-twitter-com) .if-twitter,
body:not(.amp-referrer-linkedin-com) .if-linkedin,
body:not(.amp-referrer-localhost) .if-localhost {
display: none;
}
body:not(.amp-viewer) .if-viewer,
body.amp-viewer .if-not-viewer {
display: none;
}
p {
padding: 1rem;
font-size:25px;
}
</style>
</head>
<body>
<h3>Google AMP - Dynamic Css Classes</h3>
<div>
<p class = "if-pinterest">You were referred here or embedded by Pinterest!</p>
<p class = "if-twitter">You were referred here or embedded by Twitter!</p>
<p class = "if-google">You were referred here or embedded by Google!</p>
<p class = "if-ampbyexample">You came here directly! Cool :)</p>
< class = "if-localhost">You came here directly! Cool :)</p>
</div>
<div>
<p class = "if-not-viewer">Hey! You are not coming from amp viewer</p>
<p class = "if-viewer">Hey! From amp viewer.</p>
<div>
</body>
</html>Çıktı
Bir amp-bileşeninde eylemleri veya etkinlikleri kullanmak için on özelliğini kullanabiliriz. Bu bölümde bunları detaylı olarak tartışalım.
Etkinlikler
Olaylarla çalışmak için sözdizimi aşağıdaki gibidir -
on = "eventName:elementId[.methodName[(arg1 = value, arg2 = value)]]"Detaylar geçti on nitelik aşağıdaki gibidir -
eventName- Bu, amp-bileşeni için mevcut olan etkinliğin adını alır. Örneğin, formlar için submit-success, submit-error eventNames kullanabiliriz.
elementId- Bu, olayın çağrılması gereken öğenin kimliğini alır. Başarı veya hata hakkında bilmek istediğimiz formun kimliği olabilir.
methodName - Bu, olay oluşumunda çağrılacak yöntemin adını alır.
arg=value - Bu, yönteme iletilen anahtar = değer biçimine sahip bağımsız değişkenleri alır.
On özelliğine birden fazla olay geçirmek de mümkündür ve bu şu şekilde yapılır -
on = "submit-success:lightbox;submit-error:lightbox1"Birden fazla olay varsa, bunlar on niteliğine aktarılır ve noktalı virgül (;) kullanılarak ayrılır.
Hareketler
Eylemler temelde on özniteliğiyle kullanılır ve sözdizimi aşağıdaki gibidir -
on = "tab:elementid.hide;"Birden çok işlemi aşağıdaki gibi gerçekleştirebiliriz -
on = "tab:elementid.open;tab:elementid.hide;”Elementid eylemin gerçekleştirileceği öğenin kimliğidir.
Amp, herhangi bir amp bileşeninde kullanılabilen bazı küresel olarak tanımlanmış olay ve eylemlere sahiptir ve bunlar tap event ve eylemler hide, show ve togglevisibility.
Herhangi bir html veya amp bileşeninde gizlemek / göstermek veya togglevisibility kullanmak istiyorsanız, on=”tap:elementid.[hide/show/togglevisibility]”
Olaylar ve eylemler için bazı çalışma örnekleri görelim.
Giriş Öğesinde
Çalışan bir örnek yardımıyla bunu daha iyi anlayalım -
Misal
<!doctype html>
<html amp lang = "en">
<head>
<meta charset = "utf-8">
<script async src = "https://cdn.ampproject.org/v0.js"></script>
<title>Google AMP - Amp Bind</title>
<link rel = "canonical" href = "http://example.ampproject.org/article-metadata.html">
<meta name = "viewport" content = "width = device-width,minimum-scale = 1,initial-scale = 1">
<style amp-boilerplate>
body{
-webkit-animation:
-amp-start 8s steps(1,end) 0s 1 normal both;-moz-animation:
-amp-start 8s steps(1,end) 0s 1 normal both;-ms-animation:
-amp-start 8s steps(1,end) 0s 1 normal both;animation:
-amp-start 8s steps(1,end) 0s 1 normal both
}
@-webkit-keyframes
-amp-start{from{visibility:hidden}to{visibility:visible}}@-moz-keyframes
-amp-start{from{visibility:hidden}to{visibility:visible}}@-ms-keyframes
-amp-start{from{visibility:hidden}to{visibility:visible}}@-o-keyframes
-amp-start{from{visibility:hidden}to{visibility:visible}}@keyframes
-amp-start{from{visibility:hidden}to{visibility:visible}}
</style>
<noscript>
<style amp-boilerplate>
body {
-webkit-animation:none;
-moz-animation:none;
-ms-animation:none;
animation:none
}
</style>
</noscript>
<script async custom-element = "amp-bind" src = "
https://cdn.ampproject.org/v0/amp-bind-0.1.js">
</script>
<script async custom-element = "amp-lightbox" src = "
https://cdn.ampproject.org/v0/amp-lightbox-0.1.js">
</script>
<style amp-custom>
button{
background-color: #ACAD5C;
color: white;
padding: 12px 20px;
border: none;
border-radius: 4px;
cursor: pointer;
float: left;}
.lightbox {
background: rgba(211,211,211,0.8);
width: 100%;
height: 100%;
position: absolute;
display: flex;
align-items: center;
justify-content: center;
}
#txtname{
width: 100%;
padding: 12px 20px;
margin: 8px 0;
display: inline-block;
border: 1px solid #ccc;
border-radius: 4px;
box-sizing: border-box;
}
div {
font-size:25px;
}
</style>
</head>
<body>
<h3>Google AMP - Amp Bind</h3>
<button on = "tap:AMP.setState({displaylightbox: true})">
Click Here
</button>
<br/>
<br/>
<h3>AMP - Input Element</h3>
<input id = "txtname" placeholder = "Type here" on =
"input-throttled:AMP.setState({name: event.value})">
<div [text] = "name"></div>
</body>
</html>Çıktı
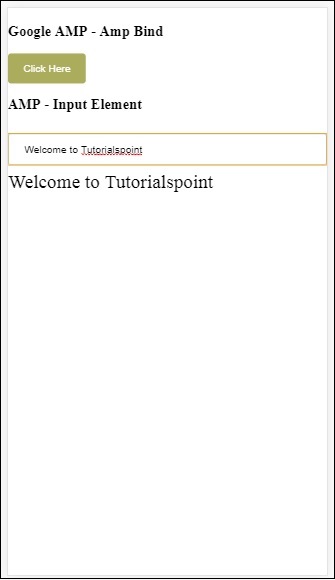
Yukarıdaki örnekte, giriş alanında aşağıdaki gibi olay kullandığımıza dikkat edin -
<input id = "txtname" placeholder = "Type here"
on = "input-throttled:AMP.setState({name: event.value})">Kullanılan olay input-throlled.
Değişikliği şu şekilde de kullanabiliriz -
<input id = "txtname" placeholder = "Type here" on =
"change:AMP.setState({name: event.value})">Kullanıcı giriş kutusundan çıktığında çıktı görüntülenecektir. Değişim olayını girdi türü üzerinde radyo, onay kutusu vb. Ve ayrıca seçili eleman üzerinde kullanabiliriz.
<input id = "txtname" placeholder = "Type here" on =
"input-debounced:AMP.setState({name: event.value})">Etkinlik input-debounced aynı changeolay ancak çıktı kullanıcı yazdıktan sonra 300 ms sonra görülür.
Misal
<!doctype html>
<html amp lang = "en">
<head>
<meta charset = "utf-8">
<script async src = "https://cdn.ampproject.org/v0.js"></script>
<title>Google AMP - Amp Bind</title>
<link rel = "canonical" href = " http://example.ampproject.org/article-metadata.html">
<meta name = "viewport" content = "width = device-width,minimum-scale = 1,initial-scale = 1">
<style amp-boilerplate>
body{
-webkit-animation:
-amp-start 8s steps(1,end) 0s 1 normal both;-moz-animation:
-amp-start 8s steps(1,end) 0s 1 normal both;-ms-animation:
-amp-start 8s steps(1,end) 0s 1 normal both;animation:
-amp-start 8s steps(1,end) 0s 1 normal both
}
@-webkit-keyframes
-amp-start{from{visibility:hidden}to{visibility:visible}}@-moz-keyframes
-amp-start{from{visibility:hidden}to{visibility:visible}}@-ms-keyframes
-amp-start{from{visibility:hidden}to{visibility:visible}}@-o-keyframes
-amp-start{from{visibility:hidden}to{visibility:visible}}@keyframes
-amp-start{from{visibility:hidden}to{visibility:visible}}
</style>
<noscript>
<style amp-boilerplate>
body{
-webkit-animation:none;
-moz-animation:none;
-ms-animation:none;
animation:none}
</style>
</noscript>
<script async custom-element = "amp-bind"
src = "https://cdn.ampproject.org/v0/amp-bind-0.1.js">
</script>
<script async custom-element = "amp-lightbox"
src = "https://cdn.ampproject.org/v0/amp-lightbox-0.1.js">
</script>
<style amp-custom>
button{
background-color: #ACAD5C;
color: white;
padding: 12px 20px;
border: none;
border-radius: 4px;
cursor: pointer;
float: left;
}
.lightbox {
background: rgba(211,211,211,0.8);
width: 100%;
height: 100%;
position: absolute;
display: flex;
align-items: center;
justify-content: center;
}
#txtname{
width: 100%;
padding: 12px 20px;
margin: 8px 0;
display: inline-block;
border: 1px solid #ccc;
border-radius: 4px;
box-sizing: border-box;
}
div {
font-size:25px;
}
</style>
</head>
<body>
<h3>Google AMP - Amp Bind</h3>
<button on = "tap:AMP.setState({displaylightbox: true})">
Click Here
</button>
<br/>
<br/>
<h3>AMP - Input Element</h3>
<input id = "txtname" placeholder = "Type here" on =
"input-debounced:AMP.setState({name: event.value})">
<div [text] = "name"></div>
</body>
</html>Çıktı
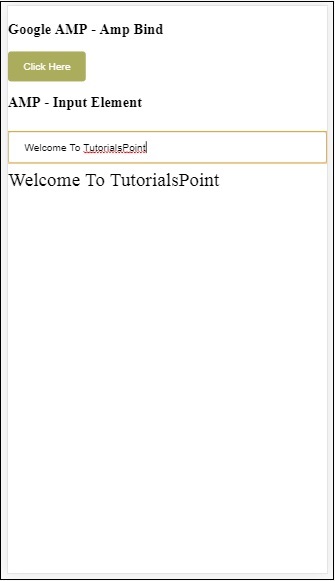
Amp Işık Kutusunda
Bu bölümde, aşağıdaki olayları lightbox üzerinde test edeceğiz -
- lightboxOpen
- lightboxClose
Misal
<!doctype html>
<html amp lang = "en">
<head>
<meta charset = "utf-8">
<script async src = "https://cdn.ampproject.org/v0.js"></script>
<title>Google AMP - Amp Lightbox</title>
<link rel = "canonical" href = " http://example.ampproject.org/article-metadata.html">
<meta name = "viewport" content = "width = device-width,minimum-scale = 1,initial-scale = 1">
<style amp-boilerplate>
body{
-webkit-animation:
-amp-start 8s steps(1,end) 0s 1 normal both;-moz-animation:
-amp-start 8s steps(1,end) 0s 1 normal both;-ms-animation:
-amp-start 8s steps(1,end) 0s 1 normal both;animation:
-amp-start 8s steps(1,end) 0s 1 normal both
}
@-webkit-keyframes
-amp-start{from{visibility:hidden}to{visibility:visible}}@-moz-keyframes
-amp-start{from{visibility:hidden}to{visibility:visible}}@-ms-keyframes
-amp-start{from{visibility:hidden}to{visibility:visible}}@-o-keyframes
-amp-start{from{visibility:hidden}to{visibility:visible}}@keyframes
-amp-start{from{visibility:hidden}to{visibility:visible}}
</style>
<noscript>
<style amp-boilerplate>
body{
-webkit-animation:none;
-moz-animation:none;
-ms-animation:none;
animation:none}
</style>
</noscript>
<script async custom-element = "amp-bind"
src = "https://cdn.ampproject.org/v0/amp-bind-0.1.js">
</script>
<script async custom-element = "amp-lightbox"
src = "https://cdn.ampproject.org/v0/amp-lightbox-0.1.js">
</script>
<style amp-custom>
amp-img {
border: 1px solid #ddd;
border-radius: 4px;
padding: 5px;
}
button {
background-color: #ACAD5C;
color: white;
padding: 12px 20px;
border: none;
border-radius: 4px;
cursor: pointer;
float: left;
}
.lightbox {
background: rgba(211,211,211,0.8);
width: 100%;
height: 100%;
position: absolute;
display: flex;
align-items: center;
justify-content: center;
}
p{font-size:30px;}
</style>
</head>
<body>
<h3>Google AMP - Amp Lightbox</h3>
<p [text] = "'Lightbox is ' + lightboxstatus + '.'">
Lightbox Event Testing
</p>
<button on = "tap:my-lightbox.open">
Show LightBox
</button>
<amp-lightbox id = "my-lightbox" layout = "nodisplay"
close-button on = "lightboxOpen:AMP.setState({lightboxstatus:'opened'});
lightboxClose:AMP.setState({lightboxstatus:'closed'});">
<div class = "lightbox">
<amp-img alt = "Beautiful Flower" src = "images/loreal.gif"
width = "246"
height = "205">
</amp-img>
</div>
</amp-lightbox>
</body>
</html>Çıktı
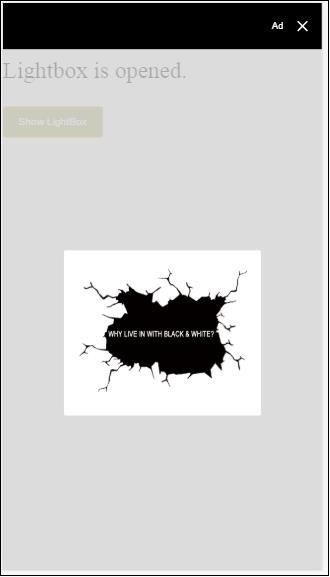
Aşağıdaki kod, ışık kutusunda açılış ve kapanış olaylarının nasıl uygulandığını gösterir -
<p [text]="'Lightbox is ' + lightboxstatus + '.'">Lightbox Event Testing</p>
<button on = "tap:my-lightbox.open">Show LightBox</button>
<amp-lightbox id = "my-lightbox" layout = "nodisplay"
close-button on = "lightboxOpen:AMP.setState({lightboxstatus:'opened'});
lightboxClose:AMP.setState({lightboxstatus:'closed'});">
<div class = "lightbox">
<amp-img alt = "Beautiful Flower" src = "images/loreal.gif"
width = "246"
height = "205">
</amp-img>
</div>
</amp-lightbox>Amp -Selector'daki etkinlik
Amp-selector'da mevcut olay select.
Misal
<!doctype html>
<html amp lang = "en">
<head>
<meta charset = "utf-8">
<script async src = "https://cdn.ampproject.org/v0.js"></script>
<title>Google AMP - Amp Selector</title>
<link rel = "canonical" href = "http://example.ampproject.org/article-metadata.html">
<meta name = "viewport" content = "width = device-width,minimum-scale = 1,initial-scale = 1">
<style amp-boilerplate>
body{
-webkit-animation:
-amp-start 8s steps(1,end) 0s 1 normal both;-moz-animation:
-amp-start 8s steps(1,end) 0s 1 normal both;-ms-animation:
-amp-start 8s steps(1,end) 0s 1 normal both;animation:
-amp-start 8s steps(1,end) 0s 1 normal both
}
@-webkit-keyframes
-amp-start{from{visibility:hidden}to{visibility:visible}}@-moz-keyframes
-amp-start{from{visibility:hidden}to{visibility:visible}}@-ms-keyframes
-amp-start{from{visibility:hidden}to{visibility:visible}}@-o-keyframes
-amp-start{from{visibility:hidden}to{visibility:visible}}@keyframes
-amp-start{from{visibility:hidden}to{visibility:visible}}
</style>
<noscript>
<style amp-boilerplate>
body {
-webkit-animation:none;
-moz-animation:none;
-ms-animation:none;
animation:none
}
</style>
</noscript>
<script async custom-element = "amp-bind"
src = "https://cdn.ampproject.org/v0/amp-bind-0.1.js">
</script>
<script async custom-element = "amp-selector"
src = "https://cdn.ampproject.org/v0/amp-selector-0.1.js">
</script>
<style amp-custom>
.radio-menu {
list-style: none;
}
.radio-menu [option][selected] {
outline: none;
}
.radio-menu [option] {
display: flex;
align-items: center;
}
.radio-menu [option]:before {
transition: background 0.25s ease-in-out;
content: "";
display: inline-block;
width: 24px;
height: 24px;
margin: 8px;
border-radius: 100%;
border: solid 1px black;
}
.radio-menu [option = red][selected]:before {
text-align: center;
content: "✓";
color: white;
background: red;
}
.radio-menu [option = green][selected]:before {
text-align: center;
content: "✓";
color: white;
background: green;
}
.radio-menu [option = blue][selected]:before {
text-align: center;
content: "✓";
color: white;
background: blue;
}
p{font-size:30px;}
</style>
</head>
<body>
<h3>Google AMP - Amp Selector</h3>
<p [text] = "'Color selected is ' + ampselectorstatus + '.'">
Amp Selector Event Testing
<p>
<amp-selector
class = "radio-menu"
layout = "container"
name = "my-selector"
on = "select:AMP.setState({ampselectorstatus:event.selectedOptions})">
<div option = "red">
Red
</div>
<div option = "green">
Green
</div>
<div option = "blue">
Blue
</div>
</amp-selector>
</body>
</html>Çıktı
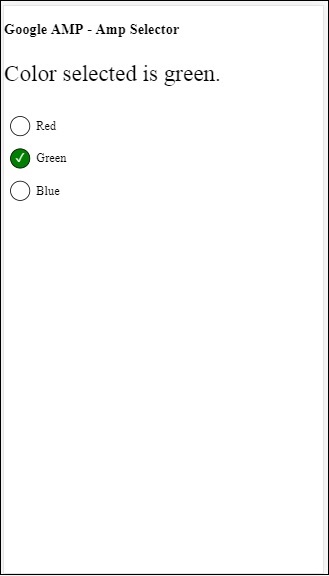
Olay seçimi şu şekilde kullanılır -
<p [text]="'Color selected is ' + ampselectorstatus + '.'">
Amp Selector Event Testing
</p>
<amp-selector
class = "radio-menu"
layout ="container"
name =" my-selector"
on = "select:AMP.setState({ampselectorstatus:event.selectedOptions})">
<div option = "red">
Red
</div>
<div option = "green">
Green
</div>
<div option = "blue">
Blue
</div>
</amp-selector>Amp-Sidebar'daki Etkinlik
Mevcut etkinlikler sidebarOpen ve sidebarClose.
Misal
<!doctype html>
<html amp lang = "en">
<head>
<meta charset = "utf-8">
<script async src = "https://cdn.ampproject.org/v0.js"></script>
<title>Google AMP - Amp Sidebar</title>
<link rel = "canonical" href = "http://example.ampproject.org/article-metadata.html">
<meta name = "viewport" content = "width = device-width,minimum-scale = 1,initial-scale = 1">
<style amp-boilerplate>
body{
-webkit-animation:
-amp-start 8s steps(1,end) 0s 1 normal both;-moz-animation:
-amp-start 8s steps(1,end) 0s 1 normal both;-ms-animation:
-amp-start 8s steps(1,end) 0s 1 normal both;animation:
-amp-start 8s steps(1,end) 0s 1 normal both
}
@-webkit-keyframes
-amp-start{from{visibility:hidden}to{visibility:visible}}@-moz-keyframes
-amp-start{from{visibility:hidden}to{visibility:visible}}@-ms-keyframes
-amp-start{from{visibility:hidden}to{visibility:visible}}@-o-keyframes
-amp-start{from{visibility:hidden}to{visibility:visible}}@keyframes
-amp-start{from{visibility:hidden}to{visibility:visible}}
</style>
<noscript>
<style amp-boilerplate>
body{
-webkit-animation:none;
-moz-animation:none;
-ms-animation:none;
animation:none
}
</style>
</noscript>
<script async custom-element = "amp-bind"
src = "https://cdn.ampproject.org/v0/amp-bind-0.1.js">
</script>
<script async custom-element = "amp-sidebar"
src = "https://cdn.ampproject.org/v0/amp-sidebar-0.1.js">
</script>
<style amp-custom>
amp-img {
border: 1px solid #ddd;
border-radius: 4px;
padding: 5px;
}
button{
background-color: #ACAD5C;
color: white;
padding: 12px 20px;
border: none;
border-radius: 4px;
cursor: pointer;
float: left;
}
.amp-sidebar-toolbar-target-shown {
display: none;
}
p{font-size:30px;}
</style>
</head>
<body>
<h3>Google AMP - Amp Sidebar</h3>
<p [text] = "'Sidebar is ' + ampsidebarstatus + '.'">
Amp Sidebar Event Testing
</p>
<button on = "tap:sidebar1">
Show Sidebar
</button>
<amp-sidebar
id = "sidebar1"
layout = "nodisplay"
side = "right"
on = "sidebarOpen:AMP.setState({ampsidebarstatus: 'Opened'});
sidebarClose:AMP.setState({ampsidebarstatus: 'Closed'})">
<ul>
<li>Nav item 1</li>
<li>
<a href = "#idTwo" on = "tap:idTwo.scrollTo">Nav item 2</a>
</li>
<li>Nav item 3</li>
<li>
<a href = "#idFour" on="tap:idFour.scrollTo">Nav item 4</a>
</li>
<li>Nav item 5</li>
<li>Nav item 6</li>
</ul>
</amp-sidebar>
<div id = "target-element">
</div>
</body>
</html>Çıktı
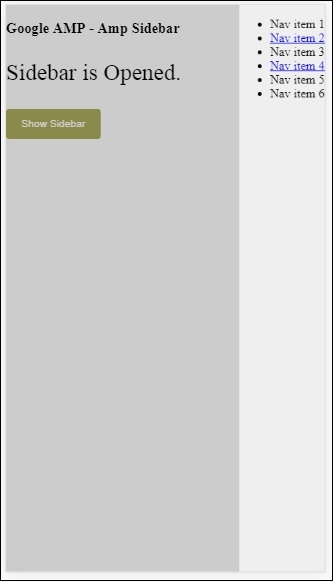
Olaylar şu şekilde kullanılır -
<p [text] = "'Sidebar is ' + ampsidebarstatus + '.'">
Amp Sidebar Event Testing
</p>
<button on = "tap:sidebar1">
Show Sidebar
</button>
<amp-sidebar
id = "sidebar1"
layout = "nodisplay"
side = "right"
on = "sidebarOpen:AMP.setState({ampsidebarstatus: 'Opened'});
sidebarClose:AMP.setState({ampsidebarstatus: 'Closed'})">
<ul>
<li>Nav item 1</li>
<li>
<a href = "#idTwo" on = "tap:idTwo.scrollTo">Nav item 2</a>
</li>
<li>Nav item 3</li>
<li>
<a href = "#idFour" on = "tap:idFour.scrollTo">Nav item 4</a>
</li>
<li>Nav item 5</li>
<li>Nav item 6</li>
</ul>
</amp-sidebar>Amp-animation, diğer amp bileşenlerinde kullanılacak animasyonları tanımlayan bir amp bileşenidir. Bu bölüm bunları ayrıntılı olarak tartışmaktadır.
Amp-animation ile çalışmak için aşağıdaki komut dosyasını eklememiz gerekiyor -
<script async custom-element = "amp-animation"
src = "https://cdn.ampproject.org/v0/amp-animation-0.1.js">
</script>Animasyonun ayrıntıları bir json yapısı içinde tanımlanır.
Temel yapısı amp-animation burada gösterildiği gibidir -
<amp-animation layout = "nodisplay">
<script type = "application/json">
{
// Timing properties
...
"animations": [
{
// animation 1
},
...
{
// animation n
}
]
}
</script>
</amp-animation>animation bileşen aşağıdakilerden oluşur - Selectors, Variables, Timing Properties, Keyframes etc.
{
"selector": "#target-id",
// Variables
// Timing properties
// Subtargets
...
"keyframes": []
}Seçici
Burada, animasyonun kullanılacağı öğenin sınıfını veya kimliğini vermemiz gerekiyor.
Değişkenler
Anahtar kareler içinde kullanılmak üzere tanımlanan değerlerdir. Değişkenler kullanılarak tanımlanırvar().
Misal
{
"--delay": "0.5s",
"animations": [
{
"selector": "#target1",
"delay": "var(--delay)",
"--x": "150px",
"--y" : "200px",
"keyframes": {
"transform": "translate(var(--x), var(--y, 0px)"
}
}
]
}Buraya delay, x ve y değişkenlerdir ve değişkenlerin değerleri gösterilen örnekte tanımlanmıştır.
Zamanlama özellikleri
Burada animasyonunuzun süresini ve gecikmesini tanımlayabilirsiniz. Aşağıdakiler desteklenen zamanlama özellikleridir -
| Emlak | Değer | Açıklama |
|---|---|---|
| süresi | Time property.Value milisaniye cinsinden olmalıdır. | Animasyon için kullanılan süre. |
| gecikme | Time property.Value milisaniye cinsinden olmalıdır. | Animasyonun yürütülmeye başlamasından önceki gecikme |
| endDelay | Time property.Value milisaniye veya saniye cinsinden olmalıdır. | Animasyon tamamlandığında geçerli olan verilen gecikme. |
| yinelemeler | Değer bir sayı olmalıdır. | Animasyonun tekrarlama sayısı. |
| iterationStart | Değer bir sayı olmalıdır. | Efektin canlandırmaya başladığı zaman farkı. |
| hafifletme | Değer bir dizedir | Bu, animasyona hareket hızı efekti elde etmek için kullanılır. Hareket hızı için bazı örnekler doğrusal, kolaylık, kolaylık, dışarı kolaylık, vb. |
| yön | Değer bir dizedir | "Normal", "ters", "alternatif" veya "alternatif-ters" seçeneklerinden biri. |
| doldurmak | Değer bir dizedir | Değerler "yok", "ileri", "geri", "her ikisi", "otomatik" olabilir. |
Anahtar Kareler
Anahtar kareler, nesne biçiminde veya dizi biçiminde olduğu gibi birçok şekilde tanımlanabilir. Aşağıdaki örnekleri düşünün.
Misal
"keyframes": {"transform": "translate(100px,200px)"}Misal
{
"keyframes": {
"opacity": [1, 0],
"transform": ["scale(1)", "scale(2)"]
}
}Misal
{
"keyframes": [
{"opacity": 1, "transform": "scale(1)"},
{"opacity": 0, "transform": "scale(2)"}
]
}Misal
{
"keyframes": [
{"easing": "ease-out", "opacity": 1, "transform": "scale(1)"},
{"opacity": 0, "transform": "scale(2)"}
]
}CSS kullanan ana kare
<style amp-custom>
div {
width: 100px;
height: 100px;
background-color: red;
position: relative;
margin: 0 auto;
transform:scale(3);
}
@keyframes example { 0% {transform:scale(3)}
75% {transform:scale(2)}
100% {transform:scale(1)}
}
</style>
<amp-animation layout = "nodisplay">
<script type = "application/json">
{
"duration": "4s",
"keyframes": "example"
}
</script>
</amp-animation>Anahtar karelerin içinde kullanılabilen bazı CSS özellikleri vardır. Desteklenenlere beyaz listedeki özellikler denir. Aşağıdakiler, ana karelerin içinde kullanılabilen beyaz listedeki özelliklerdir -
- opacity
- transform
- visibility
- 'offsetDistance'
Note - Beyaz listedeki özellikler dışında herhangi bir özelliği kullanmak konsolda hata oluşturacaktır.
Şimdi, üzerine animasyon uygulandığında görüntüyü döndürecek basit bir örnekle anlayalım. Bu örnekte, amp-animation kullanarak resmi döndürüyoruz.
Misal
<!doctype html>
<html amp lang = "en">
<head>
<meta charset = "utf-8">
<script async src = "https://cdn.ampproject.org/v0.js"></script>
<title>Google AMP - Amp Video</title>
<link rel = "canonical" href = "http://example.ampproject.org/article-metadata.html">
<meta name = "viewport" content = "width = device-width, minimum-scale = 1,initial-scale = 1">
<style amp-boilerplate>
body{
-webkit-animation:
-amp-start 8s steps(1,end) 0s 1 normal both;-moz-animation:
-amp-start 8s steps(1,end) 0s 1 normal both;-ms
-amp-start 8s steps(1,end) 0s 1 normal both;animation:
-amp-start 8s steps(1,end) 0s 1 normal both
}
@-webkit-keyframes
-amp-start{from{visibility:hidden}to{visibility:visible}}@-moz-keyframes
-amp-start{from{visibility:hidden}to{visibility:visible}}@-ms-keyframes
-amp-start{from{visibility:hidden}to{visibility:visible}}@-o-keyframes
-amp-start{from{visibility:hidden}to{visibility:visible}}@keyframes
-amp-start{from{visibility:hidden}to{visibility:visible}}
</style>
<noscript>
<style amp-boilerplate>
body{
-webkit-animation:none;
-moz-animation:none;
-ms-animation:none;
animation:none
}
</style>
</noscript>
<script async custom-element = "amp-animation"
src =" https://cdn.ampproject.org/v0/amp-animation-0.1.js">
</script>
<style amp-custom>
amp-img {
border: 1px solid black;
border-radius: 4px;
padding: 5px;
}
</style>
</head>
<body>
<h3>Google AMP - Amp Animation Example</h3>
<amp-animation id = "anim1" layout = "nodisplay" trigger = "visibility">
<script type = "application/json">
{
"duration": "1s",
"fill": "both",
"direction": "alternate",
"animations": [
{
"selector": "#image1",
"easing": "cubic-bezier(0,0,.21,1)",
"keyframes": {
"transform": "rotate(20deg)"
}
}
]
}
</script>
</amp-animation>
<br/>
<br/>
<amp-img
id = "image1"
src = "images/christmas1.jpg"
width = 300
height = 250
layout = "responsive">
</amp-img>
<br/>
</body>
</html>Çıktı

Yukarıda kullanılan amp-animation ayrıntılarının ayrıntıları aşağıda gösterilen kodda verilmiştir -
<amp-animation id = "anim1" layout = "nodisplay" trigger = "visibility">
<script type = "application/json">
{
"duration": "1s",
"fill": "both",
"direction": "alternate",
"animations": [
{
"selector": "#image1",
"easing": "cubic-bezier(0,0,.21,1)",
"keyframes": {
"transform": "rotate(20deg)"
}
}
]
}
</script>
</amp-animation>Buradaki seçici, döndürme animasyonunun uygulandığı görüntünün kimliğidir -
<amp-img
id = "image1"
src = "images/christmas1.jpg"
width = 300
height = 250
layout = "responsive">
</amp-img>CSS'den Anahtar Kareleri kullanma örneği
Misal
<!doctype html>
<html amp lang = "en">
<head>
<meta charset = "utf-8">
<script async src = "https://cdn.ampproject.org/v0.js"></script>
<title>Google AMP - Amp Video</title>
<link rel = "canonical" href = "http://example.ampproject.org/article-metadata.html">
<meta name = "viewport" content = "width = device-width,minimum-scale = 1,initial-scale = 1">
<style amp-boilerplate>
body{
-webkit-animation:
-amp-start 8s steps(1,end) 0s 1 normal both;-moz-animation:
-amp-start 8s steps(1,end) 0s 1 normal both;-ms-animation:
-amp-start 8s steps(1,end) 0s 1 normal both;animation:
-amp-start 8s steps(1,end) 0s 1 normal both
}
@-webkit-keyframes
-amp-start{from{visibility:hidden}to{visibility:visible}}@-moz-keyframes
-amp-start{from{visibility:hidden}to{visibility:visible}}@-ms-keyframes
-amp-start{from{visibility:hidden}to{visibility:visible}}@-o-keyframes
-amp-start{from{visibility:hidden}to{visibility:visible}}@keyframes
-amp-start{from{visibility:hidden}to{visibility:visible}}
</style>
<noscript>
<style amp-boilerplate>
body{
-webkit-animation:none;
-moz-animation:none;
-ms-animation:none;
animation:none
}
</style>
</noscript>
<script async custom-element = "amp-animation"
src = "https://cdn.ampproject.org/v0/amp-animation-0.1.js">
</script>
<style amp-custom>
div {
width: 100px;
height: 100px;
background-color: red;
position: relative;
margin: 0 auto;
transform:scale(3);
}
@keyframes example {
0% {transform:scale(3)}
75% {transform:scale(2)}
100% {transform:scale(1)}
}
</style>
</head>
<body>
<h3>Google AMP - Amp Animation Example</h3>
<amp-animation id = "anim1" layout = "nodisplay" trigger = "visibility">
<script type = "application/json">
{
"duration": "3s",
"fill": "both",
"direction": "alternate",
"animations": [{
"selector": "#image1",
"easing": "cubic-bezier(0,0,.21,1)",
"keyframes":"example"
}]
}
</script>
</amp-animation>
<br/>
<br/>
<div id = "image1"></div>
<br/>
</body>
</html>Çıktı
Animasyon Tetikleyicisi
Trigger = ”visibility” ile animasyon varsayılan olarak uygulanır. Bir etkinlikte animasyonu başlatmak için, tetikleyici = ”görünürlük” öğesini kaldırmalı ve aşağıdaki örnekte gösterildiği gibi animasyonu başlatmak için etkinliği eklemeliyiz -
Misal
<!doctype html>
<html amp lang = "en">
<head>
<meta charset = "utf-8">
<script async src = "https://cdn.ampproject.org/v0.js"></script>
<title>Google AMP - Amp Video</title>
<link rel = "canonical" href = "http://example.ampproject.org/article-metadata.html">
<meta name = "viewport" content = "width = device-width,
minimum-scale = 1,initial-scale = 1">
<style amp-boilerplate>
body{
-webkit-animation:
-amp-start 8s steps(1,end) 0s 1 normal both;-moz-animation:
-amp-start 8s steps(1,end) 0s 1 normal both;-ms-animation:
-amp-start 8s steps(1,end) 0s 1 normal both;animation:
-amp-start 8s steps(1,end) 0s 1 normal both
}
@-webkit-keyframes
-amp-start{from{visibility:hidden}to{visibility:visible}}@-moz-keyframes
-amp-start{from{visibility:hidden}to{visibility:visible}}@-ms-keyframes
-amp-start{from{visibility:hidden}to{visibility:visible}}@-o-keyframes
-amp-start{from{visibility:hidden}to{visibility:visible}}@keyframes
-amp-start{from{visibility:hidden}to{visibility:visible}}
</style>
<noscript>
<style amp-boilerplate>
body{
-webkit-animation:none;
-moz-animation:none;
-ms-animation:none;
animation:none}
</style>
</noscript>
<script async custom-element = "amp-animation"
src = "https://cdn.ampproject.org/v0/amp-animation-0.1.js">
</script>
<style amp-custom>
div {
width: 100px;
height: 100px;
background-color: red;
position: relative;
margin: 0 auto;
transform:scale(2);
}
@keyframes example {
0% {transform:scale(2)}
75% {transform:scale(1)}
100% {transform:scale(0.5)}
}
button{
background-color: #ACAD5C;
color: white;
padding: 12px 20px;
border: none;
border-radius: 4px;
cursor: pointer;
float: left;
}
</style>
</head>
<body>
<h3>Google AMP - Amp Animation Example</h3>
<amp-animation id = "anim1" layout = "nodisplay">
<script type = "application/json">
{
"duration": "3s",
"fill": "both",
"direction": "alternate",
"animations": [{
"selector": "#image1",
"easing": "cubic-bezier(0,0,.21,1)",
"keyframes":"example"
}]
}
</script>
</amp-animation>
<button on = "tap:anim1.start">Start</button>
<br/>
<br/>
<div id = "image1"></div>
</body>
</html>Başlat düğmesine dokunulduğunda animasyonun başlayacağını unutmayın.
Çıktı
Adlı eylemi kullandık startanimasyonla başlamak için Açık. Benzer şekilde, aşağıdaki gibi desteklenen başka eylemler de vardır -
- start
- pause
- restart
- resume
- togglePause
- seekTo
- reverse
- finish
- cancel
Eylemi kullanabileceğimiz çalışan bir örnek görelim.
Misal
<!doctype html>
<html amp lang = "en">
<head>
<meta charset = "utf-8">
<script async src = "https://cdn.ampproject.org/v0.js"></script>
<title>Google AMP - Amp Video</title>
<link rel = "canonical" href = "http://example.ampproject.org/article-metadata.html">
<meta name = "viewport" content = "width=device-width,minimum-scale = 1,initial-scale = 1">
<style amp-boilerplate>
body{
-webkit-animation:
-amp-start 8s steps(1,end) 0s 1 normal both;-moz-animation:
-amp-start 8s steps(1,end) 0s 1 normal both;-ms-animation:
-amp-start 8s steps(1,end) 0s 1 normal both;animation:
-amp-start 8s steps(1,end) 0s 1 normal both
}
@-webkit-keyframes
-amp-start{from{visibility:hidden}to{visibility:visible}}@-moz-keyframes
-amp-start{from{visibility:hidden}to{visibility:visible}}@-ms-keyframes
-amp-start{from{visibility:hidden}to{visibility:visible}}@-o-keyframes
-amp-start{from{visibility:hidden}to{visibility:visible}}@keyframes
-amp-start{from{visibility:hidden}to{visibility:visible}}
</style>
<noscript>
<style amp-boilerplate>
body{
-webkit-animation:none;
-moz-animation:none;
-ms-animation:none;
animation:none}
</style>
</noscript>
<script async custom-element = "amp-animation"
src = "https://cdn.ampproject.org/v0/amp-animation-0.1.js">
</script>
<style amp-custom>
#image1 {
width: 100px;
height: 100px;
background-color: red;
position: relative;
margin: 0 auto;
transform:scale(2);
}
@keyframes example {
0% {transform:scale(2)}
75% {transform:scale(1)}
100% {transform:scale(0.5)}
}
button1{
background-color: #ACAD5C;
color: white;
padding: 12px 20px;
border: none;
border-radius: 4px;
cursor: pointer;
float: left;
}
</style>
</head>
<body>
<h3>Google AMP - Amp Animation Example</h3>
<amp-animation id = "anim1" layout = "nodisplay">
<script type = "application/json">
{
"duration": "3s",
"fill": "both",
"direction": "alternate",
"animations": [{
"selector": "#image1",
"easing": "cubic-bezier(0,0,.21,1)",
"keyframes":"example"
}]
}
</script>
</amp-animation>
<button on = "tap:anim1.start">Start</button>
<button on = "tap:anim1.pause">Pause</button>
<button on = "tap:anim1.resume">Resume</button>
<button on = "tap:anim1.reverse">Reverse</button>
<button on = "tap:anim1.cancel">cancel</button>
<button on = "tap:anim1.finish">finish</button>
<button on = "tap:anim1.togglePause">togglePause</button>
<button on = "tap:anim1.seekTo(percent = 1.00)">seekTo(100%)</button>
<br/>
<br/>
<br/>
<br/>
<div id="image1"></div>
</body>
</html>Çıktı
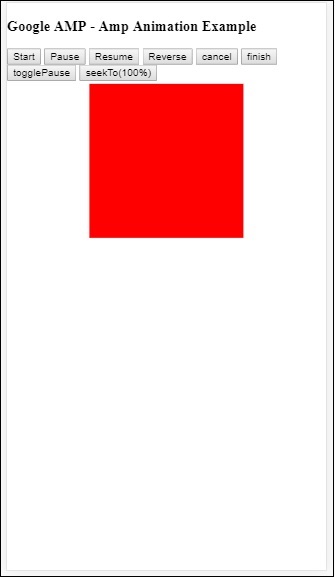
Amp-bind, veri bağlama ve JS benzeri ifadeler kullanan bir eyleme dayalı olarak amp-bileşenlerine ve html etiketlerine etkileşim eklemeye yardımcı olur. Bu bölüm veri bağlamayı ayrıntılı olarak tartışmaktadır.
Amp-bind ile çalışmak için aşağıdaki komut dosyasını sayfamıza eklememiz gerekiyor -
<script async custom-element = "amp-bind"
src = "https://cdn.ampproject.org/v0/amp-bind-0.1.js">
</script>Gösterildiği gibi çalışan bir örnek yardımıyla bunu tam olarak anlayalım -
Misal
<!doctype html>
<html amp lang = "en">
<head>
<meta charset = "utf-8">
<script async src = "https://cdn.ampproject.org/v0.js"></script>
<title>Google AMP - Amp Bind</title>
<link rel = "canonical" href =
"http://example.ampproject.org/article-metadata.html">
<meta name = "viewport" content = "width = device-width,
minimum-scale = 1,initial-scale = 1">
<style amp-boilerplate>
body{
-webkit-animation:
-amp-start 8s steps(1,end) 0s 1 normal both;-moz-animation:
-amp-start 8s steps(1,end) 0s 1 normal both;-ms-animation:
-amp-start 8s steps(1,end) 0s 1 normal both;animation:
-amp-start 8s steps(1,end) 0s 1 normal both
}
@-webkit-keyframes
-amp-start{from{visibility:hidden}to{visibility:visible}}@-moz-keyframes
-amp-start{from{visibility:hidden}to{visibility:visible}}@-ms-keyframes
-amp-start{from{visibility:hidden}to{visibility:visible}}@-o-keyframes
-amp-start{from{visibility:hidden}to{visibility:visible}}@keyframes
-amp-start{from{visibility:hidden}to{visibility:visible}}
</style>
<noscript>
<style amp-boilerplate>
body{
-webkit-animation:none;
-moz-animation:none;
-ms-animation:none;
animation:none
}
</style>
</noscript>
<script async custom-element = "amp-bind"
src = "https://cdn.ampproject.org/v0/amp-bind-0.1.js"></script>
<style amp-custom>
button{
background-color: #ACAD5C;
color: white;
padding: 12px 20px;
border: none;
border-radius: 4px;
}
</style>
</head>
<body>
<h3>Google AMP - Amp Bind</h3>
<p [text] = "'Hello ' + world + '.'">
Click on the button to change the text
</p>
<button on = "tap:AMP.setState({world: 'This is amp-bind example'})">
Click Here
</button>
</body>
</html>Çıktı
Metnin aşağıda gösterildiği gibi değiştiğini görmek için düğmeye tıklayın -
Bu nedenle, yukarıda gösterilen örnekte, düğmeye tıklandığında metni değiştirmek için amp-bind kullandık.
Amp-bind'in üç bileşeni vardır -
State- Başlangıçta eyalet boştur. Düğmeye tıkladığınızda durum değişir. Örneğin,
<button on = "tap:AMP.setState({world: 'This is amp-bind example'})">
Click Here
</button>Durumu değiştirmek için AMP.setState yöntemi kullanılır. Değişkenworld değer atanır This is amp-bind example. Değişkenworld html etiketinin içinde kullanılır -
<p [text] = "'Hello ' + world + '.'">
Click on the button to change the text
</p>Düğmeye tıklandığında dünyaya yeni bir değer atanır: Bu amp-bind örneğidir.
Ayrıca, aşağıda gösterildiği gibi bağlama ile amp-state kullanabiliriz -
<amp-state id = "myState">
<script type = "application/json">
{
"foo": "bar"
}
</script>
</amp-state>İfade atanacak bmyState.foo bağlama sırasında.
Expressions - amp-bind to work ifadeleri aşağıdaki gibidir -
'Hello ' + worldworld olduğu söyleniyor state variable.
Bindings- Bağlamalar [öznitelikler] biçimindeki özel özniteliklere uygulanır. Örneğin -
<p [text] = "'Hello ' + world + '.'">
Click on the button to change the text
</p>Yukarıdaki örnekte, [text] bağlanmak için kullanılan ifadeye sahiptir p etiket.
Bağlamalar için aşağıdaki özniteliği kullanabiliriz -
- [text]
- [class]
- [hidden]
- [width]
- [height]
Bağlamaların amp-bileşenlerinde yapılması da mümkündür ve yalnızca belirli özelliklere izin verilir. Aşağıdaki liste suh bileşenlerini ve özniteliklerini gösterir -
| Sr.No | Amp bileşeni | Öznitelikler ve Açıklama |
|---|---|---|
| 1 | <amp-carousel type = slides> | [slide]* Bu bağlama davranışını kullanarak slaydı değiştirin |
| 2 | <amp-date-picker> | [min] min -> Seçilebilir en erken tarihi ayarlar [max]max -> Seçilebilir en son tarihi ayarlar |
| 3 | <amp-iframe> | [src] İframe'in src'sini değiştir |
| 4 | <amp-img> | [alt] [attribution] [src] [srcset] Alt, attribution, src ve srcset'i değiştirebiliriz. Src değiştirilirse srcset'i önbelleğe almak için kullanıldığı gibi değiştirin. |
| 5 | <amp-lightbox> | [open]* Lightbox'ı açmak için bağlayarak gösterebilir / gizleyebilirsiniz |
| 6 | <amp-list> | [src] İfade bir dizeyse, dize URL'sinden JSON'u alır ve oluşturur. İfade bir nesne veya diziyse, ifade verilerini oluşturur. |
| 7 | <amp-selector> | [selected]* [disabled] Seçenek özellik değerleriyle tanımlanan şu anda seçili olan alt öğeleri değiştirir. Birden çok seçim için virgülle ayrılmış bir değerler listesini destekler |
Amp-State kullanarak bağlama
Html öğesi veya amp-bileşeni üzerinde kullanmak istediğimiz tüm verilerle amp-state'i tanımlayabiliriz.
Amp-state içinde kullanılan veriler, aşağıda gösterildiği gibi json biçiminde olmalıdır -
<amp-state id = "myCarsList">
<script type = "application/json">
{
"currentcar" : "bmw",
"audi": {
"imageUrl": "images/audi.jpg"
},
"bmw": {
"imageUrl": "images/bmw.jpg"
}
}
</script>
</amp-state>Bu nedenle, arabanın adı ve araba için kullanılan görüntü ile anahtar-değer çiftlerini tanımladık.
Metin ve Amp-Görüntü üzerinde Amp-bind
Aşağıda amp-bind ile amp-state kullanan çalışan bir örnek gösterilmektedir -
<!doctype html>
<html amp lang = "en">
<head>
<meta charset = "utf-8">
<script async src = "https://cdn.ampproject.org/v0.js"></script>
<title>Google AMP - Amp Bind</title>
<link rel = "canonical" href =
"http://example.ampproject.org/article-metadata.html">
<meta name = "viewport" content = "width = device-width,
minimum-scale = 1,initial-scale = 1">
<style amp-boilerplate>
body{
-webkit-animation:
-amp-start 8s steps(1,end) 0s 1 normal both;-moz-animation:
-amp-start 8s steps(1,end) 0s 1 normal both;-ms-animation:
-amp-start 8s steps(1,end) 0s 1 normal both;animation:
-amp-start 8s steps(1,end) 0s 1 normal both
}
@-webkit-keyframes
-amp-start{from{visibility:hidden}to{visibility:visible}}@-moz-keyframes
-amp-start{from{visibility:hidden}to{visibility:visible}}@-ms-keyframes
-amp-start{from{visibility:hidden}to{visibility:visible}}@-o-keyframes
-amp-start{from{visibility:hidden}to{visibility:visible}}@keyframes
-amp-start{from{visibility:hidden}to{visibility:visible}
}
</style>
<noscript>
<style amp-boilerplate>
body{
-webkit-animation:none;
-moz-animation:none;
-ms-animation:none;
animation:none
}
</style>
</noscript>
<script async custom-element = "amp-bind" src =
"https://cdn.ampproject.org/v0/amp-bind-0.1.js"></script>
<style amp-custom>
button{
background-color: #ACAD5C;
color: white;
padding: 12px 20px;
border: none;
border-radius: 4px;
cursor: pointer;
float: left;
}
</style>
</head>
<body>
<h3>Google AMP - Amp Bind</h3>
<amp-state id = "myCarsList">
<script type = "application/json">
{
"currentcar" : "bmw",
"audi": {
"imageUrl": "images/audi.jpg",
"style": "greenBackground"
},
"bmw": {
"imageUrl": "images/bmw.jpg",
"style": "redBackground"
}
}
</script>
</amp-state>
<amp-img
width = "300"
height = "200"
src = "images/bmw.jpg"
[src] = "myCarsList[currentcar].imageUrl">
</amp-img>
<p [text] = "'This is a ' + currentcar + '.'">
This is a BMW.
</p>
<br/>
<button on = "tap:AMP.setState({currentcar: 'audi'})">
Change Car
</button>
</body>
</html>Çıktı
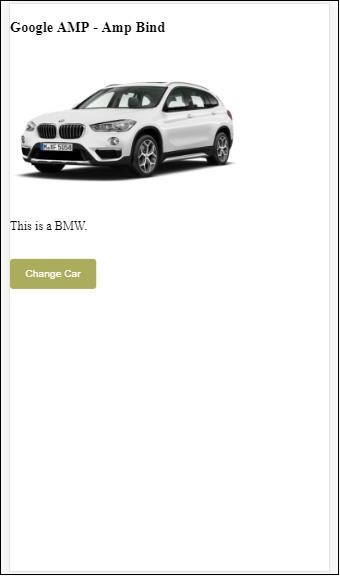
Araba değişim resmini ve ayrıca aşağıdaki metni görmek için butona tıklayın.
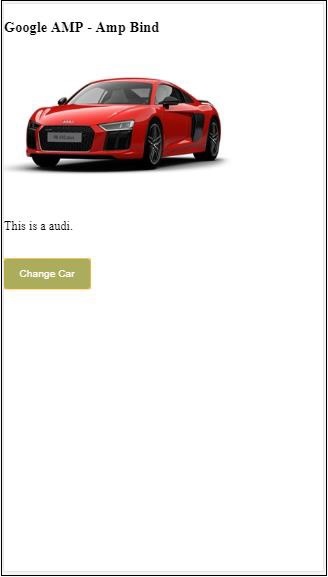
Video ve IFrame'de Amp-bind
Şimdi amp-iframe ve amp-video src'yi değiştirecek bir çalışma örneği göreceğiz.
<!doctype html>
<html amp lang = "en">
<head>
<meta charset = "utf-8">
<script async src = "https://cdn.ampproject.org/v0.js"></script>
<title>Google AMP - Amp Bind</title>
<link rel = "canonical" href =
"http://example.ampproject.org/article-metadata.html">
<meta name = "viewport" content = "width = device-width,
minimum-scale = 1,initial-scale = 1">
<style amp-boilerplate>
body{
-webkit-animation:
-amp-start 8s steps(1,end) 0s 1 normal both;-moz-animation:
-amp-start 8s steps(1,end) 0s 1 normal both;-ms-animation:
-amp-start 8s steps(1,end) 0s 1 normal both;animation:
-amp-start 8s steps(1,end) 0s 1 normal both
}
@-webkit-keyframes
-amp-start{from{visibility:hidden}to{visibility:visible}}@-moz-keyframes
-amp-start{from{visibility:hidden}to{visibility:visible}}@-ms-keyframes
-amp-start{from{visibility:hidden}to{visibility:visible}}@-o-keyframes
-amp-start{from{visibility:hidden}to{visibility:visible}}@keyframes
-amp-start{from{visibility:hidden}to{visibility:visible}}
</style>
<noscript>
<style amp-boilerplate>
body{
-webkit-animation:none;
-moz-animation:none;
-ms-animation:none;
animation:none
}
</style>
</noscript>
<script async custom-element = "amp-bind" src =
"https://cdn.ampproject.org/v0/amp-bind-0.1.js"></script>
<script async custom-element = "amp-video" src =
"https://cdn.ampproject.org/v0/amp-video-0.1.js"></script>
<script async custom-element = "amp-iframe" src =
"https://cdn.ampproject.org/v0/amp-iframe-0.1.js"></script>
<style amp-custom>
button{
background-color: #ACAD5C;
color: white;
padding: 12px 20px;
border: none;
border-radius: 4px;
cursor: pointer;
float: left;
}
</style>
</head>
<body>
<h3>Google AMP - Amp Bind</h3>
<button on = "tap:AMP.setState({currentlist: 'list1'})">
Click Here
</button>
<br/>
<br/>
<amp-state id = "myList">
<script type = "application/json">
{
"currentlist" : "",
"list1": {
"url": "video/m.mp4",
"style": "greenBackground",
"iframeurl":"https://maps.google.com/maps?q=hyderabad&t=&z=13&ie=UTF8&iwloc=&output=embed"
}
}
</script>
</amp-state>
<h3>AMP - IFRAME</h3>
<amp-iframe
width = "600"
title = "Google map"
height = "400"
layout = "responsive"
sandbox = "allow-scripts allow-same-origin allow-popups"
frameborder = "0"
src = "https://maps.google.com/maps?q=telangana&t=&z=13&ie=UTF8&iwloc=&output=embed"
[src] = "myList[currentlist].iframeurl">
<amp-img
layout = "fill"
src = "images/loading.jpg"
placeholder
>
/amp-img>
</amp-iframe>
<h3>AMP - VIDEO</h3>
<amp-video
id = "amp-video"
src = "video/samplevideo.mp4"
layout="responsive"
[src] = "myList[currentlist].url"
width = "300"
height = "170" autoplay controls>
</amp-video>
</body>
</html>Burada iframesrc ve video src ile amp-state kullandığımızı unutmayın.
<amp-state id = "myList">
<script type = "application/json">
{
"currentlist" : "",
"list1": {
"url": "video/m.mp4",
"style": "greenBackground",
"iframeurl":"
https://maps.google.com/maps?q=hyderabad&t=&z=13&ie=UTF8&iwloc=&output=embed"
}
}
</script>
</amp-state>Geçerli liste boş olarak ayarlanır ve düğmeye dokunulduğunda liste1 olarak ayarlanır. Geçerli liste değişkeni, aşağıda gösterildiği gibi iframe ve videonun src'si için kullanılır -
<amp-iframe width="600"
title = "Google map"
height = "400"
layout = "responsive"
sandbox = "allow-scripts allow-same-origin allow-popups"
frameborder = "0" src = "https://maps.google.com/maps?q=telangana&t=&z=13&ie=UTF8&iwloc=&output=embed"
[src] = "myList[currentlist].iframeurl">
<amp-img layout = "fill" src = "images/loading.jpg" placeholder>
</amp-img>
</amp-iframe>
<amp-video id = "amp-video" src = "video/samplevideo.mp4"
layout = "responsive" [src] = "myList[currentlist].url" width = "300"
height = "170" autoplay controls>
</amp-video>Çıktı
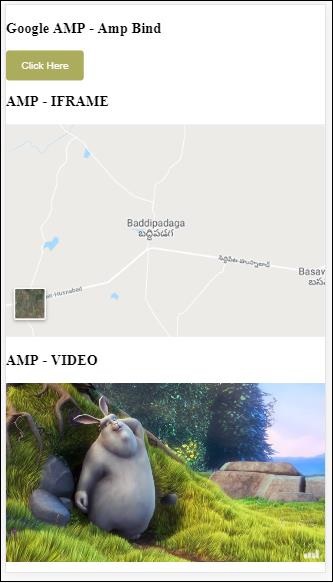
Video ve iframe src'nin değiştiğini görmek için düğmeyi tıklayın.
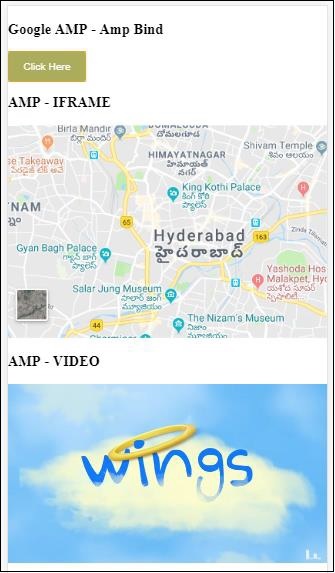
Amp-lightbox ile amp-bind
Şimdi, bağlama ve amp-lightbox'ın birlikte kullanıldığında nasıl çalıştığını görelim.
Misal
<!doctype html>
<html amp lang = "en">
<head>
<meta charset = "utf-8">
<script async src="https://cdn.ampproject.org/v0.js"></script>
<title>Google AMP - Amp Bind</title>
<link rel = "canonical" href =
"http://example.ampproject.org/article-metadata.html">
<meta name = "viewport" content = "width = device-width,
minimum-scale = 1,initial-scale = 1">
<style amp-boilerplate>
body{
-webkit-animation:
-amp-start 8s steps(1,end) 0s 1 normal both;-moz-animation:
-amp-start 8s steps(1,end) 0s 1 normal both;-ms-animation:
-amp-start 8s steps(1,end) 0s 1 normal both;animation:
-amp-start 8s steps(1,end) 0s 1 normal both
}
@-webkit-keyframes
-amp-start{from{visibility:hidden}to{visibility:visible}}@-moz-keyframes
-amp-start{from{visibility:hidden}to{visibility:visible}}@-ms-keyframes
-amp-start{from{visibility:hidden}to{visibility:visible}}@-o-keyframes
-amp-start{from{visibility:hidden}to{visibility:visible}}@keyframes
-amp-start{from{visibility:hidden}to{visibility:visible}}
</style>
<noscript>
<style amp-boilerplate>
body{
-webkit-animation:none;
-moz-animation:none;
-ms-animation:none;
animation:none
}
</style>
</noscript>
<script async custom-element = "amp-bind" src =
"https://cdn.ampproject.org/v0/amp-bind-0.1.js"></script>
<script async custom-element = "amp-lightbox" src =
"https://cdn.ampproject.org/v0/amp-lightbox-0.1.js"></script>
<style amp-custom>
button{
background-color: #ACAD5C;
color: white;
padding: 12px 20px;
border: none;
border-radius: 4px;
cursor: pointer;
float: left;
}
.lightbox {
background: rgba(211,211,211,0.8);
width: 100%;
height: 100%;
position: absolute;
display: flex;
align-items: center;
justify-content: center;
}
</style>
</head>
<body>
<h3>Google AMP - Amp Bind</h3>
<button on = "tap:AMP.setState({displaylightbox: true})">
Click Here
</button>
<br/>
<br/>
<h3>AMP - Lightbox</h3>
<amp-lightbox
id = "my-lightbox"
[open] = "displaylightbox"
layout = "nodisplay"
close-button>
<div class = "lightbox" on = "tap:AMP.setState({displaylightbox: false})">
<amp-img alt = "Beautiful Flower"
src = "images/loreal.gif"
width = "246"
height = "205">
</amp-img>
</div>
</amp-lightbox>
</body>
</html>Amp-lightbox'ta bağlamayı kullanmak için aşağıda gösterildiği gibi amp-lightbox'ta [open] kullandık -
<amp-lightbox id = "my-lightbox" [open] = "displaylightbox"
layout = "nodisplay" close-button>
<div class = "lightbox" on="tap:AMP.setState({displaylightbox: false})">
<amp-img alt = "Beautiful Flower"
src = "images/loreal.gif"
width = "246"
height = "205">
</amp-img>
</div>
</amp-lightbox>[Open] = "displaylightbox" değişken bir durum olup, düğmeye tıklandığında ve lightbox div dokunulduğunda true / false olarak değiştirilir -
<button on = "tap:AMP.setState({displaylightbox: true})">
Click Here
</button>
<div class = "lightbox" on = "tap:AMP.setState({displaylightbox: false})">
<amp-img alt = "Beautiful Flower"
src = "images/loreal.gif"
width = "246"
height = "205">
</amp-img>
</div>Çıktı
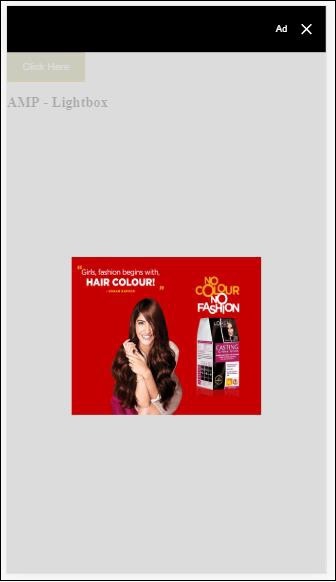
Giriş öğesine amp bağlama
Gösterildiği gibi çalışan bir örnek yardımıyla giriş öğesine amp-bağlamanın çalışmasını anlayalım -
<!doctype html>
<html amp lang = "en">
<head>
<meta charset = "utf-8">
<script async src = "https://cdn.ampproject.org/v0.js"></script>
<title>Google AMP - Amp Bind</title>
<link rel = "canonical" href=
"http://example.ampproject.org/article-metadata.html">
<meta name = "viewport" content = "width = device-width,
minimum-scale = 1,initial-scale = 1">
<style amp-boilerplate>
body{
-webkit-animation:
-amp-start 8s steps(1,end) 0s 1 normal both;-moz-animation:
-amp-start 8s steps(1,end) 0s 1 normal both;-ms-animation:
-amp-start 8s steps(1,end) 0s 1 normal both;animation:
-amp-start 8s steps(1,end) 0s 1 normal both
}
@-webkit-keyframes
-amp-start{from{visibility:hidden}to{visibility:visible}}@-moz-keyframes
-amp-start{from{visibility:hidden}to{visibility:visible}}@-ms-keyframes
-amp-start{from{visibility:hidden}to{visibility:visible}}@-o-keyframes
-amp-start{from{visibility:hidden}to{visibility:visible}}@keyframes
-amp-start{from{visibility:hidden}to{visibility:visible}}
</style>
<noscript>
<style amp-boilerplate>
body{
-webkit-animation:none;
-moz-animation:none;
-ms-animation:none;
animation:none
}
</style>
<noscript>
<script async custom-element = "amp-bind"
src = "https://cdn.ampproject.org/v0/amp-bind-0.1.js">
<script>
<script async custom-element = "amp-lightbox"
src = "https://cdn.ampproject.org/v0/amp-lightbox-0.1.js">
</script>
<style amp-custom>
button{
background-color: #ACAD5C;
color: white;
padding: 12px 20px;
border: none;
border-radius: 4px;
cursor: pointer;
float: left;
}
.lightbox {
background: rgba(211,211,211,0.8);
width: 100%;
height: 100%;
position: absolute;
display: flex;
align-items: center;
justify-content: center;
}
#txtname{
width: 100%;
padding: 12px 20px;
margin: 8px 0;
display: inline-block;
border: 1px solid #ccc;
border-radius: 4px;
box-sizing: border-box;
}
div {
font-size:25px;
}
</style>
</head>
<body>
<h3>Google AMP - Amp Bind</h3>
<button on = "tap:AMP.setState({displaylightbox: true})">
Click Here
</button>
<br/>
<br/>
<h3>
AMP - Input Element
<h3>
<input id = "txtname" placeholder = "Type here"
on = "input-throttled:AMP.setState({name: event.value})">
<div [text] = "name">
</div>
</body>
</html>Çıktı
Metin kutusuna girilen veriler altta görüntülenir. Durum değişkenini değiştirerek yapılabilirname giriş olayında gösterildiği gibi -
<input id = "txtname" placeholder = "Type here" on =
"input-throttled:AMP.setState({name: event.value})">
<div [text] = "name">
</div>AMP-Layout, Google-amp'de bulunan önemli özelliklerden biridir. Amp Layout, sayfa yüklendiğinde herhangi bir titreme veya kaydırma sorununa neden olmadan amp bileşenlerinin düzgün şekilde oluşturulmasını sağlar. Google AMP, görüntü için http isteği, veri çağrıları gibi diğer uzak kaynaklardan önce sayfada düzen oluşturmanın yapıldığından emin olun.
Düzen niteliklerinin listesi aşağıda verilmiştir.
genişlik ve yükseklik
layout
sizes
heights
media
placeholder
fallback
noloading
Düşüneceğiz layoutBu bölümde ayrıntılı olarak öznitelik. Geri kalan nitelikler bölümde ayrıntılı olarak tartışılmaktadır -Google AMP – Attributes bu öğreticinin.
Düzen Özelliği
Bileşenin sayfa içinde nasıl oluşturulacağına karar verecek bir amp-bileşeninde layout özelliğini kullanabiliriz. Amp tarafından desteklenen düzenlerin bir listesi aşağıda verilmiştir -
Mevcut değil
Container
fill
fixed
fixed-height
flex-item
intrinsic
nodisplay
Responsive
Bu düzenin her biri için, layout özelliğinin amp-bileşenini nasıl farklı şekilde oluşturduğunu gösteren bir çalışma örneği göreceğiz. Kullanacağızamp-img Örneklerimizdeki bileşen.
Mevcut Değil Örnek
<!doctype html>
<html amp lang = "en">
<head>
<meta charset = "utf-8">
<script async src="https://cdn.ampproject.org/v0.js"></script>
<title>Google AMP - Image</title>
<link rel = "canonical" href =
"http://example.ampproject.org/article-metadata.html">
<meta name = "viewport" content = "width = device-width,
minimum-scale = 1,initial-scale = 1">
<style amp-boilerplate>
body{
-webkit-animation:
-amp-start 8s steps(1,end) 0s 1 normal both;-moz-animation:
-amp-start 8s steps(1,end) 0s 1 normal both;-ms-animation:
-amp-start 8s steps(1,end) 0s 1 normal both;animation:
-amp-start 8s steps(1,end) 0s 1 normal both
}
@-webkit-keyframes
-amp-start{from{visibility:hidden}to{visibility:visible}}@-moz-keyframes
-amp-start{from{visibility:hidden}to{visibility:visible}}@-ms-keyframes
-amp-start{from{visibility:hidden}to{visibility:visible}}@-o-keyframes
-amp-start{from{visibility:hidden}to{visibility:visible}}@keyframes
-amp-start{from{visibility:hidden}to{visibility:visible}}
</style>
<noscript>
<style amp-boilerplate>
body{
-webkit-animation:none;
-moz-animation:none;
-ms-animation:none;
animation:none
}
</style>
</noscript>
<style amp-custom>
amp-img {
border: 1px solid black;
border-radius: 4px;
padding: 5px;
}
</style>
</head>
<body>
<h1>Google AMP - Image Example</h1>
<amp-img
alt = "Beautiful
Flower"src = "images/flower.jpg"
width = "246"
height = "205">
</amp-img>
</body>
</html>Çıktı
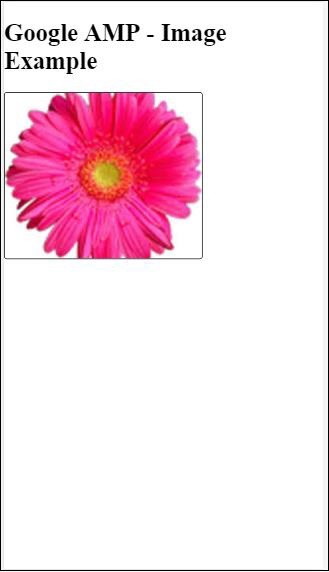
Konteyner Örneği
Layout = ”container” çoğunlukla ana elemana verilir ve alt eleman tanımlanan boyutları alır.
<!doctype html>
<html amp lang = "en">
<head>
<meta charset = "utf-8">
<script async src = "https://cdn.ampproject.org/v0.js"></script>
<title>Google AMP - Image</title>
<link rel = "canonical" href =
"http://example.ampproject.org/article-metadata.html">
<meta name = "viewport" content = "width = device-width,
minimum-scale = 1,initial-scale = 1">
<style amp-boilerplate>
body{
-webkit-animation:
-amp-start 8s steps(1,end) 0s 1 normal both;-moz-animation:
-amp-start 8s steps(1,end) 0s 1 normal both;-ms-animation:
-amp-start 8s steps(1,end) 0s 1 normal both;animation:
-amp-start 8s steps(1,end) 0s 1 normal both
}@-webkit-keyframes
-amp-start{from{visibility:hidden}to{visibility:visible}}@-moz-keyframes
-amp-start{from{visibility:hidden}to{visibility:visible}}@-ms-keyframes
-amp-start{from{visibility:hidden}to{visibility:visible}}@-o-keyframes
-amp-start{from{visibility:hidden}to{visibility:visible}}@keyframes
-amp-start{from{visibility:hidden}to{visibility:visible}}
</style>
<noscript>
<style amp-boilerplate>
body{
-webkit-animation:none;
-moz-animation:none;
-ms-animation:none;
animation:none
}
</style>
</noscript>
<style amp-custom>
amp-img {
border: 1px solid black;
border-radius: 4px;
padding: 5px;
}
h1{
font-family: "Segoe UI",Arial,sans-serif;
font-weight: 400;margin: 10px 0;
}
</style>
</head>
<body>
<h1>Google AMP - Layout = container Image Example</h1>
<amp-accordion layout = "container">
<amp-img alt = "Beautiful Flower"
src = "images/flower.jpg"
width = "246"
height = "205">
</amp-img>
</amp-accordion>
</body>
</html>Çıktı
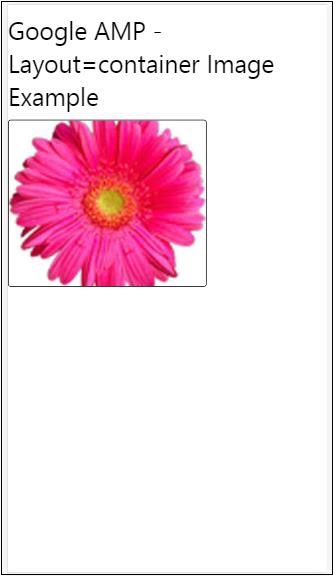
Örnek Doldur
Layout = ”fill”, ana öğenin genişliğini ve yüksekliğini alır.
<!doctype html>
<html amp lang = "en">
<head>
<meta charset = "utf-8">
<script async src = "https://cdn.ampproject.org/v0.js"></script>
<title>
Google AMP - Image
<title>
<link rel = "canonical" href =
"http://example.ampproject.org/article-metadata.html">
<meta name = "viewport" content = "width = device-width,
minimum-scale = 1,initial-scale = 1">
<style amp-boilerplate>
body{
-webkit-animation:
-amp-start 8s steps(1,end) 0s 1 normal both;-moz-animation:
-amp-start 8s steps(1,end) 0s 1 normal both;-ms-animation:
-amp-start 8s steps(1,end) 0s 1 normal both;animation:
-amp-start 8s steps(1,end) 0s 1 normal both
}
@-webkit-keyframes
-amp-start{from{visibility:hidden}to{visibility:visible}}@-moz-keyframes
-amp-start{from{visibility:hidden}to{visibility:visible}}@-ms-keyframes
-amp-start{from{visibility:hidden}to{visibility:visible}}@-o-keyframes
-amp-start{from{visibility:hidden}to{visibility:visible}}@keyframes
-amp-start{from{visibility:hidden}to{visibility:visible}}
</style>
<noscript>
<style amp-boilerplate>
body{
-webkit-animation:none;
-moz-animation:none;
-ms-animation:none;
animation:none
}
</style>
</noscript>
<style amp-custom>
amp-img {
border: 1px solid black;
border-radius: 4px;
padding: 5px;
}
h1{font-family: "Segoe UI",Arial,sans-serif;
font-weight: 400;margin: 10px 0;}
</style>
</head>
<body>
<h1>Google AMP - Layout = fill Image Example</h1>
<div style = "position:relative;width:100px;height:100px;">
<amp-img alt = "Beautiful Flower"
src = "images/flower.jpg"
width = "246"
height = "205"
layout = "fill">
</amp-img>
</div>
</body>
</html>Çıktı
Sabit ve sabit yükseklik Örneği
Sabit ve sabit yüksekliğin kullanımını anlamadan önce, lütfen aşağıdaki iki noktaya dikkat edin -
layout=”fixed” genişlik ve yüksekliğe sahip olması gerekir ve amp bileşeni bunun içinde gösterilecektir.
layout=”fixed-height” bileşen için belirtilen yüksekliğe sahip olması gerekir. Yüksekliğin değişmemesini sağlar. Sabit yükseklik kullanılırken genişlik belirtilmemelidir veya otomatik olabilir.
<!doctype html>
<html amp lang = "en">
<head>
<meta charset = "utf-8">
<script async src = "https://cdn.ampproject.org/v0.js"></script>
<title>Google AMP - Image</title>
<link rel = "canonical" href =
"http://example.ampproject.org/article-metadata.html">
<meta name = "viewport" content = "width = device-width,
minimum-scale = 1,initial-scale = 1">
<style amp-boilerplate>
body{
-webkit-animation:
-amp-start 8s steps(1,end) 0s 1 normal both;-moz-animation:
-amp-start 8s steps(1,end) 0s 1 normal both;-ms-animation:
-amp-start 8s steps(1,end) 0s 1 normal both;animation:
-amp-start 8s steps(1,end) 0s 1 normal both
}
@-webkit-keyframes
-amp-start{from{visibility:hidden}to{visibility:visible}}@-moz-keyframes
-amp-start{from{visibility:hidden}to{visibility:visible}}@-ms-keyframes
-amp-start{from{visibility:hidden}to{visibility:visible}}@-o-keyframes
-amp-start{from{visibility:hidden}to{visibility:visible}}@keyframes
-amp-start{from{visibility:hidden}to{visibility:visible}}
</style>
<noscript>
<style amp-boilerplate>
body{
-webkit-animation:none;
-moz-animation:none;
-ms-animation:none;
animation:none
}
</style>
</noscript>
<style amp-custom>
amp-img {
border: 1px solid black;
border-radius: 4px;
padding: 5px;
}
div{
display: inline-block;
width: 200px;
height:200px;
margin: 5px;
}
h1{font-family: "Segoe UI",Arial,sans-serif;
font-weight: 400;margin: 10px 0;}
</style>
</head>
<body>
<h1>Google AMP - Layout = fixed and
Layout = fixed-height Image Example
</h1>
<div>
<amp-img alt = "Beautiful Flower"
src = "images/flower.jpg"
width = "246"
height = "205"
layout = "fixed">
</amp-img>
</div>
<div>
<amp-img alt = "Beautiful Flower"
src = "images/flower.jpg"
height = "205"
layout = "fixed-height">
</amp-img>
</div>
</body>
</html>Çıktı
Flex-item ve intrinsic
<!doctype html>
<html amp lang = "en">
<head>
<meta charset = "utf-8">
<script async src ="https://cdn.ampproject.org/v0.js"></script>
<title>Google AMP - Image</title>
<link rel = "canonical" href ="
http://example.ampproject.org/article-metadata.html">
<meta name = "viewport" content = "width = device-width,
minimum-scale = 1,initial-scale = 1">
<style amp-boilerplate>
body{
-webkit-animation:
-amp-start 8s steps(1,end) 0s 1 normal both;-moz-animation:
-amp-start 8s steps(1,end) 0s 1 normal both;-ms-animation:
-amp-start 8s steps(1,end) 0s 1 normal both;animation:
-amp-start 8s steps(1,end) 0s 1 normal both
}
@-webkit-keyframes
-amp-start{from{visibility:hidden}to{visibility:visible}}@-moz-keyframes
-amp-start{from{visibility:hidden}to{visibility:visible}}@-ms-keyframes
-amp-start{from{visibility:hidden}to{visibility:visible}}@-o-keyframes
-amp-start{from{visibility:hidden}to{visibility:visible}}@keyframes
-amp-start{from{visibility:hidden}to{visibility:visible
<style>
<noscript>
<style amp-boilerplate>
body{
-webkit-animation:none;
-moz-animation:none;
-ms-animation:none;
animation:none
}
</style>
</noscript>
<style amp-custom>
amp-img {
border: 1px solid black;
border-radius: 4px;
padding: 5px;
}
displayitem {
display: inline-block;
width: 200px;
height:200px;
margin: 5px;
}
h1{font-family: "Segoe UI",Arial,sans-serif;
font-weight: 400;margin: 10px 0;}
</style>
</head>
<body>
<h1>Google AMP - Layout = flex-item and
Layout = intrinsic Image Example
</h1>
<div class = "displayitem">
<amp-img alt = "Beautiful Flower"
src = "images/flower.jpg"
layout = "flex-item">
</amp-img>
</div>
<div class = "displayitem">
<amp-img alt = "Beautiful Flower"
src = "images/flower.jpg"
width = "246"
height = "205"
layout = "intrinsic">
</amp-img>
</div>
</body>
</html>Çıktı
nodisplay ve duyarlı
Layout = nodisplay ile Amp bileşeni, display: none gibi sayfada herhangi bir yer kaplamaz. Bu tür bir düzene genişlik ve yükseklik özelliği eklemeye gerek yoktur.
Layout = responsive değerine sahip Amp bileşeni, kullanılabilir alanı veya sayfanın genişliğini kaplar ve öğenin en boy oranı korunarak yükseklik yeniden boyutlandırılır.
<!doctype html>
<html amp lang = "en">
<head>
<meta charset = "utf-8">
<script async src = "https://cdn.ampproject.org/v0.js">
</script>
<title>Google AMP - Image</title>
<link rel = "canonical" href =
"http://example.ampproject.org/article-metadata.html">
<meta name = "viewport" content="width=device-width,
minimum-scale = 1,initial-scale = 1">
<style amp-boilerplate>
body{
-webkit-animation:
-amp-start 8s steps(1,end) 0s 1 normal both;-moz-animation:
-amp-start 8s steps(1,end) 0s 1 normal both;-ms-animation:
-amp-start 8s steps(1,end) 0s 1 normal both;animation:
-amp-start 8s steps(1,end) 0s 1 normal both}
@-webkit-keyframes
-amp-start{from{visibility:hidden}to{visibility:visible}}@-moz-keyframes
-amp-start{from{visibility:hidden}to{visibility:visible}}@-ms-keyframes
-amp-start{from{visibility:hidden}to{visibility:visible}}@-o-keyframes
-amp-start{from{visibility:hidden}to{visibility:visible}}@keyframes
-amp-start{from{visibility:hidden}to{visibility:visible}}
</style>
<noscript>
<style amp-boilerplate>
body{
-webkit-animation:none;
-moz-animation:none;
-ms-animation:none;
animation:none}
</style>
</noscript>
<style amp-custom>
amp-img {
border: 1px solid black;
border-radius: 4px;
padding: 5px;
}
displayitem {
display: inline-block;
width: 200px;
height:200px;
margin: 5px;
}
h1{font-family: "Segoe UI",Arial,sans-serif;
font-weight: 400;margin: 10px 0;}
</style>
</head>
<body>
<h1>Google AMP - Layout=no-display and
Layout = responsive Image Example</h1>
<div class = "displayitem">
<amp-img alt = "Beautiful Flower"
src = "images/flower.jpg"
layout = "no-display">
</amp-img>
</div>
<div class = "displayitem">
<amp-img alt = "Beautiful Flower"
src = "images/flower.jpg"
width = "246"
height = "205"
layout = "responsive">
</amp-img>
</div>
</body>
</html>Çıktı
Google AMP'de desteklenen düzenlerin listesi aşağıdaki gibidir
Accordion
Carousel
Lightbox
Slider
Sidebar
Amp- Akordeon
Amp-akordeon, içeriği genişletme-daraltma biçiminde görüntülemek için kullanılan bir amp bileşenidir. Kullanıcıların, akordeondan kendi seçimlerine göre bölümü seçebilecekleri mobil cihazlarda görüntülemesi kolaylaşıyor.
Amp-accordion ile çalışmak için aşağıdaki komut dosyasını eklemeniz gerekir -
<script async custom-element = "amp-accordion"
src = "https://cdn.ampproject.org/v0/amp-accordion-0.1.js">
</script>Amp akordeon etiketi
<amp-accordion>
<section class = "seca">
<h3>Content 1</h3>
<div>
<p>Content 1 is opened for amp-accordion</p>
<p>Content 1 is opened for amp-accordion</p>
<p>Content 1 is opened for amp-accordion</p>
<p>Content 1 is opened for amp-accordion</p>
<p>Content 1 is opened for amp-accordion</p>
<p>Content 1 is opened for amp-accordion</p>
</div>
</section>
…
</amp-accordion>Çalışan bir amp-accordion örneğini görelim.
<!doctype html>
<html amp lang = "en">
<head>
<meta charset = "utf-8">
<script async src = "https://cdn.ampproject.org/v0.js">
</script>
<title>Google AMP - Amp Accordion </title>
<link rel = "canonical" href=
"http://example.ampproject.org/article-metadata.html">
<meta name = "viewport" content = "width = device-width,
minimum-scale = 1,initial-scale = 1">
<style amp-boilerplate>
body{
-webkit-animation:
-amp-start 8s steps(1,end) 0s 1 normal both;-moz-animation:
-amp-start 8s steps(1,end) 0s 1 normal both;-ms-animation:
-amp-start 8s steps(1,end) 0s 1 normal both;animation:
-amp-start 8s steps(1,end) 0s 1 normal both
}
@-webkit-keyframes
-amp-start{from{visibility:hidden}to{visibility:visible}}@-moz-keyframes
-amp-start{from{visibility:hidden}to{visibility:visible}}@-ms-keyframes
-amp-start{from{visibility:hidden}to{visibility:visible}}@-o-keyframes
-amp-start{from{visibility:hidden}to{visibility:visible}}@keyframes
-amp-start{from{visibility:hidden}to{visibility:visible}}
</style>
<noscript>
<style amp-boilerplate>
body{
-webkit-animation:none;
-moz-animation:none;
-ms-animation:none;
animation:none}
</style>
</noscript>
<script async custom-element = "amp-accordion" src =
"https://cdn.ampproject.org/v0/amp-accordion-0.1.js">
</script>
<style>
input[type = text]{
width: 50%;
padding: 12px;
border: 1px solid #ccc;
border-radius: 4px;
resize: vertical;
}
label {
padding: 12px 12px 12px 0;
display: inline-block;
font-family: "Segoe UI",Arial,sans-serif;
font-weight: 400;
}
.col-label {
float: left;
width: 25%;
margin-top: 6px;
}
.col-content {
float: left;
width: 75%;
margin-top: 6px;
}
.row:after {
content: "";
display: table;
clear: both;
}
.amp_example {
background-color: #f1f1f1;
padding: 0.01em 16px;
margin: 20px 0;
box-shadow: 0 2px 4px 0
rgba(0,0,0,0.16),0 2px 10px 0
rgba(0,0,0,0.12)!important;
}
h3{
font-family: "Segoe UI",Arial,sans-serif;
font-weight: 400;margin: 10px 0;
}
input[type=submit] {
background-color: #ACAD5C;
color: white;
padding: 12px 20px;
border: none;
border-radius: 4px;
cursor: pointer;
float: right;
}
.lightbox {background-color: rgba(100, 100, 100, 0.5);}
.seca {background-color:#fff;}
</style>
</head>
<body>
<div class = "amp_example">
<h3>Google AMP - Amp Accordion</h3>
<amp-accordion>
<section class = "seca">
<h3>Content 1</h3>
<div>
<p>Content 1 is opened for amp-accordion</p>
<p>Content 1 is opened for amp-accordion</p>
<p>Content 1 is opened for amp-accordion</p>
<p>Content 1 is opened for amp-accordion</p>
<p>Content 1 is opened for amp-accordion</p>
<p>Content 1 is opened for amp-accordion</p>
</div>
</section>
<section expanded class = "seca">
<h3>Content 2</h3>
<div>
<p>Content 2 is opened for amp-accordion</p>
<p>Content 2 is opened for amp-accordion</p>
<p>Content 2 is opened for amp-accordion</p>
<p>Content 2 is opened for amp-accordion</p>
<p>Content 2 is opened for amp-accordion</p>
</div>
</section>
<section class="seca">
<h3>Content 3</h3>
<div>
<p>Content 3 is opened for amp-accordion</p>
<p>Content 3 is opened for amp-accordion</p>
<p>Content 3 is opened for amp-accordion</p>
<p>Content 3 is opened for amp-accordion</p>
<p>Content 3 is opened for amp-accordion</p>
</div>
</section>
</amp-accordion>
</div>
</body>
</html>Çıktı
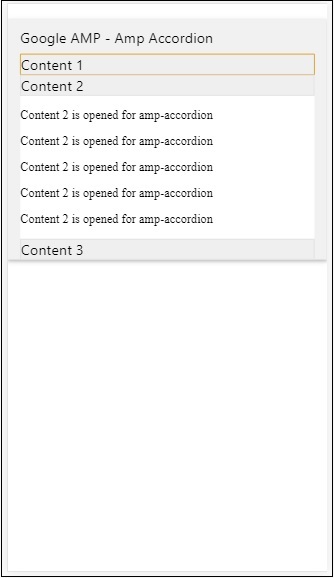
Amp-akordeonun içinde bölümler vardır. Her bölümün 2 çocuğu olabilir ve 2'den fazlası tarayıcı konsolunda bir hata görüntüler. Bölüme bir konteyner ekleyebilir ve içinde birden çok eleman bulundurabilirsiniz.
Varsayılan olarak, bölüme genişletilmiş özniteliği kullanarak genişletilmiş modda bir bölümü tuttuk.
Akordiyonları otomatik daraltma
Otomatik daraltma için, özniteliği kullanıyoruz expand-single-section örnekte gösterildiği gibi amp-accordion üzerinde. Kullanıcının açtığı bölüm yalnızca genişletilmiş durumda kalacak, diğerleri kullanarak kapatacak expand-single-section öznitelik.
<!doctype html>
<html amp lang = "en">
<head>
<meta charset = "utf-8">
<script async src = "https://cdn.ampproject.org/v0.js">
</script>
<title>Google AMP - Amp Accordion </title>
<link rel = "canonical" href=
"http://example.ampproject.org/article-metadata.html">
<meta name = "viewport" content = "width = device-width,
minimum-scale = 1,initial-scale = 1">
<style amp-boilerplate>
body{
-webkit-animation:
-amp-start 8s steps(1,end) 0s 1 normal both;-moz-animation:
-amp-start 8s steps(1,end) 0s 1 normal both;-ms-animation:
-amp-start 8s steps(1,end) 0s 1 normal both;animation:
-amp-start 8s steps(1,end) 0s 1 normal both
}
@-webkit-keyframes
-amp-start{from{visibility:hidden}to{visibility:visible}}@-moz-keyframes
-amp-start{from{visibility:hidden}to{visibility:visible}}@-ms-keyframes
-amp-start{from{visibility:hidden}to{visibility:visible}}@-o-keyframes
-amp-start{from{visibility:hidden}to{visibility:visible}}@keyframes
-amp-start{from{visibility:hidden}to{visibility:visible}}
</style>
<noscript>
<style amp-boilerplate>
body{
-webkit-animation:none;
-moz-animation:none;
-ms-animation:none;
animation:none}
</style>
</noscript>
<script async custom-element = "amp-accordion" src =
"https://cdn.ampproject.org/v0/amp-accordion-0.1.js">
</script>
<style>
input[type = text]{
width: 50%;
padding: 12px;
border: 1px solid #ccc;
border-radius: 4px;
resize: vertical;
}
label {
padding: 12px 12px 12px 0;
display: inline-block;
font-family: "Segoe UI",Arial,sans-serif;
font-weight: 400;
}
.col-label {
float: left;
width: 25%;
margin-top: 6px;
}
.col-content {
float: left;
width: 75%;
margin-top: 6px;
}
.row:after {
content: "";
display: table;
clear: both;
}
.amp_example {
background-color: #f1f1f1;
padding: 0.01em 16px;
margin: 20px 0;
box-shadow: 0 2px 4px 0
rgba(0,0,0,0.16),0 2px 10px 0
rgba(0,0,0,0.12)!important;
}
h3{
font-family: "Segoe UI",Arial,sans-serif;
font-weight: 400;
margin: 10px 0;
}
input[type=submit] {
background-color: #ACAD5C;
color: white;
padding: 12px 20px;
border: none;
border-radius: 4px;
cursor: pointer;
float: right;}
.lightbox {background-color: rgba(100, 100, 100, 0.5);}
.seca {background-color:#fff;}
</style>
<head>
<body>
<div class = "amp_example">
<h3>Google AMP - Amp Accordion</h3>
<amp-accordion expand-single-section>
<section class = "seca">
<h3>Content 1</h3>
<div>
<p>Content 1 is opened for amp-accordion</p>
<p>Content 1 is opened for amp-accordion</p>
<p>Content 1 is opened for amp-accordion</p>
<p>Content 1 is opened for amp-accordion</p>
<p>Content 1 is opened for amp-accordion</p>
<p>Content 1 is opened for amp-accordion</p>
</div>
</section>
<section class = "seca">
<h3>Content 2</h3>
<div>
<p>Content 2 is opened for amp-accordion</p>
<p>Content 2 is opened for amp-accordion</p>
<p>Content 2 is opened for amp-accordion</p>
<p>Content 2 is opened for amp-accordion</p>
<;p>Content 2 is opened for amp-accordion</p>
</div>
</section>
<section class = "seca">
<h3>Content 3</h3>
<div>
<p>Content 3 is opened for amp-accordion</p>
<p>Content 3 is opened for amp-accordion</p>
<p>Content 3 is opened for amp-accordion</p>
<p>Content 3 is opened for amp-accordion</p>
<p>Content 3 is opened for amp-accordion</p>
</div>
</section>
</amp-accordion>
</div>
</body>
</html>Çıktı
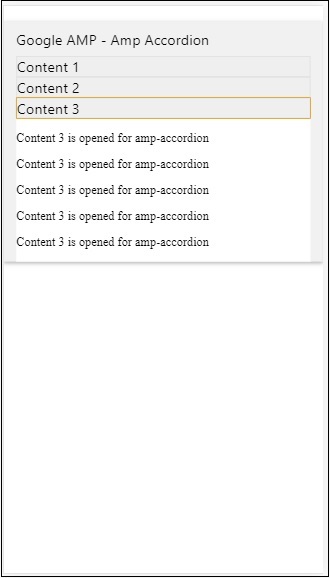
Akordeonlarda Animasyon
Kullanmak animateözniteliğinde, akordeonun genişletilip daraltılması için animasyon ekleyebiliriz. Aşağıdaki örneğe bir göz atın -
<!doctype html>
<html amp lang = "en">
<head>
<meta charset = "utf-8">
<script async src = "https://cdn.ampproject.org/v0.js">
</script>
<title>Google AMP - Amp Accordion </title>
<link rel = "canonical" href = "http://example.ampproject.org/article-metadata.html>
<meta name = "viewport" content = "width = device-width,minimum-scale = 1,initial-scale = 1">
<style amp-boilerplate>
body{
-webkit-animation:
-amp-start 8s steps(1,end) 0s 1 normal both;-moz-animation:
-amp-start 8s steps(1,end) 0s 1 normal both;-ms-animation:
-amp-start 8s steps(1,end) 0s 1 normal both;animation:
-amp-start 8s steps(1,end) 0s 1 normal both
}
@-webkit-keyframes
-amp-start{from{visibility:hidden}to{visibility:visible}}@-moz-keyframes
-amp-start{from{visibility:hidden}to{visibility:visible}}@-ms-keyframes
-amp-start{from{visibility:hidden}to{visibility:visible}}@-o-keyframes
-amp-start{from{visibility:hidden}to{visibility:visible}}@keyframes
-amp-start{from{visibility:hidden}to{visibility:visible}}
</style>
<noscript>
<style amp-boilerplate>
body{
-webkit-animation:none;
-moz-animation:none;
-ms-animation:none;animation:none
}
</style>
</noscript>
<script async custom-element = "amp-accordion" src =
"https://cdn.ampproject.org/v0/amp-accordion-0.1.js">
</script>
<style>
input[type = text]{
width: 50%;
padding: 12px;
border: 1px solid #ccc;
border-radius: 4px;
resize: vertical;
}
label {
padding: 12px 12px 12px 0;
display: inline-block;
font-family: "Segoe UI",Arial,sans-serif;
font-weight: 400;
}
.col-label {
float: left;
width: 25%;
margin-top: 6px;
}
.col-content {
float: left;
width: 75%;
margin-top: 6px;
}
.row:after {
content: "";
display: table;
clear: both;
}
.amp_example {
background-color: #f1f1f1;
padding: 0.01em 16px;
margin: 20px 0;
box-shadow: 0 2px 4px 0 rgba(0,0,0,0.16),
0 2px 10px 0 rgba(0,0,0,0.12)!important;
}
h3{
font-family: "Segoe UI",Arial,sans-serif;
font-weight: 400;margin: 10px 0;
}
input[type=submit] {
background-color: #ACAD5C;
color: white;
padding: 12px 20px;
border: none;
border-radius: 4px;
cursor: pointer;
float: right;
}
.lightbox {background-color: rgba(100, 100, 100, 0.5);}
.seca {background-color:#fff;}
</style>
</head>
<body>
<div class = "amp_example">
<h3>Google AMP - Amp Accordion</h3>
<amp-accordion animate expand-single-section>
<section class = "seca">
<h3>Content 1</h3>
<div>
<p>Content 1 is opened for amp-accordion</p>
<p>Content 1 is opened for amp-accordion</p>
<p>Content 1 is opened for amp-accordion</p>
<p>Content 1 is opened for amp-accordion</p>
<p>Content 1 is opened for amp-accordion</p>
<p>Content 1 is opened for amp-accordion</p>
</div>
</section>
<section class = "seca">
<h3>Content 2</h3>
<div>
<p>Content 2 is opened for amp-accordion</p>
<p>Content 2 is opened for amp-accordion</p>
<p>Content 2 is opened for amp-accordion</p>
<p>Content 2 is opened for amp-accordion</p>
<p>Content 2 is opened for amp-accordion</p>
</div>
</section>
<section class="seca">
<h3>Content 3</h3>
<div>
<p>Content 3 is opened for amp-accordion</p>
<p>Content 3 is opened for amp-accordion</p>
<p>Content 3 is opened for amp-accordion</p>
<p>Content 3 is opened for amp-accordion</p>
<p>Content 3 is opened for amp-accordion</p>
</div>
</section>
</amp-accordion>
</div>
</body>
</html>Çıktı
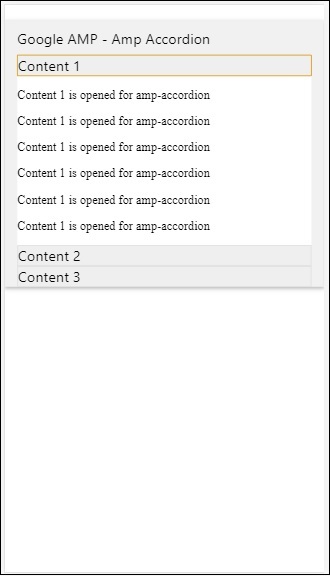
AMP Atlı Karıncası
Amp-carousel, ekranda bir dizi benzer içeriği göstermek ve içerik arasında geçiş yapmak için okları kullanmak için bir amp bileşenidir.
Amp-carousel ile çalışmak için aşağıdaki komut dosyasını eklememiz gerekir -
<script async custom-element = "amp-carousel" src = "https://cdn.ampproject.org/v0/amp-carousel-0.1.js"></script>Amp-carousel etiketi
Amp-carousel etiketi aşağıda gösterildiği gibidir -
<amp-carousel height="300" layout="fixed-height" type="carousel">
<amp-img src="images/christmas1.jpg" width="400" height="300" alt="a sample image"></amp-img>
….
</amp-carousel>Amp-carousel için kullanılabilen özellikler
Amp-carousel için kullanılabilen özellikler aşağıda gösterilen tabloda listelenmiştir -
| Sr.No | Öznitelik ve Açıklama |
|---|---|
| 1 | type Atlıkarınca öğelerini atlıkarınca ve slayt olarak görüntüleyebiliriz |
| 2 | height Atlı karıncanın piksel cinsinden yüksekliği |
| 3 | controls (optional) Ekranda sol / sağ ok gösterir. Cihazlarda birkaç saniye sonra BT kaybolur. Css okları her zaman görünür hale getirmek için kullanılabilir. |
| 4 | data-next-button-aria-label (optional) Bir sonraki karuselin etiketini ayarlamak için kullanın. |
| 5 | data-prev-button-aria-label (optional) Önceki karuselin etiketini ayarlamak için kullanın. |
| 6 | autoplay (optional) 5000 ms sonra sonraki slaydı göstermek için kullanın. IT, amp-carousel üzerinde milisaniye olmadan delay özelliği kullanılarak üzerine yazılabilir. Atlı karıncaya döngü özelliği ekler ve sona ulaştığında slaytlar tekrar oynatılır. ve otomatik oynatmanın çalışması için en az 2 slayt gerekir. |
Şimdi, atlı karıncaları farklı şekillerde görüntülemek için örnekler üzerinde çalışalım.
Atlıkarınca olarak Amp Atlı Karınca türü
Atlı karınca türü ile öğeler yatay olarak kaydırılabilir.
Example
<!doctype html>
<html amp lang = "en">
<head>
<meta charset = "utf-8">
<title>amp-carousel</title>
<script async src = "https://cdn.ampproject.org/v0.js">
</script>
<!-- ## Setup -->
<!-- Import the carousel component in the header. -->
<script async custom-element = "amp-carousel" src =
"https://cdn.ampproject.org/v0/amp-carousel-0.1.js">
</script>
<link rel = "canonical" href="
https://ampbyexample.com/components/amp-carousel/">
<meta name = "viewport" content = "width = device-width,
minimum-scale = 1,initial-scale = 1">
<style amp-boilerplate>
body{
-webkit-animation:
-amp-start 8s steps(1,end) 0s 1 normal both;-moz-animation:
-amp-start 8s steps(1,end) 0s 1 normal both;-ms-animation:
-amp-start 8s steps(1,end) 0s 1 normal both;animation:
-amp-start 8s steps(1,end) 0s 1 normal both
}
@-webkit-keyframes
-amp-start{from{visibility:hidden}to{visibility:visible}}@-moz-keyframes
-amp-start{from{visibility:hidden}to{visibility:visible}}@-ms-keyframes
-amp-start{from{visibility:hidden}to{visibility:visible}}@-o-keyframes
-amp-start{from{visibility:hidden}to{visibility:visible}}@keyframes
-amp-start{from{visibility:hidden}to{visibility:visible}}
</style>
<noscript>
<style amp-boilerplate>
body{
-webkit-animation:none;
-moz-animation:none;
-ms-animation:none;
animation:none
}
</style>
</noscript>
<style amp-custom>
h3{
font-family: "Segoe UI",Arial,sans-serif;
font-weight: 400;
margin: 10px 0;
}
</style>
</head>
<body>
<h3>Google Amp-Carousel</h3>
<amp-carousel height = "300" layout = "fixed-height" type = "carousel">
<amp-img
src = "images/christmas1.jpg"
width = "400"
height = "300"
alt = "a sample image">
</amp-img>
<amp-img src = "images/christmas2.jpg"
width = "400"
height = "300"
alt = "another sample image">
</amp-img>
<amp-img
src = "images/christmas3.jpg"
width = "400"
height = "300"
alt = "and another sample image">
</amp-img>
</amp-carousel>
</body>
</html>Çıktı

Slayt olarak Amp Atlıkarınca tipi
Amp atlıkarınca type = ”slides” bir seferde tek bir öğeyi gösterir. Düzeni dolgu, sabit, sabit yükseklik, esnek öğe, nodisplay ve duyarlı olarak kullanabilirsiniz.
Example
<!doctype html>
<html amp lang = "en">
<head>
<meta charset = "utf-8">
<title>amp-carousel</title>
<script async src = "https://cdn.ampproject.org/v0.js">
</script>
<!-- ## Setup -->
<!-- Import the carousel component in the header. -->
<script async custom-element = "amp-carousel" src =
"https://cdn.ampproject.org/v0/amp-carousel-0.1.js">
</script>
<link rel = "canonical" href=
"https://ampbyexample.com/components/amp-carousel/">
<meta name = "viewport" content = "width = device-width,
minimum-scale = 1,initial-scale = 1">
<style amp-boilerplate>
body{
-webkit-animation:
-amp-start 8s steps(1,end) 0s 1 normal both;-moz-animation:
-amp-start 8s steps(1,end) 0s 1 normal both;-ms-animation:
-amp-start 8s steps(1,end) 0s 1 normal both;animation:
-amp-start 8s steps(1,end) 0s 1 normal both
}
@-webkit-keyframes
-amp-start{from{visibility:hidden}to{visibility:visible}}@-moz-keyframes
-amp-start{from{visibility:hidden}to{visibility:visible}}@-ms-keyframes
-amp-start{from{visibility:hidden}to{visibility:visible}}@-o-keyframes
-amp-start{from{visibility:hidden}to{visibility:visible}}@keyframes
-amp-start{from{visibility:hidden}to{visibility:visible}}
</style>
<noscript>
<style amp-boilerplate>
body{
-webkit-animation:none;
-moz-animation:none;
-ms-animation:none;
animation:none}
</style>
</noscript>
<style amp-custom>
h3{
font-family: "Segoe UI",Arial,sans-serif;
font-weight: 400;margin: 10px 0;}
</style>
</head>
<body>
<h3>Google Amp-Carousel</h3>
<amp-carousel
width = "400"
height = "300"
layout = "responsive"
type = "slides">
<amp-img
src = "images/christmas1.jpg"
width = "400"
height = "300"
layout = "responsive"
alt = "a sample image">
</amp-img>
<amp-img
src = "images/christmas2.jpg"
width = "400"
height = "300"
layout = "responsive"
alt="another sample image">
</amp-img>
<amp-img
src = "images/christmas3.jpg"
width = "400"
height = "300"
layout = "responsive"
alt = "and another sample image">
</amp-img>
</amp-carousel>
</body>
</html>Çıktı
Otomatik oynatmayı kullanarak amfi atlıkarınca
Aşağıda verilen örnekte, 2000 milisaniye (2 saniye) gecikmeli otomatik oynatma özelliği ekledik. Bu, 2 saniyelik bir gecikmeden sonra slaytları değiştirecektir. Varsayılan olarak gecikme 5000 milisaniyedir (5 saniye).
Example
<!doctype html>
<html amp lang = "en">
<head>
<meta charset = "utf-8">
<title>amp-carousel</title>
<script async src = "https://cdn.ampproject.org/v0.js">
</script>
<!-- ## Setup -->
<!-- Import the carousel component in the header. -->
<script async custom-element = "amp-carousel" src =
"https://cdn.ampproject.org/v0/amp-carousel-0.1.js">
</script>
<link rel = "canonical" href =
"https://ampbyexample.com/components/amp-carousel/">
<meta name = "viewport" content = "width = device-width,
minimum-scale = 1,initial-scale = 1">
<style amp-boilerplate>
body{
-webkit-animation:
-amp-start 8s steps(1,end) 0s 1 normal both;-moz-animation:
-amp-start 8s steps(1,end) 0s 1 normal both;-ms-animation:
-amp-start 8s steps(1,end) 0s 1 normal both;animation:
-amp-start 8s steps(1,end) 0s 1 normal both
}
@-webkit-keyframes
-amp-start{from{visibility:hidden}to{visibility:visible}}@-moz-keyframes
-amp-start{from{visibility:hidden}to{visibility:visible}}@-ms-keyframes
-amp-start{from{visibility:hidden}to{visibility:visible}}@-o-keyframes
-amp-start{from{visibility:hidden}to{visibility:visible}}@keyframes
-amp-start{from{visibility:hidden}to{visibility:visible}}
</style>
<noscript>
<style amp-boilerplate>
body{
-webkit-animation:none;
-moz-animation:none;
-ms-animation:none;
animation:none}
</style>
</noscript>
<style amp-custom>
h3{
font-family: "Segoe UI",Arial,sans-serif;
font-weight: 400;
margin: 10px 0;
}
</style>
</head>
<body>
<h3>Google Amp-Carousel</h3>
<amp-carousel
width = "400"
height = "300"
layout = "responsive"
type = "slides"
autoplay delay = "2000">
<amp-img
src = "images/christmas1.jpg"
width = "400"
height = "300"
layout = "responsive"
alt = "a sample image">
</amp-img>
<amp-img
src = "images/christmas2.jpg"
width = "400"
height = "300"
layout = "responsive"
alt = "another sample image">
</amp-img>
<amp-img
src = "images/christmas3.jpg"
width = "400"
height = "300"
layout = "responsive"
alt = "and another sample image">
</amp-img>
</amp-carousel>
</body>
</html>Çıktı
AMP Işık Kutusu
Amp-lightbox, tam görüntü alanını kaplayacak ve bir kaplama gibi görüntüleyecek bir amp bileşenidir.
Amp-lightbox ile çalışmak için aşağıdaki komut dosyasını ekleyin -
<script async custom-element = "amp-lightbox" src = "https://cdn.ampproject.org/v0/amp-lightbox-0.1.js">
</script>Amp-lightbox için kullanılabilen özellikler
Amp-lightbox özelliklerinin listesi aşağıda verilmiştir -
| Sr.no | Öznitelikler ve Açıklama |
|---|---|
| 1 | animate-in (optional) Burada, ışık kutusunu açmak için animasyon stilini belirleyebilirsiniz. solma Stying için desteklenen değerler, fade-in, fly-in-alttan ve fly-in-top şeklindedir. |
| 2 | close-button (required on AMPHTML ads) Amphtmlads için kullanıldığında, ışık kutusu için kapat düğmesi belirtebiliriz. |
| 3 | id (required) Lightbox için benzersiz tanımlayıcı |
| 4 | layout (required) Düzen değeri nodisplay olacaktır |
| 5 | Scrollable (optional) Amp-lightbox'taki bu özellik sayesinde, ışık kutusunun içeriği kaydırılarak ışık kutusunun yüksekliği aşılabilir. |
Işık Kutusu Örneği
<!doctype html>
<html amp lang = "en">
<head>
<meta charset = "utf-8">
<script async src = "https://cdn.ampproject.org/v0.js">
</script>
<title>Google AMP - Amp Lightbox</title>
<link rel = "canonical" href =
"http://example.ampproject.org/article-metadata.html">
<meta name = "viewport" content = "width = device-width,
minimum-scale = 1,initial-scale = 1">
<style amp-boilerplate>
body{
-webkit-animation:
-amp-start 8s steps(1,end) 0s 1 normal both;-moz-animation:
-amp-start 8s steps(1,end) 0s 1 normal both;-ms-animation:
-amp-start 8s steps(1,end) 0s 1 normal both;animation:
-amp-start 8s steps(1,end) 0s 1 normal both
}
@-webkit-keyframes
-amp-start{from{visibility:hidden}to{visibility:visible}}@-moz-keyframes
-amp-start{from{visibility:hidden}to{visibility:visible}}@-ms-keyframes
-amp-start{from{visibility:hidden}to{visibility:visible}}@-o-keyframes
-amp-start{from{visibility:hidden}to{visibility:visible}}@keyframes
-amp-start{from{visibility:hidden}to{visibility:visible}}
</style>
<noscript>
<style amp-boilerplate>
body{
-webkit-animation:none;
-moz-animation:none;
-ms-animation:none;
animation:none}
</style>
</noscript>
<script async custom-element = "amp-lightbox" src =
"https://cdn.ampproject.org/v0/amp-lightbox-0.1.js">
</script>
<style amp-custom>
amp-img {
border: 1px solid #ddd;
border-radius: 4px;
padding: 5px;
}
button{
background-color: #ACAD5C;
color: white;
padding: 12px 20px;
border: none;
border-radius: 4px;
cursor: pointer;
float: left;
}
.lightbox {
background: rgba(211,211,211,0.8);
width: 100%;
height: 100%;
position: absolute;
display: flex;
align-items: center;
justify-content: center;
}
</style>
</head>
<body>
<h3>Google AMP - Amp Lightbox</h3>
<button on = "tap:my-lightbox">
Show LightBox
</button>
<amp-lightbox id = "my-lightbox" layout = "nodisplay">
<div class = "lightbox" on="tap:my-lightbox.close" tabindex = "0">
<amp-img
alt = "Beautiful Flower"
src = "images/flower.jpg"
width = "246"
height = "205">
</amp-img>
</div>
</amp-lightbox>
</body>
</html>Çıktı
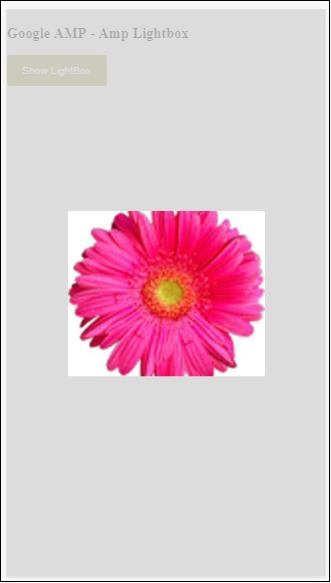
Işık kutusunu kapatmak için ekranda herhangi bir yere tıklayın.
Işık kutusuna, çoğunlukla yer paylaşımlı reklamlar gösterildiğinde kullanılan kapat düğmesi ekleyebilirsiniz. Aşağıdaki örneği inceleyin -
Misal
<!doctype html>
<html amp lang = "en">
<head>
<meta charset = "utf-8">
<script async src = "https://cdn.ampproject.org/v0.js">
</script>
<title>Google AMP - Amp Lightbox</title>
<link rel = "canonical" href =
"http://example.ampproject.org/article-metadata.html">
<meta name = "viewport" content = "width = device-width,
minimum-scale = 1,initial-scale = 1">
<style amp-boilerplate>
body{
-webkit-animation:
-amp-start 8s steps(1,end) 0s 1 normal both;-moz-animation:
-amp-start 8s steps(1,end) 0s 1 normal both;-ms-animation:
-amp-start 8s steps(1,end) 0s 1 normal both;animation:
-amp-start 8s steps(1,end) 0s 1 normal both
}
@-webkit-keyframes
-amp-start{from{visibility:hidden}to{visibility:visible}}@-moz-keyframes
-amp-start{from{visibility:hidden}to{visibility:visible}}@-ms-keyframes
-amp-start{from{visibility:hidden}to{visibility:visible}}@-o-keyframes
-amp-start{from{visibility:hidden}to{visibility:visible}}@keyframes
-amp-start{from{visibility:hidden}to{visibility:visible}}
</style>
<noscript>
<style amp-boilerplate>
body{
-webkit-animation:none;
-moz-animation:none;
-ms-animation:none;
animation:none}
</style>
</noscript>
<script async custom-element = "amp-lightbox" src =
"https://cdn.ampproject.org/v0/amp-lightbox-0.1.js">
</script>
<style amp-custom>
amp-img {
border: 1px solid #ddd;
border-radius: 4px;
padding: 5px;
}
button{
background-color: #ACAD5C;
color: white;
padding: 12px 20px;
border: none;
border-radius: 4px;
cursor: pointer;
float: left;
}
.lightbox {
background: rgba(211,211,211,0.8);
width: 100%;
height: 100%;
position: absolute;
display: flex;
align-items: center;
justify-content: center;
}
</style>
</head>
<body>
<h3>Google AMP - Amp Lightbox</h3>
<button on = "tap:my-lightbox">
Show LightBox
</button>
<amp-lightbox id = "my-lightbox" layout = "nodisplay" close-button>
<div class = "lightbox" on = "tap:my-lightbox.close">
<amp-img
alt = "Beautiful Flower"
src = "images/flower.jpg"
width = "246"
height = "205">
</amp-img>
</div>
</amp-lightbox>
</body>
</html>Çıktı
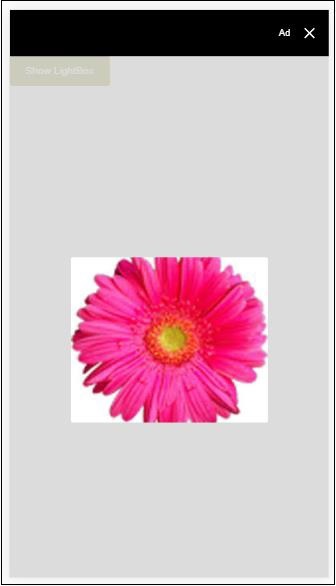
Amp Kenar Çubuğu
Amp kenar çubuğu, bir düğmeye dokunarak pencerenin kenarlarından kayan içeriği görüntülemek için kullanılan amp bileşenidir.
Amp-sidebar ile çalışmak için aşağıdaki komut dosyasını eklememiz gerekir -
<script async custom-element = "amp-sidebar" src = "
https://cdn.ampproject.org/v0/amp-sidebar-0.1.js">
</script>Amp-sidebar etiketi
<amp-sidebar id = "sidebar" layout = "nodisplay" side = "right">
<span on = "tap:sidebar.close">X</span>
Html content here..
</amp-sidebar>Amp-sidebar'da bulunan özelliklerin listesi aşağıda verilmiştir -
| Sr.no | Öznitelikler ve Açıklama |
|---|---|
| 1 | side Bu özellik, kenar çubuğunu belirtilen yönde açacaktır. Örnek sol / sağ |
| 2 | layout Nodisplay, kenar çubuğu düzeni için kullanılacak |
| 3 | open Bu özellik, kenar çubuğu açıkken eklenir. |
| 4 | data-close-button-aria-label Kapat düğmesi için etiket ayarlamak için kullanılır. |
Yukarıdaki özellikleri kullanarak kenar çubuğuyla çalışacağız. Aşağıda gösterilen örneği inceleyin -
Misal
<!doctype html>
<html amp lang = "en">
<head>
<meta charset = "utf-8">
<script async src = "https://cdn.ampproject.org/v0.js">
</script>
<title>Google AMP - Amp Sidebar</title>
<link rel = "canonical" href="
http://example.ampproject.org/article-metadata.html">
<meta name = "viewport" content = "width = device-width,
minimum-scale = 1,initial-scale = 1">
<style amp-boilerplate>
body{
-webkit-animation:
-amp-start 8s steps(1,end) 0s 1 normal both;-moz-animation:
-amp-start 8s steps(1,end) 0s 1 normal both;-ms-animation:
-amp-start 8s steps(1,end) 0s 1 normal both;animation:
-amp-start 8s steps(1,end) 0s 1 normal both
}
@-webkit-keyframes
-amp-start{from{visibility:hidden}to{visibility:visible}}@-moz-keyframes
-amp-start{from{visibility:hidden}to{visibility:visible}}@-ms-keyframes
-amp-start{from{visibility:hidden}to{visibility:visible}}@-o-keyframes
-amp-start{from{visibility:hidden}to{visibility:visible}}@keyframes
-amp-start{from{visibility:hidden}to{visibility:visible}}
</style>
<noscript>
<style amp-boilerplate>
body{
-webkit-animation:none;
-moz-animation:none;
-ms-animation:none;
animation:none}
</style>
</noscript>
<script async custom-element = "amp-sidebar" src =
"https://cdn.ampproject.org/v0/amp-sidebar-0.1.js">
</script>
<style amp-custom>
amp-img {
border: 1px solid #ddd;
border-radius: 4px;
padding: 5px;
}
button{
background-color: #ACAD5C;
color: white;
padding: 12px 20px;
border: none;
border-radius: 4px;
cursor: pointer;
float: left;
}
</style>
</head>
<body>
<h3>Google AMP - Amp Sidebar</h3>
<button on = "tap:sidebar">
Show Sidebar
</button>
<amp-sidebar id = "sidebar" layout = "nodisplay" side = "right">
<span on = "tap:sidebar.close">X</span>
<ul>
<li><a href = "/">About</a></li>
<li><a href = "/">Services</a></li>
<li><a href = "/">Contact US</a></li>
</ul>
</amp-sidebar>
</body>
</html>Çıktı
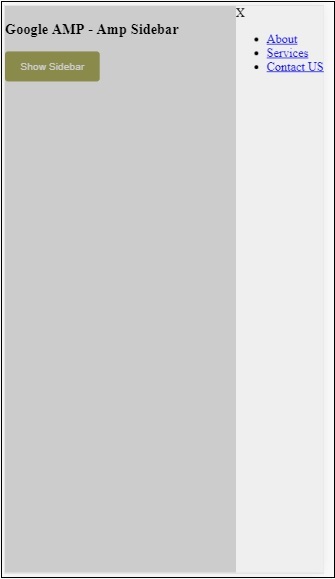
Kullandık sidesağ taraftaki kenar çubuğunu açma özelliği. Sol değeri kullanaraksidesol tarafta açmak için öznitelik. layout öznitelik gerekir nodisplay.Open özellik, kenar çubuğu açıldığında mevcuttur.
data-close-button-aria-etiketi
Amp Görüntü Kaydırıcısı
Amp-image-slider, iki görüntüyü görüntünün üzerinde dikey olarak hareket ettirerek kaydırıcı ekleyerek karşılaştırmak için kullanılan bir amp bileşenidir.
Amp-img-slider ile çalışmak için aşağıdaki komut dosyasını ekleyin -
<script async custom-element = "amp-image-slider" src = "
https://cdn.ampproject.org/v0/amp-image-slider-0.1.js">
</script>Amp-img-slider etiketi
<amp-image-slider width = "300" height = "200" layout = "responsive">
<amp-img src = "images/christmas1.jpg" layout = "fill">
</amp-img>
<amp-img src = "images/christmas2.jpg" layout = "fill">
</amp-img>
</amp-image-slider>Burada bir amp-img-slider örneği gösterilmektedir. Burada, amp-img-slider'ın içine 2 resim ekledik, burada ilk resim bir kaydırıcı gibi davranıyor ve 2. resmin üstüne kaydırabilirsiniz.
Misal
<!doctype html>
<html amp lang = "en">
<head>
<meta charset = "utf-8">
<script async src = "https://cdn.ampproject.org/v0.js">
</script>
<title>Google AMP - Amp Image Slider</title>
<link rel = "canonical" href =
"http://example.ampproject.org/article-metadata.html">
<meta name = "viewport" content = "width = device-width,
minimum-scale = 1,initial-scale = 1">
<style amp-boilerplate>
body{
-webkit-animation:
-amp-start 8s steps(1,end) 0s 1 normal both;-moz-animation:
-amp-start 8s steps(1,end) 0s 1 normal both;-ms-animation:
-amp-start 8s steps(1,end) 0s 1 normal both;animation:
-amp-start 8s steps(1,end) 0s 1 normal both
}
@-webkit-keyframes
-amp-start{from{visibility:hidden}to{visibility:visible}}@-moz-keyframes
-amp-start{from{visibility:hidden}to{visibility:visible}}@-ms-keyframes
-amp-start{from{visibility:hidden}to{visibility:visible}}@-o-keyframes
-amp-start{from{visibility:hidden}to{visibility:visible}}@keyframes
-amp-start{from{visibility:hidden}to{visibility:visible}}
</style>
<noscript>
<style amp-boilerplate>
body{
-webkit-animation:none;
-moz-animation:none;
-ms-animation:none;
animation:none}
</style>
</noscript>
<script async custom-element = "amp-image-slider" src =
"https://cdn.ampproject.org/v0/amp-image-slider-0.1.js">
</script>
<style amp-custom>
amp-img {
border: 1px solid #ddd;
border-radius: 4px;
padding: 5px;
}
</style>
</head>
<body>
<h3>Google AMP - Amp Image Slider</h3>
<amp-image-slider
width = "300"
height = "200"
layout = "responsive">
<amp-img
src = "images/christmas1.jpg"
layout = "fill">
</amp-img>
<amp-img
src = "images/christmas2.jpg"
layout = "fill">
</amp-img>
</amp-image-slider>
</body>
</html>Çıktı

Amp-image-slider, aşağıdaki örnekte gösterildiği gibi görüntüyü değiştirebileceğiniz seekTo adlı bir eyleme sahiptir -
Misal
<!doctype html>
<html amp lang = "en">
<head>
<meta charset = "utf-8">
<script async src = "https://cdn.ampproject.org/v0.js">
</script>
<title>Google AMP - Amp Image Slider</title>
<link rel = "canonical" href ="
http://example.ampproject.org/article-metadata.html">
<meta name = "viewport" content = "width = device-width,
minimum-scale = 1,initial-scale = 1">
<style amp-boilerplate>
body{
-webkit-animation:
-amp-start 8s steps(1,end) 0s 1 normal both;-moz-animation:
-amp-start 8s steps(1,end) 0s 1 normal both;-ms-animation:
-amp-start 8s steps(1,end) 0s 1 normal both;animation:
-amp-start 8s steps(1,end) 0s 1 normal both
}
@-webkit-keyframes
-amp-start{from{visibility:hidden}to{visibility:visible}}@-moz-keyframes
-amp-start{from{visibility:hidden}to{visibility:visible}}@-ms-keyframes
-amp-start{from{visibility:hidden}to{visibility:visible}}@-o-keyframes
-amp-start{from{visibility:hidden}to{visibility:visible}}@keyframes
-amp-start{from{visibility:hidden}to{visibility:visible}}
</style>
<noscript>
<style amp-boilerplate>
body{
-webkit-animation:none;
-moz-animation:none;
-ms-animation:none;
animation:none}
</style>
</noscript>
<script async custom-element = "amp-image-slider" src =
"https://cdn.ampproject.org/v0/amp-image-slider-0.1.js">
</script>
<style amp-custom>
amp-img {
border: 1px solid #ddd;
border-radius: 4px;
padding: 5px;
}
button{
background-color: #ACAD5C;
color: white;
padding: 12px 20px;
border: none;
border-radius: 4px;
cursor: pointer;
float: left;
}
.amp-sidebar-toolbar-target-shown {
display: none;
}
</style>
</head>
<body>
<h3>Google AMP - Amp Image Slider</h3>
<amp-image-slider
width = "300"
id="slider1"
height = "200"
layout = "responsive">
<amp-img src = "images/christmas1.jpg" layout = "fill">
</amp-img>
<amp-img src = "images/christmas2.jpg" layout = "fill">
</amp-img>
</amp-image-slider>
<button on = "tap:slider1.seekTo(percent = 1)">
Image 1
</button>
<button on = "tap:slider1.seekTo(percent = 0)">
Image 2
</button>
</body>
</html>Çıktı
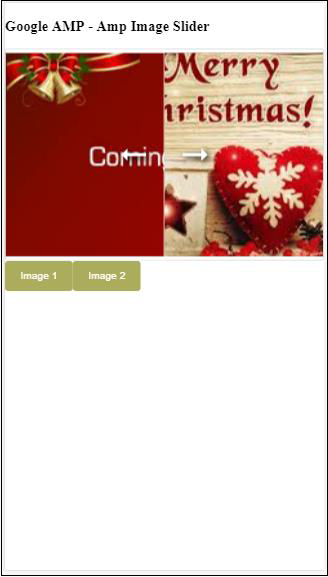
Düğmeye dokunarak görüntüleri değiştirebilirsiniz.

<button on = "tap:slider1.seekTo(percent = 1)">Image 1</button>
<button on = "tap:slider1.seekTo(percent = 0)">Image 2</button>
</div>Reklamlar, yayıncı için gelir kaynağı oldukları için yayıncı sayfaları için önemli bir rol oynar. Amp sayfaları söz konusu olduğunda, küçük bir farklılık vardır. Üçüncü taraf javascript dosyalarının eklenmesine izin vermezler. Sayfada reklam göstermek için, sayfada reklamın gösterilmesine yardımcı olan amp-ad adlı bir amp bileşeni vardır. Reklam sunan reklam ağlarının çoğu amp-ad etiketi ile uyumludur.
Reklamların nasıl çalıştığına ilişkin ayrıntılar aşağıdaki resimde gösterilmektedir -
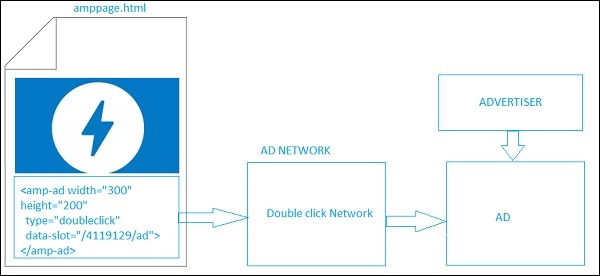
Yayıncı sayfasında reklam göstermek için, sayfada reklam sunmak üzere bir yer tutucu görevi görecek <amp-ad> eklememiz gerekir. <amp-ad>, tür için belirtilen reklam ağını çağırır.
AD-ağı dahili olarak reklamı, reklamveren tarafından verilen ve çoğunlukla bir html veya bir amphtml reklamı olan sayfada gösterilmek üzere çağıracaktır.
Çalışması için önce komut dosyasını sayfaya eklememiz gerekiyor.
<script async custom-element = "amp-ad" src = "
https://cdn.ampproject.org/v0/amp-ad-0.1.js">
</script>Doubleclick için amp-ad etiketi aşağıdaki gibi görünür -
<amp-ad width = "300"
height = "200"
type = "doubleclick"
data-slot = "/4119129/ad">
<div placeholder>
<b>Placeholder here!!!</b>
</div>
</amp-ad>Amp-ad'ı destekleyen birçok reklam ağı vardır. Bir göz atacağımızı unutmayındoubleclick amp-ad tag Örneklerimizde. Reklam ağı adı,type öznitelik.
Misal
<!doctype html>
<html amp lang = "en">
<head>
<meta charset = "utf-8">
<script async src = "https://cdn.ampproject.org/v0.js">
</script>
<title>Google AMP - AD</title>
<link rel = "canonical" href=
"http://example.ampproject.org/article-metadata.html">
<meta name = "viewport" content = "width = device-width,
minimum-scale = 1,initial-scale = 1">
<style amp-boilerplate>
body{
-webkit-animation:
-amp-start 8s steps(1,end) 0s 1 normal both;-moz-animation:
-amp-start 8s steps(1,end) 0s 1 normal both;-ms-animation:
-amp-start 8s steps(1,end) 0s 1 normal both;animation:
-amp-start 8s steps(1,end) 0s 1 normal both
}
@-webkit-keyframes
-amp-start{from{visibility:hidden}to{visibility:visible}}@-moz-keyframes
-amp-start{from{visibility:hidden}to{visibility:visible}}@-ms-keyframes
-amp-start{from{visibility:hidden}to{visibility:visible}}@-o-keyframes
-amp-start{from{visibility:hidden}to{visibility:visible}}@keyframes
-amp-start{from{visibility:hidden}to{visibility:visible}}
</style>
<noscript>
<style amp-boilerplate>
body{
-webkit-animation:none;
-moz-animation:none;
-ms-animation:none;
animation:none}
</style>
</noscript>
<script async custom-element = "amp-ad" src =
"https://cdn.ampproject.org/v0/amp-ad-0.1.js">
</script>
<style amp-custom>
div {
text-align:center;
}
</style>
</head>
<body>
<h3>Google AMP - AD</h3>
<h3>300x250 - Banner AD</h3>
<p>This is a example of adnetwork doubleclick banner ad</p>
<p>This is a example of adnetwork doubleclick banner ad</p>
<p>This is a example of adnetwork doubleclick banner ad</p>
<p>This is a example of adnetwork doubleclick banner ad</p>
<p>This is a example of adnetwork doubleclick banner ad</p>
<p>This is a example of adnetwork doubleclick banner ad</p>
<div>
<amp-ad
data-slot = /30497360/amp_by_example/AMP_Banner_300x250
height = 250
layout = fixed
style = width:300px;height:250px;
type = doubleclick
width = 300>
</amp-ad>
</div>
<p>This is a example of adnetwork doubleclick banner ad</p>
<p>This is a example of adnetwork doubleclick banner ad</p>
<p>This is a example of adnetwork doubleclick banner ad</p>
<p>This is a example of adnetwork doubleclick banner ad</p>
<p>This is a example of adnetwork doubleclick banner ad</p>
<p>This is a example of adnetwork doubleclick banner ad</p>
<p>This is a example of adnetwork doubleclick banner ad</p>
<p>This is a example of adnetwork doubleclick banner ad</p>
<p>This is a example of adnetwork doubleclick banner ad</p>
</body>
</html>Çıktı
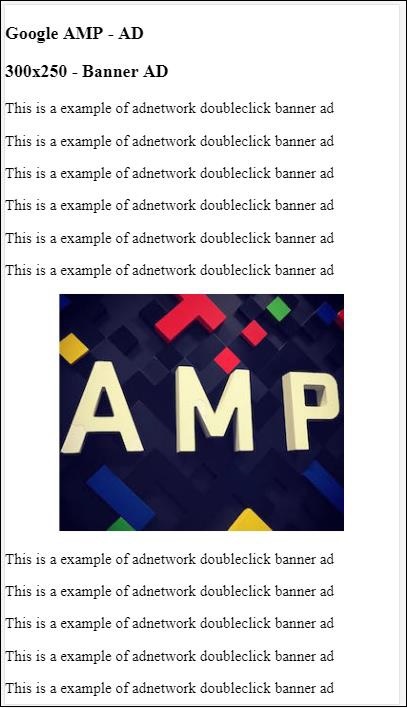
Aşağıda verilen tabloda listelendiği gibi, amp-ad'da bulunan bazı önemli özelliklere bir göz atalım -
| Sr.No | Öznitelikler ve Açıklama |
|---|---|
| 1 | type Reklam ağının adı |
| 2 | width Reklamın genişliği |
| 3 | height Reklamın yüksekliği |
| 4 | placeholder Yer tutucu alt öğe olarak kullanılır ve reklam yüklenmeye devam ederken kullanıcıya görüntülenir. Lütfen bu özelliğin reklam ağı ucu tarafından desteklenmesi gerektiğini unutmayın. |
| 5 | data-* Reklam ağına aktarılacak veri özellikleri. Örneğin, doubleclick reklam ağı ihtiyaçları data-slot= / 30497360 / amp_by_example / AMP_Banner_300x250 sayfadaki reklamı oluşturmak için. Her bir reklam ağı tarafından belirlenen veri parametreleri olacaktır. Ayrıca data override-width ve data-override-height kullanarak kullanılan genişliği ve yüksekliği de geçersiz kılabiliriz. |
| 6 | fallback Yedek, amp-ad için alt öğe olarak kullanılır ve sunulacak reklam olmadığında görüntülenir. |
Bunu, kullanan çalışan bir örnek yardımıyla anlayalım. placeholder sunulacak reklam olmadığında çalıştırılır.
Misal
<!doctype html>
<html amp lang = "en">
<head>
<meta charset = "utf-8">
<script async src = "https://cdn.ampproject.org/v0.js">
</script>
<title>Google AMP - AD</title>
<link rel = "canonical" href =
"http://example.ampproject.org/article-metadata.html">
<meta name = "viewport" content="width = device-width,
minimum-scale = 1,initial-scale = 1">
<style amp-boilerplate>
body{
-webkit-animation:
-amp-start 8s steps(1,end) 0s 1 normal both;-moz-animation:
-amp-start 8s steps(1,end) 0s 1 normal both;-ms-animation:
-amp-start 8s steps(1,end) 0s 1 normal both;animation:
-amp-start 8s steps(1,end) 0s 1 normal both
}
@-webkit-keyframes
-amp-start{from{visibility:hidden}to{visibility:visible}}@-moz-keyframes
-amp-start{from{visibility:hidden}to{visibility:visible}}@-ms-keyframes
-amp-start{from{visibility:hidden}to{visibility:visible}}@-o-keyframes
-amp-start{from{visibility:hidden}to{visibility:visible}}@keyframes
-amp-start{from{visibility:hidden}to{visibility:visible}}
</style>
<noscript>
<style amp-boilerplate>
body{
-webkit-animation:none;
-moz-animation:none;
-ms-animation:none;
animation:none}
</style>
</noscript>
<script async custom-element = "amp-ad" src =
"https://cdn.ampproject.org/v0/amp-ad-0.1.js">
</script>
<style amp-custom>
div {
text-align:center;
}
</style>
</head>
<body>
<h3>Google AMP - AD</h3>
<h3>300x250 - Banner AD</h3>
<p>This is a example of adnetwork doubleclick banner ad</p>
<p>This is a example of adnetwork doubleclick banner ad</p>
<p>This is a example of adnetwork doubleclick banner ad</p>
<p>This is a example of adnetwork doubleclick banner ad</p>
<p>This is a example of adnetwork doubleclick banner ad</p>
<p>This is a example of adnetwork doubleclick banner ad</p>
<div>
<amp-ad
data-slot = /30497360/amp_by_example/AMP_Banner_300x250
height = 250
layout = fixed
style = width:300px;height:250px;
type = doubleclick
width = 300>
<div placeholder>
<b>Placeholder Example : Ad is loading!!!</b>
</div>
</amp-ad>
</div>
<p>This is a example of adnetwork doubleclick banner ad</p>
<p>This is a example of adnetwork doubleclick banner ad</p>
<p>This is a example of adnetwork doubleclick banner ad</p>
<p>This is a example of adnetwork doubleclick banner ad<p>
<p>This is a example of adnetwork doubleclick banner ad</p>
<p>This is a example of adnetwork doubleclick banner ad</p>
</body>
</html>Çıktı
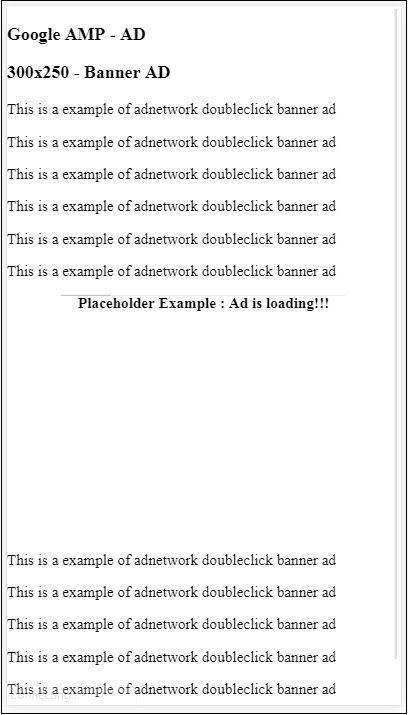
Amp-ad'ın alt öğesi olan ve sunulacak reklam olmadığında görüntülenen fallback özelliğini kullanabiliriz.
Misal
<!doctype html>
<html amp lang = "en">
<head>
<meta charset = "utf-8">
<script async src = "https://cdn.ampproject.org/v0.js">
</script>
<title>Google AMP - AD</title>
<link rel = "canonical" href =
"http://example.ampproject.org/article-metadata.html">
<meta name = "viewport" content = "width = device-width,
minimum-scale = 1,initial-scale = 1">
<style amp-boilerplate>
body{
-webkit-animation:
-amp-start 8s steps(1,end) 0s 1 normal both;-moz-animation:
-amp-start 8s steps(1,end) 0s 1 normal both;-ms-animation:
-amp-start 8s steps(1,end) 0s 1 normal both;animation:
-amp-start 8s steps(1,end) 0s 1 normal both
}
@-webkit-keyframes
-amp-start{from{visibility:hidden}to{visibility:visible}}@-moz-keyframes
-amp-start{from{visibility:hidden}to{visibility:visible}}@-ms-keyframes
-amp-start{from{visibility:hidden}to{visibility:visible}}@-o-keyframes
-amp-start{from{visibility:hidden}to{visibility:visible}}@keyframes
-amp-start{from{visibility:hidden}to{visibility:visible}}
</style>
<noscript>
<style amp-boilerplate>
body{
-webkit-animation:none;
-moz-animation:none;
-ms-animation:none;
animation:none}
</style>
</noscript>
<script async custom-element = "amp-ad" src =
"https://cdn.ampproject.org/v0/amp-ad-0.1.js">
</script>
<style amp-custom>
div, p{
text-align:center;
}
amp-ad {
border : solid 1px black;
}
</style>
</head>
<body>
<h3>Google AMP - AD</h3>
<h3>300x250 - Banner AD</h3>
<p>This is a example of adnetwork doubleclick banner ad</p>
<p>This is a example of adnetwork doubleclick banner ad</p>
<p>This is a example of adnetwork doubleclick banner ad</p>
<p>This is a example of adnetwork doubleclick banner ad</p>
<p>This is a example of adnetwork doubleclick banner ad</p>
<p>This is a example of adnetwork doubleclick banner ad</p>
<div>
<amp-ad
width = "300"
height = "250"
type = "doubleclick"
data-slot = "/4119129/no-ad">
<div fallback>
<p style = "color:green;font-size:25px;">No ads to Serve!</p>
</div>
</amp-ad>
</div>
<p>This is a example of adnetwork doubleclick banner ad</p>
<p>This is a example of adnetwork doubleclick banner ad</p>
<p>This is a example of adnetwork doubleclick banner ad</p>
<p>This is a example of adnetwork doubleclick banner ad</p>
<p>This is a example of adnetwork doubleclick banner ad</p>
<p>This is a example of adnetwork doubleclick banner ad</p>
</body>
</html>Çıktı
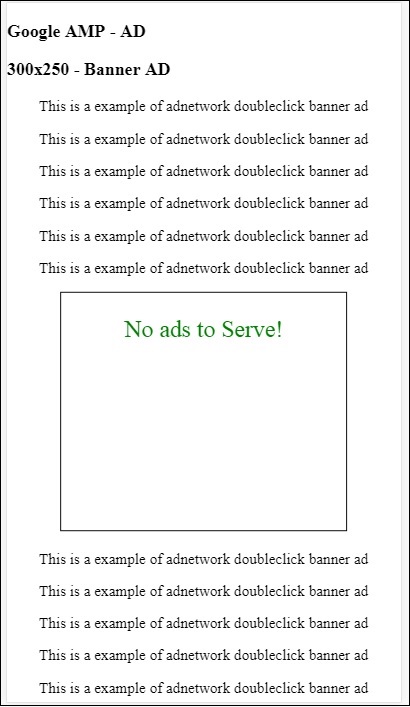
Yedek özelliği durumunda, reklam görüntü alanındaysa, mesajı yedek öğenin içinde görüntüler.
Reklam bileşeni görüntü alanının altındaysa ve reklam yoksa, amp-ad alanı daraltır ve yedek mesajı göstermez.
Reklam birimi yalnızca noad varsa ve görüntü alanının altındaysa daraltılır, böylece daraltma içeriğin kaymasına neden olabileceğinden kullanıcı içeriği okurken rahatsız olmaz.
Desteklenen reklam ağlarının listesi burada verilmiştir: https://www.ampproject.org/docs/ads/ads_vendors
Bu bölümde, reklamla ilgili aşağıdaki etiketleri amp'de tartışacağız -
Google AMP - Etkinlik İzleme Pikseli
Google AMP - Yapışkan Reklam
Google AMP - AMPHTML Reklamları
Etkinlik İzleme Pikseli
Amp, temelde sayfa görüntülemelerini saymak için bir pikseli ateşlemek için kullanılan amp-piksel sunar. Amp-piksel, tetiklenecek olan piksel url'sini vermemiz gereken img etiketine benzer ve kullanıcı hata ayıklama sırasında tarayıcının ağ sekmesinde tetiklenen url'yi görebilir.Piksel sayfada görüntülenmeyecektir.
Amp-pixel ile çalışmak için, işlevselliği çekirdek amp komut dosyasında mevcut olduğundan herhangi bir ek komut dosyası eklememize gerek yoktur.
Amp-pixel etiketi burada gösterildiği gibi görünür -
<amp-pixel src = "https://urlhere" layout = "nodisplay">
</amp-pixel>Çalışan bir örnek yardımıyla amp-pixel'in çalışmasını anlayalım -
Misal
<!doctype html>
<html amp lang = "en">
<head>
<meta charset = "utf-8">
<script async src = "https://cdn.ampproject.org/v0.js">
</script>
<title>Google AMP - Tracking Pixel</title>
<link rel = "canonical" href =
"http://example.ampproject.org/article-metadata.html">
<meta name = "viewport" content = "width = device-width,
minimum-scale = 1,initial-scale = 1">
<style amp-boilerplate>
body{
-webkit-animation:
-amp-start 8s steps(1,end) 0s 1 normal both;-moz-animation:
-amp-start 8s steps(1,end) 0s 1 normal both;-ms-animation:
-amp-start 8s steps(1,end) 0s 1 normal both;animation:
-amp-start 8s steps(1,end) 0s 1 normal both
}
@-webkit-keyframes
-amp-start{from{visibility:hidden}to{visibility:visible}}@-moz-keyframes
-amp-start{from{visibility:hidden}to{visibility:visible}}@-ms-keyframes
-amp-start{from{visibility:hidden}to{visibility:visible}}@-o-keyframes
-amp-start{from{visibility:hidden}to{visibility:visible}}@keyframes
-amp-start{from{visibility:hidden}to{visibility:visible}}
</style>
<noscript>
<style amp-boilerplate>
body{
-webkit-animation:none;
-moz-animation:none;
-ms-animation:none;
animation:none}
</style>
</noscript>
</head>
<body>
<h3>Google AMP - Tracking Pixel</h3>
<amp-pixel src = "https://www.trackerurlhere.com/tracker/foo"
layout = "nodisplay">
</amp-pixel>
</body>
</html>Çıktı
Tarayıcı ağı sekmesinde url'nin etkinleştiğini göreceksiniz. Burada sadece amp-pikselin çalışmasını göstermek için bir kukla piksel kullandık. Canlı bir ortamda, tetiklenen piksele karşı verilerin izlendiğini görmelisiniz. Canlı web sayfasında piksel her tetiklendiğinde, üzerindeki veriler sunucu tarafında sayılır. Daha sonra veriler iş açısından analiz edilebilir.
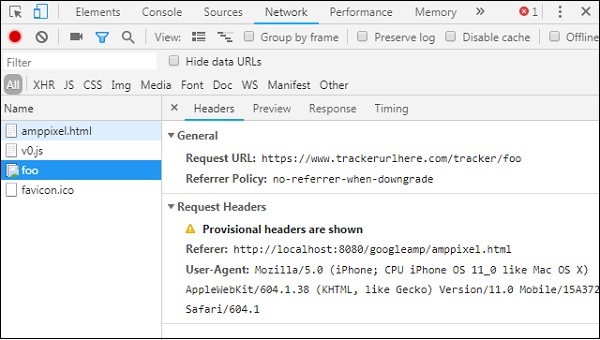
Yapışkan Reklam
Yapışkan REKLAM, reklamı görüntülemek için kullanılan bir biçim türüdür. Reklam, sayfanın alt kısmına yapışacak veamp-adbir çocuk olarak bileşen. Bu, temelde çoğunlukla sayfalarda gördüğümüz bir altbilgi reklama benzer.
Amp-sticky-ad ile çalışmak için aşağıdaki komut dosyasını eklememiz gerekir -
<script async custom-element = "amp-sticky-ad" src = "
https://cdn.ampproject.org/v0/amp-sticky-ad-1.0.js">
</script>Amp-sticky-ad ile bağlantılı koşullar aşağıdaki gibidir -
Sayfada yalnızca bir amp-sticky-ad kullanmanıza izin verilir.
amp-ad, amp-sticky-ad'ın doğrudan alt öğesi olmalıdır. Örneğin -
<amp-sticky-ad>
<amp-ad></amp-ad>
</amp-sticky-ad>Yapışkan reklam bileşeni her zaman sayfanın alt kısmında konumlandırılacaktır.
Yapışkan reklam, kabın tüm genişliğini kaplar ve alanı amp-reklamın genişliği ve yüksekliğiyle doldurur.
Yapışkan-reklamın yüksekliği 100 pikseldir. Amp-ad yüksekliği 100 pikselden azsa, yapışkan reklam amp-ad'ın yüksekliğini alacaktır. Amp-ad yüksekliği 100 pikselden fazlaysa, yükseklik 100 piksel olarak kalacaktır. taşma içeriği gizlendi. Yapışkan reklamın yüksekliğini 100 pikselden fazla değiştirmek mümkün olmayacaktır.
Yapışkan reklamın arka plan rengi değiştirilebilir. Ancak şeffaf arka plana izin verilmez.
Kullanıcı sayfayı kaydırdığında ve sayfanın altına ulaştığında, reklam sayfanın sonunda görünecek ve böylece alt içerikler gizlenmeyecek.
Yatay modda, yapışkan reklam ortaya hizalanır.
Sunulacak reklam yoksa, yapışkan reklam kapsayıcı daralacak ve görünmeyecektir.
Aşağıda verilen sayfada çalışan bir amp-sticky-ad örneğini görelim -
Misal
<!doctype html>
<html amp lang = "en">
<head>
<meta charset = "utf-8">
<script async src = "https://cdn.ampproject.org/v0.js">
</script>
<title>Google AMP - AD</title>
<link rel = "canonical" href =
"http://example.ampproject.org/article-metadata.html">
<meta name = "viewport" content = "width = device-width,
minimum-scale = 1,initial-scale = 1">
<style amp-boilerplate>
body{
-webkit-animation:
-amp-start 8s steps(1,end) 0s 1 normal both;-moz-animation:
-amp-start 8s steps(1,end) 0s 1 normal both;-ms-animation:
-amp-start 8s steps(1,end) 0s 1 normal both;animation:
-amp-start 8s steps(1,end) 0s 1 normal both
}
@-webkit-keyframes
-amp-start{from{visibility:hidden}to{visibility:visible}}@-moz-keyframes
-amp-start{from{visibility:hidden}to{visibility:visible}}@-ms-keyframes
-amp-start{from{visibility:hidden}to{visibility:visible}}@-o-keyframes
-amp-start{from{visibility:hidden}to{visibility:visible}}@keyframes
-amp-start{from{visibility:hidden}to{visibility:visible}}
</style>
<noscript>
<style amp-boilerplate>
body{
-webkit-animation:none;
-moz-animation:none;
-ms-animation:none;
animation:none}
</style>
</noscript>
<script async custom-element = "amp-sticky-ad" src =
"https://cdn.ampproject.org/v0/amp-sticky-ad-1.0.js">
</script>
<style amp-custom>
div, p{
text-align:center;
}
amp-ad {
border : solid 1px black;
}
</style>
</head>
<body>
<h3>Google AMP - Sticky AD</h3>
<p>This is a example of adnetwork doubleclick banner ad</p>
<p>This is a example of adnetwork doubleclick banner ad</p>
<p>This is a example of adnetwork doubleclick banner ad</p>
<p>This is a example of adnetwork doubleclick banner ad</p>
<p>This is a example of adnetwork doubleclick banner ad</p>
<p>This is a example of adnetwork doubleclick banner ad</p>
<div>
<amp-sticky-ad layout = "nodisplay">
<amp-ad
width = "320"
height = "50"
type = "doubleclick"
data-slot = "/35096353/amptesting/formats/sticky">
</amp-ad>
</amp-sticky-ad>
</div>
<p>This is a example of adnetwork doubleclick banner ad</p>
<p>This is a example of adnetwork doubleclick banner ad</p>
<p>This is a example of adnetwork doubleclick banner ad</p>
<p>This is a example of adnetwork doubleclick banner ad</p>
<p>This is a example of adnetwork doubleclick banner ad</p>
<p>This is a example of adnetwork doubleclick banner ad</p>
<p>This is a example of adnetwork doubleclick banner ad</p>
<p>This is a example of adnetwork doubleclick banner ad</p>
<p>This is a example of adnetwork doubleclick banner ad</p>
<p>This is a example of adnetwork doubleclick banner ad</p>
<p>This is a example of adnetwork doubleclick banner ad</p>
<p>This is a example of adnetwork doubleclick banner ad</p>
<p>This is a example of adnetwork doubleclick banner ad</p>
<p>This is a example of adnetwork doubleclick banner ad</p>
<p>This is a example of adnetwork doubleclick banner ad</p>
<p>This is a example of adnetwork doubleclick banner ad</p>
<p>This is a example of adnetwork doubleclick banner ad</p>
<p>This is a example of adnetwork doubleclick banner ad</p>
<p>This is a example of adnetwork doubleclick banner ad</p>
<p>This is a example of adnetwork doubleclick banner ad</p>
<p>This is a example of adnetwork doubleclick banner ad</p>
<p>This is a example of adnetwork doubleclick banner ad</p>
<p>This is a example of adnetwork doubleclick banner ad</p>
<p>This is a example of adnetwork doubleclick banner ad</p>
<p>This is a example of adnetwork doubleclick banner ad</p>
<p>This is a example of adnetwork doubleclick banner ad</p>
<p>This is a example of adnetwork doubleclick banner ad</p>
<p>This is a example of adnetwork doubleclick banner ad</p>
<p>This is a example of adnetwork doubleclick banner ad</p>
<p>This is a example of adnetwork doubleclick banner ad</p>
<p>This is a example of adnetwork doubleclick banner ad</p>
<p>This is a example of adnetwork doubleclick banner ad</p>
<p>This is a example of adnetwork doubleclick banner ad</p>
<p>This is a example of adnetwork doubleclick banner ad</p>
<p>This is a example of adnetwork doubleclick banner ad</p>
<p>This is a example of adnetwork doubleclick banner ad</p>
<p>This is a example of adnetwork doubleclick banner ad</p>
<p>This is a example of adnetwork doubleclick banner ad</p>
<p>This is a example of adnetwork doubleclick banner ad</p>
<p>This is a example of adnetwork doubleclick banner ad</p>
<p>This is a example of adnetwork doubleclick banner ad</p>
<p>This is a example of adnetwork doubleclick banner ad</p>
<p>This is a example of adnetwork doubleclick banner ad</p>
<p>This is a example of adnetwork doubleclick banner ad</p>
<p>This is a example of adnetwork doubleclick banner ad</p>
<p>This is a example of adnetwork doubleclick banner ad</p>
<p>This is a example of adnetwork doubleclick banner ad</p>
<p>This is a example of adnetwork doubleclick banner ad</p>
<p>This is a example of adnetwork doubleclick banner ad</p>
<p>This is a example of adnetwork doubleclick banner ad</p>
<p>This is a example of adnetwork doubleclick banner ad</p>
<p>This is a example of adnetwork doubleclick banner ad</p>
<p>This is a example of adnetwork doubleclick banner ad</p>
<h2>END OF PAGE IS VISIBLE AND CONTENT IS NOT COVERED</h2>
</body>
</html>Çıktı
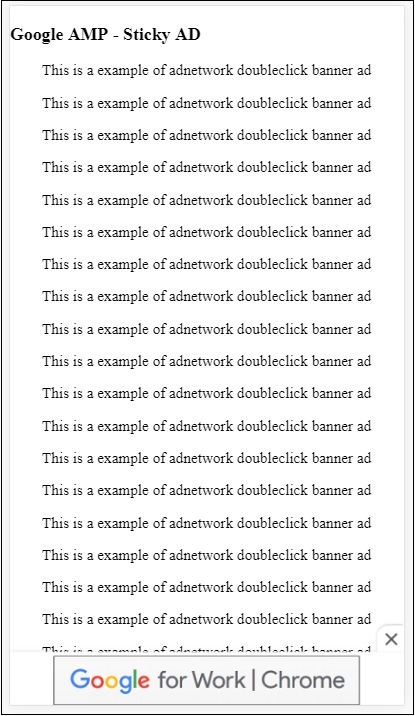
Kullanıcı sayfayı sonuna kaydırdığında böyle görünüyor -
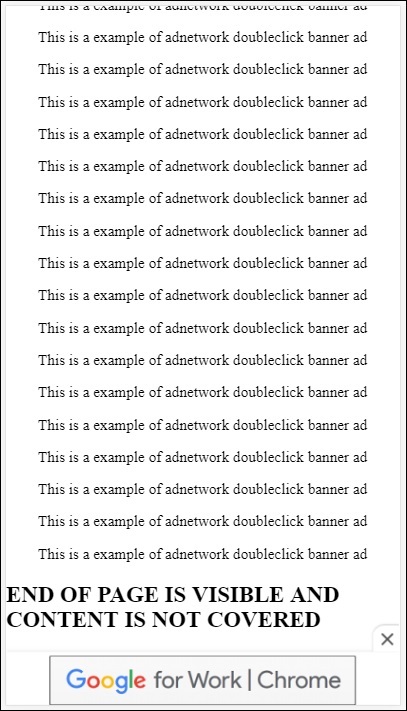
Sayfanın sonuna ulaştığınızda reklam içerikle çakışmaz. Kullanıcıların reklamı kapatmasına olanak sağlayan kapat düğmesi kullanıma sunulmuştur.
Kapat düğmesiyle ilgili herhangi bir şeyi değiştirmek isterseniz, yani görüntü veya genişlik vb. Kullanılarak yapılabilir. .amp-sticky-ad-close-button stil bileşeninde.
Kapat düğmesinin arka plan rengini değiştirme örneği
<!doctype html>
<html amp lang = "en">
<head>
<meta charset = "utf-8">
<script async src = "https://cdn.ampproject.org/v0.js">
</script>
<title>Google AMP - AD</title>
<link rel = "canonical" href =
"http://example.ampproject.org/article-metadata.html">
<meta name = "viewport" content = "width = device-width,
minimum-scale = 1,initial-scale = 1">
<style amp-boilerplate>
body{
-webkit-animation:
-amp-start 8s steps(1,end) 0s 1 normal both;-moz-animation:
-amp-start 8s steps(1,end) 0s 1 normal both;-ms-animation:
-amp-start 8s steps(1,end) 0s 1 normal both;animation:
-amp-start 8s steps(1,end) 0s 1 normal both
}
@-webkit-keyframes
-amp-start{from{visibility:hidden}to{visibility:visible}}@-moz-keyframes
-amp-start{from{visibility:hidden}to{visibility:visible}}@-ms-keyframes
-amp-start{from{visibility:hidden}to{visibility:visible}}@-o-keyframes
-amp-start{from{visibility:hidden}to{visibility:visible}}@keyframes
-amp-start{from{visibility:hidden}to{visibility:visible}}
</style>
<noscript>
<style amp-boilerplate>
body{
-webkit-animation:none;
-moz-animation:none;
-ms-animation:none;
animation:none}
</style>
</noscript>
<script async custom-element = "amp-sticky-ad"
src = "https://cdn.ampproject.org/v0/amp-sticky-ad-1.0.js">
</script>
<style amp-custom>
div, p{
text-align:center;
}
amp-ad {
border : solid 1px black;
}
.amp-sticky-ad-close-button {
background-color: red;
}
</style>
</head>
<body>
<h3>Google AMP - Sticky AD</h3>
<p>This is a example of adnetwork doubleclick banner ad</p>
<p>This is a example of adnetwork doubleclick banner ad</p>
<p>This is a example of adnetwork doubleclick banner ad</p>
<p>This is a example of adnetwork doubleclick banner ad</p>
<p>This is a example of adnetwork doubleclick banner ad</p>
<p>This is a example of adnetwork doubleclick banner ad</p>
<div>
<amp-sticky-ad layout = "nodisplay">
<amp-ad
width = "320"
height = "50"
type = "doubleclick"
data-slot = "/35096353/amptesting/formats/sticky">
</amp-ad>
</amp-sticky-ad>
</div>
<p>This is a example of adnetwork doubleclick banner ad</p>
<p>This is a example of adnetwork doubleclick banner ad</p>
<p>This is a example of adnetwork doubleclick banner ad</p>
<p>This is a example of adnetwork doubleclick banner ad</p>
<p>This is a example of adnetwork doubleclick banner ad</p>
<p>This is a example of adnetwork doubleclick banner ad</p>
<p>This is a example of adnetwork doubleclick banner ad</p>
<p>This is a example of adnetwork doubleclick banner ad</p>
<p>This is a example of adnetwork doubleclick banner ad</p>
<p>This is a example of adnetwork doubleclick banner ad</p>
<p>This is a example of adnetwork doubleclick banner ad</p>
<p>This is a example of adnetwork doubleclick banner ad</p>
<p>This is a example of adnetwork doubleclick banner ad</p>
<p>This is a example of adnetwork doubleclick banner ad</p>
<p>This is a example of adnetwork doubleclick banner ad</p>
<p>This is a example of adnetwork doubleclick banner ad</p>
<p>This is a example of adnetwork doubleclick banner ad</p>
<p>This is a example of adnetwork doubleclick banner ad</p>
<p>This is a example of adnetwork doubleclick banner ad</p>
<p>This is a example of adnetwork doubleclick banner ad</p>
<p>This is a example of adnetwork doubleclick banner ad</p>
<p>This is a example of adnetwork doubleclick banner ad</p>
<p>This is a example of adnetwork doubleclick banner ad</p>
<p>This is a example of adnetwork doubleclick banner ad</p>
<p>This is a example of adnetwork doubleclick banner ad</p>
<p>This is a example of adnetwork doubleclick banner ad</p>
<p>This is a example of adnetwork doubleclick banner ad</p>
<p>This is a example of adnetwork doubleclick banner ad</p>
<p>This is a example of adnetwork doubleclick banner ad</p>
<p>This is a example of adnetwork doubleclick banner ad</p>
<p>This is a example of adnetwork doubleclick banner ad</p>
<p>This is a example of adnetwork doubleclick banner ad</p>
<p>This is a example of adnetwork doubleclick banner ad</p>
<p>This is a example of adnetwork doubleclick banner ad</p>
<p>This is a example of adnetwork doubleclick banner ad</p>
<p>This is a example of adnetwork doubleclick banner ad</p>
<p>This is a example of adnetwork doubleclick banner ad</p>
<p>This is a example of adnetwork doubleclick banner ad</p>
<p>This is a example of adnetwork doubleclick banner ad</p>
<p>This is a example of adnetwork doubleclick banner ad</p>
<p>This is a example of adnetwork doubleclick banner ad</p>
<p>This is a example of adnetwork doubleclick banner ad</p>
<p>This is a example of adnetwork doubleclick banner ad</p>
<p>This is a example of adnetwork doubleclick banner ad</p>
<p>This is a example of adnetwork doubleclick banner ad</p>
<p>This is a example of adnetwork doubleclick banner ad</p>
<p>This is a example of adnetwork doubleclick banner ad</p>
<p>This is a example of adnetwork doubleclick banner ad</p>
<p>This is a example of adnetwork doubleclick banner ad</p>
<p>This is a example of adnetwork doubleclick banner ad</p>
<p>This is a example of adnetwork doubleclick banner ad</p>
<p>This is a example of adnetwork doubleclick banner ad</p>
<p>This is a example of adnetwork doubleclick banner ad</p>
<h2>END OF PAGE IS VISIBLE AND CONTENT IS NOT COVERED</h2>
</body>
</html>Çıktı
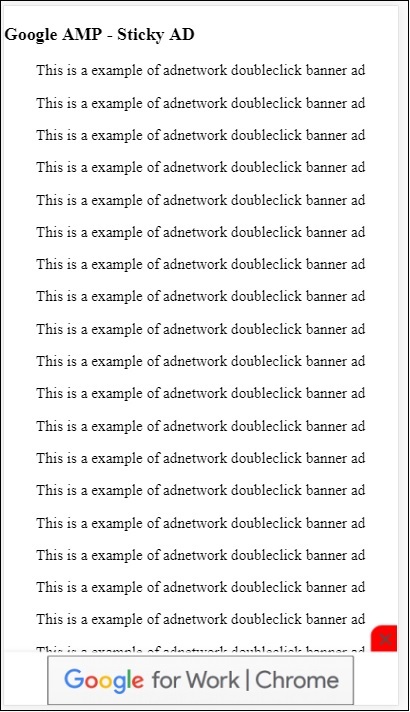
Yayıncı sayfasındaki amp yapışkan reklam örneği

AMPHTML Reklamlar
Reklamları yüklemek için kullanılan <amp-ad> 'i gördük. <amp-ad> kullanılarak yüklenen reklam içeriği, reklamların amp olmayan stilini kullanabilir. <amp-ad>, reklamlar için amp özelliğini kullanan reklamı yükler, ardından buna amphtml reklamları denir. AmpHTML reklamları, amfi spesifikasyonunu takip ettikleri için amfi olmayanlara göre daha hızlıdır.
Lightbox ve carousel gibi mevcut amp-bileşenlerini kullanarak, reklamların görüntülenmesine yardımcı olabilecek birçok türde amhtml reklam biçimi oluşturabiliriz.
Şu anda, aşağıdaki reklamlar destek amphtml reklamlarını sunuyor -
DoubleClick for Publishers
TripleLift
Dianomi
Adzerk
Google AdSense
Amphtml reklamları, aşağıda gösterildiği gibi <amp-ad> bileşeninden sunulacaktır -
Misal
<!doctype html>
<html amp lang = "en">
<head>
<meta charset = "utf-8">
<script async src = "https://cdn.ampproject.org/v0.js">
</script>
<title>Google AMP - Amp HTMLAds</title>
<link rel = "canonical" href=
"http://example.ampproject.org/article-metadata.html">
<meta name = "viewport" content = "width=device-width,
minimum-scale = 1,initial-scale = 1">
<style amp-boilerplate>
body{
-webkit-animation:
-amp-start 8s steps(1,end) 0s 1 normal both;-moz-animation:
-amp-start 8s steps(1,end) 0s 1 normal both;-ms-animation:
-amp-start 8s steps(1,end) 0s 1 normal both;animation:
-amp-start 8s steps(1,end) 0s 1 normal both
}
@-webkit-keyframes
-amp-start{from{visibility:hidden}to{visibility:visible}}@-moz-keyframes
-amp-start{from{visibility:hidden}to{visibility:visible}}@-ms-keyframes
-amp-start{from{visibility:hidden}to{visibility:visible}}@-o-keyframes
-amp-start{from{visibility:hidden}to{visibility:visible}}@keyframes
-amp-start{from{visibility:hidden}to{visibility:visible}}
</style>
<noscript>
<style amp-boilerplate>
body{
-webkit-animation:none;
-moz-animation:none;
-ms-animation:none;
animation:none}
</style>
</noscript>
<script async custom-element = "amp-ad" src =
"https://cdn.ampproject.org/v0/amp-ad-0.1.js">
</script>
<style amp-custom>
.ad-container {
background: #FFFFFF;
margin: 0;
padding: 0px;
text-align:center;
}
.article-body{
font-family: avenir, Helvetica, arial, serif, sans-serif !important;
font-weight: 400;
text-align:center;
}
.adv {
text-align:center;
}
</style>
</head>
<body>
<div>
<p>Amphtml ads are faster in comparison to the non
amp ones as they follow the amp specification.</p>
<p>Amphtml ads work fine in amp pages as well as non amp pages</p>
<div class = "ad-container">
<div>Advertising</div>
<amp-ad layout = "fixed"
width = "300"
height = "250"
type = "fake"
id = "i-amphtml-demo-fake"
src = "ampimg.html">
</amp-ad>
</div>
<p>Amphtml ads are faster in comparison to the non amp
ones as they follow the amp specification.</p>
<p>Amphtml ads work fine in amp pages as well as non amp pages</p>
</div>
</body>
</html>Reklamı göstermek için amp-ad'ı arıyoruz. Amp-ad'da kullanılan src, başka bir amp sayfasıdır. Type = ”fake” ve id = ”i-amphtml-demo-fake” kullandık. Amp-ad etiketinde kullanılan amp sayfası ayrıntıları veya ampimg.html burada gösterilir -
ampimg.html
<!doctype html>
<html amp lang = "en">
<head>
<meta charset = "utf-8">
<script async src = "https://cdn.ampproject.org/v0.js">
</script>
<title>Google AMP - Image</title>
<link rel = "canonical" href =
"http://example.ampproject.org/article-metadata.html">
<meta name = "viewport" content="width = device-width,
minimum-scale = 1,initial-scale = 1">
<style amp-boilerplate>
body{
-webkit-animation:
-amp-start 8s steps(1,end) 0s 1 normal both;-moz-animation:
-amp-start 8s steps(1,end) 0s 1 normal both;-ms-animation:
-amp-start 8s steps(1,end) 0s 1 normal both;animation:
-amp-start 8s steps(1,end) 0s 1 normal both
}
@-webkit-keyframes
-amp-start{from{visibility:hidden}to{visibility:visible}}@-moz-keyframes
-amp-start{from{visibility:hidden}to{visibility:visible}}@-ms-keyframes
-amp-start{from{visibility:hidden}to{visibility:visible}}@-o-keyframes
-amp-start{from{visibility:hidden}to{visibility:visible}}@keyframes
-amp-start{from{visibility:hidden}to{visibility:visible}}
</style>
<noscript>
<style amp-boilerplate>
body{
-webkit-animation:none;
-moz-animation:none;
-ms-animation:none;
animation:none}
</style>
</noscript>
<style amp-custom>
amp-img {
border: 1px solid black;
border-radius: 4px;
padding: 5px;
}
</style>
</head>
<body>
<amp-img alt = "Beautiful Flower"
src = "images/bannerad.png"
width = "246"
height = "205">
</amp-img>
</body>
</html>Çıktı
Amp-ad içinde amp sayfasını gösteriyoruz. Benzer şekilde, reklamları amp sayfasında göstermek için amp-video, amp-carousel kullanabiliriz. Listelenen reklam sunucusu, reklamları amphtml reklamları altında sunmak için uygun bir amp sayfasını çağırma desteğine sahiptir.
Amp analizi, bir sayfadaki verileri izlemek için kullanılan bir amp bileşenidir. Sayfadaki tüm kullanıcı etkileşimi kaydedilebilir ve verileri daha fazla iyileştirme veya iş amacıyla analiz etmek için kaydedilebilir.
Amp-analytics bileşeniyle çalışmak için aşağıdaki komut dosyasını head bölümünde eklememiz gerekir -
<script async custom-element = "amp-analytics"
src = "https://cdn.ampproject.org/v0/amp-analytics-0.1.js">
</script>Amp-analytics'te kullanılan olayları kaydetmek için üçüncü taraf bir satıcı kullanabiliriz veya ayrıca bir şirket içi izleme sistemine sahip olabiliriz.
GoogleAnalytics tedarikçisini kullanan amp-analytics örneği -
<amp-analytics type = googleanalytics>
<script type = application/json>{
"requests": {
"pageview": "${eventId}"
},
"vars": {
"account": "UA-44450152-1"
},
"triggers": {
"trackPageview" : {
"on": "visible",
"request": "pageview",
"vars": {
"eventId": "pageview"
}
}
}
}
</script>
</amp-analytics>Comscore satıcısını kullanan amp-analytics örneği
<amp-analytics type = comscore>
<script type = application/json>
{"vars": {"c2":"7922264"}}
</script>
</amp-analytics>Chartbeat tedarikçisini kullanan amp-analytics örneği
<amp-analytics type = chartbeat>
<script type = application/json>{
"vars": {
"uid": "230",
"domain": "dummyurl.com",
"sections": "us",
"authors": "Hello World"
}
}</script>
</amp-analytics>Satıcıların ayrıntılı listesi burada mevcuttur .
Şirket içi analiz tedarikçisinin nasıl kullanılacağına dair bir çalışma örneği aşağıda verilmiştir -
Misal
<!doctype html>
<html amp>
<head>
<meta charset = "utf-8">
<title>amp-analytics</title>
<script async src = "https://cdn.ampproject.org/v0.js">
</script>
<script async custom-element = "amp-analytics"
src = "https://cdn.ampproject.org/v0/amp-analytics-0.1.js">
</script>
<link rel = "canonical" href = "ampanalytics.html">
<meta name = "viewport" content = "width = device-width,
minimum-scale = 1,initial-scale = 1">
<style amp-boilerplate>
body{
-webkit-animation:
-amp-start 8s steps(1,end) 0s 1 normal both;-moz-animation:
-amp-start 8s steps(1,end) 0s 1 normal both;-ms-animation:
-amp-start 8s steps(1,end) 0s 1 normal both;animation:
-amp-start 8s steps(1,end) 0s 1 normal both}
@-webkit-keyframes
-amp-start{from{visibility:hidden}to{visibility:visible}}@-moz-keyframes
-amp-start{from{visibility:hidden}to{visibility:visible}}@-ms-keyframes
-amp-start{from{visibility:hidden}to{visibility:visible}}@-o-keyframes
-amp-start{from{visibility:hidden}to{visibility:visible}}@keyframes
-amp-start{from{visibility:hidden}to{visibility:visible}}
</style>
<noscript>
<style amp-boilerplate>
body{
-webkit-animation:none;
-moz-animation:none;
-ms-animation:none;
animation:none}
</style>
</noscript>
</head>
<body>
<h1>Google Amp - Analytics</h1>
<amp-analytics>
<script type = "application/json">
{
"requests": {
"event": "http://localhost:8080/googleamp/tracking.php?
user=test&account=localhost&event=${eventId}"
},
"triggers": {
"trackPageview": {
"on": "visible",
"request": "event",
"vars": {
"eventId": "pageview"
}
}
}
}
</script>
</amp-analytics>
</body>
</html>Tarayıcıda sayfaya vurulduğunda izleyici, sayfa görüntüleme için tetiklenecektir. Aşağıda gösterildiği gibi google ağı sekmesinde görülebilir.
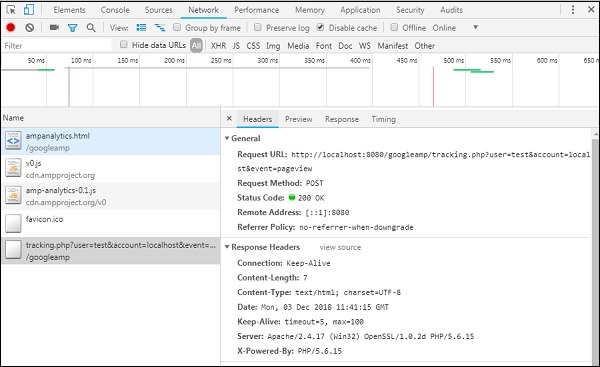
Sayfada belirli bir öğe göründüğünde de amp-analytics olayını tetikleyebilirsiniz. Aynısı için çalışan bir örnek burada gösterilmektedir -
Misal
<!doctype html>
<html amp>
<head>
<meta charset = "utf-8">
<title>amp-analytics</title>
<script async src = "https://cdn.ampproject.org/v0.js">
</script>
<script async custom-element = "amp-analytics"
src = "https://cdn.ampproject.org/v0/amp-analytics-0.1.js">
</script>
<link rel = "canonical" href = "ampanalytics.html">
<meta name = "viewport" content = "width = device-width,
minimum-scale = 1,initial-scale = 1">
<style amp-boilerplate>
body{
-webkit-animation:
-amp-start 8s steps(1,end) 0s 1 normal both;-moz-animation:
-amp-start 8s steps(1,end) 0s 1 normal both;-ms-animation:
-amp-start 8s steps(1,end) 0s 1 normal both;animation:
-amp-start 8s steps(1,end) 0s 1 normal both
}
@-webkit-keyframes
-amp-start{from{visibility:hidden}to{visibility:visible}}@-moz-keyframes
-amp-start{from{visibility:hidden}to{visibility:visible}}@-ms-keyframes
-amp-start{from{visibility:hidden}to{visibility:visible}}@-o-keyframes
-amp-start{from{visibility:hidden}to{visibility:visible}}@keyframes
-amp-start{from{visibility:hidden}to{visibility:visible}}
</style>
<noscript>
<style amp-boilerplate>
body{
-webkit-animation:none;
-moz-animation:none;
-ms-animation:none;
animation:none}
</style>
</noscript>
<script async custom-element = "amp-video"
src = "https://cdn.ampproject.org/v0/amp-video-0.1.js">
</script>
</head>
<body>
<h1>Google Amp - Analytics</h1>
<amp-video controls
id = "videoplayer"
width = "640"
height = "360"
layout = "responsive"
poster = "images/videoposter.png"
autoplay>
<source src = "video/bunny.webm" type = "video/webm" />
<source src = "video/samplevideo.mp4" type = "video/mp4" />
<div fallback>
<p>This browser does not support the video element.</p>
</div>
</amp-video>
<amp-analytics>
<script type = "application/json">
{
"requests": {
"event": "http://localhost:8080/googleamp/tracking.php?
user=test&account=localhost&event=${eventId}"
},
"triggers": {
"trackPageview": {
"on": "visible",
"request": "event",
"visibilitySpec": {
"selector": "#videoplayer",
"visiblePercentageMin": 20,
"totalTimeMin": 2000,
"continuousTimeMin": 200
},
"vars": {
"eventId": "video"
}
}
}
}
</script>
</amp-analytics>
</body>
</html>Çıktı
Amp-analytics bileşeni, komut dosyası etiketine bir json nesnesinin aktarılmasını gerektirir. Json formatı aşağıdaki gibidir -
{
"requests": {
request-name: request-value,
...
},
"vars": {
var-name: var-value,
...
},
"extraUrlParams": {
extraurlparam-name: extraurlparam-value,
...
},
"triggers": {
trigger-name: trigger-object,
...
},
"transport": {
"beacon": *boolean*,
"xhrpost": *boolean*,
"image": *boolean*,
}
}Yukarıda belirtilen tüm nesnelerin amp-analytics'e aktarılması zorunlu değildir. Üçüncü taraf bir satıcı kullanıyorsanız, satıcının kendi biçimi olacaktır ve kullanıcının verileri bu şekilde iletmesi gerekecektir.
Her bir nesneyi ayrıntılı olarak anlayalım -
Talepler
İstek nesnesinin, koşullar karşılandığında tetiklenecek bir url'si vardır. Burada bir istek nesnesi örneği gösterilmektedir -
"requests": {
"request-name": "http://localhost:8080/googleamp/tracking.php?
user=test&account=localhost&event=${eventId}"
},İstek adı tetikleyici nesnede belirtilecektir ve bunun için aynı adın kullanılması gerekir.
Vars
İstek nesnesinde kullanılacak tüm değişkenler vars nesnesinde belirtilir.
"requests": {
"event": "http://localhost:8080/googleamp/tracking.php?
user=test&account=localhost&event=${eventId}"
},
"vars": {
"eventId": "video"
}Ekstra URL Parametreleri
İstek url'sine sorgu dizesi olarak eklenecek ek parametreler bu nesnede tanımlanabilir. Aşağıdaki örneği inceleyin
"requests": {
"event": "http://localhost:8080/googleamp/tracking.php?
user=test&account=localhost&event=${eventId}&x=1&y=2&z=3"
},
"vars": {
"eventId": "video"
},
"extraUrlParams": {
"x": "1",
"y": "2",
"z": "3"
}Tetikleyiciler
Bu nesne, istek url'sinin ne zaman tetiklenmesi gerektiğini söyleyecektir. Tetikleyici nesnenin içinde bulunan anahtar / değer çiftleri aşağıda verilmiştir -
on- Dinlenecek olaydan bahsetmelisiniz. Mevcut değerleronvardır , ini-yük, tıklayın, kaydırma, zamanlayıcı, görünür, gizli, kullanıcı hatası, erişimi- *, vidio-başlatmak kılmasıdır *
request- Bu, talebin adıdır. Bu, istek nesnesindeki istek adı ile eşleşmelidir .
vars - Bu, tetikleyici nesnede kullanılacak veya tanımlanan değişken anahtar / değer çiftini geçersiz kılmak için tanımlanmış anahtar / değer değişkenlerine sahip nesnedir.
selector - Bu, tetikleyicinin ayarlandığı öğenin ayrıntılarını gösterir.
scrollSpec - Bu, kaydırma tetikleyicisinin ayrıntılarına sahip olacaktır.
timerSpec - Bu, verilecek zamanın ayrıntılarını içerecektir.
videoSpec - Bu, bir video için çağrılacak ayrıntılara sahip olacaktır.
İşte amp-video eklediğimiz bir örnek. Amp-analytics, video öğesi sayfada mevcut olduğunda, sayfada en az% 20'si göründüğünde, videonun en az 2 saniye oynatılması gerektiğinde ve 200 ms boyunca kesintisiz olarak görüntülendiğinde izleyiciyi çalıştırır. Tüm bu koşullar karşılandığında, sadece izci kovulacak. Ayrıntılar aşağıda gösterilmiştir -
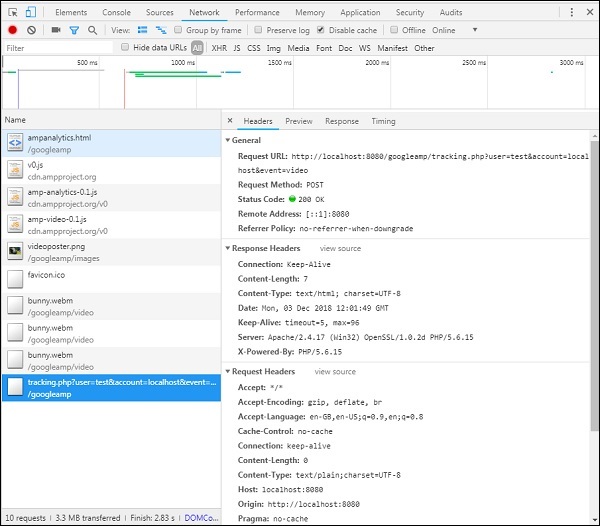
Öğenin görünürlüğü ve öğenin en az% 20 oranında görüntülenebilir olması gibi diğer koşullarla ilgili koşulları eklemek için videonun 2 saniye süreyle oynatılması gerekir, tüm bu koşulların içinde belirtilmesi gerekir. visibilitySpec aşağıda gösterildiği gibi -
<amp-analytics>
<script type = "application/json">
{
"requests": {
"event": "http://localhost:8080/googleamp/tracking.php?
user=test&account=localhost&event=${eventId}"
},
"triggers": {
"trackPageview": {
"on": "visible",
"request": "event",
"visibilitySpec": {
"selector": "#videoplayer",
"visiblePercentageMin": 20,
"totalTimeMin": 2000,
"continuousTimeMin": 200
},
"vars": {
"eventId": "video"
}
}
}
}
</script>
</amp-analytics>videoSpecizleyici ateşlemesini tetiklemek istediğiniz koşulları temel alarak tanımlamanıza olanak tanır. Koşullar burada listelenmiştir -
waitFor
Bu özellik, görünürlük tetikleyicisinin ateşlemeden önce belirli bir durumu beklemesi için kullanılır. WaitFor için kullanılabilen seçenekler şunlardır:none, ini-load ve render-start. Varsayılan olarak waitFor değeri ini-load şeklindedir.
reportWhen
Bu özellik, görünürlük tetikleyicisinin ateşlemeden önce belirli bir durumu beklemesi için kullanılır. Desteklenen değer documentExit'dir.reportWhen ve repeat mülk birlikte içeride visibilitySpec
continuousTimeMin and continuousTimeMax
Bu özellik, görünürlük izleyicinin, öğeye ihtiyaç duyduğu, sürekli olarak görüntü alanında olması gerektiğini belirtir. continuousTimeMin ve continuousTimeMax. ContinousTimeMin belirtilmezse, varsayılan olarak 0'a ayarlanır. Değer milisaniye cinsinden belirtilir.
totalTimeMin and totalTimeMin
Bu özellik, görünürlük izleyicinin tetiklemesi için öğeye ihtiyaç duyduğu toplam süre için görüntü alanında olması gerektiğini belirtir. totalTimeMin ve totalTimeMin. TotalTimeMin belirtilmezse, varsayılan olarak 0 olacaktır. Değer milisaniye cinsinden belirtilir.
visiblePercentageMin and visiblePercentageMax
Bu özellik, görünürlük izleyicinin, öğenin, visiblePercetageMin ile visiblePercetageMax öğesine atanan yüzde arasında görünüm alanı içinde görünür olmasını gerektirdiğini belirtir. İçin varsayılan değerlervisiblePercentageMin 0 ve 100 visibilePercentageMaxHer ikisi de, görünürlük tetikleyicisinin öğe görünür olmadığında tetikleneceğinden 0 değerine sahiptir ve her ikisinde de 100 varsa, öğe tamamen göründüğünde tetiklenecektir.
Repeat
True olarak ayarlanırsa, visibilitySpec koşulları her karşılandığında tetikleyici etkinleşir. Varsayılan olarak, tekrarlama değeri yanlıştır. ReportWhen özelliği ile birlikte kullanılamaz.
Tıklama tetikleyicisine bir örnek burada gösterilmektedir -
<!doctype html>
<html amp>
<head>
<meta charset = "utf-8">
<title>amp-analytics</title>
<script async src = "https://cdn.ampproject.org/v0.js">
</script>
<script async custom-element = "amp-analytics"
src="https://cdn.ampproject.org/v0/amp-analytics-0.1.js">
</script>
<link rel = "canonical" href = "ampanalytics.html">
<meta name = "viewport" content = "width = device-width,
minimum-scale = 1,initial-scale = 1">
<style amp-boilerplate>
body{
-webkit-animation:
-amp-start 8s steps(1,end) 0s 1 normal both;-moz-animation:
-amp-start 8s steps(1,end) 0s 1 normal both;-ms-animation:
-amp-start 8s steps(1,end) 0s 1 normal both;animation:
-amp-start 8s steps(1,end) 0s 1 normal both
}
@-webkit-keyframes
-amp-start{from{visibility:hidden}to{visibility:visible}}@-moz-keyframes
-amp-start{from{visibility:hidden}to{visibility:visible}}@-ms-keyframes
-amp-start{from{visibility:hidden}to{visibility:visible}}@-o-keyframes
-amp-start{from{visibility:hidden}to{visibility:visible}}@keyframes
-amp-start{from{visibility:hidden}to{visibility:visible}}
</style>
<noscript>
<style amp-boilerplate>
body{
-webkit-animation:none;
-moz-animation:none;
-ms-animation:none;
animation:none}
</style>
</noscript>
<script async custom-element = "amp-video"
src = "https://cdn.ampproject.org/v0/amp-video-0.1.js">
</script>
<style amp-custom>
a {
color: blue;
}
</style>
</head>
<body>
<h1>Google Amp - Analytics</h1>
<a>Click Here</a>
<amp-analytics>
<script type = "application/json">
{
"requests": {
"event": "http://localhost:8080/googleamp/tracking.php?
user=test&account=localhost&event=${eventId}"
},
"triggers": {
"trackAnchorClicks": {
"on": "click",
"selector": "a",
"request": "event",
"vars": {
"eventId": "clickonlink"
}
}
}
}
</script>
</amp-analytics>
</body>
</html>Çıktı
Bağlantı tıklandığında, etkinlik aşağıda gösterildiği gibi tetiklenecektir -
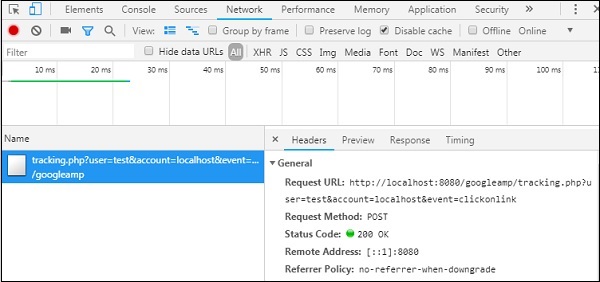
Amp, herhangi bir harici kitaplık yüklemeye gerek kalmadan sayfada sosyal widget'ları gösterme desteği sağlar. Bu bölümde, burada listelenen bazı popüler sosyal araçları tartışacağız -
Google AMP - Facebook
Google AMP - Twitter
Google AMP - Pinterest
Google Amp - Facebook
Amp-facebook bileşenini kullanarak, facebook'a bağlanabilir ve bir amp sayfasında gönderi, video, yorum görüntüleyebiliriz.
Amp-facebook'tan yararlanmak için aşağıdaki komut dosyasını sayfaya eklememiz gerekiyor -
<script async custom-element = "amp-facebook"
src = "https://cdn.ampproject.org/v0/amp-facebook-0.1.js">
</script>Amp-facebook etiket biçimi
<amp-facebook
width = "552"
height = "310"
layout = "responsive"
data-href = "https://www.facebook.com/tutorialspointindia/
posts/1784197988358159">
</amp-facebook>Amp-facebook için çalışan bir örnek burada gösterilmektedir -
Örnek: Facebook'tan gönderi gösteriliyor
<!doctype html>
<html amp lang = "en">
<head>
<meta charset = "utf-8">
<script async src = "https://cdn.ampproject.org/v0.js">
</script>
<title>Google AMP - Amp Facebook</title>
<link rel = "canonical" href =
"http://example.ampproject.org/article-metadata.html">
<meta name = "viewport" content = "width = device-width,
minimum-scale = 1,initial-scale = 1">
<style amp-boilerplate>
body{
-webkit-animation:
-amp-start 8s steps(1,end) 0s 1 normal both;-moz-animation:
-amp-start 8s steps(1,end) 0s 1 normal both;-ms-animation:
-amp-start 8s steps(1,end) 0s 1 normal both;animation:
-amp-start 8s steps(1,end) 0s 1 normal both
}
@-webkit-keyframes
-amp-start{from{visibility:hidden}to{visibility:visible}}@-moz-keyframes
-amp-start{from{visibility:hidden}to{visibility:visible}}@-ms-keyframes
-amp-start{from{visibility:hidden}to{visibility:visible}}@-o-keyframes
-amp-start{from{visibility:hidden}to{visibility:visible}}@keyframes
-amp-start{from{visibility:hidden}to{visibility:visible}}
</style>
<noscript>
<style amp-boilerplate>
body{
-webkit-animation:none;
-moz-animation:none;
-ms-animation:none;
animation:none}
</style>
</noscript>
<script async custom-element = "amp-facebook"
src = "https://cdn.ampproject.org/v0/amp-facebook-0.1.js">
</script>
</head>
<body>
<h3>Google AMP - Amp Facebook</h3>
<h2>Learn Python webscrapping</h2>
<amp-facebook
width = "552"
height = "310"
layout = "responsive"
data-href = "https://www.facebook.com/tutorialspointindia/posts/1784197988358159">
</amp-facebook>
</body>
</html>Çıktı
Örnek: Facebook'tan video gösteriliyor
<!doctype html>
<html amp lang = "en">
<head>
<meta charset = "utf-8">
<script async src = "https://cdn.ampproject.org/v0.js">
</script>
<title>Google AMP - Amp Facebook>/title>
<link rel = "canonical" href =
"http://example.ampproject.org/article-metadata.html">
<meta name = "viewport" content = "width = device-width,
minimum-scale = 1,initial-scale = 1">
<style amp-boilerplate>
body{
-webkit-animation:
-amp-start 8s steps(1,end) 0s 1 normal both;-moz-animation:
-amp-start 8s steps(1,end) 0s 1 normal both;-ms-animation:
-amp-start 8s steps(1,end) 0s 1 normal both;animation:
-amp-start 8s steps(1,end) 0s 1 normal both
}
@-webkit-keyframes
-amp-start{from{visibility:hidden}to{visibility:visible}}@-moz-keyframes
-amp-start{from{visibility:hidden}to{visibility:visible}}@-ms-keyframes
-amp-start{from{visibility:hidden}to{visibility:visible}}@-o-keyframes
-amp-start{from{visibility:hidden}to{visibility:visible}}@keyframes
-amp-start{from{visibility:hidden}to{visibility:visible}}
</style>
<noscript>
<style amp-boilerplate>
body{
-webkit-animation:none;
-moz-animation:none;
-ms-animation:none;
animation:none}
</style>
</noscript>
<script async custom-element = "amp-facebook"
src = "https://cdn.ampproject.org/v0/amp-facebook-0.1.js">
</script>
</head>
<body>
<h3<Google AMP - Amp Facebook Video</h3>
<h2<Learn Python</h2>
<amp-facebook
width = "476"
height = "316"
layout = "responsive"
data-embed-as = "video"
data-href = "https://www.facebook.com/thetutorialkings/videos/701545820223256">
</amp-facebook>
</body>
</html>Çıktı
Örnek: Bir Facebook gönderisine ilişkin yorumları gösterme
<!doctype html>
<html amp lang = "en">
<head>
<meta charset = "utf-8">
<script async src = "https://cdn.ampproject.org/v0.js">
</script>
<title>Google AMP - Amp Facebook</title>
<link rel = "canonical" href =
"http://example.ampproject.org/article-metadata.html">
<meta name = "viewport" content = "width = device-width,
minimum-scale = 1,initial-scale = 1">
<style amp-boilerplate>
body{
-webkit-animation:
-amp-start 8s steps(1,end) 0s 1 normal both;-moz-animation:
-amp-start 8s steps(1,end) 0s 1 normal both;-ms-animation:
-amp-start 8s steps(1,end) 0s 1 normal both;animation:
-amp-start 8s steps(1,end) 0s 1 normal both
}
@-webkit-keyframes
-amp-start{from{visibility:hidden}to{visibility:visible}}@-moz-keyframes
-amp-start{from{visibility:hidden}to{visibility:visible}}@-ms-keyframes
-amp-start{from{visibility:hidden}to{visibility:visible}}@-o-keyframes
-amp-start{from{visibility:hidden}to{visibility:visible}}@keyframes
-amp-start{from{visibility:hidden}to{visibility:visible}}
</style>
<noscript>
<style amp-boilerplate>
body{
-webkit-animation:none;
-moz-animation:none;
-ms-animation:none;
animation:none}
</style>
</noscript>
<script async custom-element = "amp-facebook"
src = "https://cdn.ampproject.org/v0/amp-facebook-0.1.js">
</script>
</head>
<body>
<h3>Google AMP - Amp Facebook comment for post</h3>
<h2>Learn Microprocessor</h2>
<amp-facebook
width = "552"
height = "500"
layout = "responsive"
data-embed-type = "comment"
data-href = "https://www.facebook.com/tutorialspointindia/posts/1744145745696717?
comment_id=1744179789026646&include_parent=false">
</amp-facebook>
</body>
</html>Çıktı
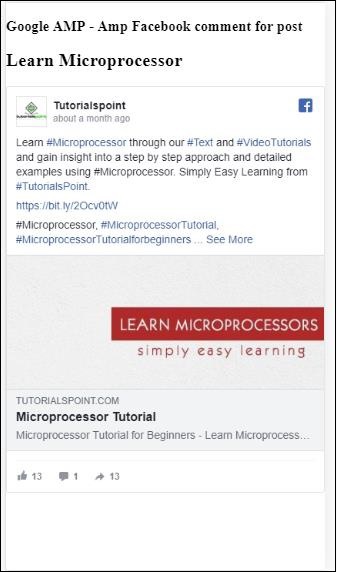
Mevcut özellikler amp-facebook vardır
data-href (zorunlu) - Burada facebook url'sini belirtmeniz gerekir.
data-embed-as- Mevcut seçenekler gönderi, video ve yorumdur. Varsayılan olarak gönderidir.
data-locale (zorunlu) - Ekranı yerel dilde gösterir, seçiminize göre değiştirebilirsiniz.
data-include-comment-parent- Doğru veya yanlış değerleri alır. Varsayılan olarak yanlıştır. Yorum olarak data-embed-as seçeneğini kullandığınızda, yoruma ebeveyn cevabına ihtiyaç duymanız durumunda, bu seçeneği true olarak ayarlayabilirsiniz.
Şimdiye kadar amp sayfasına gönderi / video ve yorum eklemeyi gördük. Facebook sayfasını eklememiz gerekirse, amp adlı bir bileşen varamp-facebook-page.
Amp Facebook Sayfası Eklentisi
Amp-facebook-page bileşeni bize istediğimiz facebook sayfası ayrıntılarını verir. Amp-facebook-page ile çalışmak için aşağıdaki komut dosyasını eklememiz gerekir -
<script async custom-element = "amp-facebook-page" src = "
https://cdn.ampproject.org/v0/amp-facebook-page-0.1.js">
</script>Burada amp-facebook-page kullanan bir çalışma örneği gösterilmektedir -
Misal
<!doctype html>
<html amp lang = "en">
<head>
<meta charset = "utf-8">
<script async src = "https://cdn.ampproject.org/v0.js">
</script>
<title>Google AMP - Amp Facebook</title>
<link rel = "canonical" href =
"http://example.ampproject.org/article-metadata.html">
<meta name = "viewport" content = "width = device-width,
minimum-scale = 1,initial-scale = 1">
<style amp-boilerplate>
body{
-webkit-animation:
-amp-start 8s steps(1,end) 0s 1 normal both;-moz-animation:
-amp-start 8s steps(1,end) 0s 1 normal both;-ms-animation:
-amp-start 8s steps(1,end) 0s 1 normal both;animation:
-amp-start 8s steps(1,end) 0s 1 normal both
}
@-webkit-keyframes
-amp-start{from{visibility:hidden}to{visibility:visible}}@-moz-keyframes
-amp-start{from{visibility:hidden}to{visibility:visible}}@-ms-keyframes
-amp-start{from{visibility:hidden}to{visibility:visible}}@-o-keyframes
-amp-start{from{visibility:hidden}to{visibility:visible}}@keyframes
-amp-start{from{visibility:hidden}to{visibility:visible}}
</style>
<noscript>
<style amp-boilerplate>
body{
-webkit-animation:none;
-moz-animation:none;
-ms-animation:none;
animation:none}
</style>
</noscript>
<script async custom-element = "amp-facebook-page"
src = "https://cdn.ampproject.org/v0/amp-facebook-page-0.1.js">
</script>
</head>
<body>
<h3>Google AMP - Amp Facebook Page</h3>
<h3>Welcome to Tutorialspoint Facebook Page</h3>
<amp-facebook-page
width = "340"
height = "130"
layout = "responsive"
data-href = "https://www.facebook.com/tutorialspointindia/">
</amp-facebook-page>
</body>
</html>Çıktı

Amp-facebook benzeri
Facebook sayfasını düğme eklentisi gibi gömmek için amp-facebook benzeri bileşen kullanabiliriz. Amp-facebook benzeri ile çalışmak için aşağıdaki komut dosyasını eklememiz gerekir -
"<script async custom-element = "amp-facebook-like"
src = "https://cdn.ampproject.org/v0/amp-facebook-like-0.1.js">
</script>Misal
<!doctype html>
<html amp lang = "en">
<head>
<meta charset = "utf-8">
<script async src = "https://cdn.ampproject.org/v0.js">
</script>
<title>Google AMP - Amp Facebook</title>
<link rel = "canonical"
href = "http://example.ampproject.org/article-metadata.html">
<meta name = "viewport" content = "width = device-width,
minimum-scale = 1,initial-scale = 1">
<style amp-boilerplate>
body{
-webkit-animation:
-amp-start 8s steps(1,end) 0s 1 normal both;-moz-animation:
-amp-start 8s steps(1,end) 0s 1 normal both;-ms-animation:
-amp-start 8s steps(1,end) 0s 1 normal both;animation:
-amp-start 8s steps(1,end) 0s 1 normal both
}
@-webkit-keyframes
-amp-start{from{visibility:hidden}to{visibility:visible}}@-moz-keyframes
-amp-start{from{visibility:hidden}to{visibility:visible}}@-ms-keyframes
-amp-start{from{visibility:hidden}to{visibility:visible}}@-o-keyframes
-amp-start{from{visibility:hidden}to{visibility:visible}}@keyframes
-amp-start{from{visibility:hidden}to{visibility:visible}}
</style>
<noscript>
<style amp-boilerplate>
body{
-webkit-animation:none;
-moz-animation:none;
-ms-animation:none;
animation:none}
</style>
</noscript>
<script async custom-element = "amp-facebook-like"
src = "https://cdn.ampproject.org/v0/amp-facebook-like-0.1.js">
</script>
<style amp-custom>
amp-facebook-like {
margin: 1rem
}
</style>
</head>
<body>
<h3>Google AMP - Amp Facebook Likes</h3>
<h3>Welcome to Tutorialspoint Facebook Likes</h3>
<amp-facebook-like
width = "110"
height = "20"
layout = "fixed"
data-layout = "button_count"
data-href = "https://www.facebook.com/tutorialspointindia">
</amp-facebook-like>
</body>
</html>Çıktı
Amp facebook yorumları eklentisi
Amp-facebook-comments bileşeni verilen sayfanın yorumlarını verecektir.
Amp-facebook-comments ile çalışmak için aşağıdaki komut dosyasını eklememiz gerekir -
<script async custom-element = "amp-facebook-comments"
src = "https://cdn.ampproject.org/v0/amp-facebook-comments-0.1.js">
</script>Misal
<!doctype html>
<html amp lang = "en">
<head>
<meta charset = "utf-8">
<script async src = "https://cdn.ampproject.org/v0.js">
</script>
<title>Google AMP - Amp Facebook</title>
<link rel = "canonical" href =
"http://example.ampproject.org/article-metadata.html">
<meta name = "viewport" content = "width = device-width,
minimum-scale = 1,initial-scale = 1">
<style amp-boilerplate>
body{
-webkit-animation:
-amp-start 8s steps(1,end) 0s 1 normal both;-moz-animation:
-amp-start 8s steps(1,end) 0s 1 normal both;-ms-animation:
-amp-start 8s steps(1,end) 0s 1 normal both;animation:
-amp-start 8s steps(1,end) 0s 1 normal both
}
@-webkit-keyframes
-amp-start{from{visibility:hidden}to{visibility:visible}}@-moz-keyframes
-amp-start{from{visibility:hidden}to{visibility:visible}}@-ms-keyframes
-amp-start{from{visibility:hidden}to{visibility:visible}}@-o-keyframes
-amp-start{from{visibility:hidden}to{visibility:visible}}@keyframes
-amp-start{from{visibility:hidden}to{visibility:visible}}
</style>
<noscript>
<style amp-boilerplate>
body{
-webkit-animation:none;
-moz-animation:none;
-ms-animation:none;
animation:none}
</style>
</noscript>
<script async custom-element = "amp-facebook-comments"
src = "https://cdn.ampproject.org/v0/amp-facebook-comments-0.1.js">
</script>
<style amp-custom>
amp-facebook-like {
margin: 1rem
}
</style>
</head>
<body>
<h3>Google AMP - Amp Facebook Likes</h3>
<amp-facebook-comments
width = 486
height = 657
layout = "responsive"
data-numposts = "2"
data-href = "https://developers.facebook.com/docs/plugins/comments">
</amp-facebook-comments>
</body>
</html>Çıktı
Öznitelik data-numpostsEkranda görüntülenecek yorumların sayısına karar verir. Tüm yorumları almak istiyorsanız, özelliği kaldırabilirsiniz.
Google AMP - Pinterest
Amp, amp-pinterest bileşenini kullanarak bir pinterest widget'ı sağlar. Bu bileşeni, pinterest widget'ını, pinterest kaydet düğmesini ve pinterest takip butonunu göstermek için kullanabiliriz.
Amp-pinterest ile çalışmaya başlamak için aşağıdaki komut dosyasını eklememiz gerekiyor -
<script async custom-element="amp-pinterest" src="https://cdn.ampproject.org/v0/amp-pinterest-0.1.js">
</script>Amp-pinterest etiketi
<amp-pinterest width = 300 height = 450 data-do = "embedPin"
data-url = "https://in.pinterest.com/pin/856739529089490354/">
</amp-pinterest>Pinterest Widget'ı
Example
Pinterest widget'ını göstermek için data-do = "embedPin" niteliğini kullanmamız gerekir. Aynısı için çalışan bir örnek burada gösterilmektedir -
<!doctype html>
<html amp lang = "en">
<head>
<meta charset = "utf-8">
<script async src = "https://cdn.ampproject.org/v0.js">
</script>
<title>Google AMP - Amp Pinterest Widget</title>
<link rel = "canonical" href =
"http://example.ampproject.org/article-metadata.html">
<meta name = "viewport" content = "width = device-width,
minimum-scale = 1,initial-scale = 1">
<style amp-boilerplate>
body{
-webkit-animation:
-amp-start 8s steps(1,end) 0s 1 normal both;-moz-animation:
-amp-start 8s steps(1,end) 0s 1 normal both;-ms-animation:
-amp-start 8s steps(1,end) 0s 1 normal both;animation:
-amp-start 8s steps(1,end) 0s 1 normal both}@-webkit-keyframes
-amp-start 8s steps(1,end) 0s 1 normal both
}
@-webkit-keyframes
-amp-start{from{visibility:hidden}to{visibility:visible}}@-moz-keyframes
-amp-start{from{visibility:hidden}to{visibility:visible}}@-ms-keyframes
-amp-start{from{visibility:hidden}to{visibility:visible}}@-o-keyframes
-amp-start{from{visibility:hidden}to{visibility:visible}}@keyframes
-amp-start{from{visibility:hidden}to{visibility:visible}}
</style>
<noscript>
<style amp-boilerplate>
body{
-webkit-animation:none;
-moz-animation:none;
-ms-animation:none;
animation:none}
</style>
</noscript>
<script async custom-element = "amp-pinterest"
src = "https://cdn.ampproject.org/v0/amp-pinterest-0.1.js">
</script>
<style amp-custom>
amp-facebook-like {
margin: 1rem
}
</style>
</head>
<body>
<h3>Google AMP - Amp Pinterest Widget</h3>
<amp-pinterest
width = 300
height = 450
data-do = "embedPin"
data-url = "https://in.pinterest.com/pin/856739529089490354/">
</amp-pinterest>
</body>
</html>Output
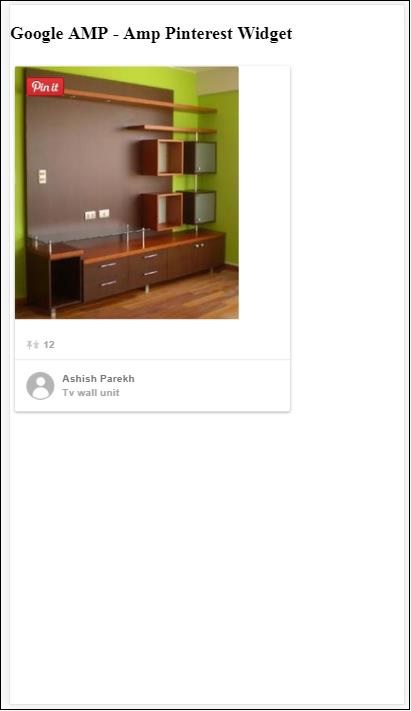
Pinterest Kaydet Düğmesi
Pinterest için kaydet düğmesini göstermek için özniteliği kullanmamız gerekir data-do="buttonPin". Pinterest kaydetme düğmesinin çalışan bir örneği burada gösterilmektedir -
Example
<!doctype html>
<html amp lang = "en">
<head>
<meta charset = "utf-8">
<script async src = "https://cdn.ampproject.org/v0.js">
</script>
<title>Google AMP - Amp Pinterest Widget</title>
<link rel = "canonical" href =
"http://example.ampproject.org/article-metadata.html">
<meta name = "viewport" content = "width = device-width,
minimum-scale = 1,initial-scale = 1">
<style amp-boilerplate>
body{
-webkit-animation:
-amp-start 8s steps(1,end) 0s 1 normal both;-moz-animation:
-amp-start 8s steps(1,end) 0s 1 normal both;-ms-animation:
-amp-start 8s steps(1,end) 0s 1 normal both;animation:
-amp-start 8s steps(1,end) 0s 1 normal both
}
@-webkit-keyframes
-amp-start{from{visibility:hidden}to{visibility:visible}}@-moz-keyframes
-amp-start{from{visibility:hidden}to{visibility:visible}}@-ms-keyframes
-amp-start{from{visibility:hidden}to{visibility:visible}}@-o-keyframes
-amp-start{from{visibility:hidden}to{visibility:visible}}@keyframes
-amp-start{from{visibility:hidden}to{visibility:visible}}
</style>
<noscript>
<style amp-boilerplate>
body{
-webkit-animation:none;
-moz-animation:none;
-ms-animation:none;
animation:none}
</style>
</noscript>
<script async custom-element = "amp-pinterest"
src = "https://cdn.ampproject.org/v0/amp-pinterest-0.1.js">
</script>
<style amp-custom>
amp-facebook-like {
margin: 1rem
}
</style>
</head>
<body>
<h3>Google AMP - Amp Pinterest Save Button</h3>
<h3>TutorialsPoint - ReactJS</h3>
<amp-img
src = "images/reactjs.png"
width = "100"
height = "100"
alt = "blockchain image">
</amp-img>
<amp-pinterest
height = "18"
width = "56"
data-do = "buttonPin"
data-url = "https://www.tutorialspoint.com/"
data-media = "https://www.tutorialspoint.com/images/tp-logo-diamond.png"
data-description = "amp-pinterest in action">
</amp-pinterest>
</body>
</html>Output
Pinterest Takip Et Düğmesi
Pinterest için kaydetme takip et düğmesini göstermek için özniteliği kullanmamız gerekir data-do="buttonFollow". Pinterest kaydetme düğmesinin çalışan bir örneği burada gösterilmektedir -
Example
<!doctype html>
<html amp lang = "en">
<head>
<meta charset = "utf-8">
<script async src = "https://cdn.ampproject.org/v0.js">
</script>
<title>Google AMP - Amp Pinterest Widget</title>
<link rel = "canonical" href =
"http://example.ampproject.org/article-metadata.html">
<meta name = "viewport" content = "width = device-width,
minimum-scale = 1,initial-scale = 1">
<style amp-boilerplate>
body{
-webkit-animation:
-amp-start 8s steps(1,end) 0s 1 normal both;-moz-animation:
-amp-start 8s steps(1,end) 0s 1 normal both;-ms-animation:
-amp-start 8s steps(1,end) 0s 1 normal both;animation:
-amp-start 8s steps(1,end) 0s 1 normal both
}
@-webkit-keyframes
-amp-start{from{visibility:hidden}to{visibility:visible}}@-moz-keyframes
-amp-start{from{visibility:hidden}to{visibility:visible}}@-ms-keyframes
-amp-start{from{visibility:hidden}to{visibility:visible}}@-o-keyframes
-amp-start{from{visibility:hidden}to{visibility:visible}}@keyframes
-amp-start{from{visibility:hidden}to{visibility:visible}}
</style>
<noscript>
<style amp-boilerplate>
body{
-webkit-animation:none;
-moz-animation:none;
-ms-animation:none;
animation:none}
</style>
</noscript>
<script async custom-element = "amp-pinterest"
src = "https://cdn.ampproject.org/v0/amp-pinterest-0.1.js">
</script>
<style amp-custom>
amp-facebook-like {
margin: 1rem
}
</style>
</head>
<body>
<h3>Google AMP - Amp Pinterest Follow Button</h3>
<amp-pinterest
height = 50
width = 130
data-do = "buttonFollow"
data-href = "https://in.pinterest.com/wedgehairstyles/"
data-label = "wedgehairstyles">
</amp-pinterest>
</body>
</html>Output

Google Amp - Twitter
Amp, amp-twitter kullanarak twitter beslemelerini gösteren bir bileşene sahiptir.
Amp-twitter ile çalışmak için aşağıdaki komut dosyasını eklememiz gerekiyor -
<script async custom-element = "amp-twitter"
src = "https://cdn.ampproject.org/v0/amp-twitter-0.1.js">
</script>Amp-twitter etiketi
<amp-twitter width = "375" height = "472"
layout = "responsive" data-tweetid = "885634330868850689">
</amp-twitter>Tweetleri gösteren bir çalışma örneği burada gösterilmektedir
Example
<!doctype html>
<html amp lang = "en">
<head>
<meta charset = "utf-8">
<script async src = "https://cdn.ampproject.org/v0.js">
</script>
<title>Google AMP - Amp Twitter</title>
<link rel = "canonical" href =
"http://example.ampproject.org/article-metadata.html">
<meta name = "viewport" content = "width = device-width,
minimum-scale = 1,initial-scale = 1">
<style amp-boilerplate>
body{
-webkit-animation:
-amp-start 8s steps(1,end) 0s 1 normal both;-moz-animation:
-amp-start 8s steps(1,end) 0s 1 normal both;-ms-animation:
-amp-start 8s steps(1,end) 0s 1 normal both;animation:
-amp-start 8s steps(1,end) 0s 1 normal both
}
@-webkit-keyframes
-amp-start{from{visibility:hidden}to{visibility:visible}}@-moz-keyframes
-amp-start{from{visibility:hidden}to{visibility:visible}}@-ms-keyframes
-amp-start{from{visibility:hidden}to{visibility:visible}}@-o-keyframes
-amp-start{from{visibility:hidden}to{visibility:visible}}@keyframes
-amp-start{from{visibility:hidden}to{visibility:visible}}
</style>
<noscript>
<style amp-boilerplate>
body{
-webkit-animation:none;
-moz-animation:none;
-ms-animation:none;
animation:none}
</style>
</noscript>
<script async custom-element = "amp-twitter" src =
"https://cdn.ampproject.org/v0/amp-twitter-0.1.js">
</script>
<style amp-custom>
amp-facebook-like {
margin: 1rem
}
</style>
</head>
<body>
<h3>Google AMP - Amp Twitter</h3>
<amp-twitter
width = "375"
height = "472"
layout = "responsive"
data-tweetid = "885634330868850689">
</amp-twitter>
</body>
</html>Output
Bu bölümde, jwplayer ve Youtube gibi üçüncü taraf ortaklardan video ve sesin nasıl görüntüleneceğini tartışacağız. Aşağıdakileri detaylı olarak öğrenelim -
Google AMP - JwPlayer
Google AMP - YouTube
Google AMP - Ses
Google AMP - JwPlayer
Videoları sayfada göstermek için jwplayer'ı kullanmak istiyorsanız, bunu yapmak için amp'de amp-jwplayer vardır.
Amp-jwplayer ile çalışmak için aşağıdaki komut dosyasını sayfanıza ekleyin -
<script async custom-element = "amp-jwplayer" src = "
https://cdn.ampproject.org/v0/amp-jwplayer-0.1.js">
</script>Amp-jwplayer etiketi
<amp-jwplayer
data-playlist-id = "482jsTAr"
data-player-id = "uoIbMPm3"
layout = "responsive"
width = "16"
height = "9">
</amp-jwplayer>Amper sayfasında çalışan bir jwplayer örneği aşağıda gösterilmiştir -
Misal
<!doctype html>
<html amp lang = "en">
<head>
<meta charset = "utf-8">
<script async src = "https://cdn.ampproject.org/v0.js">
</script>
<title>Google AMP - Amp Jwplayer</title>
<link rel = "canonical" href =
"http://example.ampproject.org/article-metadata.html">
<meta name = "viewport" content = "width = device-width,
minimum-scale = 1,initial-scale = 1">
<style amp-boilerplate>
body{
-webkit-animation:
-amp-start 8s steps(1,end) 0s 1 normal both;-moz-animation:
-amp-start 8s steps(1,end) 0s 1 normal both;-ms-animation:
-amp-start 8s steps(1,end) 0s 1 normal both;animation:
-amp-start 8s steps(1,end) 0s 1 normal both
}
@-webkit-keyframes
-amp-start{from{visibility:hidden}to{visibility:visible}}@-moz-keyframes
-amp-start{from{visibility:hidden}to{visibility:visible}}@-ms-keyframes
-amp-start{from{visibility:hidden}to{visibility:visible}}@-o-keyframes
-amp-start{from{visibility:hidden}to{visibility:visible}}@keyframes
-amp-start{from{visibility:hidden}to{visibility:visible}}
</style>
<noscript>
<style amp-boilerplate>
body{
-webkit-animation:none;
-moz-animation:none;
-ms-animation:none;
animation:none}
</style>
</noscript>
<script async custom-element = "amp-jwplayer" src =
"https://cdn.ampproject.org/v0/amp-jwplayer-0.1.js">
</script>
</head>
<body>
<h3>Google AMP - Amp Jwplayer</h3>
<amp-jwplayer
data-playlist-id = "482jsTAr"
data-player-id = "uoIbMPm3"
layout = "responsive"
width = "16"
height = "9">
</amp-jwplayer>
</body>
</html>Çıktı

Amp-jwplayer için üç önemli özellik vardır
data-player-id
data-media-id
data-playlist-id
Oynatıcı, medya ve oynatma listesinin kimliklerini almak için, buradan yapabileceğiniz jwplayer'da bir oturum açmanız gerekir - https://dashboard.jwplayer.com/#/players
Oyuncu kimliği jwplayer oynatıcı bölümünde mevcut olacaktır. Medya kimliği şurada mevcut olacak:jwplayer playlist section.
Jwplayer, ilgili özellik için amp-jwplayer'da kullanılması gereken sekiz basamaklı bir alfasayısal kimlik verir.
Google AMP - Youtube
Youtube videosunu amp sayfanızda göstermek istiyorsanız, amp'de youtube videolarını sayfaya yerleştirmek için amp-youtube vardır.
Amp-youtube'u kullanmak için sayfanıza aşağıdaki komut dosyasını eklemeniz gerekir -
<script async custom-element = "amp-youtube" src = "
https://cdn.ampproject.org/v0/amp-youtube-0.1.js">
</script>Amp-youtube etiketi
<amp-youtube
width = "480"
height = "270"
layout = "responsive"
autoplay = "true"
data-videoid = "fWZ6-p7mGK0">
</amp-youtube>Şimdi sayfadaki amp-youtube'un çalışmasını gösteren bir örnek üzerinde çalışalım.
Misal
<!doctype html>
<html amp lang = "en">
<head>
<meta charset = "utf-8">
<script async src = "https://cdn.ampproject.org/v0.js">
</script>
<title>Google AMP - Youtube</title>
<link rel = "canonical" href =
"http://example.ampproject.org/article-metadata.html">
<meta name = "viewport" content = "width = device-width,
minimum-scale = 1,initial-scale = 1">
<style amp-boilerplate>
body{
-webkit-animation:
-amp-start 8s steps(1,end) 0s 1 normal both;-moz-animation:
-amp-start 8s steps(1,end) 0s 1 normal both;-ms-animation:
-amp-start 8s steps(1,end) 0s 1 normal both;animation:
-amp-start 8s steps(1,end) 0s 1 normal both
}
@-webkit-keyframes
-amp-start{from{visibility:hidden}to{visibility:visible}}@-moz-keyframes
-amp-start{from{visibility:hidden}to{visibility:visible}}@-ms-keyframes
-amp-start{from{visibility:hidden}to{visibility:visible}}@-o-keyframes
-amp-start{from{visibility:hidden}to{visibility:visible}}@keyframes
-amp-start{from{visibility:hidden}to{visibility:visible}}
</style>
<noscript>
<style amp-boilerplate>
body{
-webkit-animation:none;
-moz-animation:none;
-ms-animation:none;
animation:none}
</style>
</noscript>
<script async custom-element = "amp-youtube" src =
"https://cdn.ampproject.org/v0/amp-youtube-0.1.js">
</script>
</head>
<body>
<h3>Google AMP - Youtube</h3>
<h3>Youtube Videos from Tutorialspoint</h3>
<amp-youtube
width = "480"
height = "270"
layout = "responsive"
autoplay = "true"
data-videoid = "fWZ6-p7mGK0">
</amp-youtube>
</body>
</html>Çıktı
Youtube videosunu göstermek için aşağıda gösterildiği gibi amp-youtube'a video kimliği vermeniz gerekir -
<amp-youtube
width = "480"
height = "270"
layout = "responsive"
autoplay = "true"
data-videoid = "fWZ6-p7mGK0">
</amp-youtube>Veri-video kimliği nasıl alınır?
Örneğin herhangi bir Youtube URL'sini düşünün - https://www.youtube.com/watch?v=fWZ6-p7mGK0. Vurgulanan kısım, amp-youtube'unuzda kullanılacak kimliktir.
Özelliğini kullandık autoplaydoğru. Video, tarayıcı tarafından desteklendiği şekilde otomatik olarak oynatılacak ve ayrıca video sessiz modda oynatılacaktır. Sesi açmak için videoya dokunmanız gerekecek. Görüntüden çıktığında video duraklatılacak ve görüntülemeye geldiğinde duraklatılmış durumdan devam edecektir. Kullanıcı videoyu duraklatırsa ve görüntüye girip çıkarsa, video yalnızca duraklatma durumunda kalacaktır. Aynısı sesi kapatma / açma için de geçerlidir.
Google Amp - Ses
Amp, sesi çalmak için html5 ses etiketinin yerini alan bir etikete sahiptir. Amp sayfasında ses çalmak için amp-audio kullanabiliriz.
Amp-audio ile çalışmak için aşağıdaki komut dosyasını eklememiz gerekiyor -
<script async custom-element = "amp-audio" src = "
https://cdn.ampproject.org/v0/amp-audio-0.1.js">
</script>Amp ses etiketi
<amp-audio
width = "auto"
height = "50"
src = "audio/test.mp3">
<div fallback>
<p>HTML5 audio is not supported on your browser!</p>
</div>
</amp-audio>Bu nedenle, amp-audio, ses dosyasına bir http isteği olan src özelliğini alacaktır. Standart html5 sesi yerine amp-audio kullanmamızın nedeni, amp'in http isteği gerektiren öğeler için tembel bir yükleme konsepti yerleştirmesidir.
Önceliğe göre isteği yüklemeye başlayacak ve görüntü alanına ulaşmak üzereyken veya hemen önce yüklenecektir.
Sayfanızda amp-audio kullanmanın çalışan bir örneği burada gösterilmektedir -
Misal
<!doctype html>
<html amp lang = "en">
<head>
<meta charset = "utf-8">
<script async src = "https://cdn.ampproject.org/v0.js">
</script>
<title>Google AMP - Audio</title>
<link rel = "canonical" href =
"http://example.ampproject.org/article-metadata.html">
<meta name = "viewport" content = "width = device-width,
minimum-scale = 1,initial-scale = 1">
<style amp-boilerplate>
body{
-webkit-animation:
-amp-start 8s steps(1,end) 0s 1 normal both;-moz-animation:
-amp-start 8s steps(1,end) 0s 1 normal both;-ms-animation:
-amp-start 8s steps(1,end) 0s 1 normal both;animation:
-amp-start 8s steps(1,end) 0s 1 normal both
}
@-webkit-keyframes
-amp-start{from{visibility:hidden}to{visibility:visible}}@-moz-keyframes
-amp-start{from{visibility:hidden}to{visibility:visible}}@-ms-keyframes
-amp-start{from{visibility:hidden}to{visibility:visible}}@-o-keyframes
-amp-start{from{visibility:hidden}to{visibility:visible}}@keyframes
-amp-start{from{visibility:hidden}to{visibility:visible}}
</style>
<noscript>
<style amp-boilerplate>
body{
-webkit-animation:none;
-moz-animation:none;
-ms-animation:none;
animation:none}
</style>
</noscript>
<script async custom-element = "amp-audio"
src = "https://cdn.ampproject.org/v0/amp-audio-0.1.js">
</script>
</head>
<body>
<h3>Google AMP - Audio</h3>
<amp-audio
width = "auto"
height = "50"
src="audio/test.mp3">
<div fallback>
<p>HTML5 audio is not supported on your browser!</p>
</div>
</amp-audio>
</body>
</html>Çıktı
Genişlik, yükseklik, src gibi özniteliklerin belirtildiği amp-audio etiketi burada gösterilir. Ayrıca bir div ekledikfallback attribute tarayıcıda amp-audio desteklenmiyorsa yedek olarak işlev görür.
<amp-audio
width = "auto"
height = "50"
src = "audio/test.mp3">
<div fallback>
<p>HTML5 audio is not supported on your browser!</p>
</div>
</amp-audio>Kontrollerin varsayılan olarak ses etiketine eklendiğini ve sesi oynatmak / duraklatmak ve sesi kapatmak / açmak için kullanılabileceğini unutmayın. Aşağıda gösterildiği gibi ses etiketi için indirme seçeneği elde edersiniz -
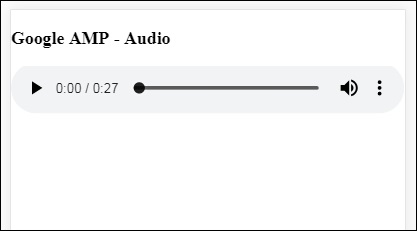
İndirmeye tıkladığınızda, kullanılan medya dosyasını indirebilirsiniz. İndirmeyi devre dışı bırakmak için şu özelliği kullanabilirsiniz -controlsList="nodownload" aşağıdaki örnekte gösterildiği gibi -
Misal
<!doctype html>
<html amp lang = "en">
<head>
<meta charset = "utf-8">
<script async src = "https://cdn.ampproject.org/v0.js">
</script>
<title>Google AMP - Audio</title>
<link rel = "canonical" href =
"http://example.ampproject.org/article-metadata.html">
<meta name = "viewport" content = "width = device-width,
minimum-scale = 1,initial-scale = 1">
<style amp-boilerplate>
body{
-webkit-animation:
-amp-start 8s steps(1,end) 0s 1 normal both;-moz-animation:
-amp-start 8s steps(1,end) 0s 1 normal both;-ms-animation:
-amp-start 8s steps(1,end) 0s 1 normal both;animation:
-amp-start 8s steps(1,end) 0s 1 normal both
}
@-webkit-keyframes
-amp-start{from{visibility:hidden}to{visibility:visible}}@-moz-keyframes
-amp-start{from{visibility:hidden}to{visibility:visible}}@-ms-keyframes
-amp-start{from{visibility:hidden}to{visibility:visible}}@-o-keyframes
-amp-start{from{visibility:hidden}to{visibility:visible}}@keyframes
-amp-start{from{visibility:hidden}to{visibility:visible}}
</style>
<noscript>
<style amp-boilerplate>
body{
-webkit-animation:none;
-moz-animation:none;
-ms-animation:none;
animation:none}
</style>
</noscript>
<script async custom-element = "amp-audio"
src = "https://cdn.ampproject.org/v0/amp-audio-0.1.js">
</script>
</head>
<body>
<h3>Google AMP - Audio</h3>
<amp-audio
width = "auto"
height = "50"
src = "audio/test.mp3"
controlsList = "nodownload">
<div fallback>
<p>HTML5 audio is not supported on your browser!</p>
</div>
</amp-audio>
</body>
</html>Çıktı

Kullanma controlsList="nodownload" sağ taraftaki üç dikey nokta kayboldu.
Gibi nitelikler vardır preload ve autoplay, ses etiketine eklenirlerse, ses dosyası sayfa yüklendiğinde yüklenir ve tarayıcı destekliyorsa otomatik olarak oynatılır. Aşağıdaki örnek, otomatik ses oynatmayı gösterir.
Misal
<!doctype html>
<html amp lang = "en">
<head>
<meta charset="utf-8">
<script async src = "https://cdn.ampproject.org/v0.js">
</script>
<title>Google AMP - Audio</title>
<link rel = "canonical" href =
"http://example.ampproject.org/article-metadata.html">
<meta name = "viewport" content = "width = device-width,
minimum-scale = 1,initial-scale = 1">
<style amp-boilerplate>
body{
-webkit-animation:
-amp-start 8s steps(1,end) 0s 1 normal both;-moz-animation:
-amp-start 8s steps(1,end) 0s 1 normal both;-ms-animation:
-amp-start 8s steps(1,end) 0s 1 normal both;animation:
-amp-start 8s steps(1,end) 0s 1 normal both
}
@-webkit-keyframes
-amp-start{from{visibility:hidden}to{visibility:visible}}@-moz-keyframes
-amp-start{from{visibility:hidden}to{visibility:visible}}@-ms-keyframes
-amp-start{from{visibility:hidden}to{visibility:visible}}@-o-keyframes
-amp-start{from{visibility:hidden}to{visibility:visible}}@keyframes
-amp-start{from{visibility:hidden}to{visibility:visible}}
</style>
<noscript>
<style amp-boilerplate>
body{
-webkit-animation:none;
-moz-animation:none;
-ms-animation:none;
animation:none}
</style>
</noscript>
<script async custom-element = "amp-audio"
src = "https://cdn.ampproject.org/v0/amp-audio-0.1.js">
</script>
</head>
<body>
<h3>Google AMP - Audio</h3>
<amp-audio
width = "auto"
height = "50"
src = "audio/test.mp3" preload autoplay>
<div fallback>
<p>HTML5 audio is not supported on your browser!</p>
</div>
</amp-audio>
</body>
</html>Çıktı
Öznitelik loop, varsa, ses tamamlandığında tekrar çalınacaktır.
Misal
<amp-audio
width = "auto"
height = "50"
src = "audio/test.mp3" loop>
<div fallback>
<p>HTML5 audio is not supported on your browser!</p>
</div>
</amp-audio>Bu bölümde, normal bir html sayfasını bir amp sayfasına nasıl dönüştürebileceğimizi anlayacağız. Ayrıca sayfayı amp için doğrulayacağız ve en son çıktıyı kontrol edeceğiz.
Başlangıç olarak, aşağıda gösterildiği gibi normal html sayfasını alalım -
test.html
<!DOCTYPE html>
<html>
<head>
<meta charset = "utf-8">
<title>Tutorials</title>
<link href = "style.css" rel = "stylesheet" />
<meta name = "viewport" content = "width = device-width, initial-scale = 1.0">
<script src = "js/jquery.js"></script>
</head>
<body>
<header role = "banner">
<h2>Tutorials</h2>
</header>
<h2>Some Important Tutorials List</h2>
<article>
<section>
<img src = "images/tut1.png" width="90%" height = "90%"/>
</section>
<section>
<img src = "images/tut2.png" width="90%" height = "90%"/>
</section>
<section>
<img src = "images/tut3.png" width="90%" height = "90%"/>
</section>
<section>
<img src = "images/tut4.png" width="90%" height = "90%"/>
</section>
</article>
<footer>
<p>For More tutorials Visit <a href =
"https://tutorialspoint.com/">Tutorials Point</a></p>
</footer>
</body>
</html>İçinde style.css kullandığımızı ve css dosyasının ayrıntılarının burada verildiği gibi olduğunu unutmayın -
h1 {color: blue;text-align: center;}
h2 {text-align: center;}
img {
border: 1px solid #ddd;
border-radius: 4px;
padding: 5px;
}
article {
text-align: center;
}
header{
width: 100%;
height: 50px;
margin: 5px auto;
border: 1px solid #000000;
text-align: center;
background-color: #ccc;
}
footer {
width: 100%;
height: 35px;
margin: 5px auto;
border: 1px solid #000000;
text-align: center;
background-color: yellow;
}Yukarıda listelenen .html'de jquery.js dosyasını da kullandığımızı unutmayın.
Şimdi, test.html'yi yerel olarak barındırın ve burada verilen bağlantıda görülen çıktıya bakın -
http://localhost:8080/googleamp/test.html
Şimdi yukarıdaki test.html dosyasını test_amp.html dosyası olarak değiştirmek için adım adım gidelim.
Öncelikle test.html'yi test_amp.html olarak kaydetmeli ve aşağıda verilen adımları izlemeliyiz.
Step 1 - Amfi kitaplığını aşağıda gösterildiği gibi head bölümüne ekleyin -
<script async src = "https://cdn.ampproject.org/v0.js">
</script>Örneğin, test_amp.html'ye eklendiğinde, aşağıdaki gibi olacaktır -
<head>
<meta charset = "utf-8">
<title>Tutorials</title>
<script async src = "https://cdn.ampproject.org/v0.js">
</script>
<link href = "style.css" rel = "stylesheet" />
<meta name = "viewport" content = "width = device-width, initial-scale = 1.0">
<script src = "js/jquery.js"></script>
</head>Şimdi tarayıcıda test_amp.html sayfasını çalıştırın ve tarayıcı konsolunu açın. Konsol mesajını aşağıda gösterildiği gibi gösterecektir -

Html dosyanızın geçerli bir amp olup olmadığını öğrenmek için, aşağıda gösterildiği gibi html sayfanızın url'sine # development = 1 ekleyin -
http://localhost:8080/googleamp/test_amp.html#development=1Tarayıcıda ve Google Chrome konsolunda yukarıdaki url'ye basın. Amperin, amp özelliği açısından geçersiz olduğunu düşündüğü hataları listeleyecektir.
Test_amp.html için aldığımız hatalar burada gösterilmektedir -
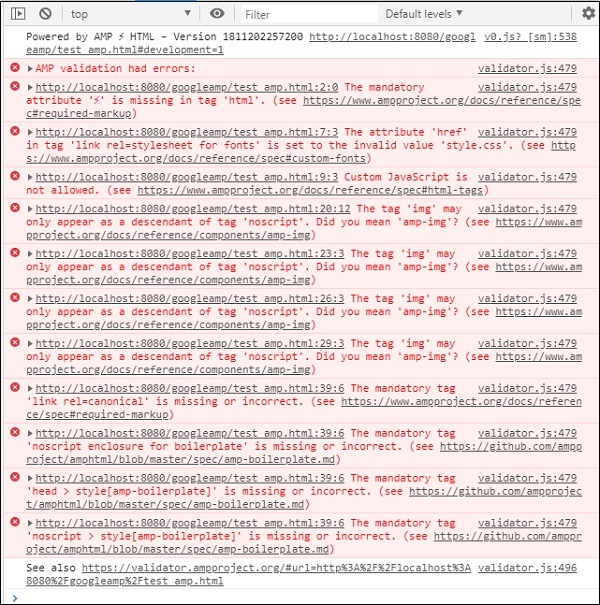
Şimdi, başarılı bir mesaj alana kadar bunları tek tek düzeltelim.
Step 2 - Konsolda şu hatayı görebiliriz -

Bunu html etiketi için ⚡ veya amp ekleyerek düzeltebiliriz. Aşağıda gösterildiği gibi html etiketine amp ekleyeceğiz -
<html amp>Step 3 - Lütfen aşağıda gösterildiği gibi head etiketinde karakter kümesi ve name = ”viewport” meta etiketinin bulunduğundan emin olun -
<head>
<meta charset = "utf-8">
<meta name = "viewport" content = "width = device-width, initial-scale = 1.0">
</head>Step 4 - Karşılaştığımız bir sonraki hata burada gösterilmektedir -

Rel = stylesheet linkinde href yazıyor, yani aşağıdaki bağlantı hata veriyor. Bunun nedeni, amp'in href ile bağlantı kullanan harici stil sayfalarının sayfaların içine yerleştirilmesine izin vermemesidir.
<link href = "style.css" rel = "stylesheet" />We can add the all the css in style.css as follows −<style amp-custom>
/*All styles from style.css please add here */
</style>Bu nedenle, style.css'de bulunan css verilerinin amp-custom özelliği ile şık bir şekilde eklenmesi gerekir.
<style amp-custom>
h1 {color: blue;text-align: center;}
h2 {text-align: center;}
img {
border: 1px solid #ddd;
border-radius: 4px;
padding: 5px;
}
article {
text-align: center;
}
header{
width: 100%;
height: 50px;
margin: 5px auto;
border: 1px solid #000000;
text-align: center;
background-color: #ccc;
}
footer {
width: 100%;
height: 35px;
margin: 5px auto;
border: 1px solid #000000;
text-align: center;
background-color: yellow;
}
</style>Stil etiketini amp sayfanıza ekleyin. Şimdi aynısını tarayıcıda yukarıdaki stil etiketi ile test edelim. Şimdiye kadar test_amp.html'de yaptığımız değişiklikler burada gösterilmektedir -
<!DOCTYPE html>
<html amp>
<head>
<meta charset = "utf-8">
<title>Tutorials</title>
<script async src = "https://cdn.ampproject.org/v0.js">
</script>
<meta name = "viewport" content = "width = device-width, initial-scale = 1.0">
<script src = "js/jquery.js"></script>
<style amp-custom>
h1 {color: blue;text-align: center;}
h2 {text-align: center;}
img {
border: 1px solid #ddd;
border-radius: 4px;
padding: 5px;
}
article {
text-align: center;
}
header{
width: 100%;
height: 50px;
margin: 5px auto;
border: 1px solid #000000;
text-align: center;
background-color: #ccc;
}
footer {
width: 100%;
height: 35px;
margin: 5px auto;
border: 1px solid #000000;
text-align: center;
background-color: yellow;
}
</style>
</head>
<body>
<header role = "banner">
<h2>Tutorials</h2>
</header>
<h2>Some Important Tutorials List</h2>
<article>
<section>
<img src = "images/tut1.png" width = "90%" height = "90%"/>
</section>
<section>
<img src = "images/tut2.png" width = "90%" height = "90%"/>
</section>
<section>
<img src = "images/tut3.png" width = "90%" height = "90%"/>
</section>
<section>
<img src = "images/tut4.png" width="90%" height = "90%"/>
</section>
</article>
<footer>
<p>For More tutorials Visit <a href =
"https://tutorialspoint.com/">Tutorials Point</a></p>
</footer>
</body>
</html>Yukarıdaki sayfa için konsolda çıkan çıktı ve hataları görelim. Aşağıdaki ekran görüntüsüne bakın -
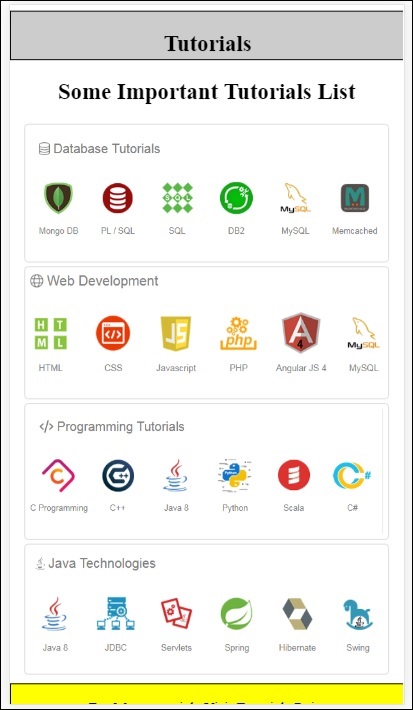
Konsolda gösterilen hata aşağıdaki gibidir -
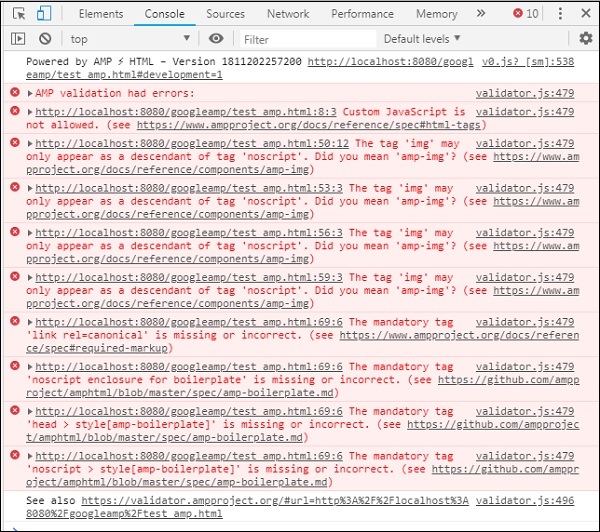
Şimdi, amp için bazı hatalarda stilin kaldırıldığını görebilirsiniz. Şimdi kalan hataları düzeltelim.
Step 5 - Listede gördüğümüz bir sonraki hata şu şekildedir -

Jquery dosyasını çağıran betik etiketini ekledik. Amp sayfalarının sayfada herhangi bir özel javascript'e izin vermediğini unutmayın. Onu kaldırmamız ve mevcut olan amp-bileşenini kullandığımızdan emin olmamız gerekecek.
Örneğin, herhangi bir animasyon gerekliyse amp-animation var, amp-analytics ise sayfaya google analytics kodunu eklemek istiyoruz. Benzer şekilde, sayfada gösterilecek reklamları görüntülemek için amp-ad bileşenimiz var. Ayrıca src'yi aynı kaynağa yönlendirebileceğimiz ve gerekirse amp-iframe'de herhangi bir özel javascript çağırabileceğimiz bir amp-iframe bileşeni de vardır.
Şimdi, script etiketini sayfadan kaldıralım.
Step 6 - Görüntülenen sonraki hata burada gösterilir -

Yukarıdaki hatalar, sayfada kullandığımız resim etiketine işaret ediyor. Amp, sayfa içinde <img src = ”” /> etiketlerinin kullanılmasına izin vermez. Bunun yerine amp-img etiketi kullanmamız gerektiğini unutmayın.
<img> etiketini burada gösterildiği gibi <amp-img> ile değiştirelim -
<section>
<amp-img alt = "Beautiful Flower"
src = "images/tut1.png"
width = "500"
height = "160"
layout = "responsive">
</amp-img>
</section>
<section>
<amp-img alt = "Beautiful Flower"
src = "images/tut2.png"
width = "500"
height = "160"
layout = "responsive">
</amp-img>
</section>
<section>
<amp-img alt = "Beautiful Flower"
src = "images/tut3.png"
width = "500"
height = "160"
layout = "responsive">
</amp-img>
</section>
<section>
<amp-img alt = "Beautiful Flower"
src = "images/tut4.png"
width = "500"
height = "160"
layout = "responsive">
</amp-img>
</section>Yukarıda gösterildiği gibi tüm <img> etiketini <amp-img> olarak değiştirdik. Şimdi, çıktıyı ve hataları görmek için sayfayı tarayıcıda çalıştıralım -
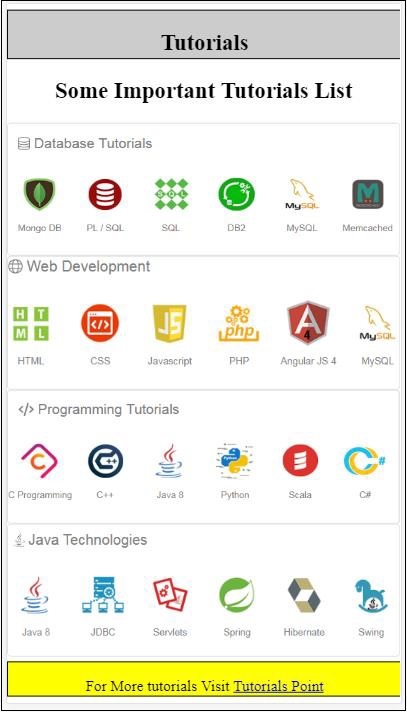
Hatalar
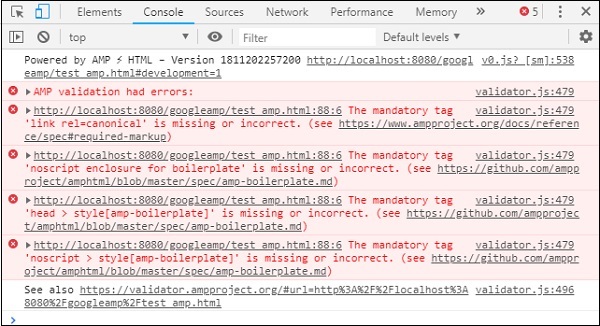
Şimdi hataların azaldığını gözlemleyin.
Step 7 - Konsolda görüntülenen sonraki hata aşağıdaki gibidir -

Head bölümüne link rel = canonical etiketi eklememiz gerekiyor. Lütfen bunun zorunlu bir etiket olduğunu ve her zaman başlığa aşağıdaki gibi eklenmesi gerektiğini unutmayın -
<link rel = "canonical" href =
"http://example.ampproject.org/article-metadata.html">Step 8 - Eksik olarak görüntülenen sonraki hata noscript tag burada gösterildiği gibi konsolda -

Head bölümünde amp-boilerplate içine alınmış <noscript> etiketini aşağıdaki gibi eklememiz gerekiyor -
<noscript>
<style amp-boilerplate>
body{
-webkit-animation:none;
-moz-animation:none;
-ms-animation:none;
animation:none}
</style>
</noscript>Step 9 - Görüntülenen bir sonraki hata aşağıda verilmiştir -

Diğer bir zorunlu etiket, amp-boilerplate içeren stil etiketidir ve noscript etiketinin önüne yerleştirilmelidir. Amp-boilerplate içeren stil etiketi burada gösterilmektedir -
<style amp-boilerplate>
body{
-webkit-animation:
-amp-start 8s steps(1,end) 0s 1 normal both;-moz-animation:
-amp-start 8s steps(1,end) 0s 1 normal both;-ms-animation:
-amp-start 8s steps(1,end) 0s 1 normal both;animation:
-amp-start 8s steps(1,end) 0s 1 normal both
}
@-webkit-keyframes
-amp-start{from{visibility:hidden}to{visibility:visible}}@-moz-keyframes
-amp-start{from{visibility:hidden}to{visibility:visible}}@-ms-keyframes
-amp-start{from{visibility:hidden}to{visibility:visible}}@-o-keyframes
-amp-start{from{visibility:hidden}to{visibility:visible}}@keyframes
-amp-start{from{visibility:hidden}to{visibility:visible}}
</style>Yukarıdaki stil etiketini test_amp.html sayfasına ekleyin.
Tamamlandıktan sonra çıktıyı ve konsolu görmek için sayfayı tarayıcıda test edin -

Konsol ayrıntıları burada gösterilmektedir -

Böylece, nihayet tüm hataları çözdük ve şimdi test_amp.html sayfası geçerli bir amp sayfası.
Üstbilgi ve altbilgi kesilirken eklenecek bazı stiller var, eklediğimiz özel stilde aynısını güncelleyebiliriz. Böylece genişliği kaldırdık: üstbilgi ve altbilgiden% 100.
İşte nihai çıktı -
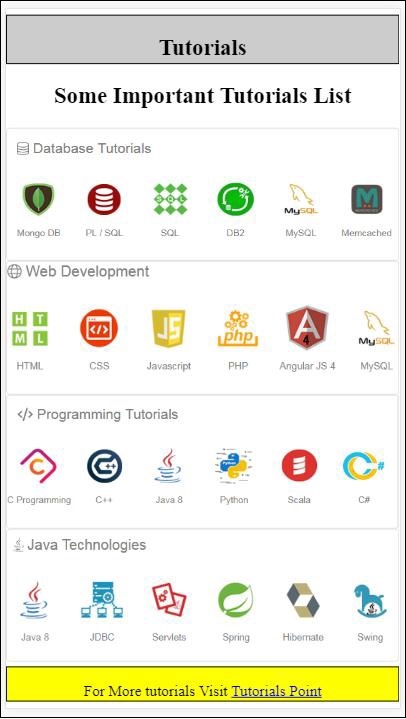
Son test_amp.html dosyası
<!DOCTYPE html>
<html amp>
<head>
<meta charset = "utf-8">
<title>Tutorials</title>
<link rel = "canonical" href=
"http://example.ampproject.org/article-metadata.html">
<script async src = "https://cdn.ampproject.org/v0.js">
</script>
<meta name = "viewport" content = "width = device-width,
initial-scale = 1.0">
<style amp-boilerplate>
body{
-webkit-animation:
-amp-start 8s steps(1,end) 0s 1 normal both;-moz-animation:
-amp-start 8s steps(1,end) 0s 1 normal both;-ms-animation:
-amp-start 8s steps(1,end) 0s 1 normal both;animation:
-amp-start 8s steps(1,end) 0s 1 normal both
}
@-webkit-keyframes
-amp-start{from{visibility:hidden}to{visibility:visible}}@-moz-keyframes
-amp-start{from{visibility:hidden}to{visibility:visible}}@-ms-keyframes
-amp-start{from{visibility:hidden}to{visibility:visible}}@-o-keyframes
-amp-start{from{visibility:hidden}to{visibility:visible}}@keyframes
-amp-start{from{visibility:hidden}to{visibility:visible}}
</style>
<noscript>
<style amp-boilerplate>
body{
-webkit-animation:none;
-moz-animation:none;
-ms-animation:none;
animation:none}
</style>
</noscript>
<style amp-custom>
h1 {color: blue;text-align: center;}
h2 {text-align: center;}
amp-img {
border: 1px solid #ddd;
border-radius: 4px;
padding: 5px;
}
article {
text-align: center;
}
header{
height: 50px;
margin: 5px auto;
border: 1px solid #000000;
text-align: center;
background-color: #ccc;
}
footer {
height: 35px;
margin: 5px auto;
border: 1px solid #000000;
text-align: center;
background-color: yellow;
}
</style>
</head>
<body>
<header role = "banner">
<h2>Tutorials</h2>
</header>
<h2>Some Important Tutorials List</h2>
<article>
<section>
<amp-img
alt = "Beautiful Flower"
src = "images/tut1.png"
width = "500"
height = "160"
layout = "responsive">
</amp-img>
</section>
<section>
<amp-img
alt = "Beautiful Flower"
src = "images/tut2.png"
width = "500"
height = "160"
layout = "responsive">
</amp-img>
</section>
<section>
<amp-img
alt = "Beautiful Flower"
src = "images/tut3.png"
width = "500"
height = "160"
layout = "responsive">
</amp-img>
</section>
<section>
<amp-img
alt = "Beautiful Flower"
src = "images/tut4.png"
width = "500"
height = "160"
layout = "responsive">
</amp-img>
</section>
</article>
<footer>
<p>For More tutorials Visit <a href =
"https://tutorialspoint.com/">
Tutorials Point</a>
</p>
</footer>
</body>
</html>Böylece, nihayet normal bir html dosyasını amp'e dönüştürmeyi bitirdik.
Bu bölümde, Google AMP sayfalarına başlamak için temel gereksinimleri tartışacağız.
Örnek Amp Sayfası
Bir amp sayfası için temel bir örnek aşağıda gösterilmiştir -
<!doctype html>
<html amp>
<head>
<meta charset = "utf-8">
<title>Amp Sample Page</title>
<link rel = "canonical" href = "./regular-html-version.html">
<meta name = "viewport" content = "width = device-width,
minimum-scale = 1,initial-scale = 1">
<style amp-custom>
h1 {color: red}
</style>
<style amp-boilerplate>
body{
-webkit-animation:
-amp-start 8s steps(1,end) 0s 1 normal both;-moz-animation:
-amp-start 8s steps(1,end) 0s 1 normal both;-ms-animation:
-amp-start 8s steps(1,end) 0s 1 normal both;animation:
-amp-start 8s steps(1,end) 0s 1 normal both
}
@-webkit-keyframes
-amp-start{from{visibility:hidden}to{visibility:visible}}@-moz-keyframes
-amp-start{from{visibility:hidden}to{visibility:visible}}@-ms-keyframes
-amp-start{from{visibility:hidden}to{visibility:visible}}@-o-keyframes
-amp-start{from{visibility:hidden}to{visibility:visible}}@keyframes
-amp-start{from{visibility:hidden}to{visibility:visible}}
</style>
<noscript>
<style amp-boilerplate>
body{
-webkit-animation:none;
-moz-animation:none;
-ms-animation:none;
animation:none}
</style>
</noscript>
<script async src = "https://cdn.ampproject.org/v0.js">
</script>
</head>
<body>
<h1>Amp Sample Page</h1>
<p>
<amp-img
src = "images/christmas1.jpg"
width = "300"
height = "300"
layout = "responsive">
</amp-img>
</p>
</body>
</html>Zorunlu Etiketler
Bir amp sayfasına dahil edilmesi gereken bazı zorunlu etiketler vardır. Bu bölüm bunları ayrıntılı olarak tartışmaktadır -
Eklediğimizden emin olmalıyız amp veya ⚡ html etiketine aşağıda gösterildiği gibi
<html amp>
OR
<html ⚡><head> ve <body> etiketlerini html sayfasına eklemeliyiz.
Zorunlu meta etiketlerden herhangi birini kaçırırsanız, amp doğrulaması başarısız olabilir. Sayfanın baş bölümü eklenecek bazı zorunlu mets etiketleri burada gösterilmektedir -
<meta charset="utf-8">
<meta name = "viewport"
content = "width = device-width,
minimum-scale = 1,
initial-scale = 1">Head etiketi içine eklenecek rel = "canonical" bağlantısı
<link rel = "canonical" href = "./regular-html-version.html">Amp-boilerplate içeren stil etiketi -
<style amp-boilerplate>
body{
-webkit-animation:
-amp-start 8s steps(1,end) 0s 1 normal both;-moz-animation:
-amp-start 8s steps(1,end) 0s 1 normal both;-ms-animation:
-amp-start 8s steps(1,end) 0s 1 normal both;animation:
-amp-start 8s steps(1,end) 0s 1 normal both
}
@-webkit-keyframes
-amp-start{from{visibility:hidden}to{visibility:visible}}@-moz-keyframes
-amp-start{from{visibility:hidden}to{visibility:visible}}@-ms-keyframes
-amp-start{from{visibility:hidden}to{visibility:visible}}@-o-keyframes
-amp-start{from{visibility:hidden}to{visibility:visible}}@keyframes
-amp-start{from{visibility:hidden}to{visibility:visible}}
</style>Amp-boilerplate içeren Noscript etiketi -
<noscript>
<style amp-boilerplate>
body{
-webkit-animation:none;
-moz-animation:none;
-ms-animation:none;
animation:none}
</style>
</noscript>Eşzamansız olan amp komut dosyası etiketi aşağıda gösterildiği gibi eklenmiştir. Bu en önemli etikettir -
<script async src = "https://cdn.ampproject.org/v0.js">
</script>Sayfaya özel css eklemek istediğinizde bu etiketi kullanmalısınız. Lütfen buraya not edin, amp sayfalarında harici stil sayfası diyemeyiz. Özel css eklemek için, tüm css'nizin buraya gitmesi gerekir -
<style amp-custom>
   //all your styles here
</style>Tarayıcınızda yukarıdaki sayfayı page-url'nin sonunda # development = 1 kullanarak doğrulayabilirsiniz.
Şimdi, aynısını tarayıcıda test edelim. Sayfayı yerel olarak barındırdım ve amppage.html olarak kaydettim.
Test edilecek yukarıdaki url
http://localhost/googleamp/amppage.html#development=1
Misal
<!doctype html>
<html amp>
<head>
<meta charset = "utf-8">
<title>Amp Sample Page</title>
<link rel = "canonical" href = "./regular-html-version.html">
<meta name = "viewport" content = "width=device-width,
minimum-scale = 1,initial-scale = 1">
<style amp-custom>
h1 {color: red}
</style>
<style amp-boilerplate>
body{
-webkit-animation:
-amp-start 8s steps(1,end) 0s 1 normal both;-moz-animation:
-amp-start 8s steps(1,end) 0s 1 normal both;-ms-animation:
-amp-start 8s steps(1,end) 0s 1 normal both;animation:
-amp-start 8s steps(1,end) 0s 1 normal both
}
@-webkit-keyframes
-amp-start{from{visibility:hidden}to{visibility:visible}}@-moz-keyframes
-amp-start{from{visibility:hidden}to{visibility:visible}}@-ms-keyframes
-amp-start{from{visibility:hidden}to{visibility:visible}}@-o-keyframes
-amp-start{from{visibility:hidden}to{visibility:visible}}@keyframes
-amp-start{from{visibility:hidden}to{visibility:visible}}
</style>
<noscript>
<style amp-boilerplate>
body{
-webkit-animation:none;
-moz-animation:none;
-ms-animation:none;
animation:none}
</style>
</noscript>
<script async src = "https://cdn.ampproject.org/v0.js">
</script>
</head>
<body>
<h1>Amp Sample Page</h1>
<p>
<amp-img
src = "images/christmas1.jpg"
width = "300"
height = "250"
layout = "responsive">
</amp-img>
</p>
</body>
</html>Çıktı

Geliştirici konsolunda amp doğrulama durumunu aşağıdaki gibi görebilirsiniz -

Geçerli bir amp sayfası için gerekli tüm zorunlu etiketleri eklediğimizden, AMP doğrulamasının başarılı olmasını sağlar.
Google AMP, web sayfalarının cihazlara daha hızlı yüklenmesini sağlamanın bir yoludur. Amp ile çalışmak için HTML5, CSS ve amp bileşenlerini kullanabiliriz.
Google Amp, bir amp sayfasını doğrulamak için birçok yol sağlar. Bu bölümde tartışacağımız önemli konulardan bazıları şunlardır:
# Development = 1 kullanma
Amp Doğrulayıcıyı Kullanma
Komut satırını kullanma
Her birini ayrıntılı olarak tartışalım.
#Development = 1 kullanma
Sayfanızın doğrulanmaya hazır olduğunu öğrendikten sonra, page-url'nin sonuna # development = 1 ekleyin ve aynısını chrome geliştirici araçlarında test edin.
Ekleyebilirsin #development=1 aşağıda verilen örnekte gösterildiği gibi sondaki html sayfanızın url'sine -
http://localhost:8080/googleamp/test_amp.html#development=1Tarayıcıda ve Google Chrome konsolunda yukarıdaki url'ye basın. Amp'in, amp özelliği açısından geçersiz olduğunu düşündüğü hataları listeleyecektir.
İşte test_amp.html için aldığımız hatalar.
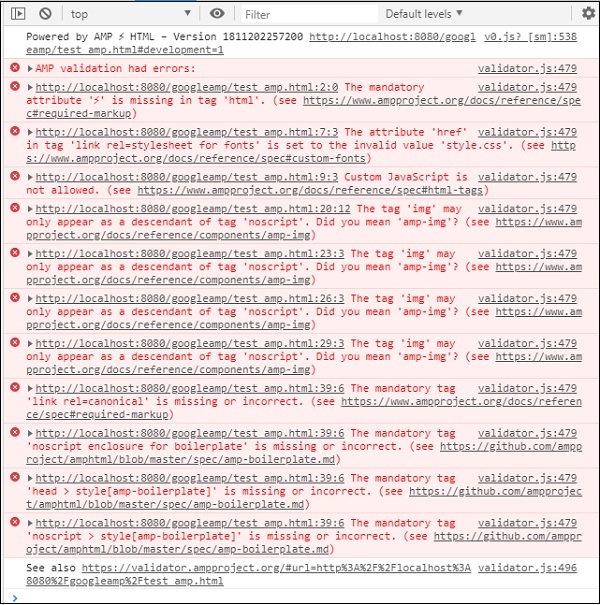
Görüntülenen hataları düzeltebilirsiniz ve tüm hatalar giderildikten sonra aşağıdaki gibi görüntülenir -

Amp Doğrulayıcıyı Kullanma
Amp, HTML içeriğini girebileceğimiz bir doğrulama aracına sahiptir ve durumu GEÇTİ veya HATA olarak görüntüler ve ayrıca sayfada hatayı gösterir. Bağlantı -https://validator.ampproject.org/
Amp doğrulayıcı aracı ekranı aşağıda gösterildiği gibidir -
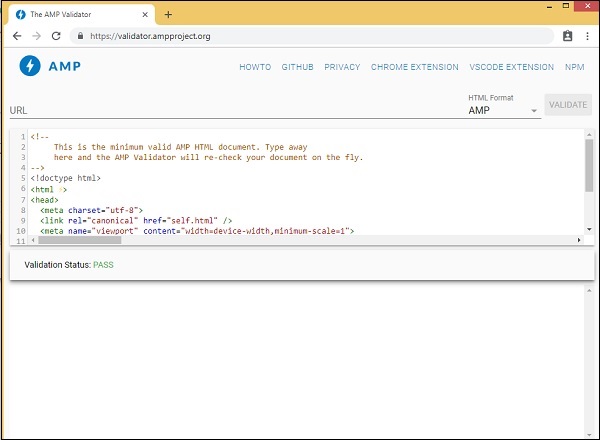
Sayfa içeriğindeki hata örneği aşağıda gösterilmiştir -
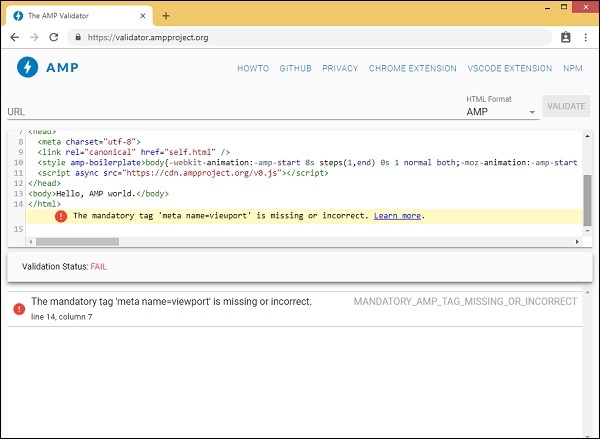
Komut Satırını Kullanma
Aşağıdaki komutu kullanarak npm paketini kurabilirsiniz -
npm install -g amphtml-validator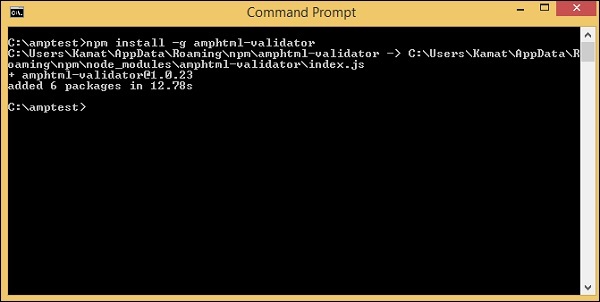
Bir amptest / klasörü oluşturduk ve amp_test.html dosyasını bu klasöre kaydettik. Komut satırında aşağıdaki komutu kullanarak amp_test.html'yi doğrulayalım.
amphtml-validator youramppage.html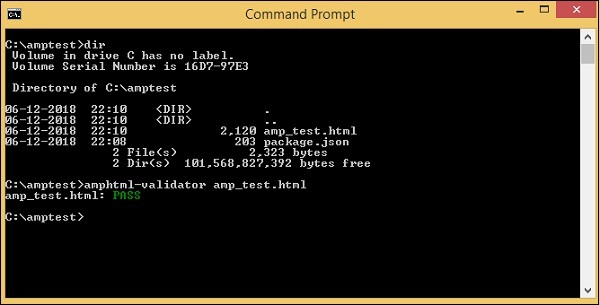
Hatayı gösterip göstermediğini görmek için sayfadan bazı etiketleri kaldıralım.
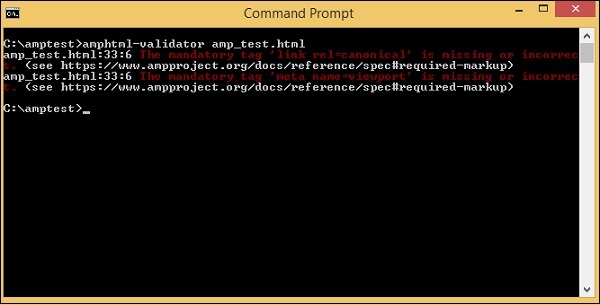
Durumu PASS olarak alana kadar görüntülenen hata düzeltilebilir.
Google amp, saf amfi sayfalarını sunmak için proxy tabanlı bir içerik dağıtım ağı olan önbelleğe alma olanağı sağlar. Amp önbelleği varsayılan olarak tüm geçerli amp sayfalarında mevcuttur. Sayfaların amfi olmayan sayfalara kıyasla daha hızlı oluşturulmasına yardımcı olur.
Şu anda 2 amfi önbellek sağlayıcısı var Google AMP Cache ve Cloudflare AMP Cache. Daha önce de belirtildiği gibi, amp önbelleğe alma, tüm geçerli amp sayfalarında kullanılabilir. Kullanıcı amp cache özelliğini kullanmak istemiyorsa, amp sayfanızı geçersiz kılmanız gerekir. Geçersiz amp sayfaları için amp önbelleği uygulanmaz.
Google arama, html içeriği için amp () tarayıp bulduğu anda, önbelleğe almayı değerlendirir.
Bu bölümde, Google amp önbellek URL'sinin çeşitli bileşenlerini tartışacağız.
Alt alan adı
Google AMP, istenen url'ye bir alt alan adı ekler. Amp cache subdomain url'si için izlenen bazı kurallar vardır. Burada gösteriliyorlar -
Alt alan önbellek URL'si kuralları
AMP belge alanını IDN'den (Punycode) UTF-8'e dönüştürme.
URL'deki kısa çizgi (-) iki kısa çizgiyle (-) değiştirilir
URL'deki nokta (.), Tire (-) ile değiştirilir.
IDN'ye (Punycode) geri dönüştürülüyor.
Örneğin pub.mypage ile değiştirilecek pub-mypage.cdn.ampproject.com. Burada cdn.ampproject.com, google amp tarafından eklenen alt alan adıdır. Artık önbelleğe alınan url Pub-mypage.cdn.ampproject.com'dur.
İçerik türü
Mevcut içerik türü, AMP HTML Belgesi için c, görüntü için i ve örneğin yazı tipi gibi kaynaklar için r'dir. İçerik türü belirtilenlerle eşleşmezse 404 hatası alırsınız.
İsteğe bağlı 's'
URL mevcutsa, içerik https: //; kaynağından alınacaktır; aksi takdirde, http: // adresinden alınacaktır.
Https ve http'den önbelleğe alınmış görüntüye yapılan istek örneği burada gösterilmektedir -
Misal
https://pub-mypage-com.cdn.ampproject.org/i/s/examples/images/testimage.pngDolayısıyla, yukarıdaki örnekte url'de i var, bu da image ve https için s anlamına geliyor -
Misal
http://pub-mypage-com.cdn.ampproject.org/i/examples/images/testimage.pngBu nedenle, yukarıdaki örnekte url i'ye sahiptir, bu da image anlamına gelir ve s yoktur, dolayısıyla url http'den alınacaktır.
Bir yazı tipi önbelleğe alınmış dosya için url aşağıdaki gibi olacaktır -
Misal
https://pub-mypage-com.cdn.ampproject.org/r/s/examples/themes/lemon/fonts/Genericons.ttfİçerik türü r yazı tipleri gibi kaynaklar için kullanılır ve s güvenli url için.
Html belgesi için url aşağıdaki gibidir -
Misal
https://pub-mypage-com.cdn.ampproject.org/c/s/trends/main.htmlURL'sinde HTML belgesi için c, ardından https: // için olan s var
Google AMP önbelleği, aşağıdaki gibi http başlıklarını kullanır Max-age içerik önbelleğinin eski mi yoksa yeni mi olduğuna karar vermek ve otomatik olarak yeni istekler gönderir ve içeriği günceller, böylece bir sonraki kullanıcı içeriği günceller.
Önceki bölümlerde birçok amp bileşenini inceledik. Ayrıca her bileşenin çalışması için bir javascript dosyası eklememiz gerektiğini de gördük.
For example, for amp-iframe the script added is as follows −
<script async custom-element="amp-iframe"
src="https://cdn.ampproject.org/v0/amp-iframe-0.1.js">
</script>We have async added to the script tag. This is the standard for amp as they load all the javascript files asynchronously. There is a custom-element attribute added which has the name of the component it is used for.
To use any amp-component if it is not a part of the core amp javascript file, the script has to be added as shown above.
We are mostly used to writing, a lot of javascript code inside pages and also include javascript file using script tag.
How can we do that in amp? So for that AMP does not allow any script code to be written or load script tag externally.
Amp has its own component to take care of the job which is suppose to be done by the additional script which is added on the page. This is basically done for performance reasons, to load the page content faster and not have javascript delay the rendering or do any changes to the DOM.
This is the specification given by AMP as per their official site for script tags −
Prohibited unless the type is application/ld+json. (Other non-executable values may be added as needed.) Exception is the mandatory script tag to load the AMP runtime and the script tags to load extended components.
A working example where we can use application/ld+json inside our amp pages is shown here. Note that we are using the script tag with type=”application/ld+json” for amp-analytics component to fire tracker.
Similarly, we can use script tag with type=”application/ld+json” on other amp-components wherever required.
Example
<!doctype html>
<html amp>
<head>
<meta charset = "utf-8">
<title>amp-analytics</title>
<script async src = "https://cdn.ampproject.org/v0.js">
</script>
<script async custom-element = "amp-analytics"
src = "https://cdn.ampproject.org/v0/amp-analytics-0.1.js">
</script>
<link rel = "canonical" href = "ampanalytics.html">
<meta name = "viewport" content = "width=device-width,
minimum-scale = 1,initial-scale = 1">
<style amp-boilerplate>
body{
-webkit-animation:
-amp-start 8s steps(1,end) 0s 1 normal both;-moz-animation:
-amp-start 8s steps(1,end) 0s 1 normal both;-ms-animation:
-amp-start 8s steps(1,end) 0s 1 normal both;animation:
-amp-start 8s steps(1,end) 0s 1 normal both
}
@-webkit-keyframes
-amp-start{from{visibility:hidden}to{visibility:visible}}@-moz-keyframes
-amp-start{from{visibility:hidden}to{visibility:visible}}@-ms-keyframes
-amp-start{from{visibility:hidden}to{visibility:visible}}@-o-keyframes
-amp-start{from{visibility:hidden}to{visibility:visible}}@keyframes
-amp-start{from{visibility:hidden}to{visibility:visible}}
</style>
<noscript>
<style amp-boilerplate>
body{
-webkit-animation:none;
-moz-animation:none;
-ms-animation:none;
animation:none}
</style>
</noscript>
</head>
<body>
<h1>Google Amp - Analytics</h1>
<amp-analytics>
<script type = "application/json">
{
"requests": {
"event": "http://localhost:8080/googleamp/tracking.php?
user=test&account=localhost&event=${eventId}"
},
"triggers": {
"trackPageview": {
"on": "visible",
"request": "event",
"vars": {
"eventId": "pageview"
}
}
}
}
</script>
</amp-analytics>
</body>
</html>When the page is hit in the browser, the tracker will be fired for pageview. It can be seen in the Google network tab as shown below.
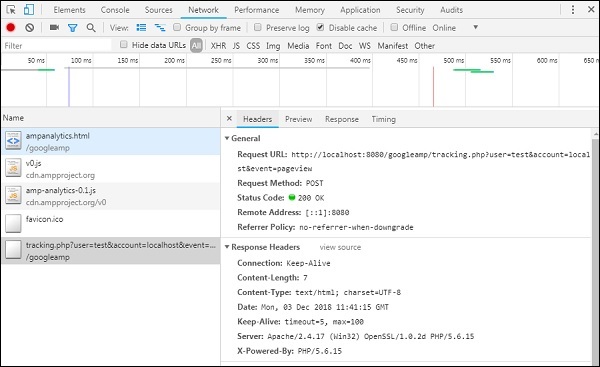
In this chapter, we will try to understand CORS in AMP. Before we dig deeper into the details, let us understand the basics of CORS and how it is useful.
What is CORS?
CORS stands for Cross Origin Resource Sharing. CORS is a process that needs extra HTTP header data to tell the browser whether the request made to the url by the web page running at say xyz.com origin should be given permission to access the data from the requested url. We make many http requests from the web page and for that we need to have CORS in place to get the data required.
When we make a http request to a different server than the host, we call it as cross origin request which means that either the domain, protocol, and port are different from the host origin. In such case, there should be a permission from the requested url for accessing the data; it means GET/PUT/POST/DELETE request made.
This additional data is available in the browser header for the http request call made. This step of permission is basically required for security reasons so that no webpage can make or get data from another domain without the required permission.
The header of the browser should have details such as Access-Control-Allow-Origin which can have values as shown below −
Access-Control-Allow-Origin : *Having value * to the request URL header means it tells the browsers to allow requesting data from any origin to access the resource.
Access-Control-Allow-Origin: https://www.example.comHaving value as above tells the browser the request made from web page www.example.com will only be allowed to get the data for the requested url.
The server configuration for CORS has to be done keeping in mind how the data that is shared will be used. Depending on that the required headers has to be set on the server side.
Now that we know what CORS is, let us go another step ahead. In case of amp, we have components like amp-form, amp-list which uses http endpoints to load data dynamically.
In case of amp pages, even if the http request is made from the same origin we need to have CORS setting in place. Questions arise here – why should we have CORS enabled even if the request and response will come from same origin. Technically we do not need CORS enabled in such case because we are requesting and displaying data for the same domain, origin etc.
Amp has a feature called caching which is added to get the data faster to the user who hits the page. In case the user has already visited the page, the data will be cached on google cdn the next user will get data served from the cache.
The data is stored at amp end which now has a different domain. When the user clicks any button to get fresh data, the amp cache url is compared with the webpage domain to get the new data. Here now if the CORS is not enabled as it deals with amp cached url and the webpage domain the request will not be valid and will fail for CORS permission. This is the reason why we need to have CORS enabled even for same origin in case of amp pages.
A working example of working with forms having CORS enabled is shown here −
<!doctype html>
<html amp lang = "en">
<head>
<meta charset = "utf-8">
<script async src = "https://cdn.ampproject.org/v0.js">
</script>
<title>Google AMP - Form</title>
<link rel = "canonical" href = "ampform.html">
<meta name = "viewport" content = "width = device-width,
minimum-scale = 1,initial-scale = 1">
<style amp-boilerplate>
body{
-webkit-animation:
-amp-start 8s steps(1,end) 0s 1 normal both;-moz-animation:
-amp-start 8s steps(1,end) 0s 1 normal both;-ms-animation:
-amp-start 8s steps(1,end) 0s 1 normal both;animation:
-amp-start 8s steps(1,end) 0s 1 normal both
}
@-webkit-keyframes
-amp-start{from{visibility:hidden}to{visibility:visible}}@-moz-keyframes
-amp-start{from{visibility:hidden}to{visibility:visible}}@-ms-keyframes
-amp-start{from{visibility:hidden}to{visibility:visible}}@-o-keyframes
-amp-start{from{visibility:hidden}to{visibility:visible}}@keyframes
-amp-start{from{visibility:hidden}to{visibility:visible}}
</style>
<noscript>
<style amp-boilerplate>
body{
-webkit-animation:none;
-moz-animation:none;
-ms-animation:none;
animation:none}
</style>
</noscript>
<script async custom-element = "amp-form"
src = "https://cdn.ampproject.org/v0/amp-form-0.1.js">
</script>
<script async custom-template = "amp-mustache"
src = "https://cdn.ampproject.org/v0/amp-mustache-0.2.js">
</script>
<style amp-custom>
form.amp-form-submit-success [submit-success],
form.amp-form-submit-error [submit-error]{
margin-top: 16px;
}
form.amp-form-submit-success [submit-success] {
color: white;
background-color:gray;
}
form.amp-form-submit-error [submit-error] {
color: red;
}
form.amp-form-submit-success.hide-inputs > input {
display: none;
}
</style>
</head>
<body>
<h3>Google AMP - Form</h3>
<form
method = "post"
class = "p2"
action-xhr = "submitform.php"
target = "_top">
<p>AMP - Form Example</p>
<div>
<input
type = "text"
name = "name"
placeholder = "Enter Name" required>
<br/>
<br/>
<input
type = "email"
name = "email"
placeholder = "Enter Email"
required>
<br/>
<br/>
</div>
<input type = "submit" value = "Submit">
<div submit-success>
<template type = "amp-mustache">
Form Submitted! Thanks {{name}}.
</template>
</div>
<div submit-error>
<template type = "amp-mustache">
Error! {{name}}, please try again.
</template>
</div>
</form>
</body>
</html>submitform.php
<?php
   if(!empty($_POST)){ $domain_url = (isset($_SERVER['HTTPS']) ? "https" : "http") . "://$_SERVER[HTTP_HOST]";
      header("Content-type: application/json");
      header("AMP-Access-Control-Allow-Source-Origin: " . $domain_url); header("Access-Control-Expose-Headers: AMP-Access-Control-Allow-Source-Origin"); $myJSON = json_encode($_POST); echo $myJSON;
   }
?>Output
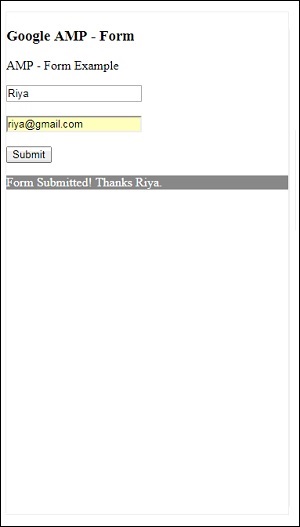
The details of response headers added to submitform.php −
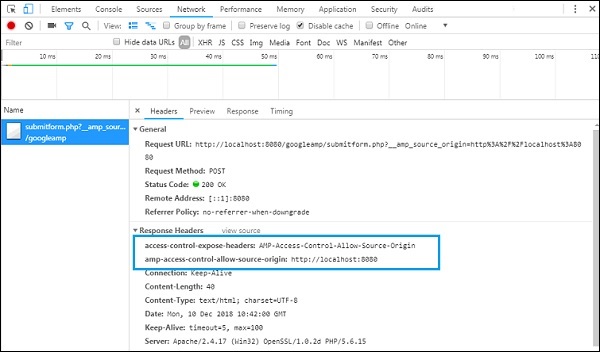
For the form to work, we need to add headers like access-control-expose-headers with value AMP-Access-Control-Allow-Source-Origin and amp-access-control-allow-source-origin − http://localhost:8080.
Here we are using php file and apache is the server used. In php file, we have added the required headers as shown below −
<?php
if(!empty($_POST)){ $domain_url = (isset($_SERVER['HTTPS']) ? "https" : "http") . "://$_SERVER[HTTP_HOST]";
header("Content-type: application/json");
header("AMP-Access-Control-Allow-Source-Origin: " . $domain_url); header("Access-Control-Expose-Headers: AMP-Access-Control-Allow-Source-Origin"); $myJSON = json_encode($_POST); echo $myJSON;
}
?>When the required headers are added, the origin http://localhost:8080 will be allowed to interact and get the data back.,