Google AMP - Liste
Amp-list, bir CORS json uç noktasını çağıran ve verileri bir şablon içinde bir json dosyası biçiminde görüntüleyen bir amp bileşenidir. Bunu çalışma örnekleri yardımıyla anlayalım.
Amp-list ile çalışmak için aşağıdaki komut dosyasını eklememiz gerekir -
<script async custom-element = "amp-list"
   src = "https://cdn.ampproject.org/v0/amp-list-0.1.js">
</script>
Bu, amp-list etiketinin biçimidir -
<amp-list width = "auto" height = "100"
layout = "fixed-height" src = "amplist.json" class = "m1">
   <template type = "amp-mustache">
      <div class = "images_for_display">
         <amp-img width = "150"
            height = "100"
            alt = "{{title}}"
            src = "{{url}}">
         </amp-img>
      </div>
   </template>
</amp-list>
Amp-list için kullanılan src, listelenecek ayrıntılara sahip bir json dosyasıdır. Json dosyasındaki verileri görüntülemek için normal html etiketlerini veya amp-bileşenlerini amp-list içinde kullanabiliriz. Şablon türü amp-mustache, görüntülenecek verileri veri bağlamak için kullanılır.
Bunu, aşağıda gösterildiği gibi çalışan bir örnek yardımıyla anlayalım -
Misal
<!doctype html>
<html amp lang = "en">
   <head>
      <meta charset = "utf-8">
      <script async src = "https://cdn.ampproject.org/v0.js"></script>
      <title>Google AMP - Amp List</title>
      <link rel = "canonical" href = "http://example.ampproject.org/article-metadata.html">
      <meta name = "viewport" content = "width = device-width,minimum-scale = 1,initial-scale = 1">

      <style amp-boilerplate>
         body{-webkit-animation:
            -amp-start 8s steps(1,end) 0s 1 normal both;-moz-animation:
            -amp-start 8s steps(1,end) 0s 1 normal both;-ms-animation:
            -amp-start 8s steps(1,end) 0s 1 normal both;animation:
            -amp-start 8s steps(1,end) 0s 1 normal both
         }
         @-webkit-keyframes
         -amp-start{from{visibility:hidden}to{visibility:visible}}@-moz-keyframes
         -amp-start{from{visibility:hidden}to{visibility:visible}}@-ms-keyframes
         -amp-start{from{visibility:hidden}to{visibility:visible}}@-o-keyframes
         -amp-start{from{visibility:hidden}to{visibility:visible}}@keyframes
         -amp-start{from{visibility:hidden}to{visibility:visible}}
      </style>

      <noscript>
         <style amp-boilerplate>
            body{
            -webkit-animation:none;-moz-animation:none;
            -ms-animation:none;animation:none}
         </style>
      </noscript>

      <script async custom-element = "amp-list"
         src = "https://cdn.ampproject.org/v0/amp-list-0.1.js">
      </script>

      <script async custom-template = "amp-mustache"
         src ="https://cdn.ampproject.org/v0/amp-mustache-0.2.js">
      </script>

      <style amp-custom>
         amp-img {
            border: 1px solid #ddd;
            border-radius: 4px;
            padding: 5px;
         }
      </style>
   </head>
   <body>
      <h3>Google AMP - Amp List</h3>
      <amp-list width = "auto" height = "100"
         layout = "fixed-height" src = "amplist.json" class = "m1">
         <template type = "amp-mustache">
            <div class = "images_for_display">
               <amp-img width = "150"
                  height = "100"
                  alt = "{{title}}"
                  src = "{{url}}">
               </amp-img>
            </div>
         </template>
      </amp-list>
   </body>
</html>
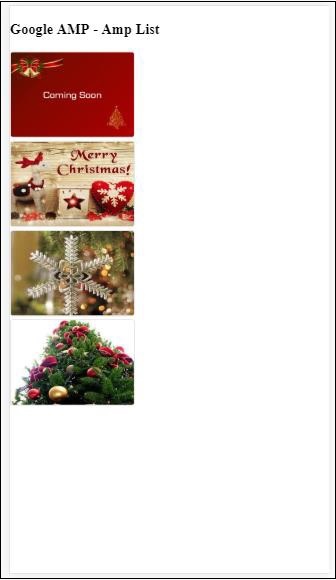
Çıktı
Yukarıda gösterilen çalışma örneğinin çıktısı aşağıda gösterildiği gibidir -

Yukarıda verilen çalışma örneğinde kullanılan json dosyası burada gösterilmektedir -
{
   "items": [
      {
         "title": "Christmas Image 1",
         "url": "images/christmas1.jpg"
      },
      {
         "title": "Christmas Image 2",
         "url": "images/christmas2.jpg"
      },
      {
         "title": "Christmas Image 3",
         "url": "images/christmas3.jpg"
      },
      {
         "title": "Christmas Image 4",
         "url": "images/christmas4.jpg"
      }
   ]
}
Listeyi, aşağıda verilen kodda gösterildiği gibi amp-list üzerindeki etkinliği kullanarak yenileyebiliriz -
Misal
<!doctype html>
<html amp lang = "en">
   <head>
      <meta charset = "utf-8">
      <script async src = "https://cdn.ampproject.org/v0.js"></script>
      <title>Google AMP - Amp List</title>
      <link rel = "canonical" href = "http://example.ampproject.org/article-metadata.html">
      <meta name = "viewport" content = "width = device-width,minimum-scale = 1,initial-scale = 1">

      <style amp-boilerplate>
         body{
            -webkit-animation:
            -amp-start 8s steps(1,end) 0s 1 normal both;-moz-animation:
            -amp-start 8s steps(1,end) 0s 1 normal both;-ms-animation:
            -amp-start 8s steps(1,end) 0s 1 normal both;animation:
            -amp-start 8s steps(1,end) 0s 1 normal both
         }
         @-webkit-keyframes
         -amp-start{from{visibility:hidden}to{visibility:visible}}@-moz-keyframes
         -amp-start{from{visibility:hidden}to{visibility:visible}}@-ms-keyframes
         -amp-start{from{visibility:hidden}to{visibility:visible}}@-o-keyframes
         -amp-start{from{visibility:hidden}to{visibility:visible}}@keyframes
         -amp-start{from{visibility:hidden}to{visibility:visible}}
      </style>

      <noscript>
         <style amp-boilerplate>
            body{
               -webkit-animation:none;
               -moz-animation:none;
               -ms-animation:none;
               animation:none}
         </style>
      </noscript>

      <script async custom-element = "amp-list"
         src = "https://cdn.ampproject.org/v0/amp-list-0.1.js">
      </script>

      <script async custom-template = "amp-mustache"
         src = "https://cdn.ampproject.org/v0/amp-mustache-0.2.js">
      </script>

      <style amp-custom>
         amp-img {
            border: 1px solid #ddd;
            border-radius: 4px;
            padding: 5px;
         }
         button{
            background-color: #ACAD5C;
            color: white;
            padding: 12px 20px;
            border: none;
            border-radius: 4px;
            cursor: pointer;
            float: right;
         }
      </style>
   </head>
   <body>
      <h3>Google AMP - Amp List</h3>
      <button on = "tap:amplist.refresh">Refresh Images</button>

      <amp-list id = "amplist" width = "auto" height = "100"
         layout = "fixed-height" src = "amplist.json" class = "m1">
      <template type = "amp-mustache">
         <div class = "images_for_display">
            <amp-img width = "150"
               height = "100"
               alt = "{{title}}"
               src = "{{url}}"></amp-img>
         </div>
      </template>
      </amp-list>
   </body>
</html>
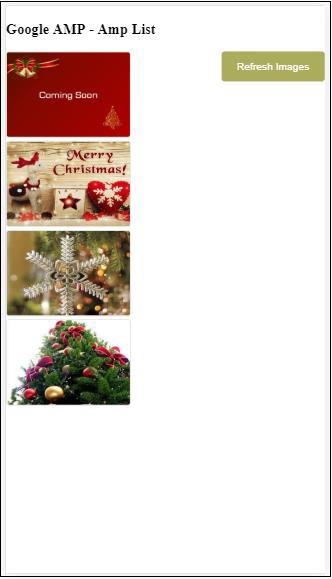
Çıktı
Yukarıda verilen çalışma örneğinin çıktısı burada gösterildiği gibidir -

Aşağıda gösterildiği gibi, tıklandığında on olayını kullanarak yenileme işlemini çağıran bir düğme eklenmiştir -
<button on = "tap:amplist.refresh">
   Refresh Images
</button>
//amplist is the id used for amp-list
Düğmeye tıklandığında json dosyası yeniden çağrılır ve içerik yüklenir. Zaten yüklenmiş görüntüler varsa, bunlar önbelleğe alınacaktır.