Google AMP - Aktionen und Ereignisse
Um Aktionen oder Ereignisse für eine Amp-Komponente zu verwenden, können Sie das Attribut on verwenden. Lassen Sie uns sie in diesem Kapitel ausführlich diskutieren.
Veranstaltungen
Die Syntax für die Arbeit mit Ereignissen lautet wie folgt:
on = "eventName:elementId[.methodName[(arg1 = value, arg2 = value)]]"Die Details gingen an on Attribut sind wie folgt -
eventName- Dies nimmt den Namen des Ereignisses an, das für die Amp-Komponente verfügbar ist. Für Formulare können wir beispielsweise eventNames "submit-success" und "submit-error" verwenden.
elementId- Dies nimmt die ID des Elements an, für das das Ereignis aufgerufen werden muss. Dies kann die ID des Formulars sein, für das wir über den Erfolg oder Fehler Bescheid wissen möchten.
methodName - Dies nimmt den Namen der Methode an, die beim Auftreten des Ereignisses aufgerufen werden soll.
arg=value - Hiermit werden die Argumente mit der an die Methode übergebenen Form key = value übernommen.
Es ist auch möglich, mehrere Ereignisse an das Attribut on zu übergeben. Dies geschieht wie folgt:
on = "submit-success:lightbox;submit-error:lightbox1"Wenn mehrere Ereignisse vorhanden sind, werden sie an das Attribut on übergeben und mit einem Semikolon (;) getrennt.
Aktionen
Aktionen werden grundsätzlich mit dem Attribut on verwendet und die Syntax lautet wie folgt:
on = "tab:elementid.hide;"Wir können mehrere Aktionen wie folgt übergeben:
on = "tab:elementid.open;tab:elementid.hide;”Elementid ist die ID des Elements, für das die Aktion ausgeführt werden soll.
Amp verfügt über einige global definierte Ereignisse und Aktionen, die für jede Amp-Komponente verwendet werden können tap event und die Aktionen sind hide, show und togglevisibility.
Wenn Sie die Sichtbarkeit für eine HTML- oder Amp-Komponente ausblenden / einblenden oder verwenden möchten, können Sie diese verwenden on=”tap:elementid.[hide/show/togglevisibility]”
Lassen Sie uns einige Arbeitsbeispiele für Ereignisse und Aktionen sehen.
Auf Eingabeelement
Lassen Sie uns dies anhand eines Arbeitsbeispiels besser verstehen -
Beispiel
<!doctype html>
<html amp lang = "en">
   <head>
      <meta charset = "utf-8">
      <script async src = "https://cdn.ampproject.org/v0.js"></script>
      <title>Google AMP - Amp Bind</title>
      <link rel = "canonical" href = "http://example.ampproject.org/article-metadata.html">
      <meta name = "viewport" content = "width = device-width,minimum-scale = 1,initial-scale = 1">

      <style amp-boilerplate>
         body{
            -webkit-animation:
            -amp-start 8s steps(1,end) 0s 1 normal both;-moz-animation:
            -amp-start 8s steps(1,end) 0s 1 normal both;-ms-animation:
            -amp-start 8s steps(1,end) 0s 1 normal both;animation:
            -amp-start 8s steps(1,end) 0s 1 normal both
         }
         @-webkit-keyframes
         -amp-start{from{visibility:hidden}to{visibility:visible}}@-moz-keyframes
         -amp-start{from{visibility:hidden}to{visibility:visible}}@-ms-keyframes
         -amp-start{from{visibility:hidden}to{visibility:visible}}@-o-keyframes
         -amp-start{from{visibility:hidden}to{visibility:visible}}@keyframes
         -amp-start{from{visibility:hidden}to{visibility:visible}}
      </style>

      <noscript>
         <style amp-boilerplate>
            body {
               -webkit-animation:none;
               -moz-animation:none;
               -ms-animation:none;
               animation:none
            }
         </style>
      </noscript>

      <script async custom-element = "amp-bind" src = "
         https://cdn.ampproject.org/v0/amp-bind-0.1.js">
      </script>

      <script async custom-element = "amp-lightbox" src = "
         https://cdn.ampproject.org/v0/amp-lightbox-0.1.js">
      </script>

      <style amp-custom>
         button{
            background-color: #ACAD5C;
            color: white;
            padding: 12px 20px;
            border: none;
            border-radius: 4px;
            cursor: pointer;
            float: left;}

         .lightbox {
            background: rgba(211,211,211,0.8);
            width: 100%;
            height: 100%;
            position: absolute;
            display: flex;
            align-items: center;
            justify-content: center;
         }
         #txtname{
            width: 100%;
            padding: 12px 20px;
            margin: 8px 0;
            display: inline-block;
            border: 1px solid #ccc;
            border-radius: 4px;
            box-sizing: border-box;
         }
         div {
            font-size:25px;
         }
      </style>
   </head>
   <body>
      <h3>Google AMP - Amp Bind</h3>
      <button on = "tap:AMP.setState({displaylightbox: true})">
         Click Here
      </button>
      <br/>
      <br/>

      <h3>AMP - Input Element</h3>
      <input id = "txtname" placeholder = "Type here" on =
         "input-throttled:AMP.setState({name: event.value})">
      <div [text] = "name"></div>
   </body>
</html>
Ausgabe
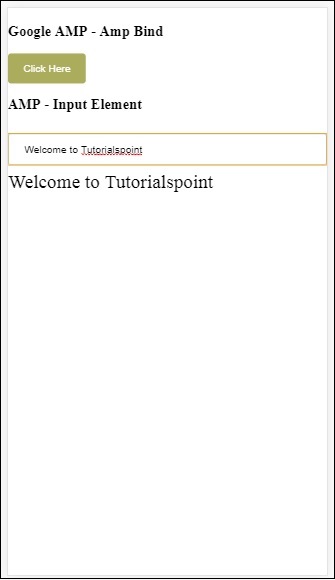
Beachten Sie, dass wir im obigen Beispiel das Ereignis im Eingabefeld wie folgt verwenden:
<input id = "txtname" placeholder = "Type here"
on = "input-throttled:AMP.setState({name: event.value})">
Das verwendete Ereignis ist input-throlled.
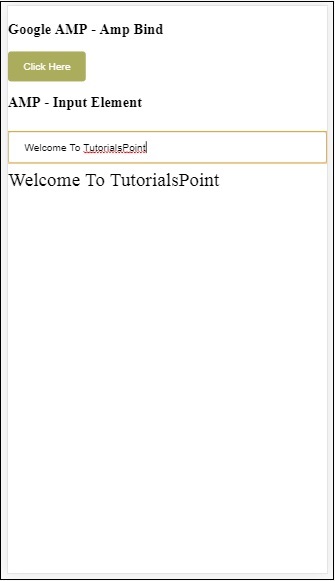
Wir können die Änderung auch wie folgt verwenden:
<input id = "txtname" placeholder = "Type here" on =
"change:AMP.setState({name: event.value})">
Die Ausgabe wird angezeigt, sobald der Benutzer das Eingabefeld verlässt. Wir können das Änderungsereignis für den Eingabetyp als Radio, Kontrollkästchen usw. und auch für das ausgewählte Element verwenden.
<input id = "txtname" placeholder = "Type here" on =
"input-debounced:AMP.setState({name: event.value})">
Veranstaltung input-debounced ist das gleiche wie changeEreignis, aber die Ausgabe wird nach 300 ms nach den Benutzertypen angezeigt.
Beispiel
<!doctype html>
<html amp lang = "en">
   <head>
      <meta charset = "utf-8">
      <script async src = "https://cdn.ampproject.org/v0.js"></script>
      <title>Google AMP - Amp Bind</title>
      <link rel = "canonical" href = " http://example.ampproject.org/article-metadata.html">
      <meta name = "viewport" content = "width = device-width,minimum-scale = 1,initial-scale = 1">

      <style amp-boilerplate>
         body{
            -webkit-animation:
            -amp-start 8s steps(1,end) 0s 1 normal both;-moz-animation:
            -amp-start 8s steps(1,end) 0s 1 normal both;-ms-animation:
            -amp-start 8s steps(1,end) 0s 1 normal both;animation:
            -amp-start 8s steps(1,end) 0s 1 normal both
         }
         @-webkit-keyframes
         -amp-start{from{visibility:hidden}to{visibility:visible}}@-moz-keyframes
         -amp-start{from{visibility:hidden}to{visibility:visible}}@-ms-keyframes
         -amp-start{from{visibility:hidden}to{visibility:visible}}@-o-keyframes
         -amp-start{from{visibility:hidden}to{visibility:visible}}@keyframes
         -amp-start{from{visibility:hidden}to{visibility:visible}}
      </style>
      <noscript>
         <style amp-boilerplate>
            body{
            -webkit-animation:none;
            -moz-animation:none;
            -ms-animation:none;
            animation:none}
         </style>
      </noscript>

      <script async custom-element = "amp-bind"
         src = "https://cdn.ampproject.org/v0/amp-bind-0.1.js">
      </script>

      <script async custom-element = "amp-lightbox"
         src = "https://cdn.ampproject.org/v0/amp-lightbox-0.1.js">
      </script>
      <style amp-custom>
         button{
            background-color: #ACAD5C;
            color: white;
            padding: 12px 20px;
            border: none;
            border-radius: 4px;
            cursor: pointer;
            float: left;
         }
         .lightbox {
            background: rgba(211,211,211,0.8);
            width: 100%;
            height: 100%;
            position: absolute;
            display: flex;
            align-items: center;
            justify-content: center;
         }
         #txtname{
            width: 100%;
            padding: 12px 20px;
            margin: 8px 0;
            display: inline-block;
            border: 1px solid #ccc;
            border-radius: 4px;
            box-sizing: border-box;
         }
         div {
            font-size:25px;
         }
      </style>
   </head>
   <body>
      <h3>Google AMP - Amp Bind</h3>
      <button on = "tap:AMP.setState({displaylightbox: true})">
         Click Here
      </button>
      <br/>
      <br/>

      <h3>AMP - Input Element</h3>
         <input id = "txtname" placeholder = "Type here" on =
         "input-debounced:AMP.setState({name: event.value})">
      <div [text] = "name"></div>
   </body>
</html>
Ausgabe
Auf Amp Lightbox
In diesem Abschnitt werden wir die folgenden Ereignisse auf Lightbox testen:
- lightboxOpen
- lightboxClose
Beispiel
<!doctype html>
<html amp lang = "en">
   <head>
      <meta charset = "utf-8">
      <script async src = "https://cdn.ampproject.org/v0.js"></script>
      <title>Google AMP - Amp Lightbox</title>
      <link rel = "canonical" href = " http://example.ampproject.org/article-metadata.html">
      <meta name = "viewport" content = "width = device-width,minimum-scale = 1,initial-scale = 1">

      <style amp-boilerplate>
         body{
            -webkit-animation:
            -amp-start 8s steps(1,end) 0s 1 normal both;-moz-animation:
            -amp-start 8s steps(1,end) 0s 1 normal both;-ms-animation:
            -amp-start 8s steps(1,end) 0s 1 normal both;animation:
            -amp-start 8s steps(1,end) 0s 1 normal both
         }
         @-webkit-keyframes
         -amp-start{from{visibility:hidden}to{visibility:visible}}@-moz-keyframes
         -amp-start{from{visibility:hidden}to{visibility:visible}}@-ms-keyframes
         -amp-start{from{visibility:hidden}to{visibility:visible}}@-o-keyframes
         -amp-start{from{visibility:hidden}to{visibility:visible}}@keyframes
         -amp-start{from{visibility:hidden}to{visibility:visible}}
      </style>

      <noscript>
         <style amp-boilerplate>
            body{
               -webkit-animation:none;
               -moz-animation:none;
               -ms-animation:none;
               animation:none}
         </style>
      </noscript>

      <script async custom-element = "amp-bind"
         src = "https://cdn.ampproject.org/v0/amp-bind-0.1.js">
      </script>

      <script async custom-element = "amp-lightbox"
         src = "https://cdn.ampproject.org/v0/amp-lightbox-0.1.js">
      </script>

      <style amp-custom>
         amp-img {
            border: 1px solid #ddd;
            border-radius: 4px;
            padding: 5px;
         }
         button {
            background-color: #ACAD5C;
            color: white;
            padding: 12px 20px;
            border: none;
            border-radius: 4px;
            cursor: pointer;
            float: left;
         }
         .lightbox {
            background: rgba(211,211,211,0.8);
            width: 100%;
            height: 100%;
            position: absolute;
            display: flex;
            align-items: center;
            justify-content: center;
         }
         p{font-size:30px;}
      </style>
   </head>
   <body>
      <h3>Google AMP - Amp Lightbox</h3>
      <p [text] = "'Lightbox is ' + lightboxstatus + '.'">
         Lightbox Event Testing
      </p>
      <button on = "tap:my-lightbox.open">
         Show LightBox
      </button>
      <amp-lightbox id = "my-lightbox" layout = "nodisplay"
      close-button on = "lightboxOpen:AMP.setState({lightboxstatus:'opened'});
      lightboxClose:AMP.setState({lightboxstatus:'closed'});">
         <div class = "lightbox">
            <amp-img alt = "Beautiful Flower" src = "images/loreal.gif"
               width = "246"
               height = "205">
            </amp-img>
         </div>
      </amp-lightbox>
   </body>
</html>
Ausgabe
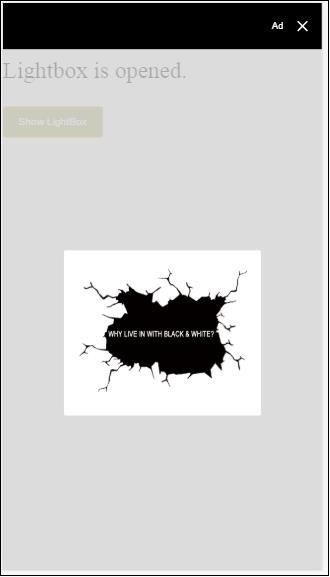
Der folgende Code zeigt, wie die Ereignisse zum Öffnen und Schließen in Lightbox implementiert werden -
<p [text]="'Lightbox is ' + lightboxstatus + '.'">Lightbox Event Testing</p>
<button on = "tap:my-lightbox.open">Show LightBox</button>
<amp-lightbox id = "my-lightbox" layout = "nodisplay"
   close-button on = "lightboxOpen:AMP.setState({lightboxstatus:'opened'});
   lightboxClose:AMP.setState({lightboxstatus:'closed'});">

   <div class = "lightbox">
      <amp-img alt = "Beautiful Flower" src = "images/loreal.gif"
         width = "246"
         height = "205">
      </amp-img>
   </div>
</amp-lightbox>
Ereignis auf Amp-Auswahl
Das auf dem Amp-Selector verfügbare Ereignis ist select.
Beispiel
<!doctype html>
<html amp lang = "en">
   <head>
      <meta charset = "utf-8">
      <script async src  = "https://cdn.ampproject.org/v0.js"></script>
      <title>Google AMP - Amp Selector</title>
      <link rel = "canonical" href = "http://example.ampproject.org/article-metadata.html">
      <meta name = "viewport" content = "width = device-width,minimum-scale = 1,initial-scale = 1">

      <style amp-boilerplate>
         body{
            -webkit-animation:
            -amp-start 8s steps(1,end) 0s 1 normal both;-moz-animation:
            -amp-start 8s steps(1,end) 0s 1 normal both;-ms-animation:
            -amp-start 8s steps(1,end) 0s 1 normal both;animation:
            -amp-start 8s steps(1,end) 0s 1 normal both
         }
         @-webkit-keyframes
         -amp-start{from{visibility:hidden}to{visibility:visible}}@-moz-keyframes
         -amp-start{from{visibility:hidden}to{visibility:visible}}@-ms-keyframes
         -amp-start{from{visibility:hidden}to{visibility:visible}}@-o-keyframes
         -amp-start{from{visibility:hidden}to{visibility:visible}}@keyframes
         -amp-start{from{visibility:hidden}to{visibility:visible}}
      </style>

      <noscript>
         <style amp-boilerplate>
            body {
               -webkit-animation:none;
               -moz-animation:none;
               -ms-animation:none;
               animation:none
            }
         </style>
      </noscript>

      <script async custom-element = "amp-bind"
         src = "https://cdn.ampproject.org/v0/amp-bind-0.1.js">
      </script>

      <script async custom-element = "amp-selector"
         src = "https://cdn.ampproject.org/v0/amp-selector-0.1.js">
      </script>

      <style amp-custom>
         .radio-menu {
            list-style: none;
         }
         .radio-menu [option][selected] {
            outline: none;
         }
         .radio-menu [option] {
            display: flex;
            align-items: center;
         }
         .radio-menu [option]:before {
            transition: background 0.25s ease-in-out;
            content: "";
            display: inline-block;
            width: 24px;
            height: 24px;
            margin: 8px;
            border-radius: 100%;
            border: solid 1px black;
         }
         .radio-menu [option = red][selected]:before {
            text-align: center;
            content: "✓";
            color: white;
            background: red;
         }
         .radio-menu [option = green][selected]:before {
            text-align: center;
            content: "✓";
            color: white;
            background: green;
         }
         .radio-menu [option = blue][selected]:before {
            text-align: center;
            content: "✓";
            color: white;
            background: blue;
         }
         p{font-size:30px;}
      </style>
   </head>
   <body>
      <h3>Google AMP - Amp Selector</h3>
      <p [text] = "'Color selected is ' + ampselectorstatus + '.'">
         Amp Selector Event Testing
      <p>
      <amp-selector
         class = "radio-menu"
         layout = "container"
         name = "my-selector"
         on = "select:AMP.setState({ampselectorstatus:event.selectedOptions})">
         <div option = "red">
            Red
         </div>
         <div option = "green">
            Green
         </div>
         <div option = "blue">
            Blue
         </div>
      </amp-selector>
   </body>
</html>
Ausgabe
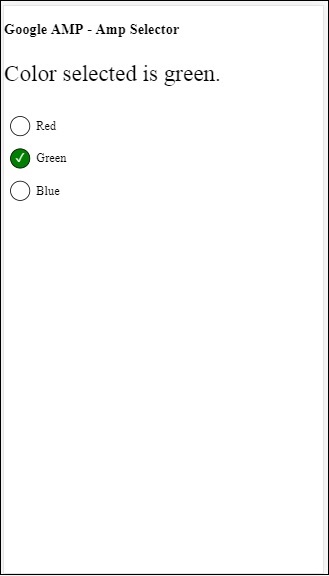
Die Ereignisauswahl wird wie folgt verwendet:
<p [text]="'Color selected is ' + ampselectorstatus + '.'">
   Amp Selector Event Testing
</p>
<amp-selector
   class = "radio-menu"
   layout  ="container"
   name =" my-selector"
   on = "select:AMP.setState({ampselectorstatus:event.selectedOptions})">
   <div option = "red">
      Red
   </div>
   <div option = "green">
      Green
   </div>
   <div option = "blue">
      Blue
   </div>
</amp-selector>
Ereignis in der Amp-Sidebar
Die verfügbaren Veranstaltungen sind sidebarOpen und sidebarClose.
Beispiel
<!doctype html>
<html amp lang = "en">
   <head>
      <meta charset = "utf-8">
      <script async src = "https://cdn.ampproject.org/v0.js"></script>
      <title>Google AMP - Amp Sidebar</title>
      <link rel = "canonical" href = "http://example.ampproject.org/article-metadata.html">
      <meta name = "viewport" content = "width = device-width,minimum-scale = 1,initial-scale = 1">

      <style amp-boilerplate>
         body{
            -webkit-animation:
            -amp-start 8s steps(1,end) 0s 1 normal both;-moz-animation:
            -amp-start 8s steps(1,end) 0s 1 normal both;-ms-animation:
            -amp-start 8s steps(1,end) 0s 1 normal both;animation:
            -amp-start 8s steps(1,end) 0s 1 normal both
         }
         @-webkit-keyframes
         -amp-start{from{visibility:hidden}to{visibility:visible}}@-moz-keyframes
         -amp-start{from{visibility:hidden}to{visibility:visible}}@-ms-keyframes
         -amp-start{from{visibility:hidden}to{visibility:visible}}@-o-keyframes
         -amp-start{from{visibility:hidden}to{visibility:visible}}@keyframes
         -amp-start{from{visibility:hidden}to{visibility:visible}}
      </style>

      <noscript>
         <style amp-boilerplate>
            body{
               -webkit-animation:none;
               -moz-animation:none;
               -ms-animation:none;
               animation:none
            }
         </style>
      </noscript>
      <script async custom-element = "amp-bind"
         src = "https://cdn.ampproject.org/v0/amp-bind-0.1.js">
      </script>
      <script async custom-element = "amp-sidebar"
         src = "https://cdn.ampproject.org/v0/amp-sidebar-0.1.js">
      </script>
      <style amp-custom>
         amp-img {
            border: 1px solid #ddd;
            border-radius: 4px;
            padding: 5px;
         }
         button{
            background-color: #ACAD5C;
            color: white;
            padding: 12px 20px;
            border: none;
            border-radius: 4px;
            cursor: pointer;
            float: left;
         }
         .amp-sidebar-toolbar-target-shown {
            display: none;
         }
         p{font-size:30px;}
      </style>
   </head>
   <body>
      <h3>Google AMP - Amp Sidebar</h3>
      <p [text] = "'Sidebar is ' + ampsidebarstatus + '.'">
         Amp Sidebar Event Testing
      </p>
      <button on = "tap:sidebar1">
         Show Sidebar
      </button>
      <amp-sidebar
         id = "sidebar1"
         layout = "nodisplay"
         side = "right"
         on = "sidebarOpen:AMP.setState({ampsidebarstatus: 'Opened'});
         sidebarClose:AMP.setState({ampsidebarstatus: 'Closed'})">
         <ul>
            <li>Nav item 1</li>
            <li>
               <a href = "#idTwo" on = "tap:idTwo.scrollTo">Nav item 2</a>
            </li>
            <li>Nav item 3</li>
            <li>
               <a href = "#idFour" on="tap:idFour.scrollTo">Nav item 4</a>
            </li>
            <li>Nav item 5</li>
            <li>Nav item 6</li>
         </ul>
      </amp-sidebar>
      <div id = "target-element">
      </div>
   </body>
</html>
Ausgabe
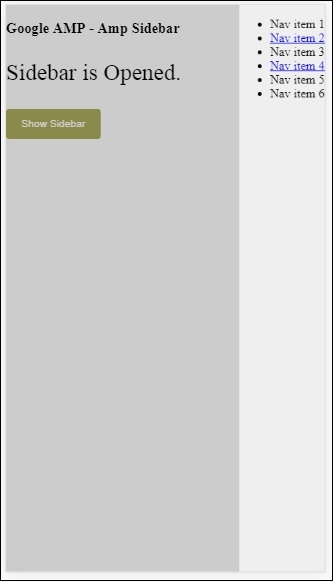
Die Ereignisse werden wie folgt verwendet:
<p [text] = "'Sidebar is ' + ampsidebarstatus + '.'">
   Amp Sidebar Event Testing
</p>
<button on = "tap:sidebar1">
   Show Sidebar
</button>
<amp-sidebar
   id = "sidebar1"
   layout = "nodisplay"
   side = "right"
   on = "sidebarOpen:AMP.setState({ampsidebarstatus: 'Opened'});
   sidebarClose:AMP.setState({ampsidebarstatus: 'Closed'})">
   <ul>
      <li>Nav item 1</li>
      <li>
         <a href = "#idTwo" on = "tap:idTwo.scrollTo">Nav item 2</a>
      </li>
      <li>Nav item 3</li>
      <li>
         <a href = "#idFour" on = "tap:idFour.scrollTo">Nav item 4</a>
      </li>
      <li>Nav item 5</li>
      <li>Nav item 6</li>
   </ul>
</amp-sidebar>