Google AMP - Formular
In diesem Kapitel wird erläutert, wie Sie mit Formularen in Google AMP arbeiten.
Beachten Sie, dass das Formular-Tag dasselbe bleibt wie in Standard-HTML. AMP hat eine spezielle Einschränkung für die Verwendung von Formularen hinzugefügt, aufgrund derer wir die JavaScript-Datei amp-form hinzufügen müssen, um mit Formularen arbeiten zu können.
Skript für Amp-Form
<script async custom-element = "amp-form"
   src = "https://cdn.ampproject.org/v0/ampform-0.1.js"></script>
Um Formulare in einer AMP-Seite zu verwenden, müssen wir das obige Skript in die HTML-Datei aufnehmen. Die JavaScript-Datei in Amp-Form unterstützthttp und xmlhttprequestzur Formularübermittlung. Bei Verwendung einer HTTP-Anfrage wird die Seite neu geladen und mitxmlhttprequest Die Seite wird nicht neu geladen. Dies wirkt wie eine Ajax-Anfrage.
Formular-Tag in AMP
For xmlhttprequest :
<form method = "post" class = "p2" action-xhr = "submitform.php" target = "_top">
   //Input fields here
</form>

For http :
<form method = "post" class = "p2" action = "submitform.php" target = "_top">
   //Input fields here
</form>
Amp-Form bietet spezielle Attribute, z. submit-error und submit-success Fehler und Erfolg beim Absenden des Formulars zu behandeln.
Example
Ein Beispiel für Amp-Form ist unten gezeigt -
<!doctype html>
<html amp lang = "en">
   <head>
      <meta charset = "utf-8">
      <script async src = "https://cdn.ampproject.org/v0.js"></script>
      <title>Google AMP - Form</title>
      <link rel = "canonical" href = "ampform.html">
      <meta name = "viewport" conten t = "width = device-width,
         minimum-scale = 1,initialscale = 1">

      <style amp-boilerplate>
         body{
            -webkit-animation:
            -amp-start 8s steps(1,end) 0s1 normal both;-moz-animation:
            -amp-start 8s steps(1,end) 0s 1 normal both;-msanimation:
            -amp-start 8s steps(1,end) 0s 1 normal both;animation:
            -amp-start 8s steps(1,end) 0s 1 normal both
         }
         @-webkit-keyframes
         -ampstart{from{visibility:hidden}to{visibility:visible}}@-moz-keyframes
         -ampstart{from{visibility:hidden}to{visibility:visible}}@-ms-keyframes
         -ampstart{from{visibility:hidden}to{visibility:visible}}@-o-keyframes
         -ampstart{from{visibility:hidden}to{visibility:visible}}@keyframes
         -ampstart{from{visibility:hidden}to{visibility:visible}}
      </style>
         <noscript>
            <style amp-boilerplate>
               body{
                  -webkit-animation:none;
                  -moz-animation:none;
                  -msanimation:none;
                  animation:none
               }
            </style>
         </noscript>
      <script async custom-element = "amp-form"
         src = "https://cdn.ampproject.org/v0/amp-form-0.1.js">
      </script>
      <script async custom-template = "amp-mustache"
         src = "https://cdn.ampproject.org/v0/amp-mustache-0.2.js">
      </script>
      <style amp-custom>
         form.amp-form-submit-success [submit-success],
         form.amp-form-submit-error [submit-error]{
            margin-top: 16px;
         }
         form.amp-form-submit-success [submit-success] {
            color: white;
            background-color:gray;
         }
         form.amp-form-submit-error [submit-error] {
            color: red;
         }
         form.amp-form-submit-success.hide-inputs > input {
            display: none;
         }
      </style>
   </head>
   <body>
      <h3>Google AMP - Form</h3>
      <form method = "post"
         class = "p2"
         action-xhr = "submitform.php"
         target = "_top">
         <p>AMP - Form Example</p>
         <div>
            <input type = "text" name = "name" placeholder = "Enter
               Name" required><br/><br/>
            <input type = "email" name = "email"
            placeholder = "Enter Email" required>
            <br/>
            <br/>
         </div>

         <input type = "submit" value = "Submit">
         <div submit-success>
            <template type = "amp-mustache">
               Form Submitted! Thanks {{name}}.
            </template>
         </div>

         <div submit-error>
            <template type = "amp-mustache">
               Error! {{name}}, please try again.
            </template>
         </div>
      </form>
   </body>
</html>
Output
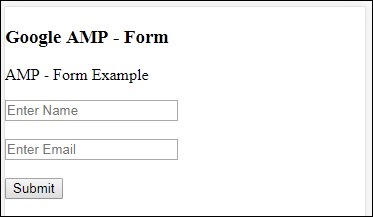
Wenn Sie den oben gezeigten Code ausgeführt haben, finden Sie das Ergebnis wie unten gezeigt -
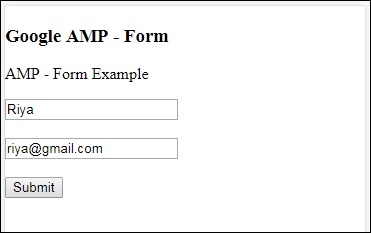
Geben Sie nun die Details ein und klicken Sie auf die Schaltfläche Senden. Der angezeigte Ausgabebildschirm sieht wie folgt aus:
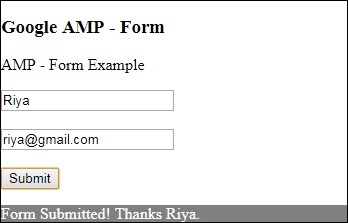
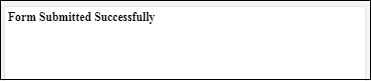
Beachten Sie, dass wir Amp-Moustache für die Datenbindung verwendet haben. Das Formular verwendet action-xhr, dh xmlhttprequest, um das Formular zu senden. Wir haben benutztsubmitform.php Datei, die die Daten im JSON-Format zurückgibt.
<form method = "post" class = "p2" action-xhr = "submitform.php"
   target = "_top">
</form>
submitform.php
<?php
   if(!empty($_POST)){
      $domain_url = (isset($_SERVER['HTTPS']) ? "https" : "http") .      "://$_SERVER[HTTP_HOST]";
      header("Content-type: application/json");
      header("AMP-Access-Control-Allow-Source-Origin: " . $domain_url);
      header("Access-Control-Expose-Headers: AMP-Access-Control-Allow-Source-Origin");
      $myJSON = json_encode($_POST);
      echo $myJSON;
   }
?>
Damit das Formular mit xmlhttprequest funktioniert, müssen Header gemäß der CORS-Spezifikation hinzugefügt werden. Details zu Antwortheadern, die zu submitform.php hinzugefügt wurden, werden unten angezeigt -
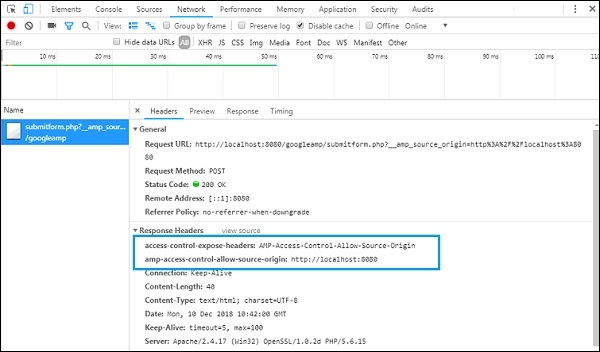
Damit das Formular funktioniert, müssen wir Überschriften wie z access-control-expose-headers mit Wert AMP-Access-Control-Allow-Source-Origin und amp-access-controlallow- source-origin - -http://localhost:8080.
Beachten Sie, dass wir eine PHP-Datei und einen Apache-Server verwenden. In der PHP-Datei haben wir die erforderlichen Header wie unten gezeigt hinzugefügt -
<?php
if(!empty($_POST)){
$domain_url = (isset($_SERVER['HTTPS']) ? "https" : "http") . "://$_SERVER[HTTP_HOST]";
header("Content-type: application/json");
header("AMP-Access-Control-Allow-Source-Origin: " . $domain_url);
header("Access-Control-Expose-Headers: AMP-Access-Control-Allow-Source-Origin");
$myJSON = json_encode($_POST);
echo $myJSON;
}
?
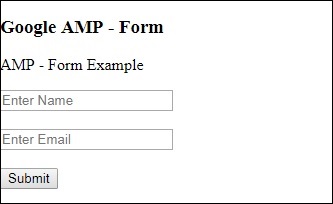
?>Falls wir eine normale http-Anfrage verwenden, wird die Seite wie unten gezeigt neu geladen -
Für die http-Anfrage haben wir das folgende Formular verwendet:
<form method = "GET" class = "p2" action = "submitform.php"
   target = "_top">
</form>
Example
Beachten Sie zum besseren Verständnis den folgenden Code:
<!doctype html>
<html amp lang = "en">
   <head>
      <meta charset = "utf-8">
      <script async src = "https://cdn.ampproject.org/v0.js"></script>
      <title>Google AMP - Form</title>
      <link rel = "canonical" href = "ampform.html">
      <meta name = "viewport" content = "width = device-width,minimum-scale = 1,initialscale = 1">

      <style amp-boilerplate>
         body{
            -webkit-animation:
            -amp-start 8s steps(1,end) 0s1 normal both;-moz-animation:
            -amp-start 8s steps(1,end) 0s 1 normal both;-msanimation:
            -amp-start 8s steps(1,end) 0s 1 normal both;animation:
            -amp-start 8s steps(1,end) 0s 1 normal both
         }
         @-webkit-keyframes
         -ampstart{from{visibility:hidden}to{visibility:visible}}@-moz-keyframes
         -ampstart{from{visibility:hidden}to{visibility:visible}}@-ms-keyframes
         -ampstart{from{visibility:hidden}to{visibility:visible}}@-o-keyframes
         -ampstart{from{visibility:hidden}to{visibility:visible}}@keyframes
         -ampstart{from{visibility:hidden}to{visibility:visible}}
      </style>
      <noscript>
         <style amp-boilerplate>
            body {
               -webkit-animation:none;
               -moz-animation:none;
               -msanimation:none;
               animation:none}
         >/style>
      </noscript>

      <script async custom-element = "amp-form"
         src = "https://cdn.ampproject.org/v0/amp-form-0.1.js">
      </script>
      <script async custom-template = "amp-mustache"
         src = "https://cdn.ampproject.org/v0/amp-mustache-0.2.js">
      </script>

      <style amp-custom>
         form.amp-form-submit-success [submit-success],
         form.amp-form-submit-error [submit-error]{
            margin-top: 16px;
         }
         form.amp-form-submit-success [submit-success] {
            color: white;
            background-color:gray;
         }
         form.amp-form-submit-error [submit-error] {
            color: red;
         }
         form.amp-form-submit-success.hide-inputs >
            input {
            display: none;
         }
      </style>
   </head>
   <body>
      <h3>Google AMP - Form</h3>
      <form method = "GET" class = "p2" action = "submitform.php" target = "_top">
         <p>AMP - Form Example</p>
         <div>
            <input type = "text" name = "name" placeholder = "Enter Name" required>
            <br/>
            <br/>
            <input type = "email" name = "email" placeholder = "Enter Email" required>
            <br/>
            <br/>
         <div>

         <input type = "submit" value = "Submit">
         <div submit-success>
            <template type = "amp-mustache">
               Form Submitted! Thanks {{name}}.
            </template>
         </div>
         <div submit-error>
            <template type = "amp-mustache">
               Error! {{name}}, please try again.
            </template>
         </div>
      </form>
   </body>
</html>
Output
Wenn Sie den oben gezeigten Code ausgeführt haben, finden Sie das Ergebnis wie unten gezeigt -