Google AMP - Medien
In diesem Kapitel wird erläutert, wie Video und Audio von Drittanbietern wie jwplayer und Youtube angezeigt werden. Lassen Sie uns im Detail Folgendes erfahren:
Google AMP - JwPlayer
Google AMP - YouTube
Google AMP - Audio
Google AMP - JwPlayer
Wenn Sie jwplayer verwenden möchten, um Videos auf der Seite anzuzeigen, verfügt amp über amp-jwplayer, um dies zu tun.
Um mit amp-jwplayer zu arbeiten, fügen Sie Ihrer Seite das folgende Skript hinzu:
<script async custom-element = "amp-jwplayer" src = "
   https://cdn.ampproject.org/v0/amp-jwplayer-0.1.js">
</script>
Amp-Jwplayer-Tag
<amp-jwplayer
   data-playlist-id = "482jsTAr"
   data-player-id = "uoIbMPm3"
   layout = "responsive"
   width = "16"
   height = "9">
</amp-jwplayer>
Ein funktionierendes Beispiel für jwplayer auf der Amp-Seite ist unten dargestellt -
Beispiel
<!doctype html>
<html amp lang = "en">
   <head>
      <meta charset = "utf-8">
      <script async src = "https://cdn.ampproject.org/v0.js">
      </script>
      <title>Google AMP - Amp Jwplayer</title>
      <link rel = "canonical" href =
      "http://example.ampproject.org/article-metadata.html">
      <meta name = "viewport" content = "width = device-width,
      minimum-scale = 1,initial-scale = 1">

      <style amp-boilerplate>
         body{
            -webkit-animation:
            -amp-start 8s steps(1,end) 0s 1 normal both;-moz-animation:
            -amp-start 8s steps(1,end) 0s 1 normal both;-ms-animation:
            -amp-start 8s steps(1,end) 0s 1 normal both;animation:
            -amp-start 8s steps(1,end) 0s 1 normal both
         }
         @-webkit-keyframes
         -amp-start{from{visibility:hidden}to{visibility:visible}}@-moz-keyframes
         -amp-start{from{visibility:hidden}to{visibility:visible}}@-ms-keyframes
         -amp-start{from{visibility:hidden}to{visibility:visible}}@-o-keyframes
         -amp-start{from{visibility:hidden}to{visibility:visible}}@keyframes
         -amp-start{from{visibility:hidden}to{visibility:visible}}
      </style>
      <noscript>
         <style amp-boilerplate>
            body{
               -webkit-animation:none;
               -moz-animation:none;
               -ms-animation:none;
               animation:none}
         </style>
      </noscript>
      <script async custom-element = "amp-jwplayer" src =
         "https://cdn.ampproject.org/v0/amp-jwplayer-0.1.js">
      </script>
   </head>
   <body>
      <h3>Google AMP - Amp Jwplayer</h3>
      <amp-jwplayer
         data-playlist-id = "482jsTAr"
         data-player-id = "uoIbMPm3"
         layout = "responsive"
         width = "16"
         height = "9">
      </amp-jwplayer>
   </body>
</html>
Ausgabe

Für amp-jwplayer gibt es drei wichtige Attribute
data-player-id
data-media-id
data-playlist-id
Um die IDs von Player, Medien und Wiedergabeliste zu erhalten, müssen Sie sich in jwplayer anmelden. Dies kann von hier aus erfolgen. https://dashboard.jwplayer.com/#/players
Die Spieler-ID wird im JWplayer-Player-Bereich verfügbar sein. Die Medien-ID ist in verfügbarjwplayer content section und Playlist-ID in jwplayer playlist section.
Jwplayer gibt eine achtstellige alphanumerische ID an, die im amp-jwplayer für das jeweilige Attribut verwendet werden muss.
Google AMP - Youtube
Wenn Sie Youtube-Videos auf Ihrer Amp-Seite anzeigen möchten, verfügt Amp über Amp-Youtube, um Youtube-Videos auf der Seite einzubetten.
Um amp-youtube verwenden zu können, müssen Sie Ihrer Seite das folgende Skript hinzufügen:
<script async custom-element = "amp-youtube" src = "
   https://cdn.ampproject.org/v0/amp-youtube-0.1.js">
</script>
Amp-Youtube-Tag
<amp-youtube
   width = "480"
   height = "270"
   layout = "responsive"
   autoplay = "true"
   data-videoid = "fWZ6-p7mGK0">
</amp-youtube>
Lassen Sie uns nun an einem Beispiel arbeiten, das die Funktionsweise von amp-youtube auf der Seite zeigt.
Beispiel
<!doctype html>
<html amp lang = "en">
   <head>
      <meta charset = "utf-8">
      <script async src = "https://cdn.ampproject.org/v0.js">
      </script>
      <title>Google AMP - Youtube</title>
      <link rel = "canonical" href =
      "http://example.ampproject.org/article-metadata.html">
      <meta name = "viewport" content = "width = device-width,
      minimum-scale = 1,initial-scale = 1">

      <style amp-boilerplate>
         body{
            -webkit-animation:
            -amp-start 8s steps(1,end) 0s 1 normal both;-moz-animation:
            -amp-start 8s steps(1,end) 0s 1 normal both;-ms-animation:
            -amp-start 8s steps(1,end) 0s 1 normal both;animation:
            -amp-start 8s steps(1,end) 0s 1 normal both
         }
         @-webkit-keyframes
         -amp-start{from{visibility:hidden}to{visibility:visible}}@-moz-keyframes
         -amp-start{from{visibility:hidden}to{visibility:visible}}@-ms-keyframes
         -amp-start{from{visibility:hidden}to{visibility:visible}}@-o-keyframes
         -amp-start{from{visibility:hidden}to{visibility:visible}}@keyframes
         -amp-start{from{visibility:hidden}to{visibility:visible}}
      </style>
      <noscript>
         <style amp-boilerplate>
            body{
               -webkit-animation:none;
               -moz-animation:none;
               -ms-animation:none;
               animation:none}
         </style>
      </noscript>
      <script async custom-element = "amp-youtube" src =
         "https://cdn.ampproject.org/v0/amp-youtube-0.1.js">
      </script>
   </head>
   <body>
      <h3>Google AMP - Youtube</h3>
      <h3>Youtube Videos from Tutorialspoint</h3>
      <amp-youtube
         width = "480"
         height = "270"
         layout = "responsive"
         autoplay = "true"
         data-videoid = "fWZ6-p7mGK0">
      </amp-youtube>
   </body>
</html>
Ausgabe
Um YouTube-Videos zu zeigen, musst du dem Amp-YouTube Video-ID geben, wie unten gezeigt -
<amp-youtube
   width = "480"
   height = "270"
   layout = "responsive"
   autoplay = "true"
   data-videoid = "fWZ6-p7mGK0">
</amp-youtube>
Wie bekomme ich die Daten-Video-ID?
Betrachten Sie zum Beispiel eine Youtube-URL - https://www.youtube.com/watch?v=fWZ6-p7mGK0. Der hervorgehobene Teil ist die ID, die in deinem Amp-Youtube verwendet werden soll.
Wir haben das Attribut verwendet autoplayals wahr. Das Video wird automatisch abgespielt, wie vom Browser unterstützt, und das Video wird stummgeschaltet abgespielt. Sie müssen auf das Video tippen, um die Stummschaltung aufzuheben. Das Video wird angehalten, wenn es nicht mehr angezeigt wird, und wird beim Anschauen aus dem angehaltenen Zustand fortgesetzt. Wenn der Benutzer das Video pausiert und die Ansicht ein- oder ausschaltet, bleibt das Video nur im Pausenzustand. Gleiches gilt für Stumm / Stummschaltung.
Google Amp - Audio
Amp verfügt über ein Tag zum Abspielen von Audio, das das HTML5-Audio-Tag ersetzt. Um Audio auf der Amp-Seite abzuspielen, können wir Amp-Audio verwenden.
Um mit Amp-Audio arbeiten zu können, müssen wir das folgende Skript hinzufügen:
<script async custom-element = "amp-audio" src = "
   https://cdn.ampproject.org/v0/amp-audio-0.1.js">
</script>
Amp-Audio-Tag
<amp-audio
   width = "auto"
   height = "50"
   src = "audio/test.mp3">
  <div fallback>
     <p>HTML5 audio is not supported on your browser!</p>
   </div>
</amp-audio>
Daher nimmt amp-audio das src-Attribut auf, bei dem es sich um eine http-Anforderung an die Audiodatei handelt. Der Grund, warum wir Amp-Audio anstelle des Standard-HTML5-Audios verwenden, ist, dass Amp ein verzögertes Ladekonzept für Elemente einführt, für die eine http-Anforderung erforderlich ist.
Die Anforderung wird basierend auf der Priorität geladen. Sie wird unmittelbar vor oder kurz vor dem Erreichen des Ansichtsfensters geladen.
Ein funktionierendes Beispiel für die Verwendung von Amp-Audio auf Ihrer Seite finden Sie hier -
Beispiel
<!doctype html>
<html amp lang = "en">
   <head>
      <meta charset = "utf-8">
      <script async src = "https://cdn.ampproject.org/v0.js">
      </script>
      <title>Google AMP - Audio</title>
      <link rel = "canonical" href =
      "http://example.ampproject.org/article-metadata.html">
      <meta name = "viewport" content = "width = device-width,
      minimum-scale = 1,initial-scale = 1">

      <style amp-boilerplate>
         body{
            -webkit-animation:
            -amp-start 8s steps(1,end) 0s 1 normal both;-moz-animation:
            -amp-start 8s steps(1,end) 0s 1 normal both;-ms-animation:
            -amp-start 8s steps(1,end) 0s 1 normal both;animation:
            -amp-start 8s steps(1,end) 0s 1 normal both
         }
         @-webkit-keyframes
         -amp-start{from{visibility:hidden}to{visibility:visible}}@-moz-keyframes
         -amp-start{from{visibility:hidden}to{visibility:visible}}@-ms-keyframes
         -amp-start{from{visibility:hidden}to{visibility:visible}}@-o-keyframes
         -amp-start{from{visibility:hidden}to{visibility:visible}}@keyframes
         -amp-start{from{visibility:hidden}to{visibility:visible}}
      </style>
      <noscript>
         <style amp-boilerplate>
            body{
               -webkit-animation:none;
               -moz-animation:none;
               -ms-animation:none;
               animation:none}
         </style>
      </noscript>
      <script async custom-element = "amp-audio"
         src = "https://cdn.ampproject.org/v0/amp-audio-0.1.js">
      </script>
   </head>
   <body>
      <h3>Google AMP - Audio</h3>
      <amp-audio
         width = "auto"
         height = "50"
         src="audio/test.mp3">
            <div fallback>
               <p>HTML5 audio is not supported on your browser!</p>
            </div>
      </amp-audio>
   </body>
</html>
Ausgabe
Hier wird das Tag für Amp-Audio angezeigt, in dem die Attribute wie width, height, src angegeben sind. Wir haben auch ein div mit hinzugefügtfallback attribute Dies wirkt als Fallback, wenn Amp-Audio im Browser nicht unterstützt wird.
<amp-audio
   width = "auto"
   height = "50"
   src = "audio/test.mp3">
   <div fallback>
      <p>HTML5 audio is not supported on your browser!</p>
   </div>
</amp-audio>
Beachten Sie, dass Steuerelemente standardmäßig zum Audio-Tag hinzugefügt werden und zum Abspielen / Anhalten und Stummschalten / Aufheben der Stummschaltung des Audios verwendet werden können. Sie erhalten eine Download-Option für das Audio-Tag wie unten gezeigt -
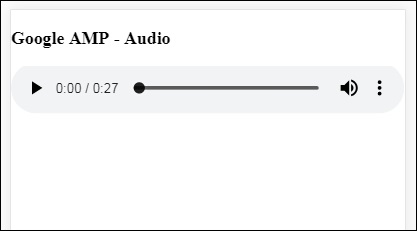

Durch Klicken auf den Download können Sie die verwendete Mediendatei herunterladen. Um den Download zu deaktivieren, können Sie das Attribut - verwendencontrolsList="nodownload" wie im folgenden Beispiel gezeigt -
Beispiel
<!doctype html>
<html amp lang = "en">
   <head>
      <meta charset = "utf-8">
      <script async src = "https://cdn.ampproject.org/v0.js">
      </script>
      <title>Google AMP - Audio</title>
      <link rel = "canonical" href =
      "http://example.ampproject.org/article-metadata.html">
      <meta name = "viewport" content = "width = device-width,
      minimum-scale = 1,initial-scale = 1">
         <style amp-boilerplate>
            body{
               -webkit-animation:
               -amp-start 8s steps(1,end) 0s 1 normal both;-moz-animation:
               -amp-start 8s steps(1,end) 0s 1 normal both;-ms-animation:
               -amp-start 8s steps(1,end) 0s 1 normal both;animation:
               -amp-start 8s steps(1,end) 0s 1 normal both
            }
            @-webkit-keyframes
            -amp-start{from{visibility:hidden}to{visibility:visible}}@-moz-keyframes
            -amp-start{from{visibility:hidden}to{visibility:visible}}@-ms-keyframes
            -amp-start{from{visibility:hidden}to{visibility:visible}}@-o-keyframes
            -amp-start{from{visibility:hidden}to{visibility:visible}}@keyframes
            -amp-start{from{visibility:hidden}to{visibility:visible}}
         </style>
         <noscript>
            <style amp-boilerplate>
               body{
                  -webkit-animation:none;
                  -moz-animation:none;
                  -ms-animation:none;
                  animation:none}
            </style>
         </noscript>
         <script async custom-element = "amp-audio"
            src = "https://cdn.ampproject.org/v0/amp-audio-0.1.js">
         </script>
   </head>
   <body>
      <h3>Google AMP - Audio</h3>
      <amp-audio
         width = "auto"
         height = "50"
         src = "audio/test.mp3"
         controlsList = "nodownload">
            <div fallback>
               <p>HTML5 audio is not supported on your browser!</p>
            </div>
      </amp-audio>
   </body>
</html>
Ausgabe

Verwenden von controlsList="nodownload" Die drei vertikalen Punkte auf der rechten Seite sind verschwunden.
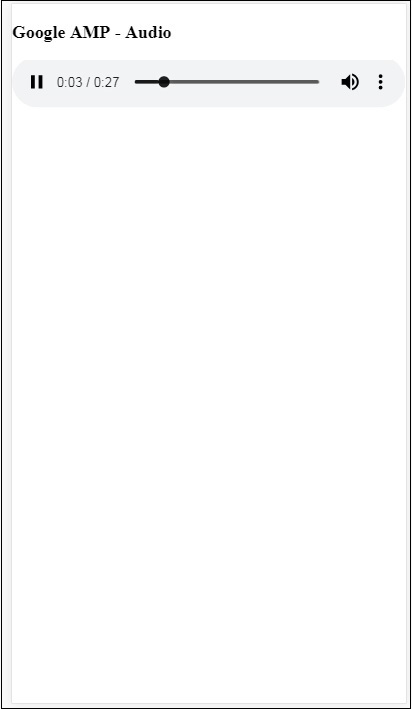
Es gibt Attribute wie preload und autoplayWenn sie dem Audio-Tag hinzugefügt werden, wird die Audiodatei beim Laden der Seite geladen und automatisch wiedergegeben, wenn der Browser dies unterstützt. Das folgende Beispiel zeigt die automatische Audiowiedergabe.
Beispiel
<!doctype html>
<html amp lang = "en">
   <head>
      <meta charset="utf-8">
      <script async src = "https://cdn.ampproject.org/v0.js">
      </script>
      <title>Google AMP - Audio</title>
      <link rel = "canonical" href =
      "http://example.ampproject.org/article-metadata.html">
      <meta name = "viewport" content = "width = device-width,
      minimum-scale = 1,initial-scale = 1">

      <style amp-boilerplate>
         body{
            -webkit-animation:
            -amp-start 8s steps(1,end) 0s 1 normal both;-moz-animation:
            -amp-start 8s steps(1,end) 0s 1 normal both;-ms-animation:
            -amp-start 8s steps(1,end) 0s 1 normal both;animation:
            -amp-start 8s steps(1,end) 0s 1 normal both
         }
         @-webkit-keyframes
         -amp-start{from{visibility:hidden}to{visibility:visible}}@-moz-keyframes
         -amp-start{from{visibility:hidden}to{visibility:visible}}@-ms-keyframes
         -amp-start{from{visibility:hidden}to{visibility:visible}}@-o-keyframes
         -amp-start{from{visibility:hidden}to{visibility:visible}}@keyframes
         -amp-start{from{visibility:hidden}to{visibility:visible}}
      </style>
      <noscript>
         <style amp-boilerplate>
            body{
               -webkit-animation:none;
               -moz-animation:none;
               -ms-animation:none;
               animation:none}
         </style>
      </noscript>
      <script async custom-element = "amp-audio"
         src = "https://cdn.ampproject.org/v0/amp-audio-0.1.js">
      </script>
   </head>
   <body>
      <h3>Google AMP - Audio</h3>
      <amp-audio
         width = "auto"
         height = "50"
         src = "audio/test.mp3" preload autoplay>
            <div fallback>
               <p>HTML5 audio is not supported on your browser!</p>
            </div>
      </amp-audio>
   </body>
</html>
Ausgabe

Das Attribut loopWenn vorhanden, wird das Audio nach Abschluss erneut abgespielt.
Beispiel
<amp-audio
   width = "auto"
   height = "50"
   src = "audio/test.mp3" loop>
   <div fallback>
      <p>HTML5 audio is not supported on your browser!</p>
   </div>
</amp-audio>