SAP HR - อินโฟไทป์
Infotype ใช้เพื่อจัดเก็บข้อมูลส่วนบุคคลเกี่ยวกับพนักงาน Infotype ประกอบด้วยรหัสสี่หลักและชื่อของ Infotype
Example - Infotype 002 ประกอบด้วยข้อมูลส่วนตัวของพนักงานเช่นชื่อวันเดือนปีเกิดสถานภาพการสมรส ฯลฯ
แต่ละ Infotype มีสองฟิลด์ -
Mandate fields - เครื่องหมายถูกในช่องฟิลด์แสดงถึงฟิลด์เหล่านี้
Option fields - ฟิลด์เหล่านี้ไม่บังคับและสามารถมีค่าว่างได้
มีช่วงตัวเลขที่กำหนดไว้ล่วงหน้าที่ SAP กำหนดไว้สำหรับ Infotype
HR และ Payroll Data Infotype → 0000 ถึง 0999
ข้อมูลองค์กร→ Infotype 1000 ถึง 1999
ข้อมูลเวลา→ Infotype 2000 ถึง 2999
คุณสามารถแบ่ง Infotype ออกเป็นกลุ่มได้อีกซึ่งเรียกว่าประเภทย่อย ตัวอย่างเช่น Infotype Address, Infotype 0006 สามารถแบ่งออกเป็นประเภทย่อย - ที่อยู่อาศัยถาวรและที่อยู่ฉุกเฉิน


การสร้าง Infotype
ในการสร้าง Infotype ให้ทำตามขั้นตอนที่กำหนด -
Step 1 - ใช้ T-code: PA30

Step 2 - หน้าต่างใหม่ Maintain HR Master Dataเปิดขึ้น ป้อนหมายเลขบุคลากรและกด Enter

Step 3 - ป้อน Infotype ที่คุณต้องการเลือกสำหรับบันทึกใหม่แล้วคลิกปุ่มสร้าง
ในส่วนช่วงเวลาให้เลือกวันที่เริ่มต้นและวันที่สิ้นสุดสำหรับ Infotype

Step 4- ในหน้าต่างถัดไปเลือกการกระทำของบุคลากร เมื่อคุณป้อนรายละเอียดทั้งหมดแล้วคลิกบันทึก

แสดง Infotype
คุณสามารถค้นหา Infotype โดยใช้ชื่อหรือหมายเลข
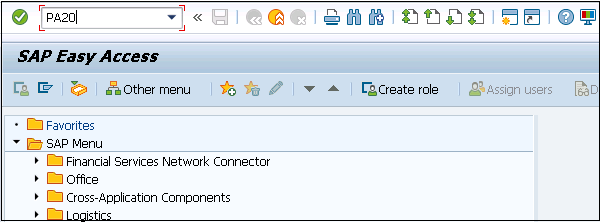
Step 1 - ค้นหา Infotype โดยใช้หมายเลขบุคลากรและ T-code: PA30 หรือ PA20
Step 2 - ในหน้าต่างใหม่ป้อนหมายเลขบุคลากรและกด Enter

Step 3- เลือก Infotype ที่คุณต้องการแสดง คลิก F7 หรือไอคอนที่ด้านบน

Step 4 - ในหน้าต่างใหม่ฟิลด์ทั้งหมดจะถูกปิดใช้งานและคุณจะเห็นรายละเอียดของ Infotype ที่เลือก

Step 5 - ในทำนองเดียวกันคุณสามารถคัดลอกหรือเปลี่ยน Infotype ที่มีอยู่โดยใช้ T-code: PA30

ลบ Infotype
ในการลบ Infotype ให้ทำตามขั้นตอนด้านล่าง
Step 1 - ในการลบ Infotype ให้ใช้ T-code เดียวกัน: PA30
Step 2 - ป้อนหมายเลขบุคลากรและเลือก Infotype ที่คุณต้องการลบ

Step 3- ในหน้าต่างถัดไปคุณจะเห็นสรุปข้อมูลที่จะถูกลบ คลิกลบ
