Android - แนวทางปฏิบัติที่ดีที่สุด
มีแนวทางปฏิบัติบางอย่างที่คุณสามารถปฏิบัติตามได้ในขณะที่พัฒนาแอปพลิเคชัน Android สิ่งเหล่านี้เป็นข้อเสนอแนะโดย Android และพวกเขายังคงปรับปรุงตามเวลา
แนวทางปฏิบัติที่ดีที่สุดเหล่านี้ ได้แก่ คุณสมบัติการออกแบบการโต้ตอบประสิทธิภาพความปลอดภัยและความเป็นส่วนตัวความเข้ากันได้การทดสอบการแจกจ่ายและเคล็ดลับในการสร้างรายได้ มีการ จำกัด ให้แคบลงและมีการระบุไว้ด้านล่าง
แนวทางปฏิบัติที่ดีที่สุด - การป้อนข้อมูลของผู้ใช้
ทุกช่องข้อความมีไว้สำหรับงานที่แตกต่างกัน ตัวอย่างเช่นช่องข้อความบางช่องมีไว้สำหรับข้อความและบางช่องใช้สำหรับตัวเลข หากเป็นตัวเลขจะเป็นการดีกว่าหากแสดงแป้นพิมพ์ตัวเลขเมื่อโฟกัสช่องข้อความนั้น ไวยากรณ์ของมันคือ
<EditText
   android:layout_width="wrap_content"
   android:layout_height="wrap_content"
   android:id="@+id/editText"
   android:layout_alignParentRight="true"
   android:layout_alignParentEnd="true"
   android:hint="User Name"
   android:layout_below="@+id/imageView"
   android:layout_alignLeft="@+id/imageView"
   android:layout_alignStart="@+id/imageView"
   android:numeric="integer" />
จากนั้นหากฟิลด์ของคุณเป็นรหัสผ่านก็จะต้องแสดงคำใบ้รหัสผ่านเพื่อให้ผู้ใช้สามารถจำรหัสผ่านได้ง่าย ก็สามารถทำได้เป็น
<EditText
   android:layout_width="wrap_content"
   android:layout_height="wrap_content"
   android:id="@+id/editText2"
   android:layout_alignLeft="@+id/editText"
   android:layout_alignStart="@+id/editText"
   android:hint="Pass Word"
   android:layout_below="@+id/editText"
   android:layout_alignRight="@+id/editText"
   android:layout_alignEnd="@+id/editText"
   android:password="true" />
แนวทางปฏิบัติที่ดีที่สุด - งานเบื้องหลัง
มีงานบางอย่างในแอปพลิเคชันที่ทำงานในพื้นหลังของแอปพลิเคชัน งานของพวกเขาอาจเป็นการดึงข้อมูลบางอย่างจากอินเทอร์เน็ตการเล่นเพลงและอื่น ๆ ขอแนะนำว่างานที่รอคอยมานานไม่ควรทำในเธรด UI และให้บริการหรือ AsyncTask อยู่เบื้องหลัง
บริการ AsyncTask Vs
ทั้งสองใช้สำหรับการทำงานเบื้องหลัง แต่บริการไม่ได้รับผลกระทบจากเหตุการณ์วงจรชีวิตของส่วนติดต่อผู้ใช้ส่วนใหญ่จึงยังคงทำงานต่อไปในสถานการณ์ที่จะปิด AsyncTask
แนวทางปฏิบัติที่ดีที่สุด - ประสิทธิภาพ
ประสิทธิภาพแอปพลิเคชันของคุณควรเป็นไปตามที่กำหนด แต่ควรทำงานแตกต่างกันไม่ได้อยู่ที่ส่วนหน้า แต่อยู่ด้านหลังเมื่ออุปกรณ์เชื่อมต่อกับแหล่งจ่ายไฟหรือกำลังชาร์จ การชาร์จอาจมาจาก USB และจากสายเคเบิล
เมื่ออุปกรณ์ของคุณกำลังชาร์จตัวเองขอแนะนำให้อัปเดตการตั้งค่าแอปพลิเคชันของคุณหากมีเช่นเพิ่มอัตราการรีเฟรชสูงสุดเมื่อเชื่อมต่ออุปกรณ์ ก็สามารถทำได้ตามนี้
IntentFilter ifilter = new IntentFilter(Intent.ACTION_BATTERY_CHANGED);
Intent batteryStatus = context.registerReceiver(null, ifilter);

// Are we charging / charged? Full or charging.
int status = batteryStatus.getIntExtra(BatteryManager.EXTRA_STATUS, -1);

// How are we charging? From AC or USB.
int chargePlug = batteryStatus.getIntExtra(BatteryManager.EXTRA_PLUGGED, -1);
แนวทางปฏิบัติที่ดีที่สุด - ความปลอดภัยและความเป็นส่วนตัว
เป็นสิ่งสำคัญมากที่แอปพลิเคชันของคุณจะต้องปลอดภัยและไม่เพียง แต่แอปพลิเคชันเท่านั้น แต่ข้อมูลผู้ใช้และข้อมูลแอปพลิเคชันควรได้รับความปลอดภัยด้วย ความปลอดภัยสามารถเพิ่มขึ้นได้จากปัจจัยต่อไปนี้
ใช้ที่จัดเก็บข้อมูลภายในแทนที่จะใช้ภายนอกเพื่อจัดเก็บไฟล์แอปพลิเคชัน
ใช้ผู้ให้บริการเนื้อหาทุกที่ที่เป็นไปได้
ใช้ SSl เมื่อเชื่อมต่อกับเว็บ
ใช้สิทธิ์ที่เหมาะสมสำหรับการเข้าถึงฟังก์ชันต่างๆของอุปกรณ์
ตัวอย่าง
ตัวอย่างด้านล่างแสดงให้เห็นถึงแนวทางปฏิบัติที่ดีที่สุดบางประการที่คุณควรปฏิบัติตามเมื่อพัฒนาแอปพลิเคชัน Android เป็นแอปพลิเคชันพื้นฐานที่ช่วยให้คุณระบุวิธีใช้ช่องข้อความและวิธีเพิ่มประสิทธิภาพโดยตรวจสอบสถานะการชาร์จของโทรศัพท์
ในการทดลองกับตัวอย่างนี้คุณต้องเรียกใช้สิ่งนี้บนอุปกรณ์จริง
| ขั้นตอน | คำอธิบาย |
|---|---|
| 1 | คุณจะใช้ Android studio IDE เพื่อสร้างแอปพลิเคชัน Android ภายใต้แพ็คเกจ com.example.sairamkrishna.myapplication |
| 2 | แก้ไขไฟล์ src / MainActivity.java เพื่อเพิ่มโค้ด |
| 3 | แก้ไขไฟล์ XML เค้าโครง res / layout / activity_main.xml เพิ่มคอมโพเนนต์ GUI หากจำเป็น |
| 4 | เรียกใช้แอปพลิเคชันและเลือกอุปกรณ์ Android ที่ใช้งานอยู่และติดตั้งแอปพลิเคชันบนแอปพลิเคชันและตรวจสอบผลลัพธ์ |
นี่คือเนื้อหาของ src/MainActivity.java
package com.example.sairamkrishna.myapplication;

import android.content.Intent;
import android.content.IntentFilter;
import android.os.BatteryManager;
import android.support.v7.app.ActionBarActivity;
import android.os.Bundle;
import android.view.View;
import android.widget.Button;
import android.widget.EditText;
import android.widget.Toast;

public class MainActivity extends ActionBarActivity {
   EditText ed1,ed2;
   Button b1;

   @Override
   protected void onCreate(Bundle savedInstanceState) {
      super.onCreate(savedInstanceState);
      setContentView(R.layout.activity_main);

      ed1=(EditText)findViewById(R.id.editText);
      ed2=(EditText)findViewById(R.id.editText2);
      b1=(Button)findViewById(R.id.button);

      b1.setOnClickListener(new View.OnClickListener() {
         @Override

         public void onClick(View v) {
            IntentFilter ifilter = new IntentFilter(Intent.ACTION_BATTERY_CHANGED);
            Intent batteryStatus = registerReceiver(null, ifilter);

            int status = batteryStatus.getIntExtra(BatteryManager.EXTRA_STATUS, -1);
            boolean isCharging = status == BatteryManager.BATTERY_STATUS_CHARGING ||
            status == BatteryManager.BATTERY_STATUS_FULL;

            int chargePlug = batteryStatus.getIntExtra(BatteryManager.EXTRA_PLUGGED,-1);
            boolean usbCharge = chargePlug == BatteryManager.BATTERY_PLUGGED_USB;
            boolean acCharge = chargePlug == BatteryManager.BATTERY_PLUGGED_AC;

            if(usbCharge){
               Toast.makeText(getApplicationContext(),"Mobile is charging on USB",
                  Toast.LENGTH_LONG).show();
            } else {
               Toast.makeText(getApplicationContext(),"Mobile is charging on AC",
                  Toast.LENGTH_LONG).show();
            }
         }
      });
   }

   @Override
   protected void onDestroy() {
      super.onDestroy();
   }
}
นี่คือเนื้อหาของ activity_main.xml
<?xml version="1.0" encoding="utf-8"?>
   <RelativeLayout
   xmlns:android="http://schemas.android.com/apk/res/android"
   xmlns:tools="http://schemas.android.com/tools"
   android:layout_width="match_parent"
   android:layout_height="match_parent"
   android:paddingLeft="@dimen/activity_horizontal_margin"
   android:paddingRight="@dimen/activity_horizontal_margin"
   android:paddingTop="@dimen/activity_vertical_margin"
   android:paddingBottom="@dimen/activity_vertical_margin"
   tools:context=".MainActivity">

   <TextView android:text="Bluetooth Example"
      android:layout_width="wrap_content"
      android:layout_height="wrap_content"
      android:id="@+id/textview"
      android:textSize="35dp"
      android:layout_alignParentTop="true"
      android:layout_centerHorizontal="true" />

   <TextView
      android:layout_width="wrap_content"
      android:layout_height="wrap_content"
      android:text="Tutorials point"
      android:id="@+id/textView"
      android:layout_below="@+id/textview"
      android:layout_centerHorizontal="true"
      android:textColor="#ff7aff24"
      android:textSize="35dp" />

   <ImageView
      android:layout_width="wrap_content"
      android:layout_height="wrap_content"
      android:id="@+id/imageView"
      android:src="@drawable/abc"
      android:layout_below="@+id/textView"
      android:layout_centerHorizontal="true" />

   <EditText
      android:layout_width="wrap_content"
      android:layout_height="wrap_content"
      android:id="@+id/editText"
      android:layout_alignParentRight="true"
      android:layout_alignParentEnd="true"
      android:hint="User Name"
      android:layout_below="@+id/imageView"
      android:layout_alignLeft="@+id/imageView"
      android:layout_alignStart="@+id/imageView"
      android:numeric="integer" />

   <EditText
      android:layout_width="wrap_content"
      android:layout_height="wrap_content"
      android:id="@+id/editText2"
      android:layout_alignLeft="@+id/editText"
      android:layout_alignStart="@+id/editText"
      android:hint="Pass Word"
      android:layout_below="@+id/editText"
      android:layout_alignRight="@+id/editText"
      android:layout_alignEnd="@+id/editText"
      android:password="true" />

   <Button
      android:layout_width="wrap_content"
      android:layout_height="wrap_content"
      android:text="Check"
      android:id="@+id/button"
      android:layout_below="@+id/editText2"
      android:layout_centerHorizontal="true" />

</RelativeLayout>
นี่คือเนื้อหาของ Strings.xml
<resources>
    <string name="app_name">My Application</string>
</resources>
นี่คือเนื้อหาของ AndroidManifest.xml
<?xml version="1.0" encoding="utf-8"?>
<manifest xmlns:android="http://schemas.android.com/apk/res/android"
   package="com.example.sairamkrishna.myapplication" >

   <application
      android:allowBackup="true"
      android:icon="@drawable/ic_launcher"
      android:label="@string/app_name"
      android:theme="@style/AppTheme" >

      <activity
         android:name="com.example.sairamkrishna.myapplication.MainActivity"
         android:label="@string/app_name" >

         <intent-filter>
            <action android:name="android.intent.action.MAIN" />
            <category android:name="android.intent.category.LAUNCHER" />
         </intent-filter>

      </activity>

   </application>
</manifest>
มาลองเรียกใช้แอปพลิเคชันของคุณ ฉันถือว่าคุณได้เชื่อมต่ออุปกรณ์มือถือ Android จริงกับคอมพิวเตอร์ของคุณ ในการเรียกใช้แอปจาก Android studio ให้เปิดไฟล์กิจกรรมของโครงการแล้วคลิก


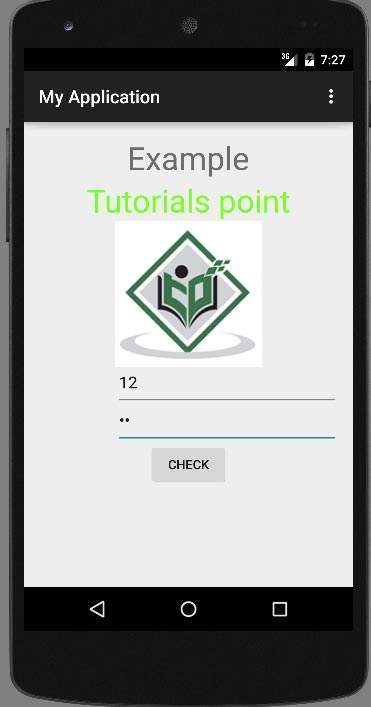
ภาพด้านบนแสดงผลลัพธ์ของแอปพลิเคชัน

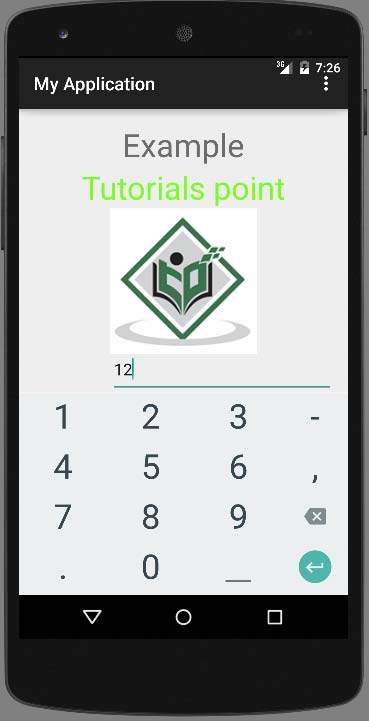
ตอนนี้เพียงพิมพ์ในฟิลด์ชื่อผู้ใช้และคุณจะเห็นคำแนะนำ Android ในตัวจากพจนานุกรมจะเริ่มขึ้น สิ่งนี้แสดงไว้ด้านบน

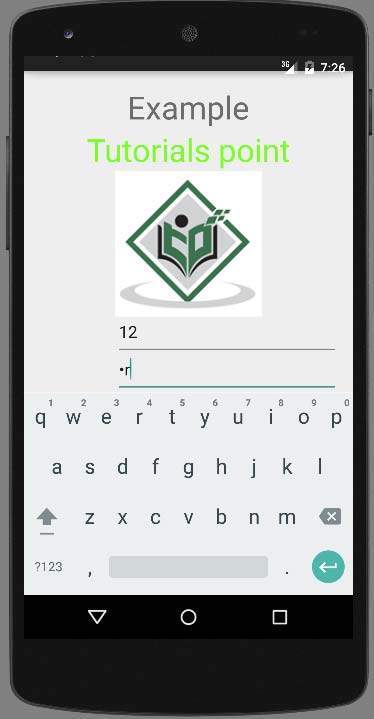
ตอนนี้คุณจะเห็นฟิลด์รหัสผ่าน มันจะหายไปทันทีที่คุณเริ่มเขียนในฟิลด์ ดังที่แสดงไว้ด้านบน
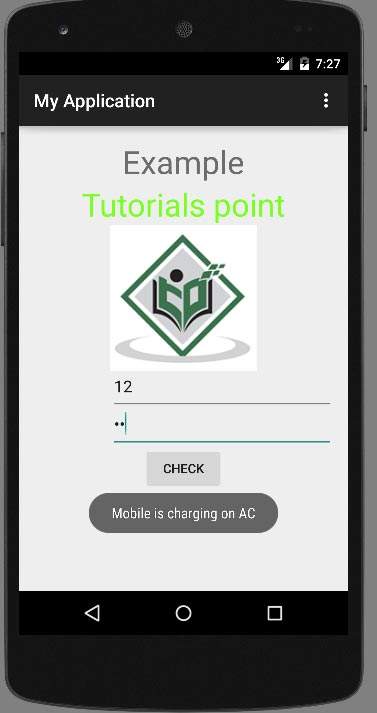
ในตอนท้ายเพียงเชื่อมต่ออุปกรณ์ของคุณกับสาย AC หรือสาย USB แล้วกดปุ่มตรวจสอบการชาร์จ ในกรณีของฉันฉันเชื่อมต่อไฟ AC มันแสดงข้อความต่อไปนี้
