Android - ตัวสลับรูปภาพ
บางครั้งคุณไม่ต้องการให้ภาพปรากฏบนหน้าจออย่างกะทันหัน แต่คุณต้องการใช้ภาพเคลื่อนไหวบางประเภทกับภาพเมื่อเปลี่ยนจากภาพหนึ่งไปยังอีกภาพหนึ่ง สิ่งนี้รองรับโดย Android ในรูปแบบของ ImageSwitcher
ตัวสลับภาพช่วยให้คุณสามารถเพิ่มช่วงการเปลี่ยนภาพบางอย่างผ่านทางที่ปรากฏบนหน้าจอได้ ในการใช้ Image Switcher คุณต้องกำหนดคอมโพเนนต์ XML ก่อน ไวยากรณ์ได้รับด้านล่าง -
<ImageSwitcher
   android:id="@+id/imageSwitcher1"
   android:layout_width="wrap_content"
   android:layout_height="wrap_content"
   android:layout_centerHorizontal="true"
   android:layout_centerVertical="true" >
</ImageSwitcher>
ตอนนี้เราสร้าง Intance ของ ImageSwithcer ในไฟล์ java และรับการอ้างอิงของคอมโพเนนต์ XML นี้ ไวยากรณ์ได้รับด้านล่าง -
private ImageSwitcher imageSwitcher;
imageSwitcher = (ImageSwitcher)findViewById(R.id.imageSwitcher1);
สิ่งต่อไปที่เราต้องทำคือใช้อินเทอร์เฟซ ViewFactory และใช้วิธีที่ไม่ได้ใช้งานที่ส่งคืน imageView ไวยากรณ์อยู่ด้านล่าง -
imageSwitcher.setImageResource(R.drawable.ic_launcher);
imageSwitcher.setFactory(new ViewFactory() {
   public View makeView() {
      ImageView myView = new ImageView(getApplicationContext());
      return myView;
   }
}
สิ่งสุดท้ายที่คุณต้องทำคือการเพิ่ม Animation ลงใน ImageSwitcher คุณต้องกำหนดออบเจ็กต์ของคลาส Animation ผ่านคลาส AnimationUtilities โดยเรียกใช้วิธีการแบบคงที่ loadAnimation ไวยากรณ์ได้รับด้านล่าง -
Animation in = AnimationUtils.loadAnimation(this,android.R.anim.slide_in_left);
imageSwitcher.setInAnimation(in);
imageSwitcher.setOutAnimation(out);
เมธอด setInAnimaton ตั้งค่าการเคลื่อนไหวของลักษณะที่ปรากฏของวัตถุบนหน้าจอในขณะที่ setOutAnimation ทำตรงกันข้าม วิธี loadAnimation () สร้างออบเจ็กต์ภาพเคลื่อนไหว
นอกเหนือจากวิธีการเหล่านี้แล้วยังมีวิธีการอื่น ๆ ที่กำหนดไว้ในคลาส ImageSwitcher มีการกำหนดไว้ด้านล่าง -
| ซีเนียร์ No | วิธีการและคำอธิบาย |
|---|---|
| 1 | setImageDrawable(Drawable drawable) ตั้งค่าภาพด้วยตัวสลับภาพ ภาพจะถูกส่งในรูปแบบของบิตแมป |
| 2 | setImageResource(int resid) ตั้งค่าภาพด้วยตัวสลับภาพ รูปภาพจะถูกส่งในรูปแบบของรหัสจำนวนเต็ม |
| 3 | setImageURI(Uri uri) ตั้งค่าภาพด้วยตัวสลับภาพ ภาพจะถูกส่งในรูปแบบของ URI |
| 4 | ImageSwitcher(Context context, AttributeSet attrs) ส่งคืนออบเจ็กต์ตัวสลับรูปภาพพร้อมกับการตั้งค่าคุณสมบัติบางอย่างที่ส่งผ่านในเมธอดแล้ว |
| 5 | onInitializeAccessibilityEvent (AccessibilityEvent event) เริ่มต้น AccessibilityEvent ด้วยข้อมูลเกี่ยวกับ View นี้ซึ่งเป็นแหล่งเหตุการณ์ |
| 6 | onInitializeAccessibilityNodeInfo (AccessibilityNodeInfo info) เริ่มต้น AccessibilityNodeInfo ด้วยข้อมูลเกี่ยวกับมุมมองนี้ |
ตัวอย่าง
ตัวอย่างด้านล่างแสดงให้เห็นถึงเอฟเฟกต์ตัวสลับรูปภาพบางอย่างบนบิตแมป เป็นแอปพลิเคชั่นพื้นฐานที่ให้คุณดูเอฟเฟกต์ภาพเคลื่อนไหวบนภาพ
ในการทดลองกับตัวอย่างนี้คุณต้องเรียกใช้สิ่งนี้บนอุปกรณ์จริง
| ขั้นตอน | คำอธิบาย |
|---|---|
| 1 | คุณจะใช้ Android studio IDE เพื่อสร้างแอปพลิเคชัน Android ภายใต้แพ็คเกจ com.example.sairamkrishna.myapplication |
| 2 | แก้ไขไฟล์ src / MainActivity.java เพื่อเพิ่มโค้ดที่จำเป็น |
| 3 | แก้ไข res / layout / activity_main เพื่อเพิ่มคอมโพเนนต์ XML ที่เกี่ยวข้อง |
| 4 | เรียกใช้แอปพลิเคชันและเลือกอุปกรณ์ Android ที่ใช้งานอยู่และติดตั้งแอปพลิเคชันบนแอปพลิเคชันและตรวจสอบผลลัพธ์ |
ต่อไปนี้เป็นเนื้อหาของไฟล์กิจกรรมหลักที่แก้ไข src/MainActivity.java.
ในโค้ดด้านล่าง tp และ abc ระบุโลโก้ของ tutorialspoint.com
package com.example.sairamkrishna.myapplication;

import android.app.Activity;
import android.app.ActionBar.LayoutParams;
import android.os.Bundle;
import android.view.View;

import android.widget.Button;
import android.widget.ImageSwitcher;
import android.widget.ImageView;
import android.widget.Toast;
import android.widget.ViewSwitcher.ViewFactory;

public class MainActivity extends Activity {
   private ImageSwitcher sw;
   private Button b1,b2;

   @Override
   protected void onCreate(Bundle savedInstanceState) {
      super.onCreate(savedInstanceState);
      setContentView(R.layout.activity_main);

      b1 = (Button) findViewById(R.id.button);
      b2 = (Button) findViewById(R.id.button2);

      sw = (ImageSwitcher) findViewById(R.id.imageSwitcher);
      sw.setFactory(new ViewFactory() {
         @Override
         public View makeView() {
            ImageView myView = new ImageView(getApplicationContext());
            myView.setScaleType(ImageView.ScaleType.FIT_CENTER);
            myView.setLayoutParams(new
               ImageSwitcher.LayoutParams(LayoutParams.WRAP_CONTENT,
                  LayoutParams.WRAP_CONTENT));
            return myView;
         }
      });

      b1.setOnClickListener(new View.OnClickListener() {
         @Override
         public void onClick(View v) {
            Toast.makeText(getApplicationContext(), "previous Image",
               Toast.LENGTH_LONG).show();
            sw.setImageResource(R.drawable.abc);
         }
      });

      b2.setOnClickListener(new View.OnClickListener() {
         @Override
         public void onClick(View v) {
            Toast.makeText(getApplicationContext(), "Next Image",
               Toast.LENGTH_LONG).show();
            sw.setImageResource(R.drawable.tp);
         }
      });
   }
}
ต่อไปนี้เป็นเนื้อหาที่แก้ไขของ xml res/layout/activity_main.xml.
<?xml version="1.0" encoding="utf-8"?>
<RelativeLayout
   xmlns:android="http://schemas.android.com/apk/res/android"
   xmlns:tools="http://schemas.android.com/tools"
   android:layout_width="match_parent"
   android:layout_height="match_parent"
   android:paddingLeft="@dimen/activity_horizontal_margin"
   android:paddingRight="@dimen/activity_horizontal_margin"
   android:paddingTop="@dimen/activity_vertical_margin"
   android:paddingBottom="@dimen/activity_vertical_margin"
   tools:context=".MainActivity">

   <TextView android:text="Gestures  Example"
      android:layout_width="wrap_content"
      android:layout_height="wrap_content"
      android:id="@+id/textview"
      android:textSize="35dp"
      android:layout_alignParentTop="true"
      android:layout_centerHorizontal="true" />

   <TextView
      android:layout_width="wrap_content"
      android:layout_height="wrap_content"
      android:text="Tutorials point"
      android:id="@+id/textView"
      android:layout_below="@+id/textview"
      android:layout_centerHorizontal="true"
      android:textColor="#ff7aff24"
      android:textSize="35dp" />

   <ImageSwitcher
      android:layout_width="wrap_content"
      android:layout_height="wrap_content"
      android:id="@+id/imageSwitcher"
      android:layout_below="@+id/textView"
      android:layout_centerHorizontal="true"
      android:layout_marginTop="168dp" />

   <Button
        android:layout_width="wrap_content"
        android:layout_height="wrap_content"
        android:text="@string/left"
        android:id="@+id/button"
        android:layout_below="@+id/textView"
        android:layout_centerHorizontal="true" />

   <Button
        android:layout_width="wrap_content"
        android:layout_height="wrap_content"
        android:text="@string/right"
        android:id="@+id/button2"
        android:layout_alignParentBottom="true"
        android:layout_alignLeft="@+id/button"
        android:layout_alignStart="@+id/button" />

</RelativeLayout>
ต่อไปนี้เป็นเนื้อหาของ Strings.xml ไฟล์.
<resources>
    <string name="app_name">My Application</string>
    <string name="left"><![CDATA[<]]></string>
    <string name="right"><![CDATA[>]]></string>
</resources>
ต่อไปนี้เป็นเนื้อหาของ AndroidManifest.xml ไฟล์.
<?xml version="1.0" encoding="utf-8"?>
<manifest xmlns:android="http://schemas.android.com/apk/res/android"
   package="com.example.sairamkrishna.myapplication"

   <application
      android:allowBackup="true"
      android:icon="@drawable/ic_launcher"
      android:label="@string/app_name"
      android:theme="@style/AppTheme" >

      <activity
         android:name="com.example.sairamkrishna.myapplication.MainActivity"
         android:label="@string/app_name" >

         <intent-filter>
            <action android:name="android.intent.action.MAIN" />
            <category android:name="android.intent.category.LAUNCHER" />
         </intent-filter>

      </activity>

   </application>
</manifest>
มาลองเรียกใช้แอปพลิเคชันของคุณที่เราเพิ่งแก้ไข ฉันถือว่าคุณได้สร้างไฟล์AVDในขณะที่ทำการตั้งค่าสภาพแวดล้อม ในการเรียกใช้แอปจาก Android studio ให้เปิดไฟล์กิจกรรมของโครงการแล้วคลิก


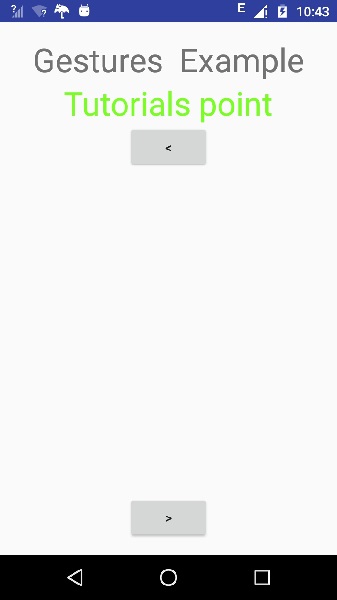
ตอนนี้ถ้าคุณจะดูที่หน้าจออุปกรณ์ของคุณคุณจะเห็นปุ่มสองปุ่ม
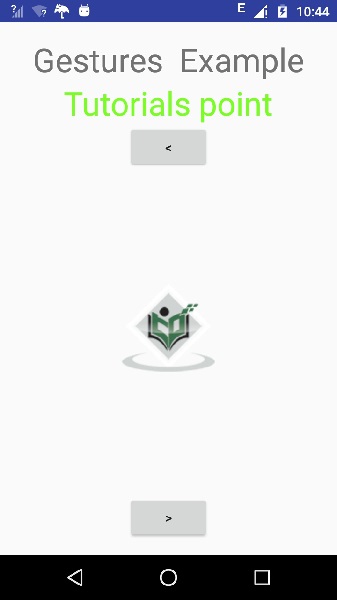
ตอนนี้เพียงแค่เลือกปุ่มบนที่ลูกศรขวา ภาพจะปรากฏจากด้านขวาและเลื่อนไปทางซ้าย ดังแสดงด้านล่าง -

ตอนนี้แตะที่ปุ่มด้านล่างซึ่งจะนำภาพก่อนหน้ากลับมาพร้อมกับการเปลี่ยนแปลงบางอย่าง ดังแสดงด้านล่าง -
